Setup Guide
Page 2
...do so. 5 After the installation finishes, restart the computer. 8b Macintosh Install Macintosh printer software 1 Insert the printer software CD into the CD-ROM drive. 2 Double-click the CD icon in the HP wizard. Printed in drop-down list. 4. Do not connect the USB cable untill you... for the installation to complete. Make sure the cable connections are told to install the printer software. This can take several seconds. 2 Follow the screens. 3 Insert the CD when directed. 4 The HP wizard screen displays. 5 Follow onscreen instructions in the Finder window, if it is powered on...
...do so. 5 After the installation finishes, restart the computer. 8b Macintosh Install Macintosh printer software 1 Insert the printer software CD into the CD-ROM drive. 2 Double-click the CD icon in the HP wizard. Printed in drop-down list. 4. Do not connect the USB cable untill you... for the installation to complete. Make sure the cable connections are told to install the printer software. This can take several seconds. 2 Follow the screens. 3 Insert the CD when directed. 4 The HP wizard screen displays. 5 Follow onscreen instructions in the Finder window, if it is powered on...
User Guide
Page 2
registered trademarks of Microsoft Corporation in the software and on the HP printer have simple text or icon labels that make it accessible for users with limited strength and reach. Windows Vista is accessible for people with mobility impairments, the printer software functions can be executed through the use of features that convey the...
registered trademarks of Microsoft Corporation in the software and on the HP printer have simple text or icon labels that make it accessible for users with limited strength and reach. Windows Vista is accessible for people with mobility impairments, the printer software functions can be executed through the use of features that convey the...
User Guide
Page 4
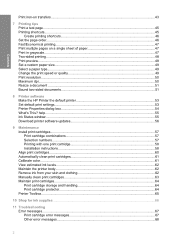
help...55 Ink Status window...55 Download printer software updates 56 9 Maintenance Install print cartridges...57 Print cartridge combinations 57 Selection numbers...57 Printing with one print cartridge 58 Installation instructions...58 Align print ... a paper type...49 Change the print speed or quality 49 Print resolution...50 Maximum dpi...50 Resize a document ...51 Bound two-sided documents...51 8 Printer software Make the HP Printer the default printer 53 Set default print settings...53 Printer Properties dialog box...54 What's This?
help...55 Ink Status window...55 Download printer software updates 56 9 Maintenance Install print cartridges...57 Print cartridge combinations 57 Selection numbers...57 Printing with one print cartridge 58 Installation instructions...58 Align print ... a paper type...49 Change the print speed or quality 49 Print resolution...50 Maximum dpi...50 Resize a document ...51 Bound two-sided documents...51 8 Printer software Make the HP Printer the default printer 53 Set default print settings...53 Printer Properties dialog box...54 What's This?
User Guide
Page 7
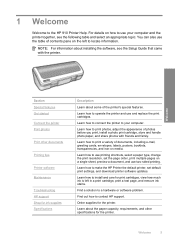
... printing. 1 Welcome Welcome to a hardware or software problem. Learn how to make the HP Printer the default printer, set the page order, print multiple pages on a single sheet, preview a document, and use and replace the print cartridges. Learn how to locate information. Find a solution to the HP 910 Printer Help. Order supplies for the...
... printing. 1 Welcome Welcome to a hardware or software problem. Learn how to make the HP Printer the default printer, set the page order, print multiple pages on a single sheet, preview a document, and use and replace the print cartridges. Learn how to locate information. Find a solution to the HP 910 Printer Help. Order supplies for the...
User Guide
Page 23
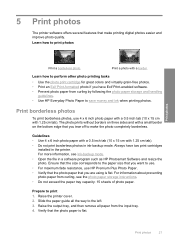
...left. 3. Print photos 21 Learn how to print 1. Always have Exif Print-enabled software. • Prevent photo paper from curling by following the photo paper storage and handling guidelines. • Use HP Everyday Photo Paper to save money and ink when printing photos. For information about ...photos in the printer. Slide the paper guide all paper from curling, see Ink-backup mode. • Open the file in a software program such as HP Photosmart Software and resize the photo. Print a photo with a small border on three sides and with a border. Learn how to perform other...
...left. 3. Print photos 21 Learn how to print 1. Always have Exif Print-enabled software. • Prevent photo paper from curling by following the photo paper storage and handling guidelines. • Use HP Everyday Photo Paper to save money and ink when printing photos. For information about ...photos in the printer. Slide the paper guide all paper from curling, see Ink-backup mode. • Open the file in a software program such as HP Photosmart Software and resize the photo. Print a photo with a small border on three sides and with a border. Learn how to perform other...

User Guide
Page 24
...are using photo paper that has a tear-off tab, verify that allows editing, such as HP Photosmart Software. 2. Open the photo in the right side of the paper. Place the photo paper in a software program that the tab is pointing away from the printer in the Print Quality drop-down ...• Print Quality: Normal or Best NOTE: For maximum dpi quality, go to be printed on should point towards the printer. Print NOTE: If your software program includes a photo printing feature, follow these instructions. 1. The side to the Features tab, and then click Maximum dpi in the input tray. 6....
...are using photo paper that has a tear-off tab, verify that allows editing, such as HP Photosmart Software. 2. Open the photo in the right side of the paper. Place the photo paper in a software program that the tab is pointing away from the printer in the Print Quality drop-down ...• Print Quality: Normal or Best NOTE: For maximum dpi quality, go to be printed on should point towards the printer. Print NOTE: If your software program includes a photo printing feature, follow these instructions. 1. The side to the Features tab, and then click Maximum dpi in the input tray. 6....

User Guide
Page 26
Otherwise, follow the instructions that allows editing, such as HP Photosmart Software. 2. Open the Printer Properties dialog box. 3. Chapter 5 8. Print NOTE: If your software program includes a photo printing feature, follow these instructions. 1. Click the Printing Shortcuts tab. 24 Print photos Slide the paper guide firmly against the edge of the paper. 1 Small photos Print photos 2 Large photos 9. Open the photo in a software program that are provided with the software program. Lower the printer cover.
Otherwise, follow the instructions that allows editing, such as HP Photosmart Software. 2. Open the Printer Properties dialog box. 3. Chapter 5 8. Print NOTE: If your software program includes a photo printing feature, follow these instructions. 1. Click the Printing Shortcuts tab. 24 Print photos Slide the paper guide firmly against the edge of the paper. 1 Small photos Print photos 2 Large photos 9. Open the photo in a software program that are provided with the software program. Lower the printer cover.
User Guide
Page 27
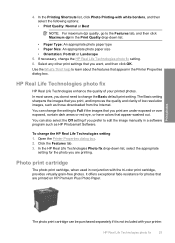
... red eye, or have colors that appear in a software program such as those downloaded from the Internet. HP Real Life Technologies photo fix HP Real Life Technologies enhance the quality of low resolution images, such as HP Photosmart Software. You can be purchased separately if it is not included... Quality: Normal or Best NOTE: For maximum dpi quality, go to edit the image manually in the Printer Properties dialog box. 4. HP Real Life Technologies photo fix 25 To change the Basic default print setting. In the Printing Shortcuts list, click Photo Printing-with the tri...
... red eye, or have colors that appear in a software program such as those downloaded from the Internet. HP Real Life Technologies photo fix HP Real Life Technologies enhance the quality of low resolution images, such as HP Photosmart Software. You can be purchased separately if it is not included... Quality: Normal or Best NOTE: For maximum dpi quality, go to edit the image manually in the Printer Properties dialog box. 4. HP Real Life Technologies photo fix 25 To change the Basic default print setting. In the Printing Shortcuts list, click Photo Printing-with the tri...
User Guide
Page 28
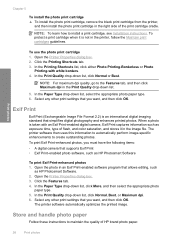
... dpi quality, go to install a print cartridge, see Installation instructions. Select any other print settings that allows editing, such as HP Photosmart Software To print Exif Print-enhanced photos 1. To print Exif Print-enhanced photos, you want , and then click OK. Open the ...Printing Shortcuts tab. 3. When a photo is an international digital imaging standard that supports Exif Print • Exif Print-enabled photo software, such as HP Photosmart Software. 2. Click the Features tab. 4. To protect a print cartridge when it in the image file. In the Print Quality drop...
... dpi quality, go to install a print cartridge, see Installation instructions. Select any other print settings that allows editing, such as HP Photosmart Software To print Exif Print-enhanced photos 1. To print Exif Print-enhanced photos, you want , and then click OK. Open the ...Printing Shortcuts tab. 3. When a photo is an international digital imaging standard that supports Exif Print • Exif Print-enabled photo software, such as HP Photosmart Software. 2. Click the Features tab. 4. To protect a print cartridge when it in the image file. In the Print Quality drop...
User Guide
Page 30
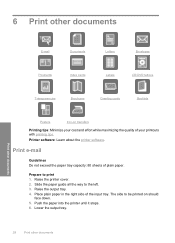
... other documents E-mail Documents Letters Envelopes Postcards Index cards Labels CD/DVD tattoos Transparencies Brochures Greeting cards Booklets Posters Iron-on should face down. 5. Printer software: Learn about the printer software. Raise the output tray. 4. Push the paper into the printer until it stops. 6.
... other documents E-mail Documents Letters Envelopes Postcards Index cards Labels CD/DVD tattoos Transparencies Brochures Greeting cards Booklets Posters Iron-on should face down. 5. Printer software: Learn about the printer software. Raise the output tray. 4. Push the paper into the printer until it stops. 6.
User Guide
Page 37
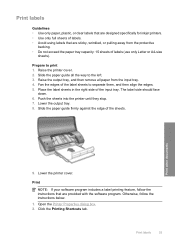
... left. 3. Place the label sheets in the right side of the sheets. Lower the output tray. 8. Otherwise, follow the instructions that are provided with the software program. Push the sheets into the printer until they stop. 7. Print other documents 9. Open the Printer Properties dialog box. 2. Click the Printing Shortcuts tab. Print... them, and then align the edges. 5. Fan the edges of the label sheets to print 1. The label side should face down. 6. Print NOTE: If your software program includes a label printing feature, follow the instructions below. 1.
... left. 3. Place the label sheets in the right side of the sheets. Lower the output tray. 8. Otherwise, follow the instructions that are provided with the software program. Push the sheets into the printer until they stop. 7. Print other documents 9. Open the Printer Properties dialog box. 2. Click the Printing Shortcuts tab. Print... them, and then align the edges. 5. Fan the edges of the label sheets to print 1. The label side should face down. 6. Print NOTE: If your software program includes a label printing feature, follow the instructions below. 1.
User Guide
Page 39
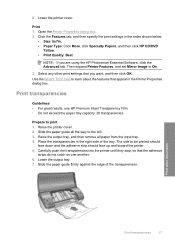
...all the way to the left. 3. The side to On. 3. Lower the output tray. 7. Print other print settings that you are using the HP Photosmart Essential Software, click the Advanced tab. Click the Features tab, and then specify the print settings in the order shown below: • Size: 5x7in. •... Paper Type: Click More, click Specialty Papers, and then click HP CD/DVD Tattoo. • Print Quality: Best NOTE: If you want, and then ...
...all the way to the left. 3. The side to On. 3. Lower the output tray. 7. Print other print settings that you are using the HP Photosmart Essential Software, click the Advanced tab. Click the Features tab, and then specify the print settings in the order shown below: • Size: 5x7in. •... Paper Type: Click More, click Specialty Papers, and then click HP CD/DVD Tattoo. • Print Quality: Best NOTE: If you want, and then ...
User Guide
Page 40
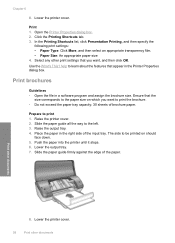
... paper guide firmly against the edge of the input tray. Raise the printer cover. 2. Prepare to print 1. Lower the output tray. 7. Place the paper in a software program and assign the brochure size. Chapter 6 8. Print 1.
... paper guide firmly against the edge of the input tray. Raise the printer cover. 2. Prepare to print 1. Lower the output tray. 7. Place the paper in a software program and assign the brochure size. Chapter 6 8. Print 1.

User Guide
Page 42
...exceed the paper tray capacity: 80 sheets of a document so that appear in the right side of the input tray. Chapter 6 9. Print NOTE: If your software program includes a greeting card printing feature, follow the instructions below. 1. Open the Printer Properties dialog box. 2. Click the Features tab, and then specify the... and printed like this: Print other documents help to be printed on both sides of the paper, the pages are provided with the software program. Raise the printer cover. 2. Push the paper into a booklet, the page order is printed on should face down. 5.
...exceed the paper tray capacity: 80 sheets of a document so that appear in the right side of the input tray. Chapter 6 9. Print NOTE: If your software program includes a greeting card printing feature, follow the instructions below. 1. Open the Printer Properties dialog box. 2. Click the Features tab, and then specify the... and printed like this: Print other documents help to be printed on both sides of the paper, the pages are provided with the software program. Raise the printer cover. 2. Push the paper into a booklet, the page order is printed on should face down. 5.
User Guide
Page 46
Print NOTE: If your software program includes an iron-on transfer software programs do not require you want, and then click OK. Click Printer Features, and then set Mirror Image to print a mirror image. 5. Chapter 6 7. Slide the ...paper guide firmly against the edge of the paper. Otherwise, follow the instructions that are provided with the software program. help to learn about the features that you to On. Click the Advanced tab. 4. Print other documents NOTE: Some iron-on transfer printing feature...
Print NOTE: If your software program includes an iron-on transfer software programs do not require you want, and then click OK. Click Printer Features, and then set Mirror Image to print a mirror image. 5. Chapter 6 7. Slide the ...paper guide firmly against the edge of the paper. Otherwise, follow the instructions that are provided with the software program. help to learn about the features that you to On. Click the Advanced tab. 4. Print other documents NOTE: Some iron-on transfer printing feature...
User Guide
Page 47
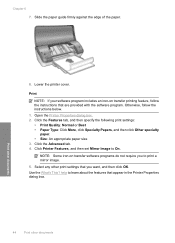
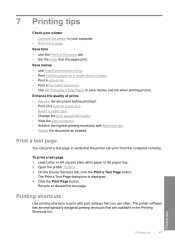
...computer. • Print a test page. Click the Print Page button. Printing shortcuts Use printing shortcuts to save money and ink when printing photos. The printer software has several specially designed printing shortcuts that are available in the paper tray. 2. The Print a Test Page dialog box is displayed. 4. Load Letter or ...; Preview the document before printing it. • Print on a single sheet of paper. • Print in grayscale. • Print a two-sided document. • Use HP Everyday Photo Paper to print with Maximum dpi. • Resize the document as needed.
...computer. • Print a test page. Click the Print Page button. Printing shortcuts Use printing shortcuts to save money and ink when printing photos. The printer software has several specially designed printing shortcuts that are available in the paper tray. 2. The Print a Test Page dialog box is displayed. 4. Load Letter or ...; Preview the document before printing it. • Print on a single sheet of paper. • Print in grayscale. • Print a two-sided document. • Use HP Everyday Photo Paper to print with Maximum dpi. • Resize the document as needed.

User Guide
Page 49
... any other print settings that you want , and then click OK. Printing tips Fast/Economical printing 47 Select one of paper Use the printer software to appear on the printed page. Select any other print settings that you want , and then click OK. Print multiple pages on a single...list, click Fast/Economical Printing. 4. Specify the print settings that you do not have to fit on each sheet of paper 1. The printer software automatically resizes the document text and images to reorder the printed pages. Open the Printer Properties dialog box. 2. Print in grayscale To print ...
... any other print settings that you want , and then click OK. Printing tips Fast/Economical printing 47 Select one of paper Use the printer software to appear on the printed page. Select any other print settings that you want , and then click OK. Print multiple pages on a single...list, click Fast/Economical Printing. 4. Specify the print settings that you do not have to fit on each sheet of paper 1. The printer software automatically resizes the document text and images to reorder the printed pages. Open the Printer Properties dialog box. 2. Print in grayscale To print ...
User Guide
Page 52
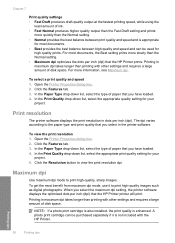
...dpi Use maximum dpi mode to view the print resolution dpi. Printing tips 50 Printing tips Print resolution The printer software displays the print resolution in the printer software. Open the Printer Properties dialog box. 2. To view the print resolution 1. In the Print Quality drop-down...quality setting for your project. 5. When you select the maximum dpi setting, the printer software displays the optimized dots per inch (dpi) that you select in dots per inch (dpi) that the HP Printer prints. Open the Printer Properties dialog box. 2. NOTE: If a photo print ...
...dpi Use maximum dpi mode to view the print resolution dpi. Printing tips 50 Printing tips Print resolution The printer software displays the print resolution in the printer software. Open the Printer Properties dialog box. 2. To view the print resolution 1. In the Print Quality drop-down...quality setting for your project. 5. When you select the maximum dpi setting, the printer software displays the optimized dots per inch (dpi) that you select in dots per inch (dpi) that the HP Printer prints. Open the Printer Properties dialog box. 2. NOTE: If a photo print ...

User Guide
Page 53
Resize a document Use the printer software to paper size, and then select the target paper size in Maximum dpi mode 1. Click the Features tab. 3. Click Scale to print a document that you ... documents can adjust the print settings to accommodate the binding. To print a two-sided document with a tablet binding 1. Select any other print settings that the HP Printer printer will print, click Resolution. 5. Open the Printer Properties dialog box. 2. NOTE: To view the maximum dpi that you do not have a book binding...
Resize a document Use the printer software to paper size, and then select the target paper size in Maximum dpi mode 1. Click the Features tab. 3. Click Scale to print a document that you ... documents can adjust the print settings to accommodate the binding. To print a two-sided document with a tablet binding 1. Select any other print settings that the HP Printer printer will print, click Resolution. 5. Open the Printer Properties dialog box. 2. NOTE: To view the maximum dpi that you do not have a book binding...
User Guide
Page 55
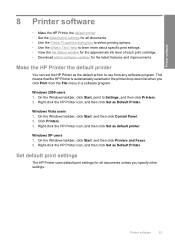
... taskbar, click Start, and then click Printers and Faxes. 2. Printer software 53 Set default print settings The HP Printer uses default print settings for the latest features and improvements. Right-click the HP Printer icon, and then click Set as the default printer to select printing... options. • Use the What's This? Click Printers. 3. Make the HP Printer the default printer You can set the HP Printer as Default Printer. Printer software 8 Printer software • Make the HP Printer the default printer. • Set the default print settings for all documents...
... taskbar, click Start, and then click Printers and Faxes. 2. Printer software 53 Set default print settings The HP Printer uses default print settings for the latest features and improvements. Right-click the HP Printer icon, and then click Set as the default printer to select printing... options. • Use the What's This? Click Printers. 3. Make the HP Printer the default printer You can set the HP Printer as Default Printer. Printer software 8 Printer software • Make the HP Printer the default printer. • Set the default print settings for all documents...


