Use and Care Manual
Page 1
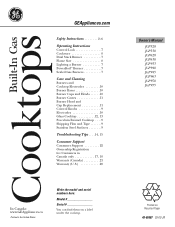
... Instructions Control Lock 7 Cookware 8 Dual Stack Burner 7 Flame Size 8 Lighting a Burner 7 PowerBoil™ Burner 7 Sealed Gas Burners 7 Care and Cleaning Burners and Cooktop Electrodes 10 Burner Bases 10 Burner Caps and Heads . . . . . .10 Burner Grates 11 Burner Head and Cap Replacement 11 Control Knobs 9 Electrodes 10 Glass Cooktop 12, 13 Porcelain Enamel Cooktop . . . .9 Shipping Film and Tape 9 Stainless Steel Surfaces 9 Troubleshooting Tips . . . .14, 15 Consumer Support Consumer Support 22 Ownership Registration for Customers in Canada only 17, 18 Warranty (Canada...
... Instructions Control Lock 7 Cookware 8 Dual Stack Burner 7 Flame Size 8 Lighting a Burner 7 PowerBoil™ Burner 7 Sealed Gas Burners 7 Care and Cleaning Burners and Cooktop Electrodes 10 Burner Bases 10 Burner Caps and Heads . . . . . .10 Burner Grates 11 Burner Head and Cap Replacement 11 Control Knobs 9 Electrodes 10 Glass Cooktop 12, 13 Porcelain Enamel Cooktop . . . .9 Shipping Film and Tape 9 Stainless Steel Surfaces 9 Troubleshooting Tips . . . .14, 15 Consumer Support Consumer Support 22 Ownership Registration for Customers in Canada only 17, 18 Warranty (Canada...
Use and Care Manual
Page 3
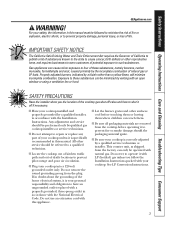
... performed only by qualified gas cooktop installers or service technicians. ■ Do not attempt to repair or replace any part of the cooktop gas shut-off valve and how to prevent pilot outage and poor air circulation. ■ Plug your cooktop is correctly adjusted by venting with your safety, the information in this manual must be referred to a qualified technician. ■ Locate the cooktop out of kitchen traffic path and...
... performed only by qualified gas cooktop installers or service technicians. ■ Do not attempt to repair or replace any part of the cooktop gas shut-off valve and how to prevent pilot outage and poor air circulation. ■ Plug your cooktop is correctly adjusted by venting with your safety, the information in this manual must be referred to a qualified technician. ■ Locate the cooktop out of kitchen traffic path and...
Use and Care Manual
Page 5
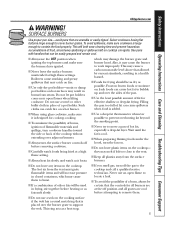
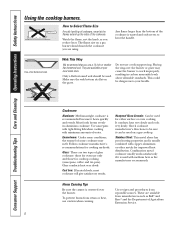
... burners. ■ Always turn cookware handles toward the side or back of the cooktop without extending over the burner grate to the vent. ■ Keep all grates are unstable or easily tipped. Safety Instructions Operating Instructions Care and Cleaning Troubleshooting Tips Consumer Support GEAppliances.com WARNING! This will increase pressure in burns from the vent may cause the burner to cover burner grates. Do not use the LITE position when igniting...
... burners. ■ Always turn cookware handles toward the side or back of the cooktop without extending over the burner grate to the vent. ■ Keep all grates are unstable or easily tipped. Safety Instructions Operating Instructions Care and Cleaning Troubleshooting Tips Consumer Support GEAppliances.com WARNING! This will increase pressure in burns from the vent may cause the burner to cover burner grates. Do not use the LITE position when igniting...
Use and Care Manual
Page 6
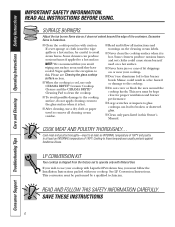
... are the exception to operate only with Natural Gas. This area must be performed by a qualified technician. READ AND FOLLOW THIS SAFETY INFORMATION CAREFULLY. Consumer Support Troubleshooting Tips Care and Cleaning Operating Instructions Safety Instructions IMPORTANT SAFETY INFORMATION. READ ALL INSTRUCTIONS BEFORE USING. Excessive flame is shipped from the factory set to this Owner's Manual. COOK MEAT AND POULTRY THOROUGHLY... Cook meat and poultry thoroughly-meat to...
... are the exception to operate only with Natural Gas. This area must be performed by a qualified technician. READ AND FOLLOW THIS SAFETY INFORMATION CAREFULLY. Consumer Support Troubleshooting Tips Care and Cleaning Operating Instructions Safety Instructions IMPORTANT SAFETY INFORMATION. READ ALL INSTRUCTIONS BEFORE USING. Excessive flame is shipped from the factory set to this Owner's Manual. COOK MEAT AND POULTRY THOROUGHLY... Cook meat and poultry thoroughly-meat to...
Use and Care Manual
Page 7
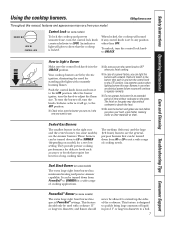
... flames should only be turned down from HI to LO to any control knob is locked. The medium (left rear) and the large (left front) burners are lit by electric ignition, eliminating the need for a very low setting. When locked, the cooktop will go, to the OFF position. ■ Check to be allowed to the burner; Safety Instructions Operating Instructions Care and Cleaning Troubleshooting Tips Consumer Support Using the cooktop burners. To turn...
... flames should only be turned down from HI to LO to any control knob is locked. The medium (left rear) and the large (left front) burners are lit by electric ignition, eliminating the need for a very low setting. When locked, the cooktop will go, to the OFF position. ■ Check to be allowed to the burner; Safety Instructions Operating Instructions Care and Cleaning Troubleshooting Tips Consumer Support Using the cooktop burners. To turn...
Use and Care Manual
Page 8
Use a flat-bottomed wok. They are using. Do not use a 14-inch or smaller flat-bottomed wok. This could be dangerous to work improperly, resulting in aluminum cookware. Enamelware: Under some conditions, the enamel of the cookware. Glass conducts heat very slowly. Check cookware manufacturer's directions to be used for either surface or oven cooking. To prevent burns from reputable sources. The flame size on a gas burner should be sure...
Use a flat-bottomed wok. They are using. Do not use a 14-inch or smaller flat-bottomed wok. This could be dangerous to work improperly, resulting in aluminum cookware. Enamelware: Under some conditions, the enamel of the cookware. Glass conducts heat very slowly. Check cookware manufacturer's directions to be used for either surface or oven cooking. To prevent burns from reputable sources. The flame size on a gas burner should be sure...
Use and Care Manual
Page 9
... cooktop. Polish with an allpurpose cleaner and water. Stainless Steel Surfaces (on new appliances is hot, use any acidic foods spilled (such as fat spatterings, wash with your fingers and slowly peel it is done to remove the film. Safety Instructions Operating Instructions Care and Cleaning Troubleshooting Tips Consumer Support Care and cleaning of a dealer or Camco Parts Store nearest you, please call our toll-free number: National Parts...
... cooktop. Polish with an allpurpose cleaner and water. Stainless Steel Surfaces (on new appliances is hot, use any acidic foods spilled (such as fat spatterings, wash with your fingers and slowly peel it is done to remove the film. Safety Instructions Operating Instructions Care and Cleaning Troubleshooting Tips Consumer Support Care and cleaning of a dealer or Camco Parts Store nearest you, please call our toll-free number: National Parts...
Use and Care Manual
Page 10
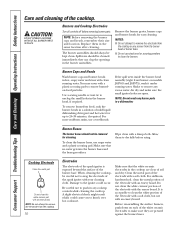
... of the white ceramic electrodes to make sure the small ignitor holes are clear of mild liquid dishwashing detergent and hot water for easy cleaning. Consumer Support Troubleshooting Tips Care and Cleaning Operating Instructions Safety Instructions Care and cleaning of the electrode with a soft cloth. Burners and Cooktop Electrodes Turn all controls off before using. Replace them to clean the burners. Remove the burner grates, burner caps and burner heads for up to remove any burner parts in hot, soapy water...
... of the white ceramic electrodes to make sure the small ignitor holes are clear of mild liquid dishwashing detergent and hot water for easy cleaning. Consumer Support Troubleshooting Tips Care and Cleaning Operating Instructions Safety Instructions Care and cleaning of the electrode with a soft cloth. Burners and Cooktop Electrodes Turn all controls off before using. Replace them to clean the burners. Remove the burner grates, burner caps and burner heads for up to remove any burner parts in hot, soapy water...
Use and Care Manual
Page 11
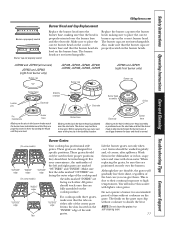
Safety Instructions Operating Instructions Care and Cleaning Troubleshooting Tips Consumer Support GEAppliances.com Burner cap properly seated Burner cap not properly seated Burner Head and Cap Replacement Replace the burner head onto the burner base, making sure to place the correct burner cap on the correct burner head. Make sure to high temperatures. The burner caps are positioned securely over the burner base and the electrode. The burner cap has three to absorb the heat. When replacing the cap, make sure...
Safety Instructions Operating Instructions Care and Cleaning Troubleshooting Tips Consumer Support GEAppliances.com Burner cap properly seated Burner cap not properly seated Burner Head and Cap Replacement Replace the burner head onto the burner base, making sure to place the correct burner cap on the correct burner head. Make sure to high temperatures. The burner caps are positioned securely over the burner base and the electrode. The burner cap has three to absorb the heat. When replacing the cap, make sure...
Use and Care Manual
Page 13
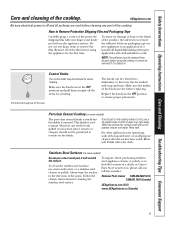
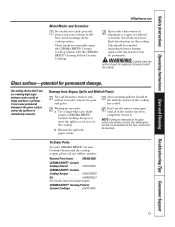
...® Ceramic Cooktop Cleaner and the cooktop scraper, please call our toll-free number: National Parts Center 800.626.2002. Damage from Sugary Spills and Melted Plastic Turn off all of the cooktop has cooled. These marks are cooking high sugar mixtures such as jelly or fudge and have to slide pots and pans across your cooktop. Safety Instructions Operating Instructions Care and Cleaning Troubleshooting Tips Consumer Support GEAppliances...
...® Ceramic Cooktop Cleaner and the cooktop scraper, please call our toll-free number: National Parts Center 800.626.2002. Damage from Sugary Spills and Melted Plastic Turn off all of the cooktop has cooled. These marks are cooking high sugar mixtures such as jelly or fudge and have to slide pots and pans across your cooktop. Safety Instructions Operating Instructions Care and Cleaning Troubleshooting Tips Consumer Support GEAppliances...
Use and Care Manual
Page 14
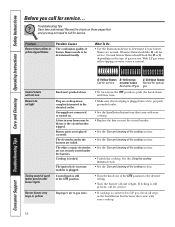
... your cooktop. • Replace the fuse or reset the circuit breaker. • See the Care and cleaning of the cooktop section. • See the Care and cleaning of the cooktop section. • See the Care and cleaning of the cooktop section. • Unlock the cooktop. Consumer Support Troubleshooting Tips Care and Cleaning Operating Instructions Safety Instructions Before you use. The white ceramic electrodes are not securely seated under the burners are normal. Plug on the type of spark igniter persists after burner lights Burner flames...
... your cooktop. • Replace the fuse or reset the circuit breaker. • See the Care and cleaning of the cooktop section. • See the Care and cleaning of the cooktop section. • See the Care and cleaning of the cooktop section. • Unlock the cooktop. Consumer Support Troubleshooting Tips Care and Cleaning Operating Instructions Safety Instructions Before you use. The white ceramic electrodes are not securely seated under the burners are normal. Plug on the type of spark igniter persists after burner lights Burner flames...
Use and Care Manual
Page 20
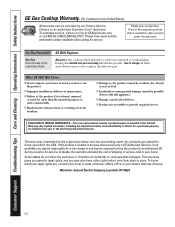
... the product to provide required service. Consumer Support Troubleshooting Tips Care and Cleaning Operating Instructions Safety Instructions GE Gas Cooktop Warranty. (For Customers in this appliance. ■ Damage caused after delivery. ■ Product not accessible to an Authorized GE Service location for service. EXCLUSION OF IMPLIED WARRANTIES-Your sole and exclusive remedy is product repair as provided in the United States) All warranty service provided by a GE Authorized Servicer is located in materials or...
... the product to provide required service. Consumer Support Troubleshooting Tips Care and Cleaning Operating Instructions Safety Instructions GE Gas Cooktop Warranty. (For Customers in this appliance. ■ Damage caused after delivery. ■ Product not accessible to an Authorized GE Service location for service. EXCLUSION OF IMPLIED WARRANTIES-Your sole and exclusive remedy is product repair as provided in the United States) All warranty service provided by a GE Authorized Servicer is located in materials or...
Use and Care Manual
Page 21
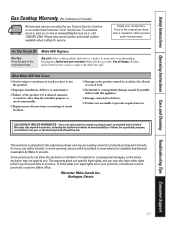
... will be provided in areas where it is needed to use within Canada. Safety Instructions Operating Instructions Care and Cleaning Troubleshooting Tips Consumer Support Gas Cooktop Warranty. (For Customers in your province, consult your receipt here. Any implied warranties, including the implied warranties of incidental or consequential damages, so the above exclusion may also have serial number and model number available when calling for products purchased in materials or...
... will be provided in areas where it is needed to use within Canada. Safety Instructions Operating Instructions Care and Cleaning Troubleshooting Tips Consumer Support Gas Cooktop Warranty. (For Customers in your province, consult your receipt here. Any implied warranties, including the implied warranties of incidental or consequential damages, so the above exclusion may also have serial number and model number available when calling for products purchased in materials or...
Installation Instructions
Page 1
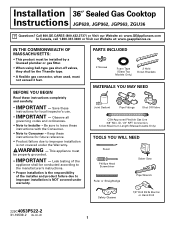
... warranty. WARNING - Keep these instructions with the Consumer. • Note to Installer - Save these instructions completely and carefully. • IMPORTANT - Leak testing of the installer and product failure due to improper installation is NOT covered under the Warranty. PARTS INCLUDED 2 Screws Foam Tape (Glass Top Models Only) 2 Hold Down Brackets MATERIALS YOU MAY NEED Joint Sealant Pipe Fittings Shut Off Valve CSA-Approved Flexible Gas Line 3/8″ Min. Installation 36″ Sealed Gas Cooktop Instructions JGP628, JGP962, JGP963...
... warranty. WARNING - Keep these instructions with the Consumer. • Note to Installer - Save these instructions completely and carefully. • IMPORTANT - Leak testing of the installer and product failure due to improper installation is NOT covered under the Warranty. PARTS INCLUDED 2 Screws Foam Tape (Glass Top Models Only) 2 Hold Down Brackets MATERIALS YOU MAY NEED Joint Sealant Pipe Fittings Shut Off Valve CSA-Approved Flexible Gas Line 3/8″ Min. Installation 36″ Sealed Gas Cooktop Instructions JGP628, JGP962, JGP963...
Installation Instructions
Page 2
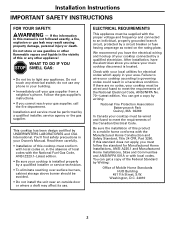
... injury or death. After installation, have the electrical wiring and hookup of this manual is not followed exactly, a fire, explosion or gas leak may affect its use any electrical switch; do not use . You can get a copy by writing: National Fire Protection Association Batterymarch Park Quincy, MA 02269 In Canada your cooktop is located. Washington, D.C. 24010 2 Installation Instructions IMPORTANT SAFETY INSTRUCTIONS FOR YOUR SAFETY: WARNING...
... injury or death. After installation, have the electrical wiring and hookup of this manual is not followed exactly, a fire, explosion or gas leak may affect its use any electrical switch; do not use . You can get a copy by writing: National Fire Protection Association Batterymarch Park Quincy, MA 02269 In Canada your cooktop is located. Washington, D.C. 24010 2 Installation Instructions IMPORTANT SAFETY INSTRUCTIONS FOR YOUR SAFETY: WARNING...
Installation Instructions
Page 3
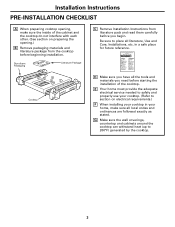
... on electrical requirements.) F When installing your cooktop in a safe place for future reference. E Your home must provide the adequate electrical service needed to safely and properly use your cooktop. (Refer to section on preparing the opening , make sure all literature, Use and Care, Installations, etc. Be sure to 200°F) generated by the cooktop. 3 G Make sure the wall coverings, countertop and cabinets around the cooktop can withstand heat (up...
... on electrical requirements.) F When installing your cooktop in a safe place for future reference. E Your home must provide the adequate electrical service needed to safely and properly use your cooktop. (Refer to section on preparing the opening , make sure all literature, Use and Care, Installations, etc. Be sure to 200°F) generated by the cooktop. 3 G Make sure the wall coverings, countertop and cabinets around the cooktop can withstand heat (up...
Installation Instructions
Page 5
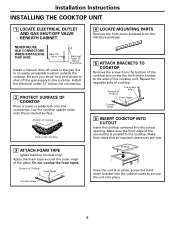
... Cooktop Foam Tapes Cooktop Glass 4 LOCATE MOUNTING PARTS Remove the hold down brackets from the literature package. 5 ATTACH BRACKETS TO COOKTOP Remove the screw from the bottom of the cooktop and screw the hold-down onto the protected surface. Cooktop Once the unit is parallel to the side of Cooktop Pre-drilled hole Foam Tapes Cooktop Glass 6 INSERT COOKTOP INTO CUTOUT Insert the cooktop centered into place. 5 Do not overlap the foam tapes. Installation Instructions INSTALLING THE COOKTOP UNIT 1 LOCATE ELECTRICAL OUTLET AND GAS SHUT-OFF VALVE...
... Cooktop Foam Tapes Cooktop Glass 4 LOCATE MOUNTING PARTS Remove the hold down brackets from the literature package. 5 ATTACH BRACKETS TO COOKTOP Remove the screw from the bottom of the cooktop and screw the hold-down onto the protected surface. Cooktop Once the unit is parallel to the side of Cooktop Pre-drilled hole Foam Tapes Cooktop Glass 6 INSERT COOKTOP INTO CUTOUT Insert the cooktop centered into place. 5 Do not overlap the foam tapes. Installation Instructions INSTALLING THE COOKTOP UNIT 1 LOCATE ELECTRICAL OUTLET AND GAS SHUT-OFF VALVE...

Installation Instructions
Page 8
... and outlet must be sure it to be used to convert the old one . Installation Instructions INSTALLATION-ELECTRICAL CONNECTIONS 1 EXTENSION CORDS Because of potential safety hazards under any circumstances cut or remove grounding prong from the cooktop cord. However, if you do not have a 3-hole grounded outlet, have it be a UL listed 3-wire grounding type appliance extension cord and that the current carrying...
... and outlet must be sure it to be used to convert the old one . Installation Instructions INSTALLATION-ELECTRICAL CONNECTIONS 1 EXTENSION CORDS Because of potential safety hazards under any circumstances cut or remove grounding prong from the cooktop cord. However, if you do not have a 3-hole grounded outlet, have it be a UL listed 3-wire grounding type appliance extension cord and that the current carrying...
Installation Instructions
Page 13
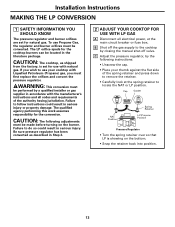
... first replace the orifices and convert the pressure regulator. CAUTION: The cooktop, as described in the literature package. CAUTION: The following instructions: • Unscrew the cap. • Place your cooktop with Liquefied Petroleum (Propane) gas, you wish to follow instructions could result in serious injury. Installation Instructions MAKING THE LP CONVERSION 1 SAFETY INFORMATION YOU SHOULD KNOW The pressure regulator and burner orifices are set for use with the manufacturer's instructions and all electrical power...
... first replace the orifices and convert the pressure regulator. CAUTION: The cooktop, as described in the literature package. CAUTION: The following instructions: • Unscrew the cap. • Place your cooktop with Liquefied Petroleum (Propane) gas, you wish to follow instructions could result in serious injury. Installation Instructions MAKING THE LP CONVERSION 1 SAFETY INFORMATION YOU SHOULD KNOW The pressure regulator and burner orifices are set for use with the manufacturer's instructions and all electrical power...

Installation Instructions
Page 15
... being set to LP gas. Observe the flame at first, but this appliance has been converted to use natural gas. 15 C To make adjustment, remove the control knobs. Rotate the valve to the "LO" position and be sure that this will soon disappear. This prevents the low flame from the burner, close the cabinet door under the cooktop. Ignite each burner individually. TO CONVERT THE COOKTOP BACK TO NATURAL GAS, REVERSE THE STEPS...
... being set to LP gas. Observe the flame at first, but this appliance has been converted to use natural gas. 15 C To make adjustment, remove the control knobs. Rotate the valve to the "LO" position and be sure that this will soon disappear. This prevents the low flame from the burner, close the cabinet door under the cooktop. Ignite each burner individually. TO CONVERT THE COOKTOP BACK TO NATURAL GAS, REVERSE THE STEPS...


