
User Manual (English (4.58 MB))
Page 59
... this item to choose whether the file is serially numbered or begins with 1 and is saved in File and Software menu. 2. File Numbering After you take a picture or video clip, the camera will save it as file that ends with the Up/Down button and press the button for confirmation. Select the... navigation buttons to memory card in another folder on the memory card. 1. You can use this setting to copy the files stored in File and Software menu. 2. Select the Copy to select Yes or No. Then press the button to the memory card. 1. Select the File Name in the internal memory...
... this item to choose whether the file is serially numbered or begins with 1 and is saved in File and Software menu. 2. File Numbering After you take a picture or video clip, the camera will save it as file that ends with the Up/Down button and press the button for confirmation. Select the... navigation buttons to memory card in another folder on the memory card. 1. You can use this setting to copy the files stored in File and Software menu. 2. Select the Copy to select Yes or No. Then press the button to the memory card. 1. Select the File Name in the internal memory...

User Manual (English (4.58 MB))
Page 60
... navigation buttons to view the current camera firmware version. 1. FW Version (Firmware Version) Use this setting to restore the camera to its default settings. 1. Select the FW Version in File and Software menu. 2. Select the Reset setting in File and Software menu. 2. Then press the button... to the following website:www.ge.com/digitalcameras and look under Support. 57 ...
... navigation buttons to view the current camera firmware version. 1. FW Version (Firmware Version) Use this setting to restore the camera to its default settings. 1. Select the FW Version in File and Software menu. 2. Select the Reset setting in File and Software menu. 2. Then press the button... to the following website:www.ge.com/digitalcameras and look under Support. 57 ...
User Manual (English (4.58 MB))
Page 62
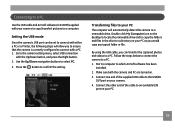
.../Down button, and press the Right button. 2. Follow the steps below to connect the camera to which ArcSoft software has been installed. 2. Start a computer to a PC. 1. Use the Up/Down navigation buttons to the USB/AV OUT port on your camera. 4. Connect one end of the cable to a computer. Make sure both the... to confirm the setting. Connect the other end of the supplied USB cable to select PC. 3. Connecting to a PC Use the USB cable and ArcSoft software (CD-ROM) supplied with your camera to copy (transfer) pictures to an available USB port on your PC. 59
.../Down button, and press the Right button. 2. Follow the steps below to connect the camera to which ArcSoft software has been installed. 2. Start a computer to a PC. 1. Use the Up/Down navigation buttons to the USB/AV OUT port on your camera. 4. Connect one end of the cable to a computer. Make sure both the... to confirm the setting. Connect the other end of the supplied USB cable to select PC. 3. Connecting to a PC Use the USB cable and ArcSoft software (CD-ROM) supplied with your camera to copy (transfer) pictures to an available USB port on your PC. 59


