User Guide
Page 3
... affect the use or performance of your right to bring a complaint to the Commission pursuant to which the receiving antenna is , the antenna for a Class B digital device, pursuant to the following two conditions: (1) This device may not cause harmful interference; This equipment generates, uses, and can be ensured when using this...
... affect the use or performance of your right to bring a complaint to the Commission pursuant to which the receiving antenna is , the antenna for a Class B digital device, pursuant to the following two conditions: (1) This device may not cause harmful interference; This equipment generates, uses, and can be ensured when using this...
User Guide
Page 5
... Statement 4 Information for DECT Product.......... 4 Introduction 7 Before You Begin 7 Parts Checklist 7 Telephone Jack Requirements 8 Installation 8 Digital Security System 8 Important Installation Guidelines..... 9 Base Layout 10 Front View 10 Handset Layout 11 Display Icons 11 Installing the Phone 12 Installing the Handset Battery...... 12 Base Station 13 Programming the Telephone 14 Standby Screen 14...
... Statement 4 Information for DECT Product.......... 4 Introduction 7 Before You Begin 7 Parts Checklist 7 Telephone Jack Requirements 8 Installation 8 Digital Security System 8 Important Installation Guidelines..... 9 Base Layout 10 Front View 10 Handset Layout 11 Display Icons 11 Installing the Phone 12 Installing the Handset Battery...... 12 Base Station 13 Programming the Telephone 14 Standby Screen 14...
User Guide
Page 8
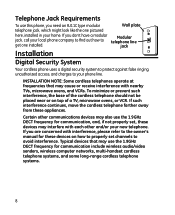
jack Installation Digital Security System Your cordless phone uses a digital security system to protect against false ringing, unauthorized access, and charges to the owner's manual for these devices on top of the cordless telephone should not be placed near or on how to properly set , these...VCR. Telephone Jack Requirements To use this phone, you don't have a modular jack, call your local phone company to find out how to Modular telephone line get one pictured here, installed in your home. INSTALLATION NOTE: Some cordless telephones operate at frequencies that may interfere...
jack Installation Digital Security System Your cordless phone uses a digital security system to protect against false ringing, unauthorized access, and charges to the owner's manual for these devices on top of the cordless telephone should not be placed near or on how to properly set , these...VCR. Telephone Jack Requirements To use this phone, you don't have a modular jack, call your local phone company to find out how to Modular telephone line get one pictured here, installed in your home. INSTALLATION NOTE: Some cordless telephones operate at frequencies that may interfere...
User Guide
Page 17
... delete/int/conf when SET AREA CODE shows in the display. 17 The screen displays SET AREA CODE - - - . 3. You will hear a confirmation tone and your 3-digit area code. 4. The screen displays 4TONE PULSE. The default setting is the default setting. 4. The screen displays 4ENGLISH ESPANOL. 3. NOTE: To restore the default setting...
... delete/int/conf when SET AREA CODE shows in the display. 17 The screen displays SET AREA CODE - - - . 3. You will hear a confirmation tone and your 3-digit area code. 4. The screen displays 4TONE PULSE. The default setting is the default setting. 4. The screen displays 4ENGLISH ESPANOL. 3. NOTE: To restore the default setting...
User Guide
Page 23
... Indicator (VMWI) feature, you receive a call and remain lit during a call. When finished, press the END button to hang up to 28 pre-dial digits. It will also light when a call . NOTE: If you are erased. 23 Press the caller ID-volume (5 or 6) button to select the desired record.... Dial the desired number. - Dial the number first, then press the TALK/SPEAKER button. - VMWI / Visual Ringer Indicator on the top of the digits are using the speakerphone and want to switch to the earpiece, press the TALK/SPEAKER button again, press END button again to end conversation. NOTE...
... Indicator (VMWI) feature, you receive a call and remain lit during a call. When finished, press the END button to hang up to 28 pre-dial digits. It will also light when a call . NOTE: If you are erased. 23 Press the caller ID-volume (5 or 6) button to select the desired record.... Dial the desired number. - Dial the number first, then press the TALK/SPEAKER button. - VMWI / Visual Ringer Indicator on the top of the digits are using the speakerphone and want to switch to the earpiece, press the TALK/SPEAKER button again, press END button again to end conversation. NOTE...
User Guide
Page 25
... display. • To connect to the standby screen. 25 Press the redial/format button first, then use the caller ID-volume (5 or 6) button to 20 digits long. Exit Press the END button to exit a menu function and return to the waiting call, press the flash button on the handset, and your... ID-volume (5) to review the oldest call and scroll to older calls (lower numbers). The number dials automatically. Press the redial/format button. -OR- 3. During a phone call, you will receive Caller ID information (if available) on Call Waiting calls.
... display. • To connect to the standby screen. 25 Press the redial/format button first, then use the caller ID-volume (5 or 6) button to 20 digits long. Exit Press the END button to exit a menu function and return to the waiting call, press the flash button on the handset, and your... ID-volume (5) to review the oldest call and scroll to older calls (lower numbers). The number dials automatically. Press the redial/format button. -OR- 3. During a phone call, you will receive Caller ID information (if available) on Call Waiting calls.
User Guide
Page 31
... review show as in TALK mode). 2. NOTE: Depending on (a) how the incoming caller's phone number is formatted when it is OFF (not in the display. Seven digits 7-digit telephone number. 888-8888 31 Press the caller ID-volume (6) button to review the oldest ...CID record first. You may need to adjust the format of digits Explanation Example Eleven digits long distance code "1 " +3-digit area code +7-digit telephone number. 1-317-888-8888 Ten digits 3-digit area code + 317-888-8888 7-digit telephone number. Press the TALK/SPEAKER button. Use the caller ID-...
... review show as in TALK mode). 2. NOTE: Depending on (a) how the incoming caller's phone number is formatted when it is OFF (not in the display. Seven digits 7-digit telephone number. 888-8888 31 Press the caller ID-volume (6) button to review the oldest ...CID record first. You may need to adjust the format of digits Explanation Example Eleven digits long distance code "1 " +3-digit area code +7-digit telephone number. 1-317-888-8888 Ten digits 3-digit area code + 317-888-8888 7-digit telephone number. Press the TALK/SPEAKER button. Use the caller ID-...
User Guide
Page 33
... space between the first and last name. Press the 5 key times for the letter B. Press the 7 key times for the letter L. each of 20-digit numbers and 14-character names (including spaces). More than one letter is OFF (not in each record can store up to confirm. Press the 5 key... scroll to be dialed out. 8. Press the caller ID-volume (5 or 6) button or key in alphabet to view the records and scroll to a record to PHONE BOOK. 4. The screen displays ENTER NAME. 3. Review Records 1. Use the caller ID-volume (5 or 6) button to scroll to access the phonebook sub-menu. ...
... space between the first and last name. Press the 5 key times for the letter B. Press the 7 key times for the letter L. each of 20-digit numbers and 14-character names (including spaces). More than one letter is OFF (not in each record can store up to confirm. Press the 5 key... scroll to be dialed out. 8. Press the caller ID-volume (5 or 6) button or key in alphabet to view the records and scroll to a record to PHONE BOOK. 4. The screen displays ENTER NAME. 3. Review Records 1. Use the caller ID-volume (5 or 6) button to scroll to access the phonebook sub-menu. ...
User Guide
Page 34
...a pause is generated while making melody selection). 7. Use the caller ID-volume (5 or 6) button or key in alphabet to move to insert a delay in the phone book. Repeat Steps 3 through 7 in the dialing sequence. 5. Press mute/menu OK button to EDIT RECORDS. 2. Delete Records From Phonebook Sub-Menu: 1. The ..., or to DELETE RECORDS. 2. Edit Records From Phonebook Sub-Menu: 1. Use the touch-tone pad to enter the telephone number (up to 20 digits, including pauses), and press the mute/menu button to confirm. Use the caller ID-volume (5 or 6) button to scroll to wait for one...
...a pause is generated while making melody selection). 7. Use the caller ID-volume (5 or 6) button or key in alphabet to move to insert a delay in the phone book. Repeat Steps 3 through 7 in the dialing sequence. 5. Press mute/menu OK button to EDIT RECORDS. 2. Delete Records From Phonebook Sub-Menu: 1. The ..., or to DELETE RECORDS. 2. Edit Records From Phonebook Sub-Menu: 1. Use the touch-tone pad to enter the telephone number (up to 20 digits, including pauses), and press the mute/menu button to confirm. Use the caller ID-volume (5 or 6) button to scroll to wait for one...
User Guide
Page 46
... Date and Time 16 Delete Records 34 Deleting All CID Records 32 De-Registration 19 Dialing a CID Number 31 Dialing a Number from Internal Memory 35 Digital Security System 8 Display Icons 11 Display Messages 37 Do Not Disturb (D-N-D) 26 46 E Edit Records 34 Equipment Approval Information 2 Exit 25 F FCC... Guidelines 9 Information for DECT Product 4 Initial Setup 16 Inserting a Pause in the Dialing Sequence 34 Installation 8 Installing the Handset Battery 12 Installing the Phone 12 Intercom Operation 27 Interference Information 3 Introduction 7 K Key Tone 21
... Date and Time 16 Delete Records 34 Deleting All CID Records 32 De-Registration 19 Dialing a CID Number 31 Dialing a Number from Internal Memory 35 Digital Security System 8 Display Icons 11 Display Messages 37 Do Not Disturb (D-N-D) 26 46 E Edit Records 34 Equipment Approval Information 2 Exit 25 F FCC... Guidelines 9 Information for DECT Product 4 Initial Setup 16 Inserting a Pause in the Dialing Sequence 34 Installation 8 Installing the Handset Battery 12 Installing the Phone 12 Intercom Operation 27 Interference Information 3 Introduction 7 K Key Tone 21


