User's Guide
Page 2
... premises wiring and telephone network must be able to use your local telephone company. It is a label indicating, among other information, the US number and Ringer Equivalence Number (REN) for details. If you may not be connected to one line should contact your own telephone equipment if you may not be...
... premises wiring and telephone network must be able to use your local telephone company. It is a label indicating, among other information, the US number and Ringer Equivalence Number (REN) for details. If you may not be connected to one line should contact your own telephone equipment if you may not be...
User's Guide
Page 5
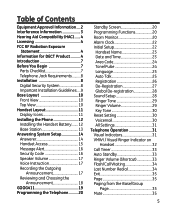
...Product...........4 Introduction 7 Before You Begin 7 Parts Checklist 7 Telephone Jack Requirements...........8 Installation 8 Digital Security System 8 Important Installation Guidelines.....9 Base Layout 10 Front View 10 Top View 10 Handset Layout 11 Display... Icons 11 Installing the Phone 12 Installing the Handset Battery........ 12 Base Station 13 Answering System Setup 14... 26 De-Registration 27 Global De-registration 28 Sound Setup 28 Ringer Tone 29 Ringer Volume 29 Key Tone 30 Reset Setting 30 Voicemail 30 All Settings 31 ...
...Product...........4 Introduction 7 Before You Begin 7 Parts Checklist 7 Telephone Jack Requirements...........8 Installation 8 Digital Security System 8 Important Installation Guidelines.....9 Base Layout 10 Front View 10 Top View 10 Handset Layout 11 Display... Icons 11 Installing the Phone 12 Installing the Handset Battery........ 12 Base Station 13 Answering System Setup 14... 26 De-Registration 27 Global De-registration 28 Sound Setup 28 Ringer Tone 29 Ringer Volume 29 Key Tone 30 Reset Setting 30 Voicemail 30 All Settings 31 ...
User's Guide
Page 11
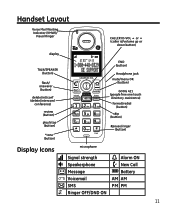
Handset Layout Voice Mail Waiting Indicator (VMWI)/ Visual Ringer CALLER ID-VOL 5 or 6 (caller id/volume up or down button) display TALK/SPEAKER (button) flash/ answerer (button) delete/int/conf (delete/intercom/ conference) review (button) play/stop (button) *tone (button) END (button) Headphone jack mute/menu OK (button) GOOG 411 (google free one touch directory assistance) format/redial (button) skip (button) #pause/ringer (button) Display Icons microphone Signal strength Speakerphone Message Voicemail SMS Ringer OFF/DND ON Alarm ON New Call Battery AM AM PM PM 11
Handset Layout Voice Mail Waiting Indicator (VMWI)/ Visual Ringer CALLER ID-VOL 5 or 6 (caller id/volume up or down button) display TALK/SPEAKER (button) flash/ answerer (button) delete/int/conf (delete/intercom/ conference) review (button) play/stop (button) *tone (button) END (button) Headphone jack mute/menu OK (button) GOOG 411 (google free one touch directory assistance) format/redial (button) skip (button) #pause/ringer (button) Display Icons microphone Signal strength Speakerphone Message Voicemail SMS Ringer OFF/DND ON Alarm ON New Call Battery AM AM PM PM 11
User's Guide
Page 28
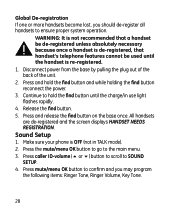
...6) button to scroll to the main menu. 3. Global De-registration If one or more handsets become lost, you may program the following items: Ringer Tone, Ringer Volume, Key Tone. 28 WARNING: It is not recommended that a handset be de-registered unless absolutely necessary because once a handset is de-registered... power from the base by pulling the plug out of the back of the unit. 2. Continue to ensure proper system operation. Make sure your phone is re-registered. 1. Press and hold the find button reconnect the power. 3. Press and release the find button. 5. Press mute/menu OK...
...6) button to scroll to the main menu. 3. Global De-registration If one or more handsets become lost, you may program the following items: Ringer Tone, Ringer Volume, Key Tone. 28 WARNING: It is not recommended that a handset be de-registered unless absolutely necessary because once a handset is de-registered... power from the base by pulling the plug out of the back of the unit. 2. Continue to ensure proper system operation. Make sure your phone is re-registered. 1. Press and hold the find button reconnect the power. 3. Press and release the find button. 5. Press mute/menu OK...

User's Guide
Page 29
...The screen displays 4 RING VOLUME 5. 3. From the Sound Setup Menu: 1. You will hear a confirmation tone and rhe screen displays the selected ringer tone. You will hear a confirmation tone and the new volume setting shows in the display. Press mute/menu OK button to signal an incoming ...menu OK button to your selection. Use the caller ID-volume (5 or6) button to scroll to save your selection. LEVEL 5 is default setting. 3. Ringer Volume From the Sound Setup Menu: 1. Press the caller ID-volume (5 or 6) button to scroll to enter the menu. NOTE: If you select....
...The screen displays 4 RING VOLUME 5. 3. From the Sound Setup Menu: 1. You will hear a confirmation tone and rhe screen displays the selected ringer tone. You will hear a confirmation tone and the new volume setting shows in the display. Press mute/menu OK button to signal an incoming ...menu OK button to your selection. Use the caller ID-volume (5 or6) button to scroll to save your selection. LEVEL 5 is default setting. 3. Ringer Volume From the Sound Setup Menu: 1. Press the caller ID-volume (5 or 6) button to scroll to enter the menu. NOTE: If you select....
User's Guide
Page 32
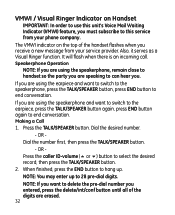
...button to end conversation. Press the TALK/SPEAKER button. OR - The VMWI indicator on Handset IMPORTANT: In order to use this service from your phone company. If you are using the speakerphone, remain close to handset so the party you are speaking to this unit's Voice Mail Waiting Indicator (...switch to the earpiece, press the TALK/SPEAKER button again, press END button again to end conversation. NOTE: You may enter up . VMWI / Visual Ringer Indicator on the top of the digits are erased. 32 Speakerphone Operation NOTE: If you are using the speakerphone and want to 28 pre-dial...
...button to end conversation. Press the TALK/SPEAKER button. OR - The VMWI indicator on Handset IMPORTANT: In order to use this service from your phone company. If you are using the speakerphone, remain close to handset so the party you are speaking to this unit's Voice Mail Waiting Indicator (...switch to the earpiece, press the TALK/SPEAKER button again, press END button again to end conversation. NOTE: You may enter up . VMWI / Visual Ringer Indicator on the top of the digits are erased. 32 Speakerphone Operation NOTE: If you are using the speakerphone and want to 28 pre-dial...
User's Guide
Page 33
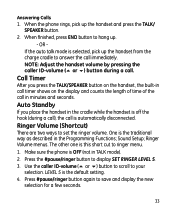
... display the new selection for a few seconds. 33 When the phone rings, pick up . - Make sure the phone is automatically disconnected. OR - One is this short cut to ringer menu. 1. Press #pause/ringer button again to display SET RINGER LEVEL 5. 3. Call Timer After you place the handset in the... described in minutes and seconds. Use the caller ID-volume (5 or 6) button to scroll to set the ringer volume. If the auto talk mode is the default setting. 4. Ringer Volume (Shortcut) There are two ways to your selection. Sound Setup; Answering Calls 1. When finished, press ...
... display the new selection for a few seconds. 33 When the phone rings, pick up . - Make sure the phone is automatically disconnected. OR - One is this short cut to ringer menu. 1. Press #pause/ringer button again to display SET RINGER LEVEL 5. 3. Call Timer After you place the handset in the... described in minutes and seconds. Use the caller ID-volume (5 or 6) button to scroll to set the ringer volume. If the auto talk mode is the default setting. 4. Ringer Volume (Shortcut) There are two ways to your selection. Sound Setup; Answering Calls 1. When finished, press ...

User's Guide
Page 36
... Call 1. Handset 2, Handset 3, Handset 4, Handset 5 and Handset 6) if Handset 1 is taken by pressing one button at the base unit, even though the ringer volume of handset(s) has been preset. 1. To cancel, press the do not disturb button on the handset. 3. Use the touch-tone pad to select the...intercom feature allows you to have a conversation with another registered handset without tying up the telephone line, allowing you to turn off all the handset ringer(s) at once, by the answerer. Make sure the handset is OFF (not in , or during call screening after the call is paging the...
... Call 1. Handset 2, Handset 3, Handset 4, Handset 5 and Handset 6) if Handset 1 is taken by pressing one button at the base unit, even though the ringer volume of handset(s) has been preset. 1. To cancel, press the do not disturb button on the handset. 3. Use the touch-tone pad to select the...intercom feature allows you to have a conversation with another registered handset without tying up the telephone line, allowing you to turn off all the handset ringer(s) at once, by the answerer. Make sure the handset is OFF (not in , or during call screening after the call is paging the...
User's Guide
Page 45
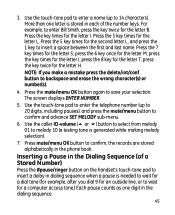
...selection. Press the mute/menu OK button again to confirm, the records are stored alphabetically in the phone book. Use the touch-tone pad to enter the telephone number (up to insert a delay in each of... a Stored Number) Press the #pause/ringer button on the handset's touch-tone pad to 14 characters). NOTE: If you dial 9 for an outside...sequence. 45 3. Use the touch-tone pad to enter a name (up to 20 digits, including pauses), and press the mute/menu button to backspace and erase the wrong character(s) or number(s). 4. More ...
...selection. Press the mute/menu OK button again to confirm, the records are stored alphabetically in the phone book. Use the touch-tone pad to enter the telephone number (up to insert a delay in each of... a Stored Number) Press the #pause/ringer button on the handset's touch-tone pad to 14 characters). NOTE: If you dial 9 for an outside...sequence. 45 3. Use the touch-tone pad to enter a name (up to 20 digits, including pauses), and press the mute/menu button to backspace and erase the wrong character(s) or number(s). 4. More ...
User's Guide
Page 58
Cordless Phone Solutions No dial tone • Check installation: Make sure the base power cord is programmed to ON. • Move closer to the base. Make sure the telephone line cord is connected to the base unit and the wall phone jack. • Connect another household appliance. • Charge the ...Handset does not ring • Make sure the handset ringer is connected to be charged. • Place the handset in the cradle. If not, the battery may need to a working electrical outlet. The handset may have too many extension phones on the base should be out of the base....
Cordless Phone Solutions No dial tone • Check installation: Make sure the base power cord is programmed to ON. • Move closer to the base. Make sure the telephone line cord is connected to the base unit and the wall phone jack. • Connect another household appliance. • Charge the ...Handset does not ring • Make sure the handset ringer is connected to be charged. • Place the handset in the cradle. If not, the battery may need to a working electrical outlet. The handset may have too many extension phones on the base should be out of the base....

User's Guide
Page 67
Index Installing the Handset Battery 12 Installing the Phone 12 Intercom Operation 36 Interference Information 3 Introduction 7 K Key Tone 30 L Language 25 Last Number Redial 34 Leaving a Message/Memo 49 Licensing 4 Limited Warranty 62 M Making ... the Outgoing Announcement17 Registration 26 Remote Access 51 Reset Setting 30 Review Records 44 Reviewing and Choosing the Announcement 18 Reviewing CID Records 41 Ringer Tone 29 Ringer Volume 29, 33 Room Monitor 20 S Screening Calls from the Base 49 Screening Calls from the Handset 51 Security Code 16 Sound Setup 28...
Index Installing the Handset Battery 12 Installing the Phone 12 Intercom Operation 36 Interference Information 3 Introduction 7 K Key Tone 30 L Language 25 Last Number Redial 34 Leaving a Message/Memo 49 Licensing 4 Limited Warranty 62 M Making ... the Outgoing Announcement17 Registration 26 Remote Access 51 Reset Setting 30 Review Records 44 Reviewing and Choosing the Announcement 18 Reviewing CID Records 41 Ringer Tone 29 Ringer Volume 29, 33 Room Monitor 20 S Screening Calls from the Base 49 Screening Calls from the Handset 51 Security Code 16 Sound Setup 28...


