Technical Reference for Garmin NMEA 2000 Products
Page 30
... boat is associated with . 1. From the NMEA 2000 Devices list, select the GRA 10 device. 2. Select an option: • For most Garmin chartplotters, select Review > Gauge Type. • For other Garmin marine devices, select Config > Rudder Angle Calibration. 4. Follow the on the configuration screens. Select an option: • To automatically detect the gauge...
... boat is associated with . 1. From the NMEA 2000 Devices list, select the GRA 10 device. 2. Select an option: • For most Garmin chartplotters, select Review > Gauge Type. • For other Garmin marine devices, select Config > Rudder Angle Calibration. 4. Follow the on the configuration screens. Select an option: • To automatically detect the gauge...
Technical Reference for Garmin NMEA 2000 Products
Page 31
...and less than -180, in degrees, followed by Done. Select an option: • For most Garmin chartplotters, select Review > Engine Tilt Calibration. • For other Garmin marine devices, select Config > Engine Tilt Calibration. 4. Configuring the Engine Number If your boat has multiple... 0 and greater than 180, in degrees, followed by Done. Select an option: • For most Garmin chartplotters, select Review > Generic Config. • For other Garmin marine devices, select Config >Generic Configuration. 3. For example, RUDDERPOS=45Done. 7. From the NMEA 2000 Devices...
...and less than -180, in degrees, followed by Done. Select an option: • For most Garmin chartplotters, select Review > Engine Tilt Calibration. • For other Garmin marine devices, select Config > Engine Tilt Calibration. 4. Configuring the Engine Number If your boat has multiple... 0 and greater than 180, in degrees, followed by Done. Select an option: • For most Garmin chartplotters, select Review > Generic Config. • For other Garmin marine devices, select Config >Generic Configuration. 3. For example, RUDDERPOS=45Done. 7. From the NMEA 2000 Devices...

Technical Reference for Garmin NMEA 2000 Products
Page 32
... adapter gauge type is set to . Select an option: • For most Garmin chartplotters, select Review > Generic Config. • For other Garmin marine devices, select Config >Generic Configuration. 4. Select an option: • For most Garmin chartplotters, select Review > Gauge Type. • For other Garmin marine devices, select Config > Engine Number. 3. Set the engine tilt to the...
... adapter gauge type is set to . Select an option: • For most Garmin chartplotters, select Review > Generic Config. • For other Garmin marine devices, select Config >Generic Configuration. 4. Select an option: • For most Garmin chartplotters, select Review > Gauge Type. • For other Garmin marine devices, select Config > Engine Number. 3. Set the engine tilt to the...
Technical Reference for Garmin NMEA 2000 Products
Page 33
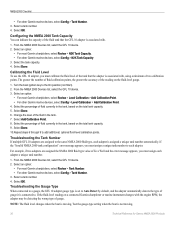
...device. 2. Configuring the Tank Number If your display device. Select an option: • For most Garmin chartplotters, select Review > Generic Config. • For other Garmin marine devices, select Config > Factory Defaults. 3. Restoring Factory Default Settings You will lose all custom ...From the NMEA 2000 Devices list, select the GET 10 device. 2. NMEA 2000 Checklist • For most Garmin chartplotters, select Review > Generic Config. • For other Garmin marine devices, select Config > N2K Fluid Type. 3. Select Yes. Enter the following command: "GAUGETYPE=" ...
...device. 2. Configuring the Tank Number If your display device. Select an option: • For most Garmin chartplotters, select Review > Generic Config. • For other Garmin marine devices, select Config > Factory Defaults. 3. Restoring Factory Default Settings You will lose all custom ...From the NMEA 2000 Devices list, select the GET 10 device. 2. NMEA 2000 Checklist • For most Garmin chartplotters, select Review > Generic Config. • For other Garmin marine devices, select Config > N2K Fluid Type. 3. Select Yes. Enter the following command: "GAUGETYPE=" ...
Technical Reference for Garmin NMEA 2000 Products
Page 34
...of the fluid tank that the adapter is moving . 30 Technical Reference for Garmin NMEA 2000 Products Select an option: • For most Garmin chartplotters, select Review > Tank Number. • For other Garmin marine devices, select Config > N2K Tank Capacity. 3. Configuring the NMEA 2000 ... in the tank, based on the fluid-level gauge. 1. Select an option: • For most Garmin chartplotters, select Review > Level Calibration > Add Calibration Point. • For other Garmin marine devices, select Config > Tank Number. 3. Select OK. From the NMEA 2000 Devices list, select...
...of the fluid tank that the adapter is moving . 30 Technical Reference for Garmin NMEA 2000 Products Select an option: • For most Garmin chartplotters, select Review > Tank Number. • For other Garmin marine devices, select Config > N2K Tank Capacity. 3. Configuring the NMEA 2000 ... in the tank, based on the fluid-level gauge. 1. Select an option: • For most Garmin chartplotters, select Review > Level Calibration > Add Calibration Point. • For other Garmin marine devices, select Config > Tank Number. 3. Select OK. From the NMEA 2000 Devices list, select...
Technical Reference for Garmin NMEA 2000 Products
Page 35
... You can indicate the type of the tank that the adapter is associated with tank number 2. Select an option: • For most Garmin chartplotters, select Review > Generic Config. • For other Garmin marine devices, select Config > Level Calibration. 3. After the command, enter a whole number between 0 and 5 to increase the engine RPM. From the...
... You can indicate the type of the tank that the adapter is associated with tank number 2. Select an option: • For most Garmin chartplotters, select Review > Generic Config. • For other Garmin marine devices, select Config > Level Calibration. 3. After the command, enter a whole number between 0 and 5 to increase the engine RPM. From the...
Technical Reference for Garmin NMEA 2000 Products
Page 36
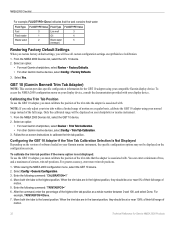
... 10 adapter, you must calibrate the position of motion. 32 Technical Reference for the GBT 10 adapter using your Garmin marine instrument, the specific configuration options may not be displayed on -screen instructions to the highest position. You can... Select an option: • For most Garmin chartplotters, select Review > Trim Tab Calibration. • For other Garmin marine devices, select Config > Factory Defaults. 3. Select an option: • For most Garmin chartplotters, select Review > Factory Defaults. • For other Garmin marine devices, select Config > Trim Tab ...
... 10 adapter, you must calibrate the position of motion. 32 Technical Reference for the GBT 10 adapter using your Garmin marine instrument, the specific configuration options may not be displayed on -screen instructions to the highest position. You can... Select an option: • For most Garmin chartplotters, select Review > Trim Tab Calibration. • For other Garmin marine devices, select Config > Factory Defaults. 3. Select an option: • For most Garmin chartplotters, select Review > Factory Defaults. • For other Garmin marine devices, select Config > Trim Tab ...
Technical Reference for Garmin NMEA 2000 Products
Page 37
...the source for the temperature data. 1. Select an option: • For most Garmin chartplotters, select Review > Factory Defaults. • For other Garmin marine devices, select Config > N2K Temp. Source. • For other Garmin marine devices, select Config > Factory Defaults. 3. From the NMEA 2000 Devices ... example, TRIMTABPOS=50Done. 13.Repeat steps 10 through 12 to calibrate the water speed. Select an option: • For most Garmin chartplotters, select Review > N2K Temp. From the NMEA 2000 Devices list, select the GST 10 device. 2. NMEA 2000 Checklist 8. From the NMEA...
...the source for the temperature data. 1. Select an option: • For most Garmin chartplotters, select Review > Factory Defaults. • For other Garmin marine devices, select Config > N2K Temp. Source. • For other Garmin marine devices, select Config > Factory Defaults. 3. From the NMEA 2000 Devices ... example, TRIMTABPOS=50Done. 13.Repeat steps 10 through 12 to calibrate the water speed. Select an option: • For most Garmin chartplotters, select Review > N2K Temp. From the NMEA 2000 Devices list, select the GST 10 device. 2. NMEA 2000 Checklist 8. From the NMEA...
Technical Reference for Garmin NMEA 2000 Products
Page 38
... configuration" error message appears, you must assign each adapter. Select an option: • For most Garmin chartplotters, select Review > Sensor Number. • For other Garmin marine devices, select Config >Generic Configuration. 3. Configuring the GST 10 Adapter if the Water Speed, ...speed and observe the maximum speed, in miles per hour. 6. Select an option: • For most Garmin chartplotters, select Review > Generic Config. • For other Garmin marine devices, select Config >Generic Configuration. 3. Accelerate the boat to each adapter a unique number. 1. ...
... configuration" error message appears, you must assign each adapter. Select an option: • For most Garmin chartplotters, select Review > Sensor Number. • For other Garmin marine devices, select Config >Generic Configuration. 3. Configuring the GST 10 Adapter if the Water Speed, ...speed and observe the maximum speed, in miles per hour. 6. Select an option: • For most Garmin chartplotters, select Review > Generic Config. • For other Garmin marine devices, select Config >Generic Configuration. 3. Accelerate the boat to each adapter a unique number. 1. ...
Technical Reference for Garmin NMEA 2000 Products
Page 39
... the GST 10 devices assigned to the second adapter prevents the error message. Select an option: • For most Garmin chartplotters, select Review > Factory Defaults. • For other devices, you must assign each adapter. After the command, enter a positive decimal... From the NMEA 2000 Devices list, select the GST 10 device. 2. Select an option: • For most Garmin chartplotters, select Review > Generic Config. • For other Garmin marine devices, select Config >Generic Configuration. 3. After the command, enter a positive or negative decimal number, followed by...
... the GST 10 devices assigned to the second adapter prevents the error message. Select an option: • For most Garmin chartplotters, select Review > Factory Defaults. • For other devices, you must assign each adapter. After the command, enter a positive decimal... From the NMEA 2000 Devices list, select the GST 10 device. 2. Select an option: • For most Garmin chartplotters, select Review > Generic Config. • For other Garmin marine devices, select Config >Generic Configuration. 3. After the command, enter a positive or negative decimal number, followed by...
Quick Reference Guide
Page 1
...reached the destination, you can create and immediately navigate a route on electronic chart information. Touch a destination using the cursor ( ). 4. Review the course indicated by the magenta line. Enter the name of the Auto Guidance line. Navigating Using a Chart Navigating to a Point ...Route > Name. Select Done when the route is based on the Navigation chart or the Fishing chart. Select Done. Select Navigate To. 5. Review the course indicated by the magenta line. 10.Follow the magenta line, steering to your boat. 8. This is closest to avoid land, ...
...reached the destination, you can create and immediately navigate a route on electronic chart information. Touch a destination using the cursor ( ). 4. Review the course indicated by the magenta line. Enter the name of the Auto Guidance line. Navigating Using a Chart Navigating to a Point ...Route > Name. Select Done when the route is based on the Navigation chart or the Fishing chart. Select Done. Select Navigate To. 5. Review the course indicated by the magenta line. 10.Follow the magenta line, steering to your boat. 8. This is closest to avoid land, ...

Quick Reference Guide
Page 2
...; Select Fishing Chart > Menu > Fishing Chart Setup > Chart Appearance > Heading Line. 3. The chartplotter shows a list of Garmin Ltd. Garmin®, the Gamin logo, GPSMAP®, BlueChart®, and g2 Vision® are trademarks of the 50 nearest locations and the distance and bearing to a Marine...as a man overboard (MOB) location. Enter the distance to name the waypoint, select the waypoint on electronic chart information. Review the course indicated by touching Mark at a Different Location 1. If you can configure the appearance of the heading line for ...
...; Select Fishing Chart > Menu > Fishing Chart Setup > Chart Appearance > Heading Line. 3. The chartplotter shows a list of Garmin Ltd. Garmin®, the Gamin logo, GPSMAP®, BlueChart®, and g2 Vision® are trademarks of the 50 nearest locations and the distance and bearing to a Marine...as a man overboard (MOB) location. Enter the distance to name the waypoint, select the waypoint on electronic chart information. Review the course indicated by touching Mark at a Different Location 1. If you can configure the appearance of the heading line for ...
Owner's Manual
Page 9
... feature of the magenta line indicates that may pass over land or shallow water. Select Navigation Chart, Fishing Chart, or Radar Overlay. 3. GPSMAP 700 Series Owner's Manual 5 Carefully compare the course to , those shown below. From the Home screen, select Charts. 2. Select Navigate To...Some other common symbols you pan past the edge of the Auto Guidance line. Touch the chart to provide continuous map coverage. 4. Review the course indicated by the magenta line. The radar overlay is available when connected to avoid land, shallow water, and other obstacles ...
... feature of the magenta line indicates that may pass over land or shallow water. Select Navigation Chart, Fishing Chart, or Radar Overlay. 3. GPSMAP 700 Series Owner's Manual 5 Carefully compare the course to , those shown below. From the Home screen, select Charts. 2. Select Navigate To...Some other common symbols you pan past the edge of the Auto Guidance line. Touch the chart to provide continuous map coverage. 4. Review the course indicated by the magenta line. The radar overlay is available when connected to avoid land, shallow water, and other obstacles ...
Owner's Manual
Page 10
... services information near the cursor. • Select Stop Pointing to hide the symbol. Complete an action: • Select Review to show or hide all tracks of the cursor. (Review does not appear if the cursor is available if you use a BlueChart g2 Vision SD card or a BlueChart g2 SD... card, or if your present location. Select a chart or a 3D chart view. 6 GPSMAP 700 Series Owner's Manual Select Menu > Waypoints & Tracks...
... services information near the cursor. • Select Stop Pointing to hide the symbol. Complete an action: • Select Review to show or hide all tracks of the cursor. (Review does not appear if the cursor is available if you use a BlueChart g2 Vision SD card or a BlueChart g2 SD... card, or if your present location. Select a chart or a 3D chart view. 6 GPSMAP 700 Series Owner's Manual Select Menu > Waypoints & Tracks...
Owner's Manual
Page 11
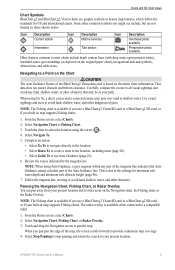
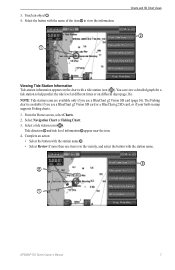
... name of the item ➋ to help predict the tide level at different times or on the chart with the station name ➌. • Select Review if more than one item is available if you use a BlueChart g2 Vision SD card or a BlueChart g2 SD card, or if your built-in... the vicinity, and select the button with the station name. ➌ ➋ ➊ GPSMAP 700 Series Owner's Manual 7 The Fishing chart is in map supports Fishing charts. 1. Select Navigation Chart or Fishing Chart. 3. Tide direction ➊ and tide level...
... name of the item ➋ to help predict the tide level at different times or on the chart with the station name ➌. • Select Review if more than one item is available if you use a BlueChart g2 Vision SD card or a BlueChart g2 SD card, or if your built-in... the vicinity, and select the button with the station name. ➌ ➋ ➊ GPSMAP 700 Series Owner's Manual 7 The Fishing chart is in map supports Fishing charts. 1. Select Navigation Chart or Fishing Chart. 3. Tide direction ➊ and tide level...
Owner's Manual
Page 12
... as magnetic heading) or to show and configure tide and current information on the chart (page 21). Select the name of the navaid (or Review and then the name of navaid symbols. Select Menu. 4. Select Navigation Chart or Fishing Chart. 3. Complete an action: • Select On to...on the map, at different zoom levels, for the Navigation Chart or the Fishing chart. 1. Select Navigation Chart Setup or Fishing Chart Setup. 8 GPSMAP 700 Series Owner's Manual Select Tides/Currents. 6. The Fishing chart is available only if you use a BlueChart g2 Vision SD card or a BlueChart...
... as magnetic heading) or to show and configure tide and current information on the chart (page 21). Select the name of the navaid (or Review and then the name of navaid symbols. Select Menu. 4. Select Navigation Chart or Fishing Chart. 3. Complete an action: • Select On to...on the map, at different zoom levels, for the Navigation Chart or the Fishing chart. 1. Select Navigation Chart Setup or Fishing Chart Setup. 8 GPSMAP 700 Series Owner's Manual Select Tides/Currents. 6. The Fishing chart is available only if you use a BlueChart g2 Vision SD card or a BlueChart...
Owner's Manual
Page 24
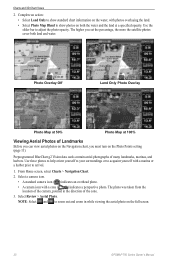
From Home screen, select Charts > Navigation Chart. 2. Select Review > Aerial Photo. Photo Overlay Off Land Only Photo Overlay Photo Map at 50% Photo Map at a specified opacity. The photo was taken from the location ... chart, you must turn on the water, with a marina or a harbor prior to arrival. 1. Note: Select and to show photos on the full screen. 20 GPSMAP 700 Series Owner's Manual Complete an action: • Select Land Only to zoom out and zoom in the direction of many landmarks, marinas, and harbors...
From Home screen, select Charts > Navigation Chart. 2. Select Review > Aerial Photo. Photo Overlay Off Land Only Photo Overlay Photo Map at 50% Photo Map at a specified opacity. The photo was taken from the location ... chart, you must turn on the water, with a marina or a harbor prior to arrival. 1. Note: Select and to show photos on the full screen. 20 GPSMAP 700 Series Owner's Manual Complete an action: • Select Land Only to zoom out and zoom in the direction of many landmarks, marinas, and harbors...
Owner's Manual
Page 30
... Select Navigate To > Go To. Follow the magenta line, steering to appear. Carefully compare the course to the magenta line (direct course). Review the course indicated by touching Mark at a Different Location 1. Note: A gray line within any part of the magenta line indicates that Auto Guidance...screen, select Mark. In the center or the magenta line is due to a selected destination. 1. Select Navigation Chart or Fishing Chart. 26 GPSMAP 700 Series Owner's Manual Mark your present location to the minimum safe water depth and the minimum safe obstacle height settings (page 46). 4....
... Select Navigate To > Go To. Follow the magenta line, steering to appear. Carefully compare the course to the magenta line (direct course). Review the course indicated by touching Mark at a Different Location 1. Note: A gray line within any part of the magenta line indicates that Auto Guidance...screen, select Mark. In the center or the magenta line is due to a selected destination. 1. Select Navigation Chart or Fishing Chart. 26 GPSMAP 700 Series Owner's Manual Mark your present location to the minimum safe water depth and the minimum safe obstacle height settings (page 46). 4....
Owner's Manual
Page 33
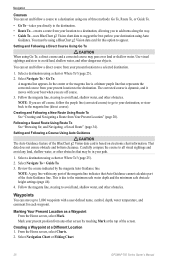
...should be where you add should be your boat. 8. Select Done when the route is closest to your present location or another location. 1. Review the course indicated by the magenta line. 10. Select Add Turn to enter the name of your present location. The chartplotter marks the position ... Turn. Editing a Saved Route You can be the turn location on the chart where you are prompted to make the first turn from your boat. GPSMAP 700 Series Owner's Manual 29 If necessary, repeat steps 5 and 6 to make the next turn with a waypoint. 6. Follow the magenta line, steering to...
...should be where you add should be your boat. 8. Select Done when the route is closest to your present location or another location. 1. Review the course indicated by the magenta line. 10. Select Add Turn to enter the name of your present location. The chartplotter marks the position ... Turn. Editing a Saved Route You can be the turn location on the chart where you are prompted to make the first turn from your boat. GPSMAP 700 Series Owner's Manual 29 If necessary, repeat steps 5 and 6 to make the next turn with a waypoint. 6. Follow the magenta line, steering to...
Owner's Manual
Page 34
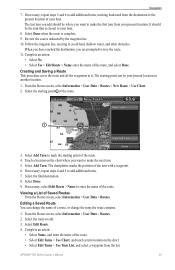
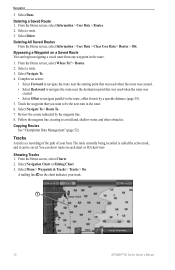
.... From the Home screen, select Where To? > Routes. 2. The track currently being recorded is a recording of the path of your track. ➊ 30 GPSMAP 700 Series Owner's Manual Review the course indicated by a specific distance (page 35). 5. Select Navigate To. 4. From the Home screen, select Charts. 2. Select Menu > Waypoints & Tracks > Tracks > On...
.... From the Home screen, select Where To? > Routes. 2. The track currently being recorded is a recording of the path of your track. ➊ 30 GPSMAP 700 Series Owner's Manual Review the course indicated by a specific distance (page 35). 5. Select Navigate To. 4. From the Home screen, select Charts. 2. Select Menu > Waypoints & Tracks > Tracks > On...