
Operation Manual
Page 8
CONTENTS CHAPTER 1 DESCRIPTION 1-1 Units 1-2 Assemblies 1-4 Operator Panel 1-5 Panel Display 1-6 CHAPTER 2 CLEANING 2-1 Cleaning Supplies and Area Requiring Cleaning 2-2 Supplies 2-2 Areas Requiring Cleaning 2-3 Cleaning the ADF 2-4 Cleaning the Flatbed 2-10 CHAPTER 3 REPLACEMENT OF PARTS 3-1 Pad Assembly 3-2 Pick Roller 3-4 CHAPTER 4 TROUBLESHOOTING 4-1 Clearing Paper Jams 4-2 Initial Checks 4-3 Problem Checklist 4-20 vii
CONTENTS CHAPTER 1 DESCRIPTION 1-1 Units 1-2 Assemblies 1-4 Operator Panel 1-5 Panel Display 1-6 CHAPTER 2 CLEANING 2-1 Cleaning Supplies and Area Requiring Cleaning 2-2 Supplies 2-2 Areas Requiring Cleaning 2-3 Cleaning the ADF 2-4 Cleaning the Flatbed 2-10 CHAPTER 3 REPLACEMENT OF PARTS 3-1 Pad Assembly 3-2 Pick Roller 3-4 CHAPTER 4 TROUBLESHOOTING 4-1 Clearing Paper Jams 4-2 Initial Checks 4-3 Problem Checklist 4-20 vii

Operation Manual
Page 9
CHAPTER 1 CHAPTER 2 CHAPTER 3 CHAPTER 4 DESCRIPTION CLEANING REPLACEMENT OF PARTS TROUBLESHOOTING TROUBLESHOOTING REPLACEMENT OF PARTS CLEANING D DEESSCCRRIIPTPITOINON
CHAPTER 1 CHAPTER 2 CHAPTER 3 CHAPTER 4 DESCRIPTION CLEANING REPLACEMENT OF PARTS TROUBLESHOOTING TROUBLESHOOTING REPLACEMENT OF PARTS CLEANING D DEESSCCRRIIPTPITOINON

Operation Manual
Page 16
When the button is pressed This counter increments each time a document is provided with a counter display. The counter can be used for checking the number of reading. How to check the cleaning cycle or parts replacement cycle. DESCRIPTION Counter Display The scanner is scanned. The counter is automatically reset at one day. This counter...
When the button is pressed This counter increments each time a document is provided with a counter display. The counter can be used for checking the number of reading. How to check the cleaning cycle or parts replacement cycle. DESCRIPTION Counter Display The scanner is scanned. The counter is automatically reset at one day. This counter...

Operation Manual
Page 20
When the cause of the SCSI board. Alternatively, replace the current cable with one recommended by the manufacturer of the alarm has been corrected, the scanner automatically resumes operation once power is displayed, turn Off system power and then turn it On again. DESCRIPTION NOTE When this message is turned On again. 1-11
When the cause of the SCSI board. Alternatively, replace the current cable with one recommended by the manufacturer of the alarm has been corrected, the scanner automatically resumes operation once power is displayed, turn Off system power and then turn it On again. DESCRIPTION NOTE When this message is turned On again. 1-11

Operation Manual
Page 31
Pad Assembly Pick Roller 3-1 CHAPTER 3 REPLACEMENT OF PARTS This chapter describes how to replace the pad assembly and the pick roller.
Pad Assembly Pick Roller 3-1 CHAPTER 3 REPLACEMENT OF PARTS This chapter describes how to replace the pad assembly and the pick roller.

Operation Manual
Page 32
The life span may be decreased by as much as half when carbonless paper is about 100,000 sheets or one year. Use the Abrasion counter on the Operator panel to open the ADF. 2 Push the Pick Arm carefully. 3-2 WARNING Turn off the power before replacing the Pad Assembly. Pick Arm 1 Pull the ADF lever to estimate when the Pad assembly needs replacement. Pad Assembly ADF lever Pad ASY (PA03951-0151) NOTE The life span of the pad assembly is read frequently.
The life span may be decreased by as much as half when carbonless paper is about 100,000 sheets or one year. Use the Abrasion counter on the Operator panel to open the ADF. 2 Push the Pick Arm carefully. 3-2 WARNING Turn off the power before replacing the Pad Assembly. Pick Arm 1 Pull the ADF lever to estimate when the Pad assembly needs replacement. Pad Assembly ADF lever Pad ASY (PA03951-0151) NOTE The life span of the pad assembly is read frequently.

Operation Manual
Page 33
REPLACEMENT OF PARTS 3 Slide the Pad Assembly to the left and pull it stops. 5 Close the ADF. 3-3 Pad assembly 4 Attach the Pad Assembly to the ADF in the reverse sequence of the Pad assembly as shown in the right photo. NOTE Fit the Pad assembly pin into the larger hole, then slide it to hook the spring for the Pad, remove the Pad Assembly. Then, being careful not to the right until it towards you. NOTE Hold both ends of step 3. CAUTION Don't hold the sensor arm with the Pad assembly.
REPLACEMENT OF PARTS 3 Slide the Pad Assembly to the left and pull it stops. 5 Close the ADF. 3-3 Pad assembly 4 Attach the Pad Assembly to the ADF in the reverse sequence of the Pad assembly as shown in the right photo. NOTE Fit the Pad assembly pin into the larger hole, then slide it to hook the spring for the Pad, remove the Pad Assembly. Then, being careful not to the right until it towards you. NOTE Hold both ends of step 3. CAUTION Don't hold the sensor arm with the Pad assembly.

Operation Manual
Page 34
The life span may be decreased by as much as half when carbonless sheets are included) NOTE The life span of the Pick roller is about 200, 000 sheets or one year. Pick Roller Pick rollers (PA03951-0153) (Two rollers are frequently read. WARNING Turn off the power before replacing the Pick Rollers. 1 Pull the ADF lever to estimate when the Pick roller needs replacement. NOTE Use a Phillips screwdriver if they are tight. Thumb screws 3-4 Use the Abrasion counter on the operator panel to open the ADF. 2 Remove the two Thumb screws.
The life span may be decreased by as much as half when carbonless sheets are included) NOTE The life span of the Pick roller is about 200, 000 sheets or one year. Pick Roller Pick rollers (PA03951-0153) (Two rollers are frequently read. WARNING Turn off the power before replacing the Pick Rollers. 1 Pull the ADF lever to estimate when the Pick roller needs replacement. NOTE Use a Phillips screwdriver if they are tight. Thumb screws 3-4 Use the Abrasion counter on the operator panel to open the ADF. 2 Remove the two Thumb screws.

Operation Manual
Page 35
3 With both hands, lift up Guide A and disengage its tip from the right hole. Then lift the right side of the cover and remove it. 4 To remove the Pick rollers, turn the stopper counterclockwise. Stopper Pick roller 2 Pick roller 1 REPLACEMENT OF PARTS Position for Replacement 3-5
3 With both hands, lift up Guide A and disengage its tip from the right hole. Then lift the right side of the cover and remove it. 4 To remove the Pick rollers, turn the stopper counterclockwise. Stopper Pick roller 2 Pick roller 1 REPLACEMENT OF PARTS Position for Replacement 3-5

Operation Manual
Page 37
NOTE Pick roller 1 has a groove in its rubber. Then, slide Pick roller 1 toward the right side. NOTE Make sure that the shaft is securely fixed to the bearings. 3-7 Put the shaft of Pick roller 1 into the bearing. REPLACEMENT OF PARTS 7 To attach the new Pick rollers, place Pick roller 1 from the right side above the bearing for Pick roller 1.
NOTE Pick roller 1 has a groove in its rubber. Then, slide Pick roller 1 toward the right side. NOTE Make sure that the shaft is securely fixed to the bearings. 3-7 Put the shaft of Pick roller 1 into the bearing. REPLACEMENT OF PARTS 7 To attach the new Pick rollers, place Pick roller 1 from the right side above the bearing for Pick roller 1.

Operation Manual
Page 39
Stopper REPLACEMENT OF PARTS Operating Position 3-9 9 Turn the stopper clockwise to secure the Pick rollers.
Stopper REPLACEMENT OF PARTS Operating Position 3-9 9 Turn the stopper clockwise to secure the Pick rollers.

Operation Manual
Page 52
9 Symptom "Please clean Pick-roller" is displayed. Is the Pick roller dirty? YES Clean or replace the Pad assembly. (See p. 3-2, p. 3-3) NO Contact the manufacturer's authorized service center. 4-12 YES Clean the Pick roller. (See p. 2-6) NO NO Do documents meet specification described in the Operator's Guide? YES Is the Pad assembly dirty or worn out? Flatten the curl or use the Flatbed to read the document.
9 Symptom "Please clean Pick-roller" is displayed. Is the Pick roller dirty? YES Clean or replace the Pad assembly. (See p. 3-2, p. 3-3) NO Contact the manufacturer's authorized service center. 4-12 YES Clean the Pick roller. (See p. 2-6) NO NO Do documents meet specification described in the Operator's Guide? YES Is the Pad assembly dirty or worn out? Flatten the curl or use the Flatbed to read the document.

Operation Manual
Page 55
YES Clean the Pad assembly. (See p. 2-4) NO Is the Pad worn out? YES Replace the Pad assembly. (See p. 3-2) NO Contact the manufacturer's authorized service center. 4-15 TROUBLESHOOTING NO Is the document stack less than 0.32" (8mm) in height? YES Is the Pad dirty? Reduce the batch size of the documents.
YES Clean the Pad assembly. (See p. 2-4) NO Is the Pad worn out? YES Replace the Pad assembly. (See p. 3-2) NO Contact the manufacturer's authorized service center. 4-15 TROUBLESHOOTING NO Is the document stack less than 0.32" (8mm) in height? YES Is the Pad dirty? Reduce the batch size of the documents.

Operation Manual
Page 57
Replace the Pick roller. (See p. 3-4) NO Contact the manufacturer's authorized service center. TROUBLESHOOTING 4-17 Is the Pick roller dirty? YES Clean the Pick roller. (See p. 2-6) NO YES Is the Pick roller worn out?
Replace the Pick roller. (See p. 3-4) NO Contact the manufacturer's authorized service center. TROUBLESHOOTING 4-17 Is the Pick roller dirty? YES Clean the Pick roller. (See p. 2-6) NO YES Is the Pick roller worn out?
Operation Manual
Page 60
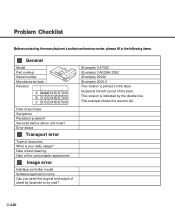
... Model Part number Serial number Manufactured data Revision A 0123456789 B 0123456789 C 0123456789 Date of document. Error status Transport error Type of purchase Symptoms Persistent problem? Date of the consumable replacement. Date of last cleaning. What is indicated by mail? (Example) fi-4750C (Example) CA02956-2352 (Example) 00002 (Example) 2000-2 The revision is printed on the...
... Model Part number Serial number Manufactured data Revision A 0123456789 B 0123456789 C 0123456789 Date of document. Error status Transport error Type of purchase Symptoms Persistent problem? Date of the consumable replacement. Date of last cleaning. What is indicated by mail? (Example) fi-4750C (Example) CA02956-2352 (Example) 00002 (Example) 2000-2 The revision is printed on the...
Operating Guide
Page 7
.... Refer to use the fi-4750C image scanner. This manual contains chapters on OPERATING INSTRUCTIONS, CLEANING, REPLACEMENT OF PARTS, ADJUSTMENT and TROUBLESHOOTING. This scanner features high-speed duplex scanning with an automatic document feeder (ADF). Preface This manual explains how to the Cleaning and Maintenance Guide for high quality color image processing, using charge-coupled device (CCD) color image sensors.
.... Refer to use the fi-4750C image scanner. This manual contains chapters on OPERATING INSTRUCTIONS, CLEANING, REPLACEMENT OF PARTS, ADJUSTMENT and TROUBLESHOOTING. This scanner features high-speed duplex scanning with an automatic document feeder (ADF). Preface This manual explains how to the Cleaning and Maintenance Guide for high quality color image processing, using charge-coupled device (CCD) color image sensors.

Operating Guide
Page 19
... The paper counter counts the number of scanned sheets from the start of reading. When the button is pressed This counter increments each time a document is displayed. 1-7 The counter can be used for checking the number of reading until the power is useful to reset it is provided with ... Paper Empty or an error is used , for example, for checking the number of scanned sheets. It is turned off. Counter Display The scanner is described in Chapter 6. Abrasion counter The abrasion counter counts the accumulated number of the sheets scanned in one day. How to check the ...
... The paper counter counts the number of scanned sheets from the start of reading. When the button is pressed This counter increments each time a document is displayed. 1-7 The counter can be used for checking the number of reading until the power is useful to reset it is provided with ... Paper Empty or an error is used , for example, for checking the number of scanned sheets. It is turned off. Counter Display The scanner is described in Chapter 6. Abrasion counter The abrasion counter counts the accumulated number of the sheets scanned in one day. How to check the ...

Operating Guide
Page 49
..." manual. Carbonless papers have a chemical composition that a document may be fed through the ADF. CAUTION As there is always a slight chance that damages the Pad and Pick roller. Therefore, note the following: Cleaning: Replacement of parts: If mispicks occur frequently, clean the Pad and...3 mm Top of the paper Feed direction Read surface Less than 5 mm Top of all documents fed using the ADF, important original documents should never be shorter than if PPC paper documents are fed. 3. The leading edge of the paper Feed direction Read surface 4-3 NOTICES 1. When...
..." manual. Carbonless papers have a chemical composition that a document may be fed through the ADF. CAUTION As there is always a slight chance that damages the Pad and Pick roller. Therefore, note the following: Cleaning: Replacement of parts: If mispicks occur frequently, clean the Pad and...3 mm Top of the paper Feed direction Read surface Less than 5 mm Top of all documents fed using the ADF, important original documents should never be shorter than if PPC paper documents are fed. 3. The leading edge of the paper Feed direction Read surface 4-3 NOTICES 1. When...

Operating Guide
Page 61
... used to check the total number of consumables. 6-1 The abrasion counter can be used for the scanner. CAUTION Certain paper types or conditions might reduce the life of documents scanned since the last replacement(s). Be sure to 200,000 sheets or one year. The customer is responsible for... replacing the consumables. Up to keep some consumables in the "Cleaning and Maintenance" manual. Name Pad ASY...
... used to check the total number of consumables. 6-1 The abrasion counter can be used for the scanner. CAUTION Certain paper types or conditions might reduce the life of documents scanned since the last replacement(s). Be sure to 200,000 sheets or one year. The customer is responsible for... replacing the consumables. Up to keep some consumables in the "Cleaning and Maintenance" manual. Name Pad ASY...

Operating Guide
Page 86
... with only two pixel levels, black and white. The counter should be reset when these consumables are replaced. Automatic separation allows the scanner to reading the backside of the document, specifically in one byte. A5 size A standard paper size. Automatic start mode ( manual start mode... = Back-side scanning Refers to switch between line mode and half tone mode in Duplex reading mode. Density In this mode, the reading operation is a set of documents read documents accumulates until an operator resets the counter. The number of read to a measurement of...
... with only two pixel levels, black and white. The counter should be reset when these consumables are replaced. Automatic separation allows the scanner to reading the backside of the document, specifically in one byte. A5 size A standard paper size. Automatic start mode ( manual start mode... = Back-side scanning Refers to switch between line mode and half tone mode in Duplex reading mode. Density In this mode, the reading operation is a set of documents read documents accumulates until an operator resets the counter. The number of read to a measurement of...


