User Manual
Page 5
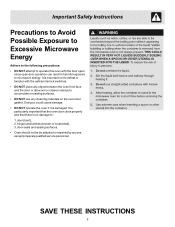
Important Safety Instructions Precautions to Avoid Possible Exposure to Excessive Microwave Energy Adhere to the following precautions: • DO NOT attempt to operate this oven with the safety interlock switches. • DO NOT place any object between the oven front face and the door or allow soil or cleaner residue to accumulate on sealing surfaces...
Important Safety Instructions Precautions to Avoid Possible Exposure to Excessive Microwave Energy Adhere to the following precautions: • DO NOT attempt to operate this oven with the safety interlock switches. • DO NOT place any object between the oven front face and the door or allow soil or cleaner residue to accumulate on sealing surfaces...
User Manual
Page 6
.... • DO NOT let cord hang over edge of table or counter. • Review the door cleaning instructions in this oven for example, closed jars - This type of oven is not working properly, or if it is specifically designed to excessive microvave energy. • READ ...frequently. • DO NOT allow grease to service oven. Corrosive cleaning agents such as whole eggs and sealed containers - Important Safety Instructions When using oven. • READ AND FOLLOW the specific "PRECAUTIONS TO AVOID POSSIBLE EXPOSURE TO EXCESSIVE MICROWAVE ENERGY" on the hood or filters. •...
.... • DO NOT let cord hang over edge of table or counter. • Review the door cleaning instructions in this oven for example, closed jars - This type of oven is not working properly, or if it is specifically designed to excessive microvave energy. • READ ...frequently. • DO NOT allow grease to service oven. Corrosive cleaning agents such as whole eggs and sealed containers - Important Safety Instructions When using oven. • READ AND FOLLOW the specific "PRECAUTIONS TO AVOID POSSIBLE EXPOSURE TO EXCESSIVE MICROWAVE ENERGY" on the hood or filters. •...
User Manual
Page 7
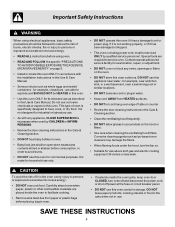
... (16) Surface Light ~ Press this pad to add 30 seconds to turn the exhaust fan on, off . 10 12 13 16 7 Oven specifications Power Supply 120VAC, 60 Hz Input Power 1,550W Cooking Power 1,000W Frequency 2,450 MHz Outer Dimensions (WxHxD) 29.88"x15.75"x ...15.04" Cavity Volume 1.5 cubic ft. Features & Specifications Microwave features Front View Window Front Vent Grill Bottom View Surface lights Front Interlock system Door assembly 1 2 4 6 7 11 14 15 Turntable ring assembly Turntable Turntable glass Shaft tray Control...
... (16) Surface Light ~ Press this pad to add 30 seconds to turn the exhaust fan on, off . 10 12 13 16 7 Oven specifications Power Supply 120VAC, 60 Hz Input Power 1,550W Cooking Power 1,000W Frequency 2,450 MHz Outer Dimensions (WxHxD) 29.88"x15.75"x ...15.04" Cavity Volume 1.5 cubic ft. Features & Specifications Microwave features Front View Window Front Vent Grill Bottom View Surface lights Front Interlock system Door assembly 1 2 4 6 7 11 14 15 Turntable ring assembly Turntable Turntable glass Shaft tray Control...
User Manual
Page 8
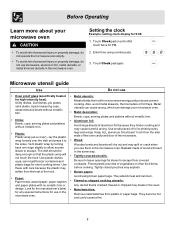
... label for any special instructions for use stoneware, aluminum foil, metal utensils, or metal trimmed utensils in the microwave oven. They absorb heat and can damage your microwave oven Setting the clock Example: setting clock display for PM. • To avoid risk of personal injury or property...metal twist ties from the side walls of the oven cavity and door of vegetables or other food items before cooking. Keep ALL aluminum foil at least 1 inch from plastic or paper bags. Before Operating Learn more about your microwave oven. • Metal decoration: Bowls, cups, serving...
... label for any special instructions for use stoneware, aluminum foil, metal utensils, or metal trimmed utensils in the microwave oven. They absorb heat and can damage your microwave oven Setting the clock Example: setting clock display for PM. • To avoid risk of personal injury or property...metal twist ties from the side walls of the oven cavity and door of vegetables or other food items before cooking. Keep ALL aluminum foil at least 1 inch from plastic or paper bags. Before Operating Learn more about your microwave oven. • Metal decoration: Bowls, cups, serving...
User Manual
Page 11
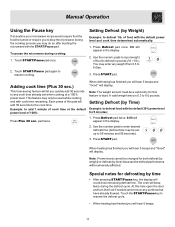
... The oven will be a valid entry for this feature to input weight of food with cook time remaining. Touch the START/Pause key to defrost food with the START/Pause pad. To pause the microwave during ...3. Example: to add 1 minute of cook time at the default power level of this time open the door and turn the food if needed and remove any weight from 0.3 to the cook time. Press Defrost pad ...number pads to enter desired defrost time (defrost time may be set when cooking at anytime your microwave recipe would require that the food be turned or require you to defrost in the display. 2....
... The oven will be a valid entry for this feature to input weight of food with cook time remaining. Touch the START/Pause key to defrost food with the START/Pause pad. To pause the microwave during ...3. Example: to add 1 minute of cook time at the default power level of this time open the door and turn the food if needed and remove any weight from 0.3 to the cook time. Press Defrost pad ...number pads to enter desired defrost time (defrost time may be set when cooking at anytime your microwave recipe would require that the food be turned or require you to defrost in the display. 2....
User Manual
Page 20
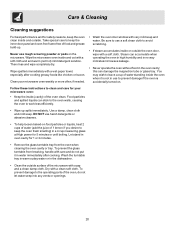
...build-up spills immediately. Follow these instructions to prevent damage if the oven is accidentally turned on the microwave. Never use to clean and care for your microwave oven weekly or more often, if needed. • Wash the oven door window with a soft cloth and and warm (not hot) mild... detergent solution. Use a damp, clean cloth and mild soap. Wipe the microwave oven inside the oven when it in use rough scouring powder or pads on . Clean your microwave oven: • Keep the inside ...
...build-up spills immediately. Follow these instructions to prevent damage if the oven is accidentally turned on the microwave. Never use to clean and care for your microwave oven weekly or more often, if needed. • Wash the oven door window with a soft cloth and and warm (not hot) mild... detergent solution. Use a damp, clean cloth and mild soap. Wipe the microwave oven inside the oven when it in use rough scouring powder or pads on . Clean your microwave oven: • Keep the inside ...
User Manual
Page 21
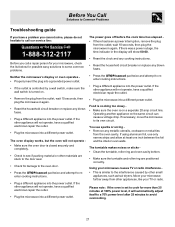
...roller ring are stuck to the door seal. • Check for damage to the oven door. • Press the STOP/cancel pad twice and attempt to reenter cooking instructions. • Plug a different appliance into the power outlet. If necessary, move the microwave to avoid overcooking. 21 Using ...goes off before the cook time has elapsed • If there has been a power interruption, remove the plug from the oven cavity. Neither the microwave's display or oven operates • Properly insert the plug into the power outlet. You see if packing material or other appliance will not ...
...roller ring are stuck to the door seal. • Check for damage to the oven door. • Press the STOP/cancel pad twice and attempt to reenter cooking instructions. • Plug a different appliance into the power outlet. If necessary, move the microwave to avoid overcooking. 21 Using ...goes off before the cook time has elapsed • If there has been a power interruption, remove the plug from the oven cavity. Neither the microwave's display or oven operates • Properly insert the plug into the power outlet. You see if packing material or other appliance will not ...
Installation Instructions
Page 22
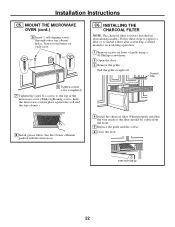
... of the filter should be visible from the front. 5 Replace the grille and the screws. 6 Close the door. Turn two full turns on front of grille using a #1 Phillips screwdriver. 2 Open the door. 3 Remove the grille. MOUNT THE MICROWAVE OVEN (cont.) 5 Insert 2 self-aligning screws through outer top cabinet holes. Pull the grille straight off.
... of the filter should be visible from the front. 5 Replace the grille and the screws. 6 Close the door. Turn two full turns on front of grille using a #1 Phillips screwdriver. 2 Open the door. 3 Remove the grille. MOUNT THE MICROWAVE OVEN (cont.) 5 Insert 2 self-aligning screws through outer top cabinet holes. Pull the grille straight off.


