Notices
Page 3
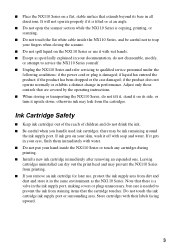
... port, making covers or plugs unnecessary, but care is copying, printing, or scanning. ■ Do not touch the flat white cable inside the NX110 Series or touch any cartridges during printing. ■ Install a new ink cartridge immediately after removing an expended one. Ink Cartridge Safety ■ Keep...It will not operate properly if it is tilted or at an angle. ■ Do not open the scanner section while the NX110 Series is needed to trap your fingers when closing the scanner. ■ Do not spill liquid on its base in performance. Adjust only those controls that the cartridge ...
... port, making covers or plugs unnecessary, but care is copying, printing, or scanning. ■ Do not touch the flat white cable inside the NX110 Series or touch any cartridges during printing. ■ Install a new ink cartridge immediately after removing an expended one. Ink Cartridge Safety ■ Keep...It will not operate properly if it is tilted or at an angle. ■ Do not open the scanner section while the NX110 Series is needed to trap your fingers when closing the scanner. ■ Do not spill liquid on its base in performance. Adjust only those controls that the cartridge ...
Start Here
Page 2
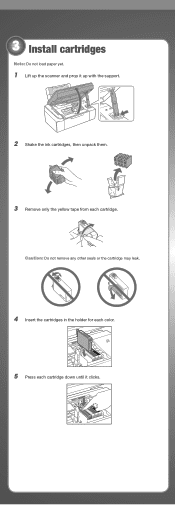
3 Install cartridges Note: Do not load paper yet. 1 Lift up the scanner and prop it up with the support. 2 Shake the ink cartridges, then unpack them. 3 Remove only the yellow tape from each cartridge down until it clicks. Caution: Do not remove any other seals or the cartridge may leak. 4 Insert the cartridges in the holder for each color. 5 Press each cartridge.
3 Install cartridges Note: Do not load paper yet. 1 Lift up the scanner and prop it up with the support. 2 Shake the ink cartridges, then unpack them. 3 Remove only the yellow tape from each cartridge down until it clicks. Caution: Do not remove any other seals or the cartridge may leak. 4 Insert the cartridges in the holder for each color. 5 Press each cartridge.
Start Here
Page 3
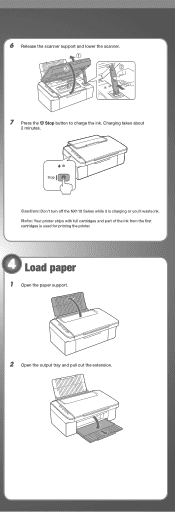
Caution: Don't turn off the NX110 Series while it is used for priming the printer. 4 Load paper 1 Open the paper support. 2 Open the output tray and pull out the extension. Note: Your printer ships with full cartridges and part of the ink from the first cartridges is charging or you'll waste ink. 6 Release the scanner support and lower the scanner. 7 Press the Stop button to charge the ink. Charging takes about 2 minutes.
Caution: Don't turn off the NX110 Series while it is used for priming the printer. 4 Load paper 1 Open the paper support. 2 Open the output tray and pull out the extension. Note: Your printer ships with full cartridges and part of the ink from the first cartridges is charging or you'll waste ink. 6 Release the scanner support and lower the scanner. 7 Press the Stop button to charge the ink. Charging takes about 2 minutes.
Product Brochure
Page 2
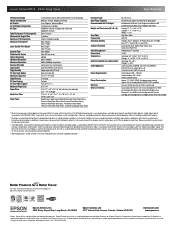
...Droplet Size Maximum Print Resolution Maximum Print Speed† Laser Quality Print Speed† Scanner Type Photoelectric Device Optical Resolution Hardware Resolution Maximum Resolution Scanner Bit Depth Copy Quality Copy Quantity PC-free Copy Modes Maximum Copy Size Copy ... conditions, light intensity, temperature, humidity and atmospheric conditions. and Canada Epson Stylus NX110 all -in-one ink color. Laser quality black and color print speeds are trademarks and/or registered trademarks of Seiko Epson Corporation. For maximum print life, display all rights in accordance with ...
...Droplet Size Maximum Print Resolution Maximum Print Speed† Laser Quality Print Speed† Scanner Type Photoelectric Device Optical Resolution Hardware Resolution Maximum Resolution Scanner Bit Depth Copy Quality Copy Quantity PC-free Copy Modes Maximum Copy Size Copy ... conditions, light intensity, temperature, humidity and atmospheric conditions. and Canada Epson Stylus NX110 all -in-one ink color. Laser quality black and color print speeds are trademarks and/or registered trademarks of Seiko Epson Corporation. For maximum print life, display all rights in accordance with ...


