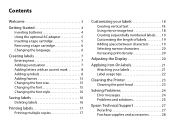
User Manual
Page 3
... Using mirror-image text 18 Creating sequentially numbered labels. . . . 19 Customizing the length of labels 19 Adding space between characters 19 Selecting narrow characters 20 Increasing print density 20 Adjusting the Display 20 Applying Iron-On labels 21 Attaching your labels 21 Label usage tips 22 Cleaning the Printer 23 Cleaning the print head 23 Solving Problems 24 Error messages 24 Problems and solutions 25 Epson Technical Support...
... Using mirror-image text 18 Creating sequentially numbered labels. . . . 19 Customizing the length of labels 19 Adding space between characters 19 Selecting narrow characters 20 Increasing print density 20 Adjusting the Display 20 Applying Iron-On labels 21 Attaching your labels 21 Label usage tips 22 Cleaning the Printer 23 Cleaning the print head 23 Solving Problems 24 Error messages 24 Problems and solutions 25 Epson Technical Support...
User Manual
Page 5
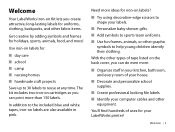
.... ■ Personalize baby shower gifts. ■ Add symbols to sports team uniforms. ■ Use fun frames, animals, or other types of tape listed on cartridges so you can do even more: ■ Organize stuff in pink. Need more ideas for iron-on labels for: ■ day care ■... looking file labels. ■ Identify your computer cables and other fabric items. Get creative by adding symbols and frames for your LabelWorks printer! In addition to reuse at any time. Welcome Your LabelWorks Iron-on labels are also available in your kitchen, bathroom, and every room of uses for ...
.... ■ Personalize baby shower gifts. ■ Add symbols to sports team uniforms. ■ Use fun frames, animals, or other types of tape listed on cartridges so you can do even more: ■ Organize stuff in pink. Need more ideas for iron-on labels for: ■ day care ■... looking file labels. ■ Identify your computer cables and other fabric items. Get creative by adding symbols and frames for your LabelWorks printer! In addition to reuse at any time. Welcome Your LabelWorks Iron-on labels are also available in your kitchen, bathroom, and every room of uses for ...

User Manual
Page 6
Remove the rear cover. 2. Insert 6 AAA alkaline batteries, positioning the + and - Inserting batteries 1. ends as shown. 3. Follow the instructions in this section to insert the batteries and tape cartridge, and change the language if necessary. Replace the cover and snap it into place. 4 | Getting Started Getting Started Your Label Works printer requires 6 AAA batteries (not included). An optional AC adapter is also available (APT0615Z1-1).
Remove the rear cover. 2. Insert 6 AAA alkaline batteries, positioning the + and - Inserting batteries 1. ends as shown. 3. Follow the instructions in this section to insert the batteries and tape cartridge, and change the language if necessary. Replace the cover and snap it into place. 4 | Getting Started Getting Started Your Label Works printer requires 6 AAA batteries (not included). An optional AC adapter is also available (APT0615Z1-1).

User Manual
Page 8
Removing a tape cartridge 1. Press to turn on the display, follow these steps: 1. Press + . 2. Press to highlight Language, then press to cut the tape. Hold the cartridge by the tabs, and lift it into place. 6. If there is excess tape, feed the end of the tape through the tape guide slot. Replace the cover and snap it straight up. 5. Press + . 8. Press the...
Removing a tape cartridge 1. Press to turn on the display, follow these steps: 1. Press + . 2. Press to highlight Language, then press to cut the tape. Hold the cartridge by the tabs, and lift it into place. 6. If there is excess tape, feed the end of the tape through the tape guide slot. Replace the cover and snap it straight up. 5. Press + . 8. Press the...

User Manual
Page 19
... label and the number of copies shows on the display while the labels print. 4. When printing stops, press the Cut button to enter the number of a label at the same time. 1. Using scissors, cut mark is printed between each label. The actual print image will not show on the display. 2. A cut along the marks to print the current label. You see 2-9 on the display. Printing labels 1. Press...
... label and the number of copies shows on the display while the labels print. 4. When printing stops, press the Cut button to enter the number of a label at the same time. 1. Using scissors, cut mark is printed between each label. The actual print image will not show on the display. 2. A cut along the marks to print the current label. You see 2-9 on the display. Printing labels 1. Press...

User Manual
Page 22
... You can adjust the following display settings: Contrast: Adjusts the density of the fonts on the display. 2. Press to change from Narrow to Wide, then press . Press to adjust the print density, then press to select the density you want . Press . 2. When the power is recommended. 20 | Adjusting the Display Adjusting the Display You can make your labels darker if necessary. 1. 3. Language: Changes the language of measurement...
... You can adjust the following display settings: Contrast: Adjusts the density of the fonts on the display. 2. Press to change from Narrow to Wide, then press . Press to adjust the print density, then press to select the density you want . Press . 2. When the power is recommended. 20 | Adjusting the Display Adjusting the Display You can make your labels darker if necessary. 1. 3. Language: Changes the language of measurement...
User Manual
Page 23
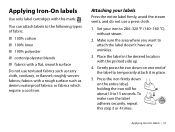
Set your labels Press the entire label firmly, avoid the steam vents, and do not use textured fabrics such as denim; Place the label in place. 5. Press the iron firmly down on the entire label, holding the iron still for about...Iron-On labels Use only label cartridges with the printed side up. 4. Applying Iron-On labels | 21 fabrics with a flat, smooth surface Do not use a press cloth. 1. Make sure the area where you want to temporarily attach it in the desired location with this step 3 or 4 times. roughly woven fabrics; You can attach labels to the following types...
Set your labels Press the entire label firmly, avoid the steam vents, and do not use textured fabrics such as denim; Place the label in place. 5. Press the iron firmly down on the entire label, holding the iron still for about...Iron-On labels Use only label cartridges with the printed side up. 4. Applying Iron-On labels | 21 fabrics with a flat, smooth surface Do not use a press cloth. 1. Make sure the area where you want to temporarily attach it in the desired location with this step 3 or 4 times. roughly woven fabrics; You can attach labels to the following types...

User Manual
Page 24
... be easily removed. ■ Never clean the labels with chemicals or solvents such as paper or leather. ■ When using bleach or spot detergent, make sure you test it in advance. 22 | Applying Iron-On labels Label usage tips ■ Labels are dry-cleanable and machine washable. ■ Keep the label..., the print on the label. ■ Once a label is attached, it is recommended that are exposed to direct sunlight for long periods of time, yellowing may look distorted due to fabric that may be frequently washed or dry-cleaned, it cannot be re-attached by ironing; however,...
... be easily removed. ■ Never clean the labels with chemicals or solvents such as paper or leather. ■ When using bleach or spot detergent, make sure you test it in advance. 22 | Applying Iron-On labels Label usage tips ■ Labels are dry-cleanable and machine washable. ■ Keep the label..., the print on the label. ■ Once a label is attached, it is recommended that are exposed to direct sunlight for long periods of time, yellowing may look distorted due to fabric that may be frequently washed or dry-cleaned, it cannot be re-attached by ironing; however,...
User Manual
Page 26
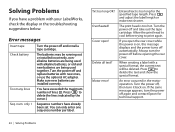
... LabelWorks, check the display or the troubleshooting suggestions below. Make sure new batteries are being used with new ones, or use the optional AC adapter. The print head is too hot. If the same message appears, turn it back on , this message displays and the power turns off and replace batteries with alkaline batteries, or old and new batteries are being used together. Error messages Insert tape Turn the power off again and contact Epson...
... LabelWorks, check the display or the troubleshooting suggestions below. Make sure new batteries are being used with new ones, or use the optional AC adapter. The print head is too hot. If the same message appears, turn it back on , this message displays and the power turns off and replace batteries with alkaline batteries, or old and new batteries are being used together. Error messages Insert tape Turn the power off again and contact Epson...
User Manual
Page 27
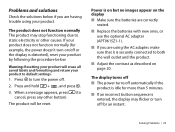
... product may flicker or turn on page 20. The display turns off ■ The power turns off automatically if the product is idle for example, the power doesn't turn off . 2. Press and hold + , and press . 3. When a message appears, press (to static electricity or other button). Solving Problems | 25 Problems and solutions Check the solutions below . Warning: Resetting your product will be reset. The product will erase...
... product may flicker or turn on page 20. The display turns off ■ The power turns off automatically if the product is idle for example, the power doesn't turn off . 2. Press and hold + , and press . 3. When a message appears, press (to static electricity or other button). Solving Problems | 25 Problems and solutions Check the solutions below . Warning: Resetting your product will be reset. The product will erase...
User Manual
Page 28
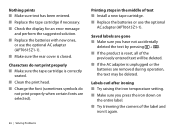
... text has been entered. ■ Replace the tape cartridge if necessary. ■ Check the display for an error message and perform the suggested solution. ■ Replace the batteries with new ones, or use the optional AC adapter (APT0615Z1-1). Characters do not print properly ■ Make sure the tape cartridge is closed. Printing stops in the middle of the label and iron it again. 26 | Solving Problems
... text has been entered. ■ Replace the tape cartridge if necessary. ■ Check the display for an error message and perform the suggested solution. ■ Replace the batteries with new ones, or use the optional AC adapter (APT0615Z1-1). Characters do not print properly ■ Make sure the tape cartridge is closed. Printing stops in the middle of the label and iron it again. 26 | Solving Problems
User Manual
Page 29
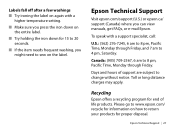
... Toll or long distance charges may apply. Recycling Epson offers a recycling program for end of support are subject to change without notice. Epson Technical Support Visit epson.com/support (U.S.) or epson.ca/ support (Canada) where you might need to sew on the label. To speak with a higher temperature setting. ■ Make sure you press the iron down on the entire label. ■ Try...
... Toll or long distance charges may apply. Recycling Epson offers a recycling program for end of support are subject to change without notice. Epson Technical Support Visit epson.com/support (U.S.) or epson.ca/ support (Canada) where you might need to sew on the label. To speak with a higher temperature setting. ■ Make sure you press the iron down on the entire label. ■ Try...
User Manual
Page 30
... output power: 10 W Supported tape 1/4" (6 mm) widths 3/8" (9 mm) (approximate) 1/2" (12 mm) 28 | Specifications AAA alkaline battery x 6 batteries Power supply optional AC adapter Model: APT0615Z1-1 Manufacturer: Seiko Epson Corp. For a complete list of tapes for multiple uses. To find the nearest one, call 800-GO-EPSON (800-463-7766). You can also purchase supplies from an Epson authorized reseller. sales) or www.epson.ca/LabelWorks...
... output power: 10 W Supported tape 1/4" (6 mm) widths 3/8" (9 mm) (approximate) 1/2" (12 mm) 28 | Specifications AAA alkaline battery x 6 batteries Power supply optional AC adapter Model: APT0615Z1-1 Manufacturer: Seiko Epson Corp. For a complete list of tapes for multiple uses. To find the nearest one, call 800-GO-EPSON (800-463-7766). You can also purchase supplies from an Epson authorized reseller. sales) or www.epson.ca/LabelWorks...
User Manual
Page 31
... when printing or using the product for a long period, unplug the power cord and remove the batteries. ■ Before cleaning, unplug the power cord and remove the batteries. if the product does not operate normally or exhibits a distinct change in damage or injury. ■ To avoid injury, keep your product, read the following safety instructions to qualified service personnel under the following locations...
... when printing or using the product for a long period, unplug the power cord and remove the batteries. ■ Before cleaning, unplug the power cord and remove the batteries. if the product does not operate normally or exhibits a distinct change in damage or injury. ■ To avoid injury, keep your product, read the following safety instructions to qualified service personnel under the following locations...

User Manual
Page 32
...belongings. ■ Do not touch the soleplate of your iron or the label immediately after it off with a cloth and replace the battery with a new one. • Do not use new and old batteries together or mix different types of batteries. • Use only AAA alkaline batteries. If a battery is swallowed,... or the tip of a pen. ■ Make sure to the product. ■ Keep batteries out of reach of children. You cannot use rechargeable batteries with your product. • Insert batteries so that the polarities (+ and -) are correct. • Remove dead batteries promptly. • Do not heat ...
...belongings. ■ Do not touch the soleplate of your iron or the label immediately after it off with a cloth and replace the battery with a new one. • Do not use new and old batteries together or mix different types of batteries. • Use only AAA alkaline batteries. If a battery is swallowed,... or the tip of a pen. ■ Make sure to the product. ■ Keep batteries out of reach of children. You cannot use rechargeable batteries with your product. • Insert batteries so that the polarities (+ and -) are correct. • Remove dead batteries promptly. • Do not heat ...

User Manual
Page 33
..., do not use a damaged AC adapter or power cord. ■ Turn off the product before unplugging the AC adapter. Make sure to avoid abrasions, cuts, fraying, crimping, and kinking. Notices | 31 Using the wrong AC adapter and power cord may overheat the print head and damage the product. Otherwise, it into the outlet. Note: Tape cartridges contain ink ribbons. Do...
..., do not use a damaged AC adapter or power cord. ■ Turn off the product before unplugging the AC adapter. Make sure to avoid abrasions, cuts, fraying, crimping, and kinking. Notices | 31 Using the wrong AC adapter and power cord may overheat the print head and damage the product. Otherwise, it into the outlet. Note: Tape cartridges contain ink ribbons. Do...

User Manual
Page 34
...-003. Epson is connected. ■ Consult the dealer or an experienced radio/TV technician for help. This equipment generates, uses, and can be left behind after removing the label; However, there is encouraged to try to which can radiate radio frequency energy and, if not installed and used in a particular installation. FCC Compliance Statement For United States Users This equipment...
...-003. Epson is connected. ■ Consult the dealer or an experienced radio/TV technician for help. This equipment generates, uses, and can be left behind after removing the label; However, there is encouraged to try to which can radiate radio frequency energy and, if not installed and used in a particular installation. FCC Compliance Statement For United States Users This equipment...
User Manual
Page 35
The replacement product or part may be new or refurbished to determine whether the product requires service. What Epson Will Do To Correct Problems: Should your Epson product prove defective during the warranty period, please call the Epson Connection at Epson's option, may be another model of the replacement product in the event that the Epson label-printing device and its option, exchange or repair the...
The replacement product or part may be new or refurbished to determine whether the product requires service. What Epson Will Do To Correct Problems: Should your Epson product prove defective during the warranty period, please call the Epson Connection at Epson's option, may be another model of the replacement product in the event that the Epson label-printing device and its option, exchange or repair the...
User Manual
Page 36
...serial number be removed or should the product fail to be properly maintained or fail to function properly as fire, flood, and lightning, improper electrical current, software problems, interaction with non-Epson products, or service other than by an Epson Authorized Servicer. damage, maintenance or service from Epson, e.g., dealer or user... include both warranties and conditions. Epson is not transferable. This warranty does not cover third party parts, components, or peripheral devices added to the Epson product caused by parts or supplies not manufactured, distributed ...
...serial number be removed or should the product fail to be properly maintained or fail to function properly as fire, flood, and lightning, improper electrical current, software problems, interaction with non-Epson products, or service other than by an Epson Authorized Servicer. damage, maintenance or service from Epson, e.g., dealer or user... include both warranties and conditions. Epson is not transferable. This warranty does not cover third party parts, components, or peripheral devices added to the Epson product caused by parts or supplies not manufactured, distributed ...

User Manual
Page 40
Font size Frame Label number The black marks indicate features you are using 2-line label Battery level
Font size Frame Label number The black marks indicate features you are using 2-line label Battery level


