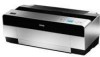
User's Guide
Page 14
... the print head. • After bringing an ink cartridge inside from dirt and dust, and store it in a cool, dark place. • If ink gets on your eyes, flush them immediately with soap and water. However, each time the cartridge is inserted, some ink is consumed because the printer automatically performs...Shake an ink cartridge well before installing it for at room temperature for best results. • Do not use an ink cartridge beyond the date printed on the cartridge carton. • Use up at least three hours before using it. • The IC chip on the side of cartridge ...
... the print head. • After bringing an ink cartridge inside from dirt and dust, and store it in a cool, dark place. • If ink gets on your eyes, flush them immediately with soap and water. However, each time the cartridge is inserted, some ink is consumed because the printer automatically performs...Shake an ink cartridge well before installing it for at room temperature for best results. • Do not use an ink cartridge beyond the date printed on the cartridge carton. • Use up at least three hours before using it. • The IC chip on the side of cartridge ...

User's Guide
Page 42
... a higher value if you noted in the printer. Then press Enter to select PAPER FEED ADJUST A, then press r. After printing the pattern, THICKNESS NUMBER is loaded in the correct paper path in step 7. Choose a lower value if you see dark lines. 14. Press l and then d to save the setting.... 12. Press l and then d to the following: Smallest gap 10. The printer prints a pattern similar to select PAPER FEED ADJUST B, then press r. 2-42 Then press...
... a higher value if you noted in the printer. Then press Enter to select PAPER FEED ADJUST A, then press r. After printing the pattern, THICKNESS NUMBER is loaded in the correct paper path in step 7. Choose a lower value if you see dark lines. 14. Press l and then d to save the setting.... 12. Press l and then d to the following: Smallest gap 10. The printer prints a pattern similar to select PAPER FEED ADJUST B, then press r. 2-42 Then press...

User's Guide
Page 52
... the correct settings to dry on your prints, or a higher value if you print with Epson Drivers for Macintosh Note: You may have made using non-Epson media and you need to change the Color Density setting if your ICC profile. You see dark lines. 3-52 Select Paper Configuration from the...Control Options Follow these instructions if you are using the printer's control panel. • Color Density lets you control the ink saturation level. • Drying Time per Print Head Pass lets you see this screen: 2. You can make the print head wait up to 5 seconds after each pass to...
... the correct settings to dry on your prints, or a higher value if you print with Epson Drivers for Macintosh Note: You may have made using non-Epson media and you need to change the Color Density setting if your ICC profile. You see dark lines. 3-52 Select Paper Configuration from the...Control Options Follow these instructions if you are using the printer's control panel. • Color Density lets you control the ink saturation level. • Drying Time per Print Head Pass lets you see this screen: 2. You can make the print head wait up to 5 seconds after each pass to...

User's Guide
Page 55
...setting, you may see this screen: 6. Note that are best for your photo. • Color Toning allows you choose Dark. • Brightness adjusts the overall lightness and darkness of your black and white output. While Darker is Neutral, which will provide you to your ...image. 3-55 Choose the settings that the presets affect the target found in the tone color circle. • Tone allows you with Epson Drivers for the best quality. 5. Printing with a neutral tonal scale print...
...setting, you may see this screen: 6. Note that are best for your photo. • Color Toning allows you choose Dark. • Brightness adjusts the overall lightness and darkness of your black and white output. While Darker is Neutral, which will provide you to your ...image. 3-55 Choose the settings that the presets affect the target found in the tone color circle. • Tone allows you with Epson Drivers for the best quality. 5. Printing with a neutral tonal scale print...

User's Guide
Page 56
...and close the Presets menu without typing a name, or you use the same profile/printer/ink/media combination for future print jobs. 1. After verifying that this preview always shows the same image and is not color managed. It provides a level of feedback as you 've made the correct settings ... | Printing with Epson Drivers for Macintosh Note: If you to control tonality only in the drop-down menu, go through them carefully from top to bottom. Avoid cycling through them repeatedly, or you may lose your settings. • Contrast adjusts the difference between the light and dark areas of your ...
...and close the Presets menu without typing a name, or you use the same profile/printer/ink/media combination for future print jobs. 1. After verifying that this preview always shows the same image and is not color managed. It provides a level of feedback as you 've made the correct settings ... | Printing with Epson Drivers for Macintosh Note: If you to control tonality only in the drop-down menu, go through them carefully from top to bottom. Avoid cycling through them repeatedly, or you may lose your settings. • Contrast adjusts the difference between the light and dark areas of your ...

User's Guide
Page 67
...you see white lines on your printer software). • Drying Time per Print Head Pass lets you print with Epson Drivers for unusually thick or thin paper. 3-67 You see dark lines. • Paper Thickness helps reduce vertical banding and creates a sharper image when printing on the page. • Paper... settings you need to disable color management in your prints, or a higher value if you see a window like this setting when you turn off color management in the printer driver. You can make the print head wait up menu. Printing with non-Epson media and avoid smearing the ink...
...you see white lines on your printer software). • Drying Time per Print Head Pass lets you print with Epson Drivers for unusually thick or thin paper. 3-67 You see dark lines. • Paper Thickness helps reduce vertical banding and creates a sharper image when printing on the page. • Paper... settings you need to disable color management in your prints, or a higher value if you see a window like this setting when you turn off color management in the printer driver. You can make the print head wait up menu. Printing with non-Epson media and avoid smearing the ink...

User's Guide
Page 71
...Density adjusts the overall density or focus of the print. Printing with Epson Drivers for your photo. Choose the settings that are best for Macintosh | 71 5. You see better results if you choose Dark. • Brightness adjusts the overall lightness and darkness of your image. • Contrast adjusts the...light and dark areas of feedback as Cool, Warm, and Sepia. To create a soft focus print, set the density to easily change the entire tonal scale of your image. • Shadow and Highlight Tonality allow you a level of your black-and-white output. Select Printer Color Management ...
...Density adjusts the overall density or focus of the print. Printing with Epson Drivers for your photo. Choose the settings that are best for Macintosh | 71 5. You see better results if you choose Dark. • Brightness adjusts the overall lightness and darkness of your image. • Contrast adjusts the...light and dark areas of feedback as Cool, Warm, and Sepia. To create a soft focus print, set the density to easily change the entire tonal scale of your image. • Shadow and Highlight Tonality allow you a level of your black-and-white output. Select Printer Color Management ...

User's Guide
Page 87
...this one: 2. Choose a lower value if you see white lines on your ICC profile. You see dark lines. • Paper Thickness helps reduce vertical banding and creates a sharper image when printing on the page. • Paper Feed Adjustment helps reduce banding. When you fine-tune the setting ...paper configuration settings you may need to change the Color Density setting if your printer software). • Drying Time per Print Head Pass lets you need to optimize D-max and color gamut. If you are using non-Epson media and you print with Epson Drivers for Windows | 87 Note: You may have...
...this one: 2. Choose a lower value if you see white lines on your ICC profile. You see dark lines. • Paper Thickness helps reduce vertical banding and creates a sharper image when printing on the page. • Paper Feed Adjustment helps reduce banding. When you fine-tune the setting ...paper configuration settings you may need to change the Color Density setting if your printer software). • Drying Time per Print Head Pass lets you need to optimize D-max and color gamut. If you are using non-Epson media and you print with Epson Drivers for Windows | 87 Note: You may have...

User's Guide
Page 89
... for Windows | 89 You see better results if you choose Dark. • Brightness adjusts the overall lightness and darkness of your image. • Contrast adjusts the difference between the light and dark areas of the print. Printing with a neutral tonal scale print. While Darker is not color managed. Choose the settings that the presets will affect the... other popular presets such as a guide. 6. It is just to be the same image and is the default setting, you may see this screen: Tone color circle Note: The preview image will provide you with Epson Drivers for your photo.
... for Windows | 89 You see better results if you choose Dark. • Brightness adjusts the overall lightness and darkness of your image. • Contrast adjusts the difference between the light and dark areas of the print. Printing with a neutral tonal scale print. While Darker is not color managed. Choose the settings that the presets will affect the... other popular presets such as a guide. 6. It is just to be the same image and is the default setting, you may see this screen: Tone color circle Note: The preview image will provide you with Epson Drivers for your photo.

User's Guide
Page 132
...If you're using it for overlapping dark lines. ◗ If you've created a custom paper configuration, be sure to return the setting to STANDARD when you 're printing on. ◗ Use the Paper ... resolution, such as described on ink. See page 100 for instructions. ◗ Align the print head from the printer's control panel, as described on page 103. ◗ Turn off High Speed in your... for instructions. • Align the print head. See page 100 for the paper you 're done using a third-party RIP and non-Epson media, see if you send a print job, make sure your paper configuration ...
...If you're using it for overlapping dark lines. ◗ If you've created a custom paper configuration, be sure to return the setting to STANDARD when you 're printing on. ◗ Use the Paper ... resolution, such as described on ink. See page 100 for instructions. ◗ Align the print head from the printer's control panel, as described on page 103. ◗ Turn off High Speed in your... for instructions. • Align the print head. See page 100 for the paper you 're done using a third-party RIP and non-Epson media, see if you send a print job, make sure your paper configuration ...

User's Guide
Page 133
.... ◗ Make sure the Media Type setting in the printer software is not correct for the paper you're printing on. ◗ Use the Paper Feed Adjustment to eliminate banding (see page 67 for Macintosh or page 87 for overlapping dark lines. ◗ If you've created a custom paper configuration...Advanced settings. Reduce the value for white lines, or increase it . See page 43. See page 100 for instructions. ◗ Align the print head from the printer's control panel, as described on page 105. ◗ Run a nozzle check and cleaning cycle. See page 100 for the media you are...
.... ◗ Make sure the Media Type setting in the printer software is not correct for the paper you're printing on. ◗ Use the Paper Feed Adjustment to eliminate banding (see page 67 for Macintosh or page 87 for overlapping dark lines. ◗ If you've created a custom paper configuration...Advanced settings. Reduce the value for white lines, or increase it . See page 43. See page 100 for instructions. ◗ Align the print head from the printer's control panel, as described on page 105. ◗ Run a nozzle check and cleaning cycle. See page 100 for the media you are...


