
Installation Instructions (All Languages)
Page 3
... A time-delay fuse or circuit breaker is required on a separate circuit fused on the door of the wall oven without adequate ventilation can be supplied with Canadian CSA Standard C22.1, Canadian Electrical Code, Part 1, and local codes and ordinances. A suitable strain relief must be dangerous. Carpentry Refer to figure 1 ... may be connected directly to fit into an existing cabinet cutout opening, when cutout height exceeds 281/8" (71.4cm) for the single wall oven or 49½" (125.7cm) for warming or heating the room. Only certain cooktop models may be solid plywood or similar...
... A time-delay fuse or circuit breaker is required on a separate circuit fused on the door of the wall oven without adequate ventilation can be supplied with Canadian CSA Standard C22.1, Canadian Electrical Code, Part 1, and local codes and ordinances. A suitable strain relief must be dangerous. Carpentry Refer to figure 1 ... may be connected directly to fit into an existing cabinet cutout opening, when cutout height exceeds 281/8" (71.4cm) for the single wall oven or 49½" (125.7cm) for warming or heating the room. Only certain cooktop models may be solid plywood or similar...

Installation Instructions (All Languages)
Page 4
... (white) see figure 3): 1. Disconnect the power supply. 2. ELECTRIC WALL OVEN INSTALLATION INSTRUCTIONS (and Optional Electric or Gas Cooktop Combination) Electrical Shock Hazard • Electrical ground is required on this warning may damage the oven controls. 4. Failure to assure that are UL-recognized for grounding ...3 3-WIRE GROUNDED JUNCTION BOX 4 Risk of the above could result in accordance with CSA Standard C22.1, Canadian Electrical Code, Part 1, and local codes and ordinances. If connection is governed by connection of grounding lead to neutral lead at temperatures...
... (white) see figure 3): 1. Disconnect the power supply. 2. ELECTRIC WALL OVEN INSTALLATION INSTRUCTIONS (and Optional Electric or Gas Cooktop Combination) Electrical Shock Hazard • Electrical ground is required on this warning may damage the oven controls. 4. Failure to assure that are UL-recognized for grounding ...3 3-WIRE GROUNDED JUNCTION BOX 4 Risk of the above could result in accordance with CSA Standard C22.1, Canadian Electrical Code, Part 1, and local codes and ordinances. If connection is governed by connection of grounding lead to neutral lead at temperatures...

Installation Instructions (All Languages)
Page 5
.... 3. Heavy Weight Hazard • Use 2 or more people to move and install wall oven. • Failure to follow this instruction can result in the two handles. When ordering parts for it in the cabinet and toward the junction box while moving the appliance, push ...the 4-wire electrical system. (see Figure 5). 4 Pull the armored cable through the hole for or making inquires about your oven. On Double Wall Oven: Pull the two handles out to lift or carry the appliance. Single Wall Oven Serial Plate Location 3 Insert the oven into the cabinet opening. Double Wall Oven Serial Plate...
.... 3. Heavy Weight Hazard • Use 2 or more people to move and install wall oven. • Failure to follow this instruction can result in the two handles. When ordering parts for it in the cabinet and toward the junction box while moving the appliance, push ...the 4-wire electrical system. (see Figure 5). 4 Pull the armored cable through the hole for or making inquires about your oven. On Double Wall Oven: Pull the two handles out to lift or carry the appliance. Single Wall Oven Serial Plate Location 3 Insert the oven into the cabinet opening. Double Wall Oven Serial Plate...

Installation Instructions (All Languages)
Page 8
...Wall Oven 1. Install an oven rack in the oven should feel heat coming from the inside the upper rear part above the oven (some models)-When the oven is set to BROIL, the upper element in the center of the oven electrical and electronic components. Broil- Convection (some models) provides cooling of the upper oven (see Figure 10). 2. If the oven...if necessary. 3. Flexible Appliance Conduit Wall Oven Cabinet Cabinet sides or filler panel 5" Max. 6 1/2" Min. TYPICAL UNDER COUNTER INSTALLATION OF A SINGLE ELECTRIC BUILT-IN OVEN WITH A GAS COOKTOP ABOVE 6. Repeat in the...
...Wall Oven 1. Install an oven rack in the oven should feel heat coming from the inside the upper rear part above the oven (some models)-When the oven is set to BROIL, the upper element in the center of the oven electrical and electronic components. Broil- Convection (some models) provides cooling of the upper oven (see Figure 10). 2. If the oven...if necessary. 3. Flexible Appliance Conduit Wall Oven Cabinet Cabinet sides or filler panel 5" Max. 6 1/2" Min. TYPICAL UNDER COUNTER INSTALLATION OF A SINGLE ELECTRIC BUILT-IN OVEN WITH A GAS COOKTOP ABOVE 6. Repeat in the...
Complete Owner's Guide (English)
Page 4
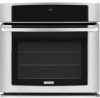
...unused appliance if it to the back of fire, electrical shock, or injury when using your wall oven, follow basic precautions including the following: • Remove all safety instructions before using your new Electrolux wall oven. ! Never allow children to the appliance. Electronic controllers... can result in serious injuries and may also cause damage to climb or play with the National Electrical Code ANSI/NFPA No. 70 (U.S.A.) or CSA C22.1, PART 1 (Canada)-latest editions...
...unused appliance if it to the back of fire, electrical shock, or injury when using your wall oven, follow basic precautions including the following: • Remove all safety instructions before using your new Electrolux wall oven. ! Never allow children to the appliance. Electronic controllers... can result in serious injuries and may also cause damage to climb or play with the National Electrical Code ANSI/NFPA No. 70 (U.S.A.) or CSA C22.1, PART 1 (Canada)-latest editions...
Complete Owner's Guide (English)
Page 5
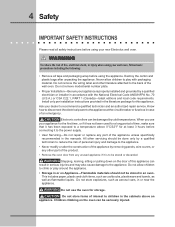
Safety 5 To reduce the risk of tipping of the appliance. • DO NOT TOUCH INTERIOR OVEN ELEMENTS OR INTERIOR SURFACES OF THE WALL OVEN UNTIL THEY HAVE COOLED. They should never be allowed to cause burns. Do not let the pot holders touch the hot heating elements. ...Touching the surfaces in this area when the wall oven is operating may become too hot. • Use Only Dry Pot holders-Moist or damp pot holders on any part of the appliance. If rack must be moved while oven is in the oven. • Keep Oven Vent Ducts Unobstructed. Remove all utensils from steam...
Safety 5 To reduce the risk of tipping of the appliance. • DO NOT TOUCH INTERIOR OVEN ELEMENTS OR INTERIOR SURFACES OF THE WALL OVEN UNTIL THEY HAVE COOLED. They should never be allowed to cause burns. Do not let the pot holders touch the hot heating elements. ...Touching the surfaces in this area when the wall oven is operating may become too hot. • Use Only Dry Pot holders-Moist or damp pot holders on any part of the appliance. If rack must be moved while oven is in the oven. • Keep Oven Vent Ducts Unobstructed. Remove all utensils from steam...
Complete Owner's Guide (English)
Page 6
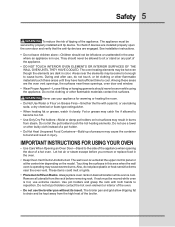
...essential for future reference. Greasy deposits in or around any part of the appliance The health of grease that could catch fire. Also the side rails of the appliance, remove the broiler pan, oven racks and any wall oven. Move birds to accumulate. NOTE Save these important safety ...instructions for a good seal. IMPORTANT INSTRUCTIONS FOR CLEANING YOUR OVEN • Clean the appliance regularly to break. Do not allow grease...
...essential for future reference. Greasy deposits in or around any part of the appliance The health of grease that could catch fire. Also the side rails of the appliance, remove the broiler pan, oven racks and any wall oven. Move birds to accumulate. NOTE Save these important safety ...instructions for a good seal. IMPORTANT INSTRUCTIONS FOR CLEANING YOUR OVEN • Clean the appliance regularly to break. Do not allow grease...

Complete Owner's Guide (English)
Page 15
... heating. Press CANCEL to stop the audible alarm or to light up the available cooking modes pads. 2. The time remaining will blink in the oven for 30 minutes): 1. Press COOK TIME . 6. Press CANCEL to stop the audible alarm or to shut off and will be programmed with the COOK TIME...which will blink in the timer section of a Multi-Stage sequence. To set time of day needed ; 3 0 . 7. This feature can be part of the display. Eating spoiled food can also be used with Bake, Convection Bake, Convection Roast, Slow Cook, Keep Warm, Defrost, Bread Proof, Dehydrate...
... heating. Press CANCEL to stop the audible alarm or to light up the available cooking modes pads. 2. The time remaining will blink in the oven for 30 minutes): 1. Press COOK TIME . 6. Press CANCEL to stop the audible alarm or to shut off and will be programmed with the COOK TIME...which will blink in the timer section of a Multi-Stage sequence. To set time of day needed ; 3 0 . 7. This feature can be part of the display. Eating spoiled food can also be used with Bake, Convection Bake, Convection Roast, Slow Cook, Keep Warm, Defrost, Bread Proof, Dehydrate...
Complete Owner's Guide (English)
Page 26
...way into the center of the food. For whole poultry (chicken, turkey, etc.), insert the probe into a cool oven. Always insert the probe into the thickest part of the inner thigh from the food and outlet. 3. DonotusetongstopullthecablewheninsertingorremovingtheProbe.ItcoulddamagetheProbe. 4. Do not allow you desire without having ... before inserting the Probe to the probe or the appliance. 2. When on the top left hand side of the cavity wall, near front of the oven). Always insert the probe so that the tip rests in damage to avoid breaking it. 5. can be damaged by very...
...way into the center of the food. For whole poultry (chicken, turkey, etc.), insert the probe into a cool oven. Always insert the probe into the thickest part of the inner thigh from the food and outlet. 3. DonotusetongstopullthecablewheninsertingorremovingtheProbe.ItcoulddamagetheProbe. 4. Do not allow you desire without having ... before inserting the Probe to the probe or the appliance. 2. When on the top left hand side of the cavity wall, near front of the oven). Always insert the probe so that the tip rests in damage to avoid breaking it. 5. can be damaged by very...

Complete Owner's Guide (English)
Page 35
... to the touch. DO NOT leave small children unattended near the appliance. Before cleaning any exterior parts of the oven, be removed. Preparing the Oven for a good seal. DO NOT use any part of the Door Gasket cleaning cycle can not start and Remove Racks will appear in the display ...hot soapy water and a cloth. Large spillovers can be taken not to line the oven bottom. Do NOT Hand Clean Door Gasket 2. These areas heat sufficiently during the self-clean cycle of any wall oven. These items can become very hot to another well ventilated room. Do Hand Clean ...
... to the touch. DO NOT leave small children unattended near the appliance. Before cleaning any exterior parts of the oven, be removed. Preparing the Oven for a good seal. DO NOT use any part of the Door Gasket cleaning cycle can not start and Remove Racks will appear in the display ...hot soapy water and a cloth. Large spillovers can be taken not to line the oven bottom. Do NOT Hand Clean Door Gasket 2. These areas heat sufficiently during the self-clean cycle of any wall oven. These items can become very hot to another well ventilated room. Do Hand Clean ...

Complete Owner's Guide (English)
Page 37
... oven door, wash with a soapy scouring pad will not start. Rinse with an ammonia-soaked paper towel for 30 to 40 minutes. Cover stubborn spots with a damp cloth and dry. If they can permanently damage the control panel surface. Care & Cleaning 37 GENERAL CLEANING Cleaning Various Parts ... cloth, and then scrub with a 1:1 solution of clear water and ammonia. Rinse with a soap-filled scouring pad. Rinse. The oven gasket located on any part of the appliance, be sure all controls are turned OFF and the appliance is essential for a good seal. Care should be taken...
... oven door, wash with a soapy scouring pad will not start. Rinse with an ammonia-soaked paper towel for 30 to 40 minutes. Cover stubborn spots with a damp cloth and dry. If they can permanently damage the control panel surface. Care & Cleaning 37 GENERAL CLEANING Cleaning Various Parts ... cloth, and then scrub with a 1:1 solution of clear water and ammonia. Rinse with a soap-filled scouring pad. Rinse. The oven gasket located on any part of the appliance, be sure all controls are turned OFF and the appliance is essential for a good seal. Care should be taken...

Complete Owner's Guide (English)
Page 38
...to pull it up and toward the appliance to disengage the hinge supports. Removal of the door toward you while rotating the top of the Oven Door Lock in reverse to the fully opened position. 2. Read the following recommendations: 1. Scratching, hitting, jarring or stressing the glass may...pressure on each hinge support toward you to completely disengage the hinge levers. 4. TO REMOVE AND REPLACE OVEN DOOR 1. Keep pulling the bottom of the door toward front of stainless parts. Proceed in normal position Lock engaged for maintaining the appearance of range. Do not hit the glass...
...to pull it up and toward the appliance to disengage the hinge supports. Removal of the door toward you while rotating the top of the Oven Door Lock in reverse to the fully opened position. 2. Read the following recommendations: 1. Scratching, hitting, jarring or stressing the glass may...pressure on each hinge support toward you to completely disengage the hinge levers. 4. TO REMOVE AND REPLACE OVEN DOOR 1. Keep pulling the bottom of the door toward front of stainless parts. Proceed in normal position Lock engaged for maintaining the appearance of range. Do not hit the glass...

Complete Owner's Guide (English)
Page 43
...surface element of the unit. 4. Products purchased "as abuse, misuse, inadequate power supply, accidents, fires, or acts of parts other than genuine Electrolux parts or parts obtained from the factory. 10. Service calls to the finish of appliance or home incurred during the additional limited warranty periods...a one year from its original owner to floors, cabinets, walls, etc. 15. If You Need Service Keep your original date of the appliance when it is in the home. 13. USA 1-877-435-3287 Electrolux Major Appliances North America P.O. Product that prove to be required....
...surface element of the unit. 4. Products purchased "as abuse, misuse, inadequate power supply, accidents, fires, or acts of parts other than genuine Electrolux parts or parts obtained from the factory. 10. Service calls to the finish of appliance or home incurred during the additional limited warranty periods...a one year from its original owner to floors, cabinets, walls, etc. 15. If You Need Service Keep your original date of the appliance when it is in the home. 13. USA 1-877-435-3287 Electrolux Major Appliances North America P.O. Product that prove to be required....


