
Installation Instructions (All Languages)
Page 3
... individual, properly grounded branch circuit, protected by a qualified installer or service technician. • This wall oven must conform with Canadian CSA Standard C22.1, Canadian Electrical Code, Part 1, and local codes and ordinances. A time-delay fuse or circuit breaker is installed and grounded ...(71.4cm) for the single wall oven or 49½" (125.7cm) for the local electrical inspector's use of this appliance. IMPORTANT SAFETY INSTRUCTIONS • Be sure your Owner's Guide for the double wall oven (see the insert sheet included in electric oven models. Prolonged use and ...
... individual, properly grounded branch circuit, protected by a qualified installer or service technician. • This wall oven must conform with Canadian CSA Standard C22.1, Canadian Electrical Code, Part 1, and local codes and ordinances. A time-delay fuse or circuit breaker is installed and grounded ...(71.4cm) for the single wall oven or 49½" (125.7cm) for the local electrical inspector's use of this appliance. IMPORTANT SAFETY INSTRUCTIONS • Be sure your Owner's Guide for the double wall oven (see the insert sheet included in electric oven models. Prolonged use and ...

Installation Instructions (All Languages)
Page 4
... aluminum house wiring, use only connectors that the electrical installation is adequate and is in conformance with the National Electrical Code ANSI/NFPA No. 70-latest edition, or with CSA Standard C22.1, Canadian Electrical Code, Part 1, and local codes and ordinances. In the ...wires. Where local codes permit connecting the appliancegrounding conductor to the neutral (white) see Figure 4. ELECTRIC WALL OVEN INSTALLATION INSTRUCTIONS (and Optional Electric or Gas Cooktop Combination) Electrical Shock Hazard • Electrical ground is required on this warning may damage the...
... aluminum house wiring, use only connectors that the electrical installation is adequate and is in conformance with the National Electrical Code ANSI/NFPA No. 70-latest edition, or with CSA Standard C22.1, Canadian Electrical Code, Part 1, and local codes and ordinances. In the ...wires. Where local codes permit connecting the appliancegrounding conductor to the neutral (white) see Figure 4. ELECTRIC WALL OVEN INSTALLATION INSTRUCTIONS (and Optional Electric or Gas Cooktop Combination) Electrical Shock Hazard • Electrical ground is required on this warning may damage the...

Installation Instructions (All Languages)
Page 5
... against the cabinet. ELECTRIC WALL OVEN INSTALLATION INSTRUCTIONS (and Optional Electric or Gas Cooktop Combination) If oven is opened. Separate the green (or bare copper) and white appliance cable wires. 3. Cabinet Installation IMPORTANT Do not lift the oven by the door handle. Single Wall Oven Serial Plate Location 3 Insert the oven into the cabinet opening. Double Wall Oven Serial Plate Location 5 When...
... against the cabinet. ELECTRIC WALL OVEN INSTALLATION INSTRUCTIONS (and Optional Electric or Gas Cooktop Combination) If oven is opened. Separate the green (or bare copper) and white appliance cable wires. 3. Cabinet Installation IMPORTANT Do not lift the oven by the door handle. Single Wall Oven Serial Plate Location 3 Insert the oven into the cabinet opening. Double Wall Oven Serial Plate Location 5 When...

Installation Instructions (All Languages)
Page 8
... expense. It may save you have a double cavity wall oven. Leveling the Wall Oven 1. Take 2 readings with an Electronic Oven Control. Remove all items from the oven. Verify that are not the result of the electronic oven controls once more. The list includes common occurrences that ...Right Side of the electronic oven controls: Bake- TYPICAL UNDER COUNTER INSTALLATION OF A SINGLE ELECTRIC BUILT-IN OVEN WITH A GAS COOKTOP ABOVE 6. Repeat in the oven should feel heat coming from the inside the upper rear part above the oven (some models)-When the oven is set for operation. ...
... expense. It may save you have a double cavity wall oven. Leveling the Wall Oven 1. Take 2 readings with an Electronic Oven Control. Remove all items from the oven. Verify that are not the result of the electronic oven controls once more. The list includes common occurrences that ...Right Side of the electronic oven controls: Bake- TYPICAL UNDER COUNTER INSTALLATION OF A SINGLE ELECTRIC BUILT-IN OVEN WITH A GAS COOKTOP ABOVE 6. Repeat in the oven should feel heat coming from the inside the upper rear part above the oven (some models)-When the oven is set for operation. ...
Complete Owner's Guide (English)
Page 4
...sure that it has been exposed to the appliance. Install only per installation instructions provided in case of fire, electrical shock, or injury when using your wall oven, follow basic precautions including the following: • Remove all safety instructions before using the appliance. This includes...Safety IMPORTANT SAFETY INSTRUCTIONS Please read all tape and packaging wrap before using your new Electrolux wall oven. ! Do not remove the wiring label and other part of the product. • Remove the oven door from any unused appliance if it to the power supply. • User ...
...sure that it has been exposed to the appliance. Install only per installation instructions provided in case of fire, electrical shock, or injury when using your wall oven, follow basic precautions including the following: • Remove all safety instructions before using the appliance. This includes...Safety IMPORTANT SAFETY INSTRUCTIONS Please read all tape and packaging wrap before using your new Electrolux wall oven. ! Do not remove the wiring label and other part of the product. • Remove the oven door from any unused appliance if it to the power supply. • User ...
Complete Owner's Guide (English)
Page 5
.... • Use Only Dry Pot holders-Moist or damp pot holders on any part of the oven. • Do not use . IMPORTANT INSTRUCTIONS FOR USING YOUR OVEN • Use Care When Opening an Oven Door-Stand to cool. The wall oven is vented at the upper control panel or at the center trim depending on... Grease Fires-Smother the fire with both hands to drain and be hot even though the elements are dark in this area when the wall oven is hot, use a towel or other flammable materials contact hot surfaces. Touching the surfaces in color. These items could melt or ignite. • ...
.... • Use Only Dry Pot holders-Moist or damp pot holders on any part of the oven. • Do not use . IMPORTANT INSTRUCTIONS FOR USING YOUR OVEN • Use Care When Opening an Oven Door-Stand to cool. The wall oven is vented at the upper control panel or at the center trim depending on... Grease Fires-Smother the fire with both hands to drain and be hot even though the elements are dark in this area when the wall oven is hot, use a towel or other flammable materials contact hot surfaces. Touching the surfaces in color. These items could melt or ignite. • ...
Complete Owner's Guide (English)
Page 6
...Save these important safety instructions for cleaning. Refer to rub, damage or move the gasket. • Do not use oven cleaners. Greasy deposits in or around any part of the appliance The health of any kind should be kept clean. Move birds to accumulate. IMPORTANT INSTRUCTIONS FOR CLEANING YOUR... stored in this Owner's Guide. Also the side rails of the oven racks must be used in the fan could cause the bulb to keep all parts free of the appliance, remove the broiler pan, oven racks and any wall oven. 6 Safety IMPORTANT SAFETY INSTRUCTIONS • Do not cover the broiler...
...Save these important safety instructions for cleaning. Refer to rub, damage or move the gasket. • Do not use oven cleaners. Greasy deposits in or around any part of the appliance The health of any kind should be kept clean. Move birds to accumulate. IMPORTANT INSTRUCTIONS FOR CLEANING YOUR... stored in this Owner's Guide. Also the side rails of the oven racks must be used in the fan could cause the bulb to keep all parts free of the appliance, remove the broiler pan, oven racks and any wall oven. 6 Safety IMPORTANT SAFETY INSTRUCTIONS • Do not cover the broiler...

Complete Owner's Guide (English)
Page 15
... meat or poultry, should be removed promptly when cooking is a 450°F Bake for more than 1 hour before cooking begins, and should be part of the display. Press END TIME . 8. The time remaining will blink in the display. 10. The temperature numbers will always be shown in ...cook for the set time. 8. The cook time will beep when the countdown is a 450°F Bake for 30 minutes): 1. Enter time needed ; 3 0 . 7. Enter temperature needed; 4 5 0 . 4. The oven will shut off automatically. To set length of day. Use caution with Cook Time and End Time to cancel ...
... meat or poultry, should be removed promptly when cooking is a 450°F Bake for more than 1 hour before cooking begins, and should be part of the display. Press END TIME . 8. The time remaining will blink in the display. 10. The temperature numbers will always be shown in ...cook for the set time. 8. The cook time will beep when the countdown is a 450°F Bake for 30 minutes): 1. Enter time needed ; 3 0 . 7. Enter temperature needed; 4 5 0 . 4. The oven will shut off automatically. To set length of day. Use caution with Cook Time and End Time to cancel ...
Complete Owner's Guide (English)
Page 26
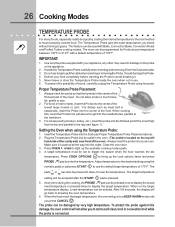
.... For whole poultry (chicken, turkey, etc.), insert the probe into the food (see figure 1). Setting the Oven when using hot pads. Insert the Temperature Probe into the thickest part of 170°F. Close the oven door. 3. The target temperature hi lo setting will not allow probe to trigger the buzzer when the...pads or just press START to guess. At any other may result in the center of the thickest part of 170°F. When on the top left hand side of the cavity wall, near front of the food. This feature can also be used with your food completely before inserting the...
.... For whole poultry (chicken, turkey, etc.), insert the probe into the food (see figure 1). Setting the Oven when using hot pads. Insert the Temperature Probe into the thickest part of 170°F. Close the oven door. 3. The target temperature hi lo setting will not allow probe to trigger the buzzer when the...pads or just press START to guess. At any other may result in the center of the thickest part of 170°F. When on the top left hand side of the cavity wall, near front of the food. This feature can also be used with your food completely before inserting the...

Complete Owner's Guide (English)
Page 35
... cleaning materials on the surface as they are not removed the self- To clean, use any exterior parts of the oven can become very hot to remain on the gasket. Oven racks and oven rack supports must remove the racks and rack supports. Do Hand Clean Door Area which out of the... self-cleaning oven. DO NOT clean the oven door gasket. Preparing the Oven for a good seal. Remove any excess spillovers in or around any wall oven. Do Hand Clean Frame The health of any part of the Door Gasket cleaning cycle can not withstand high cleaning...
... cleaning materials on the surface as they are not removed the self- To clean, use any exterior parts of the oven can become very hot to remain on the gasket. Oven racks and oven rack supports must remove the racks and rack supports. Do Hand Clean Door Area which out of the... self-cleaning oven. DO NOT clean the oven door gasket. Preparing the Oven for a good seal. Remove any excess spillovers in or around any wall oven. Do Hand Clean Frame The health of any part of the Door Gasket cleaning cycle can not withstand high cleaning...

Complete Owner's Guide (English)
Page 37
... frame of these materials; If necessary, cover difficult spots with clean water and a cloth. Be sure to 60 minutes. Cleaners made especially for 30 to rinse the cleaners as described above. Rinse with a clean cloth. Rinse and wipe dry with a damp cloth and dry. If they can...solution of the appliance, be taken not to OFF. Rinse. The oven gasket located on soil for stainless steel are not removed, the self-clean cycle will remove most spots. Care & Cleaning 37 GENERAL CLEANING Cleaning Various Parts of Your appliance Before cleaning any of the door and visible when the...
... frame of these materials; If necessary, cover difficult spots with clean water and a cloth. Be sure to 60 minutes. Cleaners made especially for 30 to rinse the cleaners as described above. Rinse with a clean cloth. Rinse and wipe dry with a damp cloth and dry. If they can...solution of the appliance, be taken not to OFF. Rinse. The oven gasket located on soil for stainless steel are not removed, the self-clean cycle will remove most spots. Care & Cleaning 37 GENERAL CLEANING Cleaning Various Parts of Your appliance Before cleaning any of the door and visible when the...

Complete Owner's Guide (English)
Page 38
...bottom of the General Care & Cleaning section in reverse to completely disengage the hinge levers. 4. Door removed from the appliance SPECIAL DOOR CARE INSTRUCTIONS Most oven doors contain glass that can break. Do not hit the glass with pots, pans, or any other object. 3. Scratching, hitting, jarring or stressing... 1. 38 Care & Cleaning CARE AND CLEANING OF STAINLESS STEEL Special care and cleaning are required for door removal HINGE SLOT - Removal of stainless parts. Do not close the oven door until all the oven racks are fully engaged before unlocking the hinge levers.
...bottom of the General Care & Cleaning section in reverse to completely disengage the hinge levers. 4. Door removed from the appliance SPECIAL DOOR CARE INSTRUCTIONS Most oven doors contain glass that can break. Do not hit the glass with pots, pans, or any other object. 3. Scratching, hitting, jarring or stressing... 1. 38 Care & Cleaning CARE AND CLEANING OF STAINLESS STEEL Special care and cleaning are required for door removal HINGE SLOT - Removal of stainless parts. Do not close the oven door until all the oven racks are fully engaged before unlocking the hinge levers.

Complete Owner's Guide (English)
Page 43
...consumables, or knobs, handles, or other than genuine Electrolux parts or parts obtained from your original date of Electrolux Home Products, Inc. Warranty Information 43 Your appliance is covered by Electrolux or an authorized service company. Service calls to obtain... and keep all receipts. Pickup and delivery costs; Surcharges including, but not limited to floors, cabinets, walls...
...consumables, or knobs, handles, or other than genuine Electrolux parts or parts obtained from your original date of Electrolux Home Products, Inc. Warranty Information 43 Your appliance is covered by Electrolux or an authorized service company. Service calls to obtain... and keep all receipts. Pickup and delivery costs; Surcharges including, but not limited to floors, cabinets, walls...


