
Operating Instructions
Page 2
... is intended to persons. Please, record and retain the Model name and serial number of uninsulated "dangerous voltage" within an equilateral triangle is completely safe. REFER SERVICING TO QUALIFIED SERVICE PERSONNEL. CAUTION: TO REDUCE THE RISK OF ELECTRIC SHOCK, DO NOT REMOVE COVER (OR BACK). If problems occur, contact your set shown on the rating label. NO USER SERVICEABLE PARTS INSIDE. und...
... is intended to persons. Please, record and retain the Model name and serial number of uninsulated "dangerous voltage" within an equilateral triangle is completely safe. REFER SERVICING TO QUALIFIED SERVICE PERSONNEL. CAUTION: TO REDUCE THE RISK OF ELECTRIC SHOCK, DO NOT REMOVE COVER (OR BACK). If problems occur, contact your set shown on the rating label. NO USER SERVICEABLE PARTS INSIDE. und...
Operating Instructions
Page 3
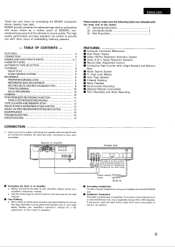
...channel and red plugs for the right channel. • Tape Dubbing • Many stereo amplifiers and receivers have been completed. FEATURES CONNECTION NAMES AND FUNCTION OF PARTS CASSETTE TAPES AUTOMATIC TAPE SELECTION PLAYBACK RELAY PLAY MUSIC SEARCH SYSTEM RECORDING PROPER RECORDING LEVEL RECORDING BIAS ADJUSTMENT REC/REC MUTE AND REC PAUSE BUTTON TWIN RECORDING RELAY RECORDING DUBBING SYNCHRONIZED RECORDING FUNCTION TWIN SYNCHRONIZED RECORDING TAPE COUNTER AND MEMORY STOP DOLBY B AND C NOISE REDUCTION SYSTEM DOLBY HX-PRO HEADROOM EXTENSION SYSTEM MAINTENANCE TROUBLESHOOTING SPECIFICATIONS...
...channel and red plugs for the right channel. • Tape Dubbing • Many stereo amplifiers and receivers have been completed. FEATURES CONNECTION NAMES AND FUNCTION OF PARTS CASSETTE TAPES AUTOMATIC TAPE SELECTION PLAYBACK RELAY PLAY MUSIC SEARCH SYSTEM RECORDING PROPER RECORDING LEVEL RECORDING BIAS ADJUSTMENT REC/REC MUTE AND REC PAUSE BUTTON TWIN RECORDING RELAY RECORDING DUBBING SYNCHRONIZED RECORDING FUNCTION TWIN SYNCHRONIZED RECORDING TAPE COUNTER AND MEMORY STOP DOLBY B AND C NOISE REDUCTION SYSTEM DOLBY HX-PRO HEADROOM EXTENSION SYSTEM MAINTENANCE TROUBLESHOOTING SPECIFICATIONS...
Operating Instructions
Page 4
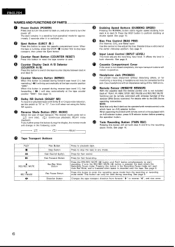
... stop the tape in any mode. Changes the tape transport direction from deck A to deck B. Eject Button (EJECT ) Press this button to reset the tape counter to zero. When the tape is recorded onto the tape. or C-type noise reduction, set this jack. MODE) Select the type of 8 to 1200 ohms. Remote Sensor (REMOTE SENSOR) With the cassette deck the remote control unit is obtained at the tape counter position "0000". C:3 RELAY Dubbing Speed Buttons (DUBBING SPEED) Pressing the NORMAL button starts regular speed...
... stop the tape in any mode. Changes the tape transport direction from deck A to deck B. Eject Button (EJECT ) Press this button to reset the tape counter to zero. When the tape is recorded onto the tape. or C-type noise reduction, set this jack. MODE) Select the type of 8 to 1200 ohms. Remote Sensor (REMOTE SENSOR) With the cassette deck the remote control unit is obtained at the tape counter position "0000". C:3 RELAY Dubbing Speed Buttons (DUBBING SPEED) Pressing the NORMAL button starts regular speed...
Operating Instructions
Page 5
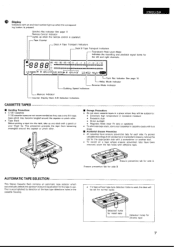
... Relay Mode Indicator Reverse Mode Indicator Memory Indicator Counter Display Deck A/B Selection Indicators CASSETTE TAPES MI Handling Precautions • C-120 Cassettes C-120 cassette tapes are not recommended as they will be subject to: • Extremely high temperature or excessive moisture • Excessive dust • Direct sunlight • Magnetic fields (near TV sets or speakers) • To eliminate tape slack, store your finger tip. Synchro Rec Indicator See page 11 Remote Control Indicator Lights up...
... Relay Mode Indicator Reverse Mode Indicator Memory Indicator Counter Display Deck A/B Selection Indicators CASSETTE TAPES MI Handling Precautions • C-120 Cassettes C-120 cassette tapes are not recommended as they will be subject to: • Extremely high temperature or excessive moisture • Excessive dust • Direct sunlight • Magnetic fields (near TV sets or speakers) • To eliminate tape slack, store your finger tip. Synchro Rec Indicator See page 11 Remote Control Indicator Lights up...
Operating Instructions
Page 6
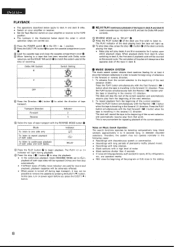
... reduction, set the Dolby NR switch correctly. Notes on your amplifier or receiver. • Set the Tape Monitor switch on Music Search Operation: The search functions operates by pressing the EJECT ( = I >) direction. When playback starts from deck B, when switching to deck A, the first deck A playback cycle will rewind the tape to the beginning of pianissimo (softly played music). • Recordings with long silences. • Blank sections with the REVERSE MODE button 0. The PLAY () 4/0 indicator will light during tape transport...
... reduction, set the Dolby NR switch correctly. Notes on your amplifier or receiver. • Set the Tape Monitor switch on Music Search Operation: The search functions operates by pressing the EJECT ( = I >) direction. When playback starts from deck B, when switching to deck A, the first deck A playback cycle will rewind the tape to the beginning of pianissimo (softly played music). • Recordings with long silences. • Blank sections with the REVERSE MODE button 0. The PLAY () 4/0 indicator will light during tape transport...
Operating Instructions
Page 7
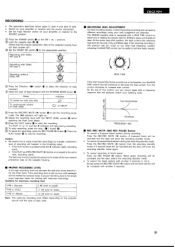
... the REC PAUSE (II) button. Mode To record on only one side To continuously record on both sides Indicator ...-- ENGLISH RECORDING • The operations described below apply to deck A and deck B alike. • Switch on your amplifier or receiver and the source component. • Set the Tape Monitor switch on your listening taste. O Press the POWER switch 0 to the reference bias level for making wel l balanced recordings. A proper recording level is set too low, soft...
... the REC PAUSE (II) button. Mode To record on only one side To continuously record on both sides Indicator ...-- ENGLISH RECORDING • The operations described below apply to deck A and deck B alike. • Switch on your amplifier or receiver and the source component. • Set the Tape Monitor switch on your listening taste. O Press the POWER switch 0 to the reference bias level for making wel l balanced recordings. A proper recording level is set too low, soft...
Operating Instructions
Page 8
... reverse the tape direction together. (Depending on the manufacturer, the length of tapes having the same recording time may differ somewhat. O Adjust the INPUT LEVEL control 0 for the best recording input level while watching the Peak Level Meter. ® Press the PLAY button 0 of deck A to start twin recording. ® To stop condition, setting deck B to the recording pause mode will assure correct sound reproduction, but does not affect the recording. • The playback sound cannot be...
... reverse the tape direction together. (Depending on the manufacturer, the length of tapes having the same recording time may differ somewhat. O Adjust the INPUT LEVEL control 0 for the best recording input level while watching the Peak Level Meter. ® Press the PLAY button 0 of deck A to start twin recording. ® To stop condition, setting deck B to the recording pause mode will assure correct sound reproduction, but does not affect the recording. • The playback sound cannot be...
Operating Instructions
Page 9
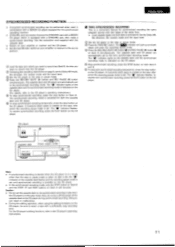
... Jack with a DENON CD player which is equipped with a sufficiently long recording time. CD player ♦ OUT 00 Cassette deck Power supply outlet I Lee 0 61 Note: • If synchronized recording is started when the CD player is indicated on the CD player. ® Stop synchronized recording, press the STOP button on the cassette deck and the synchronized recording mode is in the play mode. The "■" indicator lights on both decks will function. Use the connection cord supplied with this cassette deck • Switch...
... Jack with a DENON CD player which is equipped with a sufficiently long recording time. CD player ♦ OUT 00 Cassette deck Power supply outlet I Lee 0 61 Note: • If synchronized recording is started when the CD player is indicated on the CD player. ® Stop synchronized recording, press the STOP button on the cassette deck and the synchronized recording mode is in the play mode. The "■" indicator lights on both decks will function. Use the connection cord supplied with this cassette deck • Switch...
Operating Instructions
Page 10
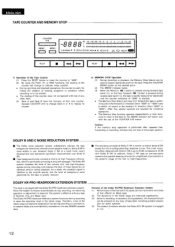
... system functions automatically during recording, no decoding is to be started. • The reading of high frequency information, which is performed after repeated fastforwarding or rewinding, the tape may not stop operation is particularly annoying during playback, the improved sound can be enjoyed on the new DENON cassette deck. ENGLISH TAPE COUNTER AND MEMORY STOP COUNTER A/B RESET NMI MEMO ONE - and high-frequency signals during forward tape travel () direction (from...
... system functions automatically during recording, no decoding is to be started. • The reading of high frequency information, which is performed after repeated fastforwarding or rewinding, the tape may not stop operation is particularly annoying during playback, the improved sound can be enjoyed on the new DENON cassette deck. ENGLISH TAPE COUNTER AND MEMORY STOP COUNTER A/B RESET NMI MEMO ONE - and high-frequency signals during forward tape travel () direction (from...
Operating Instructions
Page 11
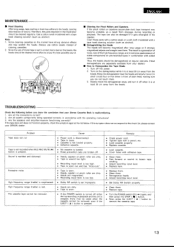
.... • Fast forward or rewind to loosen tape winding. • Adjust recording input level. • Replace tape. • Replace them. • Clean them. • Demagnetize heads. • Adjust recording input level. • Set Dolby NR Switch properly. • Clean them . 3. Are all system components being operated correctly in front of metal tape is pressed. If the tape deck still does not function properly, check the symptom against the list below. ENGLISH MAINTENANCE...
.... • Fast forward or rewind to loosen tape winding. • Adjust recording input level. • Replace tape. • Replace them. • Clean them. • Demagnetize heads. • Adjust recording input level. • Set Dolby NR Switch properly. • Clean them . 3. Are all system components being operated correctly in front of metal tape is pressed. If the tape deck still does not function properly, check the symptom against the list below. ENGLISH MAINTENANCE...
Operating Instructions
Page 12
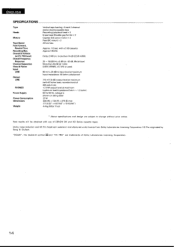
... 80 mV (-20 dBm) input level at maximum Input impedance: 50 kohm unbalanced 775 mV (0 dB) output level at 3% THD level) Overall Frequency Response Channel Separation Wow & Flutter Input LINE Output LINE PHONES Power Supply Power Consumption Dimensions Weight Vertical tape loading; 4-track 2-channel stereo double cassette deck Recording/playback head x 2 Erase head (Double-gap ferrite) x 2 Capstan (DC servo motor) x 2 Real (DC motor) x 2 4.8 cm/sec. ENGLISH SPECIFICATIONS Type Heads Motors Tape Speed Fast Forward, Rewind Time Recording Bias Overall S/N Ratio (at...
... 80 mV (-20 dBm) input level at maximum Input impedance: 50 kohm unbalanced 775 mV (0 dB) output level at 3% THD level) Overall Frequency Response Channel Separation Wow & Flutter Input LINE Output LINE PHONES Power Supply Power Consumption Dimensions Weight Vertical tape loading; 4-track 2-channel stereo double cassette deck Recording/playback head x 2 Erase head (Double-gap ferrite) x 2 Capstan (DC servo motor) x 2 Real (DC motor) x 2 4.8 cm/sec. ENGLISH SPECIFICATIONS Type Heads Motors Tape Speed Fast Forward, Rewind Time Recording Bias Overall S/N Ratio (at...


