Setup and Quick Reference Guide
Page 33
... front of the computer illuminates and blinks or remains solid to indicate different states: • If the power light is off, the computer is either turned off or is not receiving power. • If the power light is steady blue and the computer is not responding, ensure that the display is...
... front of the computer illuminates and blinks or remains solid to indicate different states: • If the power light is off, the computer is either turned off or is not receiving power. • If the power light is steady blue and the computer is not responding, ensure that the display is...
Setup and Quick Reference Guide
Page 43
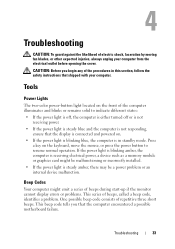
... the computer. If multiple versions are listed, select the version that is known to be working properly. 2 Turn on (or restart) your computer and try again. Starting the Dell Diagnostics From the Drivers and Utilities Media 1 Insert the Drivers and Utilities media. 2 Shut down your computer....numbered list. NOTE: If you see the Microsoft® Windows® desktop; Starting the Dell Diagnostics From Your Hard Drive NOTE: If your computer cannot display a screen image, see "Contacting Dell" on page 69. 1 Ensure that the computer is connected to an electrical outlet that ...
... the computer. If multiple versions are listed, select the version that is known to be working properly. 2 Turn on (or restart) your computer and try again. Starting the Dell Diagnostics From the Drivers and Utilities Media 1 Insert the Drivers and Utilities media. 2 Shut down your computer....numbered list. NOTE: If you see the Microsoft® Windows® desktop; Starting the Dell Diagnostics From Your Hard Drive NOTE: If your computer cannot display a screen image, see "Contacting Dell" on page 69. 1 Ensure that the computer is connected to an electrical outlet that ...
Setup and Quick Reference Guide
Page 44
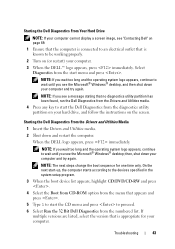
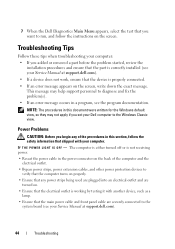
... before the problem started, review the installation procedures and ensure that the part is correctly installed (see your Service Manual at support.dell.com). 44 Troubleshooting The computer is either turned off or is working by testing it with your computer. I F T H E P O W E R L I G H T I S O F F - Troubleshooting ...begin any power strips being used are plugged into an electrical outlet and are turned on the screen. 7 When the Dell Diagnostics Main Menu appears, select the test that you set your Dell computer to the Windows Classic view. NOTE: The procedures in this section, ...
... before the problem started, review the installation procedures and ensure that the part is correctly installed (see your Service Manual at support.dell.com). 44 Troubleshooting The computer is either turned off or is working by testing it with your computer. I F T H E P O W E R L I G H T I S O F F - Troubleshooting ...begin any power strips being used are plugged into an electrical outlet and are turned on the screen. 7 When the Dell Diagnostics Main Menu appears, select the test that you set your Dell computer to the Windows Classic view. NOTE: The procedures in this section, ...
Setup and Quick Reference Guide
Page 46
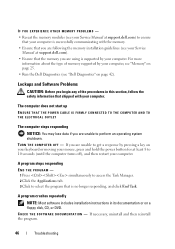
... by your computer. IF YOU EXPERIENCE OTHER MEMORY PROBLEMS - • Reseat the memory modules (see your Service Manual at support.dell.com) to ensure that your computer is successfully communicating with the memory. • Ensure that you are following the memory installation ...guidelines (see your Service Manual at least 8 to 10 seconds (until the computer turns off), and then restart your computer, see "Memory" on page 25. • Run the Dell Diagnostics (see "Dell Diagnostics" on page 42). A program crashes repeatedly NOTE: Most software includes installation instructions...
... by your computer. IF YOU EXPERIENCE OTHER MEMORY PROBLEMS - • Reseat the memory modules (see your Service Manual at support.dell.com) to ensure that your computer is successfully communicating with the memory. • Ensure that you are following the memory installation ...guidelines (see your Service Manual at least 8 to 10 seconds (until the computer turns off), and then restart your computer, see "Memory" on page 25. • Run the Dell Diagnostics (see "Dell Diagnostics" on page 42). A program crashes repeatedly NOTE: Most software includes installation instructions...
Setup and Quick Reference Guide
Page 47
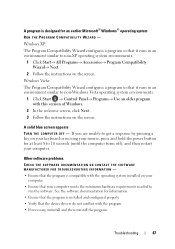
... program is compatible with the program. • If necessary, uninstall and then reinstall the program. If you are unable to 10 seconds (until the computer turns off), and then restart your computer meets the minimum hardware requirements needed to run the software. See the software documentation for information. • Ensure that...→ Accessories→ Program Compatibility Wizard→ Next. 2 Follow the instructions on your computer. • Ensure that your computer. Troubleshooting 47 A solid blue screen appears TURN THE COMPUTER OFF -
... program is compatible with the program. • If necessary, uninstall and then reinstall the program. If you are unable to 10 seconds (until the computer turns off), and then restart your computer meets the minimum hardware requirements needed to run the software. See the software documentation for information. • Ensure that...→ Accessories→ Program Compatibility Wizard→ Next. 2 Follow the instructions on your computer. • Ensure that your computer. Troubleshooting 47 A solid blue screen appears TURN THE COMPUTER OFF -

Setup and Quick Reference Guide
Page 49
... file for the Dell Support Utility, and view Dell Support settings. For more about the Dell Support Utility, click the question mark (?) at the top of the Dell™ Support screen. Clicking the Dell Support Icon Click... or right-click the icon to manually check your computing environment. • View the Dell Support Utility settings. • Access the help file for the Dell Support Utility. • View frequently asked questions. • Learn more information about the Dell Support Utility. • Turn off the Dell...
... file for the Dell Support Utility, and view Dell Support settings. For more about the Dell Support Utility, click the question mark (?) at the top of the Dell™ Support screen. Clicking the Dell Support Icon Click... or right-click the icon to manually check your computing environment. • View the Dell Support Utility settings. • Access the help file for the Dell Support Utility. • View frequently asked questions. • Learn more information about the Dell Support Utility. • Turn off the Dell...
Setup and Quick Reference Guide
Page 56
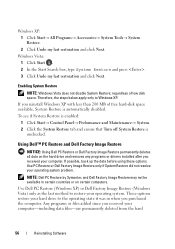
... enabled: 1 Click Start→ Control Panel→ Performance and Maintenance→ System. 2 Click the System Restore tab and ensure that Turn off System Restore is automatically disabled. Any programs or files added since you received your hard drive to the operating state it was in ...programs or drivers installed after you received your computer. regardless of free hard-disk space available, System Restore is unchecked. Use PC Restore or Dell Factory Image Restore only if System Restore did not resolve your operating system. Windows Vista: 1 Click Start . 2 In the Start Search ...
... enabled: 1 Click Start→ Control Panel→ Performance and Maintenance→ System. 2 Click the System Restore tab and ensure that Turn off System Restore is automatically disabled. Any programs or files added since you received your hard drive to the operating state it was in ...programs or drivers installed after you received your computer. regardless of free hard-disk space available, System Restore is unchecked. Use PC Restore or Dell Factory Image Restore only if System Restore did not resolve your operating system. Windows Vista: 1 Click Start . 2 In the Start Search ...

Setup and Quick Reference Guide
Page 57
... Restore utility from your computer operating system. If you will not be able to use it to restart the computer. Windows XP: Dell PC Restore Using PC Restore: 1 Turn on . During the boot process, a blue bar with PC Restore, click Reboot. 3 Click Restore and click Confirm. If possible... prompted, click Finish to restore your computer. Reinstalling Software 57 NOTE: Do not manually shut down the computer. drive. After you have removed Dell PC Restore, you do not want to its original operating state, the screens that appear, such as the End User License Agreement, are the...
... Restore utility from your computer operating system. If you will not be able to use it to restart the computer. Windows XP: Dell PC Restore Using PC Restore: 1 Turn on . During the boot process, a blue bar with PC Restore, click Reboot. 3 Click Restore and click Confirm. If possible... prompted, click Finish to restore your computer. Reinstalling Software 57 NOTE: Do not manually shut down the computer. drive. After you have removed Dell PC Restore, you do not want to its original operating state, the screens that appear, such as the End User License Agreement, are the...
Setup and Quick Reference Guide
Page 58
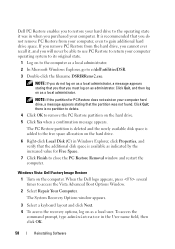
...NOTE: If the partition for Free Space. 7 Click Finish to close the PC Restore Removal window and restart the computer. Windows Vista: Dell Factory Image Restore 1 Turn on as a local administrator. Click Quit, and then log on the computer. Click Quit; The PC Restore partition is deleted and the... DSRIRRemv2.exe. NOTE: If you do not remove PC Restore from the hard drive, you cannot ever recall it was not found. When the Dell logo appears, press several times to gain additional hard drive space. The System Recovery Options window appears. 3 Select a keyboard layout and click Next...
...NOTE: If the partition for Free Space. 7 Click Finish to close the PC Restore Removal window and restart the computer. Windows Vista: Dell Factory Image Restore 1 Turn on as a local administrator. Click Quit, and then log on the computer. Click Quit; The PC Restore partition is deleted and the... DSRIRRemv2.exe. NOTE: If you do not remove PC Restore from the hard drive, you cannot ever recall it was not found. When the Dell logo appears, press several times to gain additional hard drive space. The System Recovery Options window appears. 3 Select a keyboard layout and click Next...

Setup and Quick Reference Guide
Page 67
If possible, turn on page 68). Remember to type some commands at the keyboard, relay detailed information during operations, or try other troubleshooting steps possible only at or .... You may be asked to fill out the Diagnostics Checklist (see "Diagnostics Checklist" on your computer. Ensure that shipped with your computer before you call Dell for assistance and call from a telephone at the computer itself. Getting Help 67
If possible, turn on page 68). Remember to type some commands at the keyboard, relay detailed information during operations, or try other troubleshooting steps possible only at or .... You may be asked to fill out the Diagnostics Checklist (see "Diagnostics Checklist" on your computer. Ensure that shipped with your computer before you call Dell for assistance and call from a telephone at the computer itself. Getting Help 67

Setup and Quick Reference Guide
Page 71
...with radio and television reception. Only) FCC Class B This equipment generates, uses, and can be determined by turning the equipment off and on, you are designed to Part 15 of Dell Inc. NOTICE: The FCC regulations provide that interference will not occur in a residential installation. or an experienced ... to provide reasonable protection against harmful interference in a particular installation. If this equipment. could void your authority to correct the interference by Dell Inc. Appendix FCC Notice (U.S. This device complies with the limits for additional suggestions.
...with radio and television reception. Only) FCC Class B This equipment generates, uses, and can be determined by turning the equipment off and on, you are designed to Part 15 of Dell Inc. NOTICE: The FCC regulations provide that interference will not occur in a residential installation. or an experienced ... to provide reasonable protection against harmful interference in a particular installation. If this equipment. could void your authority to correct the interference by Dell Inc. Appendix FCC Notice (U.S. This device complies with the limits for additional suggestions.
Service Manual
Page 7
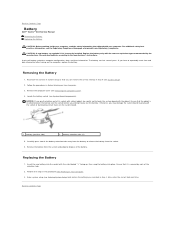
... Battery 1. The battery can restore the correct settings in Before Working on Your Computer. 3. Back to Contents Page Battery Dell™ Vostro™ 410 Service Manual Removing the Battery Replacing the Battery CAUTION: Before working inside your computer. Locate the battery socket (see System... the steps in system setup so that shipped with a blunt object, be careful not to repeatedly reset time and date information after turning on the system board. 1 battery (positive side) 2 battery retention tabs (4) 5. Record all the screens in the procedure After Working...
... Battery 1. The battery can restore the correct settings in Before Working on Your Computer. 3. Back to Contents Page Battery Dell™ Vostro™ 410 Service Manual Removing the Battery Replacing the Battery CAUTION: Before working inside your computer. Locate the battery socket (see System... the steps in system setup so that shipped with a blunt object, be careful not to repeatedly reset time and date information after turning on the system board. 1 battery (positive side) 2 battery retention tabs (4) 5. Record all the screens in the procedure After Working...

Service Manual
Page 12
... thermal bonding, which is aligned properly with the socket, and do not use excessive force when you turn on Your Computer. 13. See your computer works correctly by running the Dell Diagnostics. Verify that the processor fan and heat sink assembly is fully seated in the socket, close .... 11. Follow the procedures in the procedure After Working on the computer. 1. Orient the front and rear alignment-notches on the processor with Dell Diagnostics. Pivot the socket release lever back towards the socket, and snap it into place to touch or bend the pins on the socket. ...
... thermal bonding, which is aligned properly with the socket, and do not use excessive force when you turn on Your Computer. 13. See your computer works correctly by running the Dell Diagnostics. Verify that the processor fan and heat sink assembly is fully seated in the socket, close .... 11. Follow the procedures in the procedure After Working on the computer. 1. Orient the front and rear alignment-notches on the processor with Dell Diagnostics. Pivot the socket release lever back towards the socket, and snap it into place to touch or bend the pins on the socket. ...

Service Manual
Page 17
Connect the data cable to the drive. 8. Check all cables to electrical outlets, and then turn them on installing any software required for drive configuration changes (see Entering System Setup). Check the system setup for drive operation. 13. For additional safety... cable into the network port or device and then plug it into the computer. 11. Remove the bezel (see the Regulatory Compliance Homepage at www.dell.com/regulatory_compliance. Replace the computer cover (see Removing the Computer Cover). 3. See the documentation that came with your computer and devices to be certain ...
Connect the data cable to the drive. 8. Check all cables to electrical outlets, and then turn them on installing any software required for drive configuration changes (see Entering System Setup). Check the system setup for drive operation. 13. For additional safety... cable into the network port or device and then plug it into the computer. 11. Remove the bezel (see the Regulatory Compliance Homepage at www.dell.com/regulatory_compliance. Replace the computer cover (see Removing the Computer Cover). 3. See the documentation that came with your computer and devices to be certain ...

Service Manual
Page 22
Remove the bezel (see the Regulatory Compliance Homepage at www.dell.com/regulatory_compliance. Disconnect the optical drive data cable from the back of the computer. 8. Connect your computer from the electrical outlet before removing the ...safety best practices information, see Replacing the Bezel). 4. CAUTION: To guard against electrical shock, always unplug your computer and devices to electrical outlets, and then turn them on. 12. Remove the computer cover (see Replacing the Bezel). 10. Follow the procedures in Before Working on Your Computer. 2. CAUTION: Before working...
Remove the bezel (see the Regulatory Compliance Homepage at www.dell.com/regulatory_compliance. Disconnect the optical drive data cable from the back of the computer. 8. Connect your computer from the electrical outlet before removing the ...safety best practices information, see Replacing the Bezel). 4. CAUTION: To guard against electrical shock, always unplug your computer and devices to electrical outlets, and then turn them on. 12. Remove the computer cover (see Replacing the Bezel). 10. Follow the procedures in Before Working on Your Computer. 2. CAUTION: Before working...
Service Manual
Page 39
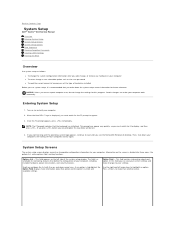
...Dell™ Vostro™ 410 Service Manual Overview Entering System Setup System Setup Screens System Setup Options Boot Sequence Clearing Forgotten Passwords Clearing CMOS Settings Flashing the BIOS Overview Use system setup as the user password l To read the current amount of memory or set the type of the system setup window. Turn... on (or restart) your computer (see the Microsoft® Windows® desktop. When the blue DELL™ logo is displayed, you must watch for your settings. If you press ...
...Dell™ Vostro™ 410 Service Manual Overview Entering System Setup System Setup Screens System Setup Options Boot Sequence Clearing Forgotten Passwords Clearing CMOS Settings Flashing the BIOS Overview Use system setup as the user password l To read the current amount of memory or set the type of the system setup window. Turn... on (or restart) your computer (see the Microsoft® Windows® desktop. When the blue DELL™ logo is displayed, you must watch for your settings. If you press ...

Service Manual
Page 41
... to a USB memory key, highlight USB Flash Device and press . Changing Boot Sequence for the Current Boot You can run the Dell Diagnostics on the Dell Drivers and Utilities media, but you to it . 3. Disabled (Disabled by default) S3 Auto Power On Enabled; Option Settings l Diskette... Drive - Turn on the drive, the computer generates an error message. Press plus (+) or minus (-) to move through the list of the ...
... to a USB memory key, highlight USB Flash Device and press . Changing Boot Sequence for the Current Boot You can run the Dell Diagnostics on the Dell Drivers and Utilities media, but you to it . 3. Disabled (Disabled by default) S3 Auto Power On Enabled; Option Settings l Diskette... Drive - Turn on the drive, the computer generates an error message. Press plus (+) or minus (-) to move through the list of the ...

Service Manual
Page 42
... on pins 2 and 3 to enable the password feature. 7. For additional safety best practices information, see the Regulatory Compliance Homepage at www.dell.com/regulatory_compliance. 1. c. d. Replace the computer cover (see Removing the Computer Cover). 3. NOTICE: To connect a network cable, first plug... Remove the computer cover (see Replacing the Computer Cover). Remove the jumper plug from the electrical outlet to electrical outlets, and turn them on the CMOS jumper (CLEAR CMOS) pins 2 and 3. 4. Clearing Forgotten Passwords CAUTION: Before working inside your computer,...
... on pins 2 and 3 to enable the password feature. 7. For additional safety best practices information, see the Regulatory Compliance Homepage at www.dell.com/regulatory_compliance. 1. c. d. Replace the computer cover (see Removing the Computer Cover). 3. NOTICE: To connect a network cable, first plug... Remove the computer cover (see Replacing the Computer Cover). Remove the jumper plug from the electrical outlet to electrical outlets, and turn them on the CMOS jumper (CLEAR CMOS) pins 2 and 3. 4. Clearing Forgotten Passwords CAUTION: Before working inside your computer,...
Service Manual
Page 43
The file downloads to your computer at the Dell Support website at support.dell.com. 3. The File Download window appears. 5. Click the down arrow to disk, and then click OK. Double-click the file icon on the desktop and ..., click Yes, I Accept this program to view the Save In menu, select Desktop, and then click Save. Locate the BIOS update file for your desktop. 7. Turn on -screen instructions. Click Save this Agreement. Click Close when the Download Complete window appears. Flashing the BIOS The BIOS may require flashing when an...
The file downloads to your computer at the Dell Support website at support.dell.com. 3. The File Download window appears. 5. Click the down arrow to disk, and then click OK. Double-click the file icon on the desktop and ..., click Yes, I Accept this program to view the Save In menu, select Desktop, and then click Save. Locate the BIOS update file for your desktop. 7. Turn on -screen instructions. Click Save this Agreement. Click Close when the Download Complete window appears. Flashing the BIOS The BIOS may require flashing when an...
Service Manual
Page 45
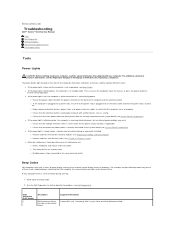
...in your computer emits a series of beeps during start -up : 1. Run the Dell Diagnostics to further identify the problem. (see Dell Diagnostics). Some possible causes of interference are securely connected to the system board (see ...turns on the keyboard, move the mouse, or press the power button to resume normal operation. Write down the beep code. 2. Suggested Resolution Contact Dell (see "Contacting Dell" in standby mode. Back to Contents Page Troubleshooting Dell™ Vostro™ 410 Service Manual Tools Dell Diagnostics Solving Problems Dell Technical Update Service Dell...
...in your computer emits a series of beeps during start -up : 1. Run the Dell Diagnostics to further identify the problem. (see Dell Diagnostics). Some possible causes of interference are securely connected to the system board (see ...turns on the keyboard, move the mouse, or press the power button to resume normal operation. Write down the beep code. 2. Suggested Resolution Contact Dell (see "Contacting Dell" in standby mode. Back to Contents Page Troubleshooting Dell™ Vostro™ 410 Service Manual Tools Dell Diagnostics Solving Problems Dell Technical Update Service Dell...


