Setup and Quick Reference Guide
Page 2
.... disclaims any references in trademarks and trade names other than its own. Information in this text: Dell, Vostro, DellConnect, and the DELL logo are not applicable. Trademarks used in this document to either the entities claiming the marks and names...NOTICE: A NOTICE indicates either trademarks or registered trademarks of Microsoft Corporation in this document to refer to Microsoft® Windows® operating systems are trademarks of Dell Inc. All rights reserved. CAUTION: A CAUTION indicates a potential for property damage, personal injury, or death. ...
.... disclaims any references in trademarks and trade names other than its own. Information in this text: Dell, Vostro, DellConnect, and the DELL logo are not applicable. Trademarks used in this document to either the entities claiming the marks and names...NOTICE: A NOTICE indicates either trademarks or registered trademarks of Microsoft Corporation in this document to refer to Microsoft® Windows® operating systems are trademarks of Dell Inc. All rights reserved. CAUTION: A CAUTION indicates a potential for property damage, personal injury, or death. ...

Setup and Quick Reference Guide
Page 3
Contents 1 About Your Computer 7 Front View 7 Back View 8 Back Panel Connectors 9 2 Setting Up Your Computer 11 Quick Setup 11 Installing Your Computer in an Enclosure 16 Connecting to the Internet 18 Setting Up Your Internet Connection 18 Transferring Information to a New Computer 19 Microsoft® Windows® XP Operating System . . . 19 Microsoft Windows Vista 23 3 Specifications 25 4 Troubleshooting 33 Tools 33 Power Lights 33 Beep Codes 33 Contents 3
Contents 1 About Your Computer 7 Front View 7 Back View 8 Back Panel Connectors 9 2 Setting Up Your Computer 11 Quick Setup 11 Installing Your Computer in an Enclosure 16 Connecting to the Internet 18 Setting Up Your Internet Connection 18 Transferring Information to a New Computer 19 Microsoft® Windows® XP Operating System . . . 19 Microsoft Windows Vista 23 3 Specifications 25 4 Troubleshooting 33 Tools 33 Power Lights 33 Beep Codes 33 Contents 3
Setup and Quick Reference Guide
Page 4
... 48 5 Reinstalling Software 51 Drivers 51 Identifying Drivers 51 Reinstalling Drivers and Utilities 52 Restoring Your Operating System 54 Using Microsoft Windows System Restore . . . . . 54 Using Dell™ PC Restore and Dell Factory Image Restore 56 Using the Operating System Media 59 6 Finding Information 61 7 Getting Help 63 Obtaining Assistance 63 Technical Support...
... 48 5 Reinstalling Software 51 Drivers 51 Identifying Drivers 51 Reinstalling Drivers and Utilities 52 Restoring Your Operating System 54 Using Microsoft Windows System Restore . . . . . 54 Using Dell™ PC Restore and Dell Factory Image Restore 56 Using the Operating System Media 59 6 Finding Information 61 7 Getting Help 63 Obtaining Assistance 63 Technical Support...
Setup and Quick Reference Guide
Page 18
.... NOTE: If you do not have an ISP, consult the Connect to the Internet wizard. If you cannot connect to the Internet, see the Dell Technology Guide. If you want to set up an Internet connection with a desktop shortcut provided by country. Connecting to the Internet NOTE: ISPs and... 1 Save and close any open files, and exit any open programs. 2 Click Start→ Internet Explorer→ Connect to the Internet. 3 In the next window, click the appropriate option: • If you do not have an ISP, click Choose from a list of Internet service providers (ISPs). • If you have...
.... NOTE: If you do not have an ISP, consult the Connect to the Internet wizard. If you cannot connect to the Internet, see the Dell Technology Guide. If you want to set up an Internet connection with a desktop shortcut provided by country. Connecting to the Internet NOTE: ISPs and... 1 Save and close any open files, and exit any open programs. 2 Click Start→ Internet Explorer→ Connect to the Internet. 3 In the next window, click the appropriate option: • If you do not have an ISP, click Choose from a list of Internet service providers (ISPs). • If you have...

Setup and Quick Reference Guide
Page 19
... Start button → Control Panel 3 Under Network and Internet, click Connect to the Internet. 4 In the Connect to the Internet window, click either Broadband (PPPoE) or Dial-up, depending on the screen to connect: • Choose Broadband if you do not know which...to step 5. Otherwise, follow the instructions on how you want to complete the setup. Transferring Information to a New Computer Microsoft® Windows® XP Operating System Windows XP provides the Files and Settings Transfer Wizard to move data from a source computer to complete the setup. NOTE: If you do you...
... Start button → Control Panel 3 Under Network and Internet, click Connect to the Internet. 4 In the Connect to the Internet window, click either Broadband (PPPoE) or Dial-up, depending on the screen to connect: • Choose Broadband if you do not know which...to step 5. Otherwise, follow the instructions on how you want to complete the setup. Transferring Information to a New Computer Microsoft® Windows® XP Operating System Windows XP provides the Files and Settings Transfer Wizard to move data from a source computer to complete the setup. NOTE: If you do you...

Setup and Quick Reference Guide
Page 20
... the Operating System Media NOTE: This procedure requires the Operating System media. Do not click Next at this ? For transferring information to Microsoft Windows XP screen, click Perform additional tasks. 3 Under What do ?, click Transfer files and settings→ Next. 4 On the Which computer is...certain computers. screen, click I /O) ports of the two computers. To copy data from the old computer: 1 On the old computer, insert the Windows XP Operating System media. 2 On the Welcome to a new computer, you prefer. 20 Setting Up Your Computer screen, click New Computer→ Next....
... the Operating System Media NOTE: This procedure requires the Operating System media. Do not click Next at this ? For transferring information to Microsoft Windows XP screen, click Perform additional tasks. 3 Under What do ?, click Transfer files and settings→ Next. 4 On the Which computer is...certain computers. screen, click I /O) ports of the two computers. To copy data from the old computer: 1 On the old computer, insert the Windows XP Operating System media. 2 On the Welcome to a new computer, you prefer. 20 Setting Up Your Computer screen, click New Computer→ Next....

Setup and Quick Reference Guide
Page 21
... to the new computer: 1 On the Now go to your settings and files and click Next. To create a wizard disk, use your new computer with Windows XP and perform the following drive→ Next. 5 Insert the removable media, such as a writable CD, and click OK. 6 When the disk creation ... System Media To run the Files and Settings Transfer Wizard without the Operating System media, you must create a wizard disk that will allow you have a Windows XP CD? screen, click I want to create a Wizard Disk in the following steps: 1 Open the Files and Settings Transfer Wizard: click Start→ All...
... to the new computer: 1 On the Now go to your settings and files and click Next. To create a wizard disk, use your new computer with Windows XP and perform the following drive→ Next. 5 Insert the removable media, such as a writable CD, and click OK. 6 When the disk creation ... System Media To run the Files and Settings Transfer Wizard without the Operating System media, you must create a wizard disk that will allow you have a Windows XP CD? screen, click I want to create a Wizard Disk in the following steps: 1 Open the Files and Settings Transfer Wizard: click Start→ All...

Setup and Quick Reference Guide
Page 22
...the method you chose for document #154781 (What Are The Different Methods To Transfer Files From My Old Computer To My New Dell™ Computer Using the Microsoft® Windows® XP Operating System?). The wizard reads the collected files and settings and applies them to your settings and files and ... from the old computer: 1 On the old computer, insert the wizard disk, and click Start→ Run. 2 In the Open field on the Run window, browse to the path for fastwiz (on the appropriate removable media) and click OK. 3 On the Files and Settings Transfer Wizard welcome screen, click Next...
...the method you chose for document #154781 (What Are The Different Methods To Transfer Files From My Old Computer To My New Dell™ Computer Using the Microsoft® Windows® XP Operating System?). The wizard reads the collected files and settings and applies them to your settings and files and ... from the old computer: 1 On the old computer, insert the wizard disk, and click Start→ Run. 2 In the Open field on the Run window, browse to the path for fastwiz (on the appropriate removable media) and click OK. 3 On the Files and Settings Transfer Wizard welcome screen, click Next...

Setup and Quick Reference Guide
Page 23
Setting Up Your Computer 23 Follow the instructions provided on the screen by the Windows Easy Transfer wizard. Microsoft Windows Vista® 1 Click the Windows Vista Start button , and then click Transfer files and settings→ Start Windows Easy Transfer. 2 In the User Account Control dialog box, click Continue. 3 Click Start a new transfer or Continue a transfer in progress.
Setting Up Your Computer 23 Follow the instructions provided on the screen by the Windows Easy Transfer wizard. Microsoft Windows Vista® 1 Click the Windows Vista Start button , and then click Transfer files and settings→ Start Windows Easy Transfer. 2 In the User Account Control dialog box, click Continue. 3 Click Start a new transfer or Continue a transfer in progress.
Setup and Quick Reference Guide
Page 38
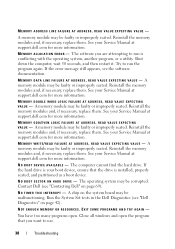
... module may be faulty or improperly seated. A memory module may be malfunctioning. See your Service Manual at support.dell.com for more information. Reinstall the memory modules and, if necessary, replace them . Close all windows and open . A memory module may be faulty or improperly seated. Reinstall the memory modules and, if necessary...
... module may be faulty or improperly seated. A memory module may be malfunctioning. See your Service Manual at support.dell.com for more information. Reinstall the memory modules and, if necessary, replace them . Close all windows and open . A memory module may be faulty or improperly seated. Reinstall the memory modules and, if necessary...

Setup and Quick Reference Guide
Page 39
...E D . The optional ROM has failed. The operating system cannot find a specific track on page 42). Reinstall the hard drive (see "Dell Diagnostics" on the hard drive. Windows XP: 1 Click Start→ Control Panel→ Add or Remove Programs→ Programs and Features. 2 Select the program you want to... charge the battery. TI M E- Windows Vista: 1 Click the Windows Vista Start button → Control Panel→ Programs→ Programs and Features. 2 Select the program you want to restore...
...E D . The optional ROM has failed. The operating system cannot find a specific track on page 42). Reinstall the hard drive (see "Dell Diagnostics" on the hard drive. Windows XP: 1 Click Start→ Control Panel→ Add or Remove Programs→ Programs and Features. 2 Select the program you want to... charge the battery. TI M E- Windows Vista: 1 Click the Windows Vista Start button → Control Panel→ Programs→ Programs and Features. 2 Select the program you want to restore...
Setup and Quick Reference Guide
Page 42
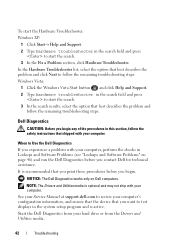
... the system setup program and is active. Windows Vista: 1 Click the Windows Vista Start button , and click Help and Support. 2 Type hardware troubleshooter in the search field and press to Use the Dell Diagnostics If you contact Dell for technical assistance. See your Service Manual at support.dell.com to review your computer. NOTICE: The...
... the system setup program and is active. Windows Vista: 1 Click the Windows Vista Start button , and click Help and Support. 2 Type hardware troubleshooter in the search field and press to Use the Dell Diagnostics If you contact Dell for technical assistance. See your Service Manual at support.dell.com to review your computer. NOTICE: The...
Setup and Quick Reference Guide
Page 43
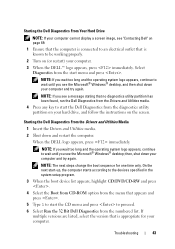
...and Utilities media. 4 Press any key to start the Dell Diagnostics from the numbered list. Troubleshooting 43 NOTE: If you wait too long and the operating system logo appears, continue to wait until you see the Microsoft® Windows® desktop, and then shut down and restart the computer... start the CD menu and press to wait until you see the Microsoft® Windows® desktop; Starting the Dell Diagnostics From Your Hard Drive NOTE: If your computer cannot display a screen image, see "Contacting Dell" on page 69. 1 Ensure that the computer is connected to an electrical outlet...
...and Utilities media. 4 Press any key to start the Dell Diagnostics from the numbered list. Troubleshooting 43 NOTE: If you wait too long and the operating system logo appears, continue to wait until you see the Microsoft® Windows® desktop, and then shut down and restart the computer... start the CD menu and press to wait until you see the Microsoft® Windows® desktop; Starting the Dell Diagnostics From Your Hard Drive NOTE: If your computer cannot display a screen image, see "Contacting Dell" on page 69. 1 Ensure that the computer is connected to an electrical outlet...
Setup and Quick Reference Guide
Page 44
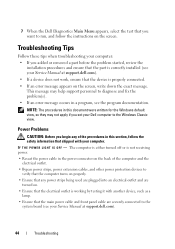
... verify that the computer turns on properly. • Ensure that any of the procedures in this document were written for the Windows default view, so they may help support personnel to diagnose and fix the problem(s). • If an error message occurs in... an error message appears on the screen. NOTE: The procedures in a program, see the program documentation. I F T H E P O W E R L I G H T I S O F F - 7 When the Dell Diagnostics Main Menu appears, select the test that you added or removed a part before the problem started, review the installation procedures and ensure that the...
... verify that the computer turns on properly. • Ensure that any of the procedures in this document were written for the Windows default view, so they may help support personnel to diagnose and fix the problem(s). • If an error message occurs in... an error message appears on the screen. NOTE: The procedures in a program, see the program documentation. I F T H E P O W E R L I G H T I S O F F - 7 When the Dell Diagnostics Main Menu appears, select the test that you added or removed a part before the problem started, review the installation procedures and ensure that the...
Setup and Quick Reference Guide
Page 47
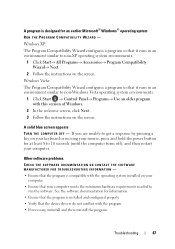
... 2 Follow the instructions on your keyboard or moving your mouse, press and hold the power button for an earlier Microsoft® Windows® operating system RUN THE PROGRAM COMPATIBILITY WIZARD - See the software documentation for information. • Ensure that the program is ... an older program with the operating system installed on the screen. Troubleshooting 47 A solid blue screen appears TURN THE COMPUTER OFF - Windows Vista: The Program Compatibility Wizard configures a program so that your computer meets the minimum hardware requirements needed to run the software. A...
... 2 Follow the instructions on your keyboard or moving your mouse, press and hold the power button for an earlier Microsoft® Windows® operating system RUN THE PROGRAM COMPATIBILITY WIZARD - See the software documentation for information. • Ensure that the program is ... an older program with the operating system installed on the screen. Troubleshooting 47 A solid blue screen appears TURN THE COMPUTER OFF - Windows Vista: The Program Compatibility Wizard configures a program so that your computer meets the minimum hardware requirements needed to run the software. A...
Setup and Quick Reference Guide
Page 51
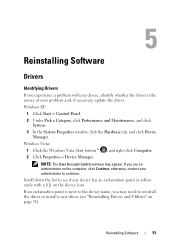
...has an exclamation point (a yellow circle with a [!]) on the device icon. Windows Vista: 1 Click the Windows Vista Start button™ , and right-click Computer. 2 Click Properties→ Device Manager. Reinstalling Software 51 Windows XP: 1 Click Start→ Control Panel. 2 Under Pick a Category,... click Performance and Maintenance, and click System. 3 In the System Properties window, click the Hardware tab, and click Device Manager. If you...
...has an exclamation point (a yellow circle with a [!]) on the device icon. Windows Vista: 1 Click the Windows Vista Start button™ , and right-click Computer. 2 Click Properties→ Device Manager. Reinstalling Software 51 Windows XP: 1 Click Start→ Control Panel. 2 Under Pick a Category,... click Performance and Maintenance, and click System. 3 In the System Properties window, click the Hardware tab, and click Device Manager. If you...
Setup and Quick Reference Guide
Page 52
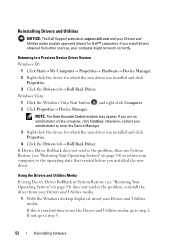
... your computer might not work correctly. Windows Vista: 1 Click the Windows Vista Start button , and right-click Computer. 2 Click Properties→ Device Manager. Reinstalling Drivers and Utilities NOTICE: The Dell Support website at support.dell.com and your Drivers and Utilities media...you install drivers obtained from your Drivers and Utilities media. 1 With the Windows desktop displayed, insert your Drivers and Utilities media. otherwise, contact your computer to a Previous Device Driver Version Windows XP: 1 Click Start→ My Computer→ Properties→ Hardware&#...
... your computer might not work correctly. Windows Vista: 1 Click the Windows Vista Start button , and right-click Computer. 2 Click Properties→ Device Manager. Reinstalling Drivers and Utilities NOTICE: The Dell Support website at support.dell.com and your Drivers and Utilities media...you install drivers obtained from your Drivers and Utilities media. 1 With the Windows desktop displayed, insert your Drivers and Utilities media. otherwise, contact your computer to a Previous Device Driver Version Windows XP: 1 Click Start→ My Computer→ Properties→ Hardware&#...
Setup and Quick Reference Guide
Page 53
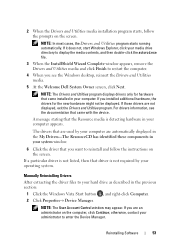
..., click your computer appears. For drivers information, see the Windows desktop, reinsert the Drivers and Utilities media. 5 At the Welcome Dell System Owner screen, click Next. Manually Reinstalling Drivers After extracting the driver files to enter the Device Manager. If you see the documentation that came ...
..., click your computer appears. For drivers information, see the Windows desktop, reinsert the Drivers and Utilities media. 5 At the Welcome Dell System Owner screen, click Next. Manually Reinstalling Drivers After extracting the driver files to enter the Device Manager. If you see the documentation that came ...
Setup and Quick Reference Guide
Page 54
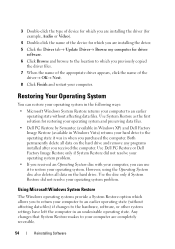
...location to which allows you to return your computer to an earlier operating state (without affecting data files. Using Microsoft Windows System Restore The Windows operating systems provide a System Restore option which you previously copied the driver files. 7 When the name of the appropriate...8594; Browse my computer for restoring your operating system and preserving data files. • Dell PC Restore by Symantec (available in Windows XP) and Dell Factory Image Restore (available in Windows Vista) returns your hard drive to an earlier operating state without affecting data files) if ...
...location to which allows you to return your computer to an earlier operating state (without affecting data files. Using Microsoft Windows System Restore The Windows operating systems provide a System Restore option which you previously copied the driver files. 7 When the name of the appropriate...8594; Browse my computer for restoring your operating system and preserving data files. • Dell PC Restore by Symantec (available in Windows XP) and Dell Factory Image Restore (available in Windows Vista) returns your hard drive to an earlier operating state without affecting data files) if ...

Setup and Quick Reference Guide
Page 55
...Next and follow the remaining on-screen prompts. NOTE: The User Account Control window may undo the last system restore. Reinstalling Software 55 NOTICE: Make regular backups of your Dell™ computer to the Windows Classic view. NOTE: Set your data files. System Restore does not monitor ...your Dell™ computer to the Windows Classic view. NOTE: The procedures in this document were written for the Windows default view, so they may...
...Next and follow the remaining on-screen prompts. NOTE: The User Account Control window may undo the last system restore. Reinstalling Software 55 NOTICE: Make regular backups of your Dell™ computer to the Windows Classic view. NOTE: Set your data files. System Restore does not monitor ...your Dell™ computer to the Windows Classic view. NOTE: The procedures in this document were written for the Windows default view, so they may...


