User Guide
Page 34
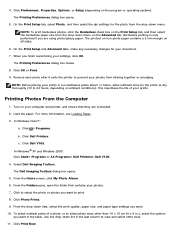
... check box on ambient conditions). Click OK or Print. 9. Turn on all sides. 6. In Windows® XP and Windows 2000: Click Start® Programs or All Programs® Dell Printers® Dell V105. 4. Click Photo Prints. 9. When you want . 10. Click Dell Printers. Click Dell V105. The Dell Imaging Toolbox dialog box opens. 5. Click Print Now. The Printing Preferences dialog box opens...
... check box on ambient conditions). Click OK or Print. 9. Turn on all sides. 6. In Windows® XP and Windows 2000: Click Start® Programs or All Programs® Dell Printers® Dell V105. 4. Click Photo Prints. 9. When you want . 10. Click Dell Printers. Click Dell V105. The Dell Imaging Toolbox dialog box opens. 5. Click Print Now. The Printing Preferences dialog box opens...
User Guide
Page 35
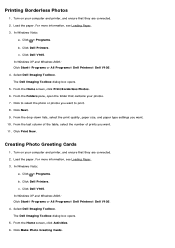
.... 10. From the Home screen, click Activities. 6. Turn on your photos. 7. For more information, see Loading Paper. 3. Click Dell Printers. c. Click Dell V105. Select Dell Imaging Toolbox. From the Home screen, click Print Borderless Photos. 6. Turn on your computer and printer, and ensure that they are connected. 2. Load the paper. In Windows Vista: a. Click Dell Printers. In Windows XP and Windows 2000...
.... 10. From the Home screen, click Activities. 6. Turn on your photos. 7. For more information, see Loading Paper. 3. Click Dell Printers. c. Click Dell V105. Select Dell Imaging Toolbox. From the Home screen, click Print Borderless Photos. 6. Turn on your computer and printer, and ensure that they are connected. 2. Load the paper. In Windows Vista: a. Click Dell Printers. In Windows XP and Windows 2000...
User Guide
Page 44
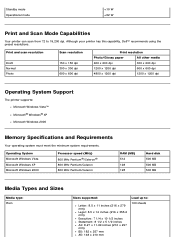
Standby mode Operational mode
Standby mode Operational mode
User Guide
Page 48
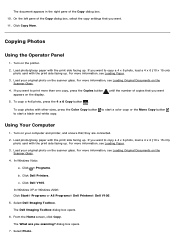
... The What are connected. 2. c. Load your original photo on the display. In Windows XP or Windows 2000: Click Start® Programs or All Programs® Dell Printers® Dell V105. 5. For more than one copy, press the Copies button appears on the scanner glass. Turn on your computer ...and printer, and ensure that they are you want to copy a 4 x 6 photo, load a 4 x 6 (10 x 15 cm...
... The What are connected. 2. c. Load your original photo on the display. In Windows XP or Windows 2000: Click Start® Programs or All Programs® Dell Printers® Dell V105. 5. For more than one copy, press the Copies button appears on the scanner glass. Turn on your computer ...and printer, and ensure that they are you want to copy a 4 x 6 photo, load a 4 x 6 (10 x 15 cm...
User Guide
Page 57
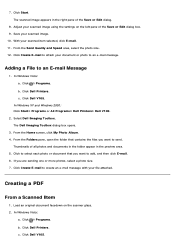
...to add, and then click E-mail. 6. In Windows XP and Windows 2000: Click Start® Programs or All Programs® Dell Printers® Dell V105. 2. In Windows Vista: a. Save your document or photo to attach your scanned image. 10. Click Dell Printers. c. The Dell Imaging Toolbox dialog box opens. 3. Creating a ...are sending one or more photos, select a photo size. 7. Load an original document facedown on the left pane of the Save or Edit dialog. 8. Click ® Programs. b. Click Dell V105. c. From the Home screen, click My Photo Album. 4. In Windows Vista: ...
...to add, and then click E-mail. 6. In Windows XP and Windows 2000: Click Start® Programs or All Programs® Dell Printers® Dell V105. 2. In Windows Vista: a. Save your document or photo to attach your scanned image. 10. Click Dell Printers. c. The Dell Imaging Toolbox dialog box opens. 3. Creating a ...are sending one or more photos, select a photo size. 7. Load an original document facedown on the left pane of the Save or Edit dialog. 8. Click ® Programs. b. Click Dell V105. c. From the Home screen, click My Photo Album. 4. In Windows Vista: ...
User Guide
Page 58
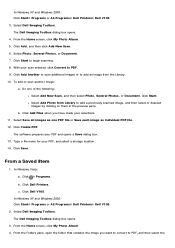
...Dell Imaging Toolbox. Do one PDF file or Save each image as one of the following: Select Add New Scan, and then select Photo, Several Photos, or Document. Click Add Files when you want to convert to begin scanning. 8. From a Saved Item 1. Click Dell V105. From the Home screen, click My Photo Album. 4. The Dell...The Dell Imaging Toolbox dialog box opens. 3. In Windows XP and Windows 2000: Click Start® Programs or All Programs® Dell Printers® Dell V105. 3. Click Save. Click Dell Printers. Select Add Photo from Library to add an image from the Library. 10....
...Dell Imaging Toolbox. Do one PDF file or Save each image as one of the following: Select Add New Scan, and then select Photo, Several Photos, or Document. Click Add Files when you want to convert to begin scanning. 8. From a Saved Item 1. Click Dell V105. From the Home screen, click My Photo Album. 4. The Dell...The Dell Imaging Toolbox dialog box opens. 3. In Windows XP and Windows 2000: Click Start® Programs or All Programs® Dell Printers® Dell V105. 3. Click Save. Click Dell Printers. Select Add Photo from Library to add an image from the Library. 10....
User Guide
Page 59
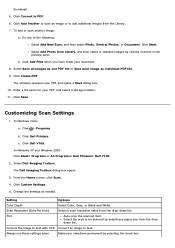
.... 9. Do one PDF file or Save...Windows XP and Windows 2000: Click Start® Programs or All Programs® Dell Printers® Dell V105. 2. Click Start. c. Click Create PDF. Select the area to text. Click Dell V105. Select Dell... Imaging Toolbox. Click Custom Settings. 5. Always use these settings when Make your PDF, and select a storage location. 11. thumbnail. 5. Click Add Files when you have made your PDF and opens a Save dialog box. 10...
.... 9. Do one PDF file or Save...Windows XP and Windows 2000: Click Start® Programs or All Programs® Dell Printers® Dell V105. 2. Click Start. c. Click Create PDF. Select the area to text. Click Dell V105. Select Dell... Imaging Toolbox. Click Custom Settings. 5. Always use these settings when Make your PDF, and select a storage location. 11. thumbnail. 5. Click Add Files when you have made your PDF and opens a Save dialog box. 10...


