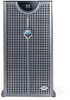
Installing the SCSI Backplane Daughter Card
Page 29
RAID RAID RAID 2 SCSI A SCSI B - SCSI 2 SCSI SCSI 1 1 SCSI B 8 Installation and Troubleshooting Guide SCSI A Replacing the Front Fan Assembly SCSI 5-3 RAID 2 SCSI A SCSI B 5-2. 6 Installation and Troubleshooting Guide 5-1 Removing the Front Fan Assembly 7 SCSI SCSI 5-2 - RAID SCSI A RAID SCSI 2 SCSI B -
Microprocessor Upgrade Installation
Page 5
... retention clip(s) • A VRM, if applicable Your upgrade kit may also include a cooling fan. The following items are contained in a pin-grid array (PGA) package that is installed in a ZIF socket on the Dell Support website at support.dell.com, and upgrade the BIOS if necessary. Adding or Replacing a Microprocessor NOTICE: The secondary...
Microprocessor Upgrade Installation
Page 6
...necessary to bend any of the pins when removing the microprocessor. NOTICE: Be careful not to maintain proper thermal conditions. NOTE: If a cooling fan is ready for information on removing the heat sink. 5 Swing the socket release lever upward to the fully open position so that the socket...sink. NOTICE: Never remove the heat sink from a microprocessor unless you can remove the heat sink without removing the fan. www.dell.com | support.dell.com 4 If you can remove the fan to provide easier access to bend any of the pins on the microprocessor appear bent, see "Getting Help" in ...
Microprocessor Upgrade Installation
Page 8
...points toward the triangular mark on the system board, if applicable. 10 Orient the heat-sink retention clip as shown in your system. www.dell.com | support.dell.com 9 Install the heat sink. • If the heat sink provided has a protective cover on the underside of the heat sink,... remove and discard the cover to provide proper thermal conditions. For information on installing a cooling fan, see Figure 1-2). NOTICE: To avoid possible damage to ensure ...
Installing or Replacing an ERA/O Card
Page 4
c Swing the fan assembly up and out of the way. www.dell.com | support.dell.com 4 Remove the front fan assembly: a Disconnect the front fan assembly power cable from the front fan connector on the SCSI backplane board. See Figure 1-1. Figure 1-1. Removing the Front Fan Assembly release latch 1-2 Installing or Replacing an ERA/O Card b Release the fan assembly by pressing the release latch.
Installing or Replacing an ERA/O Card
Page 8
www.dell.com | support.dell.com 8 Reinstall the expansion-card guide: a Holding the expansion-card guide at a 45-degree angle, insert the two tabs at the ends of the expansion-... slots on the system board. Figure 1-5. NOTE: SCSI cables connected from an expansion card to the SCSI backplane board should be routed under the front fan assembly.
Installing or Replacing an ERA/O Card
Page 9
...the latest version of the connector. 12 Connect a network cable to the front fan connector on the documentation CD for the location of the ERA/O firmware, available at the Dell Support website at support.dell.com. Installing or Replacing an ERA/O Card 1-7 See Figure 1-6 for information... about updating the firmware. Figure 1-6. See "Replacing the Cover" in the hinge bracket and swing the fan assembly down until the release lever ...
Installing the 1 x 2 SCSI Backplane
Page 42
1 x 2 1 : 2 1x2 3 & 4 & 1 Assembly 2 3 4 & CD-ROM / CD-ROM / & Removing the Bezel Removing the Cover Removing the Front Fan Installing Drives 5-1 5-2 1 x 2 SCSI