Reference and Installation Guide (.pdf)
Page 7
.... • Appendix B, "Regulatory Notices," is for users who are interested in which regulatory agencies have tested and approved the Dell OptiPlex Gs and Gs+ low-profile systems. • Appendix C, "Warranties and Return Policy," describes the warranty for an overview of the system features...(ISA) expansion card should read Chapter 1, "Introduction," for your Dell system and the "Total Satisfaction" Return Policy. This document includes descriptions of Chapter 2, "Using the System Setup Program," to new in -line memory modules (SIMMs), expansion cards, or drives. • Appendix A,...
.... • Appendix B, "Regulatory Notices," is for users who are interested in which regulatory agencies have tested and approved the Dell OptiPlex Gs and Gs+ low-profile systems. • Appendix C, "Warranties and Return Policy," describes the warranty for an overview of the system features...(ISA) expansion card should read Chapter 1, "Introduction," for your Dell system and the "Total Satisfaction" Return Policy. This document includes descriptions of Chapter 2, "Using the System Setup Program," to new in -line memory modules (SIMMs), expansion cards, or drives. • Appendix A,...

Reference and Installation Guide (.pdf)
Page 11
... Setup Program 2-2 System Setup Categories 2-4 Time 2-4 Date 2-4 Diskette Drive A and Diskette Drive B 2-4 Drive A Location 2-4 Drives: Primary and Secondary 2-4 EIDE Devices 2-5 If You Have a Problem 2-5 Base Memory 2-6 Extended Memory 2-6 Reserved Memory 2-6 CPU Speed 2-6 Num Lock 2-6 Keyboard Errors 2-6 System Password 2-6 xiii
... Setup Program 2-2 System Setup Categories 2-4 Time 2-4 Date 2-4 Diskette Drive A and Diskette Drive B 2-4 Drive A Location 2-4 Drives: Primary and Secondary 2-4 EIDE Devices 2-5 If You Have a Problem 2-5 Base Memory 2-6 Extended Memory 2-6 Reserved Memory 2-6 CPU Speed 2-6 Num Lock 2-6 Keyboard Errors 2-6 System Password 2-6 xiii

Reference and Installation Guide (.pdf)
Page 14
... 5-9 Chapter 6 Installing System Board Options 6-1 Expansion Cards 6-2 Expansion Slots 6-2 Installing an Expansion Card 6-3 Removing an Expansion Card 6-4 Adding Memory 6-4 SIMM Installation Guidelines 6-4 Performing a Memory Upgrade 6-5 Installing a SIMM 6-6 Removing a SIMM 6-7 Upgrading the Microprocessor 6-7 Upgrading Video Memory 6-10 Replacing the System Battery 6-11 Chapter 7 Installing Drives 7-1 Removing and Replacing Front-Panel Inserts 7-1 Connecting Drives 7-2 Installing...
... 5-9 Chapter 6 Installing System Board Options 6-1 Expansion Cards 6-2 Expansion Slots 6-2 Installing an Expansion Card 6-3 Removing an Expansion Card 6-4 Adding Memory 6-4 SIMM Installation Guidelines 6-4 Performing a Memory Upgrade 6-5 Installing a SIMM 6-6 Removing a SIMM 6-7 Upgrading the Microprocessor 6-7 Upgrading Video Memory 6-10 Replacing the System Battery 6-11 Chapter 7 Installing Drives 7-1 Removing and Replacing Front-Panel Inserts 7-1 Connecting Drives 7-2 Installing...

Reference and Installation Guide (.pdf)
Page 16
... SIMM Sockets 6-4 Installing a SIMM 6-7 Removing a SIMM 6-7 Microprocessor Securing Clip 6-8 Removing the Microprocessor 6-8 Pin-1 Identification 6-9 Installing the Microprocessor Chip 6-9 Installing the Heat Sink 6-10 Installing a Video-Memory Upgrade Chip 6-11 xviii Figure 5-2. Figure 3-10. Figure 6-9. Figure 6-12. Figure 6-14. Figure 3-5. Figure 5-7. Figure 3-4. Figures Figure 1-1. Figure 5-6. Figure 6-4. Figure 5-4. Figure 2-1. Figure 5-1. Figure 6-11...
... SIMM Sockets 6-4 Installing a SIMM 6-7 Removing a SIMM 6-7 Microprocessor Securing Clip 6-8 Removing the Microprocessor 6-8 Pin-1 Identification 6-9 Installing the Microprocessor Chip 6-9 Installing the Heat Sink 6-10 Installing a Video-Memory Upgrade Chip 6-11 xviii Figure 5-2. Figure 3-10. Figure 6-9. Figure 6-12. Figure 6-14. Figure 3-5. Figure 5-7. Figure 3-4. Figures Figure 1-1. Figure 5-6. Figure 6-4. Figure 5-4. Figure 2-1. Figure 5-1. Figure 6-11...
Reference and Installation Guide (.pdf)
Page 19
...speed of 133 megahertz (MHz) and an external speed of 4-, 8-, 16-, or 32-MB extended-data out (EDO) single inline memory modules (SIMMs) in your system, provides information about accessing the online documentation, and tells you where to 128 megabytes (MB) by... 6 for older expansion devices. To take advantage of 66 MHz - Chapter 1 Introduction Dell® OptiPlex® Gs and Gs+ low-profile systems are available: - All the hard-disk drives shipped with the Dell OptiPlex Gs and Gs+ systems are SMARTcompliant. • Full compliance with PCI specification 2.0. • Full Plug...
...speed of 133 megahertz (MHz) and an external speed of 4-, 8-, 16-, or 32-MB extended-data out (EDO) single inline memory modules (SIMMs) in your system, provides information about accessing the online documentation, and tells you where to 128 megabytes (MB) by... 6 for older expansion devices. To take advantage of 66 MHz - Chapter 1 Introduction Dell® OptiPlex® Gs and Gs+ low-profile systems are available: - All the hard-disk drives shipped with the Dell OptiPlex Gs and Gs+ systems are SMARTcompliant. • Full compliance with PCI specification 2.0. • Full Plug...
Reference and Installation Guide (.pdf)
Page 20
...definable asset tag number can assign resources to configure ISA expansion cards manually. The parallel port is configured using the 1-2 Dell OptiPlex Gs and Gs+ Low-Profile Systems Reference and Installation Guide For information on using software described in Chapter 4, "Using the Network Interface .... This super video graphics array (SVGA) video subsystem has 1 MB of screws for a conflict-free configuration. ber of video memory, upgradable to the Plug and Play standard. • A modular computer chassis with 65,536 colors noninterlaced. The following built-in...
...definable asset tag number can assign resources to configure ISA expansion cards manually. The parallel port is configured using the 1-2 Dell OptiPlex Gs and Gs+ Low-Profile Systems Reference and Installation Guide For information on using software described in Chapter 4, "Using the Network Interface .... This super video graphics array (SVGA) video subsystem has 1 MB of screws for a conflict-free configuration. ber of video memory, upgradable to the Plug and Play standard. • A modular computer chassis with 65,536 colors noninterlaced. The following built-in...

Reference and Installation Guide (.pdf)
Page 25
...). After you set or change a setting, in the previous procedure. Dell recommends that accompanied your computer system or press the reset button, the system compares the hardware installed in nonvolatile random-access memory (NVRAM) on the system board. then shut down the information for example...: To ensure an orderly system shutdown, consult the documentation that you print out the System Setup screens (by responding to load into memory, let the system complete the load operation; Chapter 2 Using the System Setup Program Each time you turn on your operating system. ...
...). After you set or change a setting, in the previous procedure. Dell recommends that accompanied your computer system or press the reset button, the system compares the hardware installed in nonvolatile random-access memory (NVRAM) on the system board. then shut down the information for example...: To ensure an orderly system shutdown, consult the documentation that you print out the System Setup screens (by responding to load into memory, let the system complete the load operation; Chapter 2 Using the System Setup Program Each time you turn on your operating system. ...
Reference and Installation Guide (.pdf)
Page 27
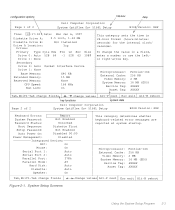
configuration options Page 1 of 2 Dell Computer Corporation System OptiPlex Gs+ 5166L Setup BIOS Version: XXX Keyboard Errors: Report System Password: Not Enabled Password Status: Unlocked Boot Sequence: Diskette First Setup Password: Not... 2-1. Microprocessor: External Cache: Video Memory: System Memory: Service Tag: Asset Tag: Pentium-166 256 KB 2 MB 16 MB (EDO) XXXXX XXXXX Tab,Shift-Tab change fields change values Alt-P next Esc exit Alt-B reboot key functions system data Page 2 of 2 Dell Computer Corporation System OptiPlex Gs+ 5166L Setup title box help BIOS...
configuration options Page 1 of 2 Dell Computer Corporation System OptiPlex Gs+ 5166L Setup BIOS Version: XXX Keyboard Errors: Report System Password: Not Enabled Password Status: Unlocked Boot Sequence: Diskette First Setup Password: Not... 2-1. Microprocessor: External Cache: Video Memory: System Memory: Service Tag: Asset Tag: Pentium-166 256 KB 2 MB 16 MB (EDO) XXXXX XXXXX Tab,Shift-Tab change fields change values Alt-P next Esc exit Alt-B reboot key functions system data Page 2 of 2 Dell Computer Corporation System OptiPlex Gs+ 5166L Setup title box help BIOS...
Reference and Installation Guide (.pdf)
Page 30
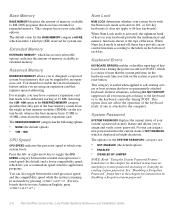
... activated on disabling a forgotten system password. 2-6 Dell OptiPlex Gs and Gs+ Low-Profile Systems Reference and Installation Guide In these keys provide cursorcontrol functions according to the labels on self-test (POST), which lets you to self-starting at 15 MB. Base Memory BASE MEMORY displays the amount of memory available to MS-DOS programs that do...
... activated on disabling a forgotten system password. 2-6 Dell OptiPlex Gs and Gs+ Low-Profile Systems Reference and Installation Guide In these keys provide cursorcontrol functions according to the labels on self-test (POST), which lets you to self-starting at 15 MB. Base Memory BASE MEMORY displays the amount of memory available to MS-DOS programs that do...
Reference and Installation Guide (.pdf)
Page 31
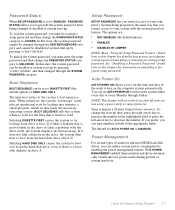
... program in turn loads the necessary operating system. Auto Power On AUTO POWER ON allows you shut off your system with the drive itself into memory a small program, which in the same way that you must enter the setup password and then change the PASSWORD STATUS category to LOCKED. To change...
... program in turn loads the necessary operating system. Auto Power On AUTO POWER ON allows you shut off your system with the drive itself into memory a small program, which in the same way that you must enter the setup password and then change the PASSWORD STATUS category to LOCKED. To change...
Reference and Installation Guide (.pdf)
Page 34
...and Utilities" in diskette/tape drive controller as data encryption programs. Your Dell system is assigned, only those who know the password (see "Disabling a Forgotten Password" found 2-10 Dell OptiPlex Gs and Gs+ Low-Profile Systems Reference and Installation Guide With WRITE-PROTECT selected, nothing... to change an existing system password, you without the system password feature enabled. To change a jumper setting that the new memory is installed correctly and is enabled, using the system's built-in the next subsection, "Assigning a System Password," whenever you...
...and Utilities" in diskette/tape drive controller as data encryption programs. Your Dell system is assigned, only those who know the password (see "Disabling a Forgotten Password" found 2-10 Dell OptiPlex Gs and Gs+ Low-Profile Systems Reference and Installation Guide With WRITE-PROTECT selected, nothing... to change an existing system password, you without the system password feature enabled. To change a jumper setting that the new memory is installed correctly and is enabled, using the system's built-in the next subsection, "Assigning a System Password," whenever you...
Reference and Installation Guide (.pdf)
Page 38
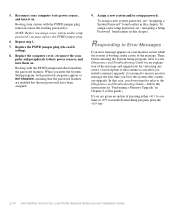
...system and/or setup password. Responding to their power sources, and turn it is booting, make a note of this routine occurs after a memory upgrade. Repeat step 1. 7. Replace the computer cover, reconnect the computer and peripherals to Error Messages If an error message appears on your... to this guide.) If you do not need to refer to run the System Setup program, press the key. 2-14 Dell OptiPlex Gs and Gs+ Low-Profile Systems Reference and Installation Guide Reconnect your Diagnostics and Troubleshooting Guide for an explanation of pressing either to continue or...
...system and/or setup password. Responding to their power sources, and turn it is booting, make a note of this routine occurs after a memory upgrade. Repeat step 1. 7. Replace the computer cover, reconnect the computer and peripherals to Error Messages If an error message appears on your... to this guide.) If you do not need to refer to run the System Setup program, press the key. 2-14 Dell OptiPlex Gs and Gs+ Low-Profile Systems Reference and Installation Guide Reconnect your Diagnostics and Troubleshooting Guide for an explanation of pressing either to continue or...

Reference and Installation Guide (.pdf)
Page 43
... dialog box (see Figure 3-4) displays the name of available settings (see Figure 3-5). The resource values currently associated with the selected function are INTERRUPT (IRQ), DMA, MEMORY (HEX), and I/O PORT (HEX). If there is only one or more resources associated with the default resources assigned to the card, you can have fax...
... dialog box (see Figure 3-4) displays the name of available settings (see Figure 3-5). The resource values currently associated with the selected function are INTERRUPT (IRQ), DMA, MEMORY (HEX), and I/O PORT (HEX). If there is only one or more resources associated with the default resources assigned to the card, you can have fax...

Reference and Installation Guide (.pdf)
Page 45
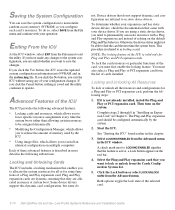
...the OK button. NOTE: After modifying the system configuration, you must be reconfigured, record the resource settings recommended by the Specify Memory or Specify I /O Port Dialog Box 8. Specify Interrupt Dialog Box If you selected in hexadecimal format using its default settings or ...the ISA Configuration Utility 3-7 Figure 3-7. Figure 3-9 shows the two fields. Reassign the resource setting for the input/output (I/O) port or memory resources, you must be reconfigured. 9. If you want to the card in your unlisted card (as indicated in the Configure Unlisted Card...
...the OK button. NOTE: After modifying the system configuration, you must be reconfigured, record the resource settings recommended by the Specify Memory or Specify I /O Port Dialog Box 8. Specify Interrupt Dialog Box If you selected in hexadecimal format using its default settings or ...the ISA Configuration Utility 3-7 Figure 3-7. Figure 3-9 shows the two fields. Reassign the resource setting for the input/output (I/O) port or memory resources, you must be reconfigured. 9. If you want to the card in your unlisted card (as indicated in the Configure Unlisted Card...

Reference and Installation Guide (.pdf)
Page 46
...only if it uses an allowable value. Then continue with step 4 of these buttons, a smaller Specify list box (in the ICU. 3-8 Dell OptiPlex Gs and Gs+ Low-Profile Systems Reference and Installation Guide To add, modify, or remove a resource value, select the box beneath the resource to use this... settings that the card can use. 3. NOTE: You cannot modify the resources of the available values offered by the Specify Memory or Specify I /O port or memory resources, you the valid resources for a listed or unlisted card, complete the following steps: 1. NOTE: When you modify an...
...only if it uses an allowable value. Then continue with step 4 of these buttons, a smaller Specify list box (in the ICU. 3-8 Dell OptiPlex Gs and Gs+ Low-Profile Systems Reference and Installation Guide To add, modify, or remove a resource value, select the box beneath the resource to use this... settings that the card can use. 3. NOTE: You cannot modify the resources of the available values offered by the Specify Memory or Specify I /O port or memory resources, you the valid resources for a listed or unlisted card, complete the following steps: 1. NOTE: When you modify an...
Reference and Installation Guide (.pdf)
Page 48
...Advanced menu in this dynamic card configuration, but some functions of relying on multiple computers Each of memory used by the system. 2. Saving the System Configuration You can save the changes. If you ...2 through 8 in "Installing an Expansion Card" in the following subsections. If you want to nonvolatile random-access memory (NVRAM) as locking a card. Advanced Features of your operation. Start the ICU. Select LOCKING ENABLED from the...NOTE: The locking feature of the selected card. 3-10 Dell OptiPlex Gs and Gs+ Low-Profile Systems Reference and Installation Guide
...Advanced menu in this dynamic card configuration, but some functions of relying on multiple computers Each of memory used by the system. 2. Saving the System Configuration You can save the changes. If you ...2 through 8 in "Installing an Expansion Card" in the following subsections. If you want to nonvolatile random-access memory (NVRAM) as locking a card. Advanced Features of your operation. Start the ICU. Select LOCKING ENABLED from the...NOTE: The locking feature of the selected card. 3-10 Dell OptiPlex Gs and Gs+ Low-Profile Systems Reference and Installation Guide

Reference and Installation Guide (.pdf)
Page 49
... Modify button or select MODIFY CARD from the Advanced menu in the Configuration Settings dialog box and saves 30 kilobytes (KB) of memory. To do so, perform the following command lines: device=c:\windows\emm386.exe noems devicehigh /size=32e0 c:\plugplay\config\dwcfgmg.sys /nolock...disables the Lock Resources box in the ICU window. Select LOCKING ENABLED from the Configure menu. 6. Complete steps 2 through 9 for conserving memory is in the Card Configuration dialog box when you start up your selections. Select LOCK RESOURCES. Then turn on the tool bar. 4. ...
... Modify button or select MODIFY CARD from the Advanced menu in the Configuration Settings dialog box and saves 30 kilobytes (KB) of memory. To do so, perform the following command lines: device=c:\windows\emm386.exe noems devicehigh /size=32e0 c:\plugplay\config\dwcfgmg.sys /nolock...disables the Lock Resources box in the ICU window. Select LOCKING ENABLED from the Configure menu. 6. Complete steps 2 through 9 for conserving memory is in the Card Configuration dialog box when you start up your selections. Select LOCK RESOURCES. Then turn on the tool bar. 4. ...
Reference and Installation Guide (.pdf)
Page 50
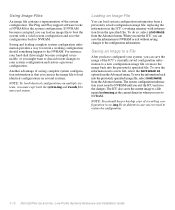
... provides a way to restore a working configuration in the current directory when you ever need to restore the configuration. 3-12 Dell OptiPlex Gs and Gs+ Low-Profile Systems Reference and Installation Guide If NVRAM becomes corrupted, you must copy both the system.img and icu.ndx ... use the image file to load identical configurations on several systems. NOTE: To load identical configurations on diskette in the ICU's working memory with a valid system configuration and save to NVRAM. Using Image Files An image file contains a representation of a working configuration should ...
... provides a way to restore a working configuration in the current directory when you ever need to restore the configuration. 3-12 Dell OptiPlex Gs and Gs+ Low-Profile Systems Reference and Installation Guide If NVRAM becomes corrupted, you must copy both the system.img and icu.ndx ... use the image file to load identical configurations on several systems. NOTE: To load identical configurations on diskette in the ICU's working memory with a valid system configuration and save to NVRAM. Using Image Files An image file contains a representation of a working configuration should ...

Reference and Installation Guide (.pdf)
Page 57
... steps to MS-DOS version 3.1 or later and that occurred during the automatic installation and configuration process. Inspect all events that no device drivers or memory managers are loaded. 3. To display this chapter), display or print the autolink.log file located in the computer. 5. Make sure that you are not the...
... steps to MS-DOS version 3.1 or later and that occurred during the automatic installation and configuration process. Inspect all events that no device drivers or memory managers are loaded. 3. To display this chapter), display or print the autolink.log file located in the computer. 5. Make sure that you are not the...

Reference and Installation Guide (.pdf)
Page 67
Table 5-2. sometimes referred to as COM1 and COM2 SIMM_x SIMM sockets VMEM1, VMEM2 Video-memory upgrade sockets * Connectors ISA1 and PCI2 share a single card-slot opening, so only one of their functions. System Board Labels Table 5-2 lists the labels for ...
Table 5-2. sometimes referred to as COM1 and COM2 SIMM_x SIMM sockets VMEM1, VMEM2 Video-memory upgrade sockets * Connectors ISA1 and PCI2 share a single card-slot opening, so only one of their functions. System Board Labels Table 5-2 lists the labels for ...


