
Quick Reference Guide
Page 13
Front View 1 2 18 17 16 15 3 14 13 4 12 5 11 10 6 9 7 8 1 grip 2 display 3 ambient light sensor (with Dual-bulb 4 device status lights CCFL LCD option only) 5 digital array microphone 6 biometric reader 7 touch pad 8 touch pad buttons 9 track stick buttons 10 keyboard 11 track stick 12 rotating hinge 13 digital array microphone 15 Windows® security button 14 power button 16 screen rotate button 17 QuickSet tablet settings button 18 e-mail application shortcut button Quick Reference Guide 13
Front View 1 2 18 17 16 15 3 14 13 4 12 5 11 10 6 9 7 8 1 grip 2 display 3 ambient light sensor (with Dual-bulb 4 device status lights CCFL LCD option only) 5 digital array microphone 6 biometric reader 7 touch pad 8 touch pad buttons 9 track stick buttons 10 keyboard 11 track stick 12 rotating hinge 13 digital array microphone 15 Windows® security button 14 power button 16 screen rotate button 17 QuickSet tablet settings button 18 e-mail application shortcut button Quick Reference Guide 13

Quick Reference Guide
Page 18
... screen savers, or other powerintensive programs such as standard equipment in the battery bay. NOTE: It is supplied as complex 3D graphics applications. • Running the computer in maximum performance mode. For optimal computer performance and to help preserve BIOS settings, operate your new computer.... Operating time on operating conditions. NOTE: Because the battery may not be fully charged, use the AC adapter to connect your Dell™ Tablet-PC with the main battery installed at all times. For best results, operate the computer with your computer to an electrical outlet...
... screen savers, or other powerintensive programs such as standard equipment in the battery bay. NOTE: It is supplied as complex 3D graphics applications. • Running the computer in maximum performance mode. For optimal computer performance and to help preserve BIOS settings, operate your new computer.... Operating time on operating conditions. NOTE: Because the battery may not be fully charged, use the AC adapter to connect your Dell™ Tablet-PC with the main battery installed at all times. For best results, operate the computer with your computer to an electrical outlet...
Quick Reference Guide
Page 24
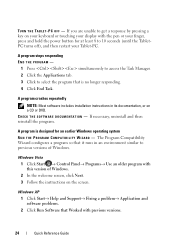
...instructions in an environment similar to get a response by pressing a key on your keyboard or touching your display with the pen or your Tablet-PC. The Program Compatibility Wizard configures a program so that is designed for at least 8 to select the program that it runs in its...with previous versions. 24 Quick Reference Guide A program stops responding END THE PROGRAM - 1 Press simultaneously to access the Task Manager. 2 Click the Applications tab. 3 Click to 10 seconds (until the TabletPC turns off), and then restart your finger, press and hold the power button for an ...
...instructions in an environment similar to get a response by pressing a key on your keyboard or touching your display with the pen or your Tablet-PC. The Program Compatibility Wizard configures a program so that is designed for at least 8 to select the program that it runs in its...with previous versions. 24 Quick Reference Guide A program stops responding END THE PROGRAM - 1 Press simultaneously to access the Task Manager. 2 Click the Applications tab. 3 Click to 10 seconds (until the TabletPC turns off), and then restart your finger, press and hold the power button for an ...
Quick Reference Guide
Page 26
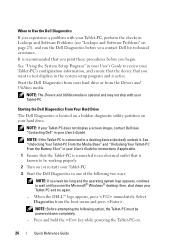
... the Drivers and Utilities media. NOTE: The Drivers and Utilities media is connected to review your Tablet-PC's configuration information, and ensure that the device that you contact Dell for instructions if applicable. 1 Ensure that the Tablet-PC is connected to an electrical outlet that you print these procedures before you want to test...
... the Drivers and Utilities media. NOTE: The Drivers and Utilities media is connected to review your Tablet-PC's configuration information, and ensure that the device that you contact Dell for instructions if applicable. 1 Ensure that the Tablet-PC is connected to an electrical outlet that you print these procedures before you want to test...

Quick Reference Guide
Page 29
... for all devices attached to customize the test by changing the test settings. 5 When the tests are complete, close the Main Menu screen. 6 Remove the Dell Drivers and Utilities media (if applicable). Displays your Tablet-PC is encountered during a test, a message appears with an error code and a description of the problem. The...
... for all devices attached to customize the test by changing the test settings. 5 When the tests are complete, close the Main Menu screen. 6 Remove the Dell Drivers and Utilities media (if applicable). Displays your Tablet-PC is encountered during a test, a message appears with an error code and a description of the problem. The...

User's Guide
Page 28
.... For more information about your display, see "Adjusting Brightness on the Dual-bulb (CCFL) LCD" on the display option you chose when ordering your Tablet-PC, your Tablet-PC may or may not have an ambient light sensor. A M B I E N T L I G H T S E N S O R - D IS PL A Y - 7 touch pad 9 track... stick 13 digital array microphone 15 Windows® security button 17 QuickSet tablet settings button 8 touch pad buttons 10 keyboard 12 rotating hinge 14 power button 16 screen rotate button 18 e-mail application shortcut button G RI P - The ambient light sensor detects available environmental...
.... For more information about your display, see "Adjusting Brightness on the Dual-bulb (CCFL) LCD" on the display option you chose when ordering your Tablet-PC, your Tablet-PC may or may not have an ambient light sensor. A M B I E N T L I G H T S E N S O R - D IS PL A Y - 7 touch pad 9 track... stick 13 digital array microphone 15 Windows® security button 17 QuickSet tablet settings button 8 touch pad buttons 10 keyboard 12 rotating hinge 14 power button 16 screen rotate button 18 e-mail application shortcut button G RI P - The ambient light sensor detects available environmental...

User's Guide
Page 30
... seconds). Rotate the hinge to landscape mode. If you are using your e-mail application. S C R E E N R O T A T E B U T T O N - Access Dell QuickSet to access the Windows Task Manager dialog box or a login screen, the same way you can use the key combination in tablet mode, you use the screen rotate button to change the display orientation from portrait...
... seconds). Rotate the hinge to landscape mode. If you are using your e-mail application. S C R E E N R O T A T E B U T T O N - Access Dell QuickSet to access the Windows Task Manager dialog box or a login screen, the same way you can use the key combination in tablet mode, you use the screen rotate button to change the display orientation from portrait...

User's Guide
Page 57
When you convert your Tablet-PC between notebook and tablet modes, the screen orientation of your Tablet-PC will damage your Tablet-PC settings. To convert your Tablet-PC from landscape (notebook mode) to notebook mode: NOTICE: Forcing the hinge beyond the 180-degree point will ...that the display assembly does not scrape the keycaps as you rotate the display, or you have established in the Dell QuickSet application or the Pen and Tablet settings application, most commonly from tablet mode to portrait (tablet mode). See "QuickSet" on page 71 for more information on customizing your...
When you convert your Tablet-PC between notebook and tablet modes, the screen orientation of your Tablet-PC will damage your Tablet-PC settings. To convert your Tablet-PC from landscape (notebook mode) to notebook mode: NOTICE: Forcing the hinge beyond the 180-degree point will ...that the display assembly does not scrape the keycaps as you rotate the display, or you have established in the Dell QuickSet application or the Pen and Tablet settings application, most commonly from tablet mode to portrait (tablet mode). See "QuickSet" on page 71 for more information on customizing your...

User's Guide
Page 62
Using the Back Button Use the back button, located adjacent to the scroll control, to move backward in applications that support navigation, such as web browsers and Windows Explorer, and to close the active window. • To move backward, press and release the back ...; To rapidly scroll through a list of items or a set of pages one at a time, shift the scroll control up or down and release. Controlling Your Tablet-PC in the center/neutral position. • To launch context sensitive menus, press and hold the back button. • To customize the back button behavior...
Using the Back Button Use the back button, located adjacent to the scroll control, to move backward in applications that support navigation, such as web browsers and Windows Explorer, and to close the active window. • To move backward, press and release the back ...; To rapidly scroll through a list of items or a set of pages one at a time, shift the scroll control up or down and release. Controlling Your Tablet-PC in the center/neutral position. • To launch context sensitive menus, press and hold the back button. • To customize the back button behavior...

User's Guide
Page 63
1 2345 1 power button 3 screen rotate button 5 e-mail application shortcut button 2 Windows security button 4 QuickSet tablet settings button Setting Up and Using Your Tablet-PC 63
1 2345 1 power button 3 screen rotate button 5 e-mail application shortcut button 2 Windows security button 4 QuickSet tablet settings button Setting Up and Using Your Tablet-PC 63

User's Guide
Page 64
... (Windows XP). To access QuickSet, click the QuickSet icon in tablet mode, you can disable and enable the tablet buttons using Tablet PC Settings (Windows Vista) or Tablet Settings (Windows XP). QUICKSET TABLET SETTINGS BUTTON Press this button using the Dell QuickSet application. The computer will not recognize input until you press and hold the screen rotate...
... (Windows XP). To access QuickSet, click the QuickSet icon in tablet mode, you can disable and enable the tablet buttons using Tablet PC Settings (Windows Vista) or Tablet Settings (Windows XP). QUICKSET TABLET SETTINGS BUTTON Press this button using the Dell QuickSet application. The computer will not recognize input until you press and hold the screen rotate...

User's Guide
Page 65
... the settings for these buttons: • In Windows Vista, click Start → Control Panel→ Mobile PC→ Tablet PC Settings→ Set tablet buttons to the back button, the tablet settings button, the e-mail application shortcut button, and the scroll control (Windows Vista). Using the Pen Ejecting and Storing the Pen Press and...
... the settings for these buttons: • In Windows Vista, click Start → Control Panel→ Mobile PC→ Tablet PC Settings→ Set tablet buttons to the back button, the tablet settings button, the e-mail application shortcut button, and the scroll control (Windows Vista). Using the Pen Ejecting and Storing the Pen Press and...

User's Guide
Page 66
... a felt-tip pen). If the pen is not in its compartment when the Tablet-PC shuts down or enters sleep or hibernate mode, the pen indicator LED blinks slowly... the pen tip, then firmly pull the tip from the pen. 66 Setting Up and Using Your Tablet-PC Replacing the Pen Tip 1 2 3 4 5 1 pen 3 right-click pen button 5 pen-tip remover tool 2 erase ... pen) and soft (simulates the feel of the pen indicator LED can be enabled or disabled through the QuickSet tablet settings application (see "Dell QuickSet Help" on page 20 for instructions on accessing QuickSet). To replace a pen tip: 1 Use the pen...
... a felt-tip pen). If the pen is not in its compartment when the Tablet-PC shuts down or enters sleep or hibernate mode, the pen indicator LED blinks slowly... the pen tip, then firmly pull the tip from the pen. 66 Setting Up and Using Your Tablet-PC Replacing the Pen Tip 1 2 3 4 5 1 pen 3 right-click pen button 5 pen-tip remover tool 2 erase ... pen) and soft (simulates the feel of the pen indicator LED can be enabled or disabled through the QuickSet tablet settings application (see "Dell QuickSet Help" on page 20 for instructions on accessing QuickSet). To replace a pen tip: 1 Use the pen...

User's Guide
Page 68
... and editing with Input Panel: • In Windows Vista, click Start → All Programs→ Tablet PC→ Tablet PC Pen Training, and tap each of the screen when the Input Panel is cancelled. Some applications, such as lining through text you can also open the Input Panel by lining through text... you to write with the pen directly into your applications with Tablet PC, and then click Start. Tap the icon and the Input Panel slides out from the edge of a mouse. • In Windows XP, click...
... and editing with Input Panel: • In Windows Vista, click Start → All Programs→ Tablet PC→ Tablet PC Pen Training, and tap each of the screen when the Input Panel is cancelled. Some applications, such as lining through text you can also open the Input Panel by lining through text... you to write with the pen directly into your applications with Tablet PC, and then click Start. Tap the icon and the Input Panel slides out from the edge of a mouse. • In Windows XP, click...

User's Guide
Page 72
... the QuickSet Icon Double-click the QuickSet icon to launch QuickSet. • View the Dell QuickSet Help file. • View the version and copyright date of the QuickSet application program installed on your Tablet-PC. Help and Support provides information for : • Network connectivity • Display ...main menu provides links to QuickSet features that have been customized by Dell. Help and Support To access Help and Support, click Start (or Start in Windows Vista. You can configure settings on your Tablet-PC. Control Panel To access the Control Panel, click Start ...
... the QuickSet Icon Double-click the QuickSet icon to launch QuickSet. • View the Dell QuickSet Help file. • View the version and copyright date of the QuickSet application program installed on your Tablet-PC. Help and Support provides information for : • Network connectivity • Display ...main menu provides links to QuickSet features that have been customized by Dell. Help and Support To access Help and Support, click Start (or Start in Windows Vista. You can configure settings on your Tablet-PC. Control Panel To access the Control Panel, click Start ...
User's Guide
Page 73
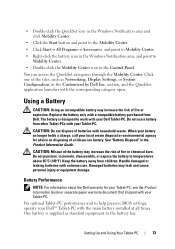
...Replace the battery only with extreme care. One battery is designed to work with your Dell Tablet-PC. Click one of the tiles, such as standard equipment in the Customized by Dell Inc. The battery is supplied as Networking, Display Settings, or System Configuration, in...battery from children. Keep the battery away from other Tablet-PCs with the corresponding category open. Damaged batteries may leak and cause personal injury or equipment damage. section, and the QuickSet application launches with your Dell™ Tablet-PC with household waste. CAUTION: Do not dispose of...
...Replace the battery only with extreme care. One battery is designed to work with your Dell Tablet-PC. Click one of the tiles, such as standard equipment in the Customized by Dell Inc. The battery is supplied as Networking, Display Settings, or System Configuration, in...battery from children. Keep the battery away from other Tablet-PCs with the corresponding category open. Damaged batteries may leak and cause personal injury or equipment damage. section, and the QuickSet application launches with your Dell™ Tablet-PC with household waste. CAUTION: Do not dispose of...

User's Guide
Page 74
...USB devices. • Using high-brightness display settings, 3D screen savers, or other powerintensive programs such as complex 3D graphics applications. • Running the Tablet-PC in maximum performance mode. To view battery charge status, check the Power Meter in Windows XP) • Battery charge ...gauge and health gauge 74 Setting Up and Using Your Tablet-PC You can use an optional battery slice (see "Accessing Power Options Properties" on the battery charge: • Dell QuickSet Battery Meter • Microsoft Windows Power Meter window and Power icon ( ...
...USB devices. • Using high-brightness display settings, 3D screen savers, or other powerintensive programs such as complex 3D graphics applications. • Running the Tablet-PC in maximum performance mode. To view battery charge status, check the Power Meter in Windows XP) • Battery charge ...gauge and health gauge 74 Setting Up and Using Your Tablet-PC You can use an optional battery slice (see "Accessing Power Options Properties" on the battery charge: • Dell QuickSet Battery Meter • Microsoft Windows Power Meter window and Power icon ( ...

User's Guide
Page 97
... default display settings: 1 Open the ATI CATALYST® Control Center: Using Your Tablet-PC With a Projector 97 When using extended desktop mode, you start applications on the Tablet-PC and then "drag" the applications that each display (extended). To enable extended desktop mode, select Show different parts ...of shifting from the 16:10 to the 4:3 aspect ratio. You can use the Tablet-PC display in Clone ...
... default display settings: 1 Open the ATI CATALYST® Control Center: Using Your Tablet-PC With a Projector 97 When using extended desktop mode, you start applications on the Tablet-PC and then "drag" the applications that each display (extended). To enable extended desktop mode, select Show different parts ...of shifting from the 16:10 to the 4:3 aspect ratio. You can use the Tablet-PC display in Clone ...
User's Guide
Page 119
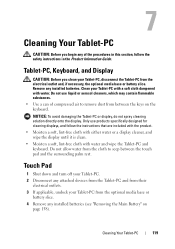
...directly onto the display. Do not allow water from the electrical outlet and, if necessary, the optional media base or battery slice. Tablet-PC, Keyboard, and Display CAUTION: Before you begin any installed batteries. Do not use products specifically designed for cleaning displays, and ... cloth to remove dust from the optional media base or battery slice. 4 Remove any attached devices from the Tablet-PC and from their electrical outlets. 3 If applicable, undock your Tablet-PC. 2 Disconnect any installed batteries (see "Removing the Main Battery" on the keyboard. Remove any of ...
...directly onto the display. Do not allow water from the electrical outlet and, if necessary, the optional media base or battery slice. Tablet-PC, Keyboard, and Display CAUTION: Before you begin any installed batteries. Do not use products specifically designed for cleaning displays, and ... cloth to remove dust from the optional media base or battery slice. 4 Remove any attached devices from the Tablet-PC and from their electrical outlets. 3 If applicable, undock your Tablet-PC. 2 Disconnect any installed batteries (see "Removing the Main Battery" on the keyboard. Remove any of ...
User's Guide
Page 122
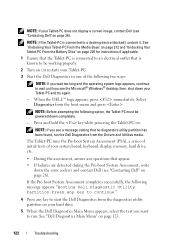
... Battery Slice" on page 220 for instructions if applicable. 1 Ensure that the Tablet-PC is connected to an electrical outlet that is connected to a docking device (docked), undock it. NOTE: Before attempting the following message appears: "Booting Dell Diagnostic Utility Partition.Press any key to continue." ...that no diagnostics utility partition has been found, run . then, shut down the error code(s) and contact Dell (see "Contacting Dell" on (or restart) your Tablet-PC. 3 Start the Dell Diagnostics in one of the following two ways: NOTE: If you wait too long and the operating system ...
... Battery Slice" on page 220 for instructions if applicable. 1 Ensure that the Tablet-PC is connected to an electrical outlet that is connected to a docking device (docked), undock it. NOTE: Before attempting the following message appears: "Booting Dell Diagnostic Utility Partition.Press any key to continue." ...that no diagnostics utility partition has been found, run . then, shut down the error code(s) and contact Dell (see "Contacting Dell" on (or restart) your Tablet-PC. 3 Start the Dell Diagnostics in one of the following two ways: NOTE: If you wait too long and the operating system ...


