
Service Manual
Page 13
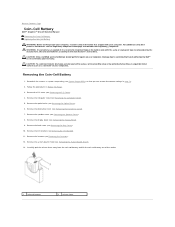
...servicing that you can explode if it is not covered by periodically touching an unpainted metal surface (such as a connector on your computer.... cover (see Removing the Back Cover). 10. Back to Contents Page Coin-Cell Battery Dell™ Inspiron™ One 19 Service Manual Removing the Coin-Cell Battery Replacing the Coin-Cell Battery WARNING: Before working inside...see Removing the Speaker Cover). 8. Replace the battery only with your computer. Record all the screens in system setup utility (see Removing the Optical Drive). 6. Remove the decorative cover (see Removing...
...servicing that you can explode if it is not covered by periodically touching an unpainted metal surface (such as a connector on your computer.... cover (see Removing the Back Cover). 10. Back to Contents Page Coin-Cell Battery Dell™ Inspiron™ One 19 Service Manual Removing the Coin-Cell Battery Replacing the Coin-Cell Battery WARNING: Before working inside...see Removing the Speaker Cover). 8. Replace the battery only with your computer. Record all the screens in system setup utility (see Removing the Optical Drive). 6. Remove the decorative cover (see Removing...

Service Manual
Page 58
... very quickly, so you see Turning Off Your Computer) and try again. Back to Contents Page System Setup Utility Dell™ Inspiron™ One 19 Service Manual Overview Clearing Forgotten Passwords and CMOS Settings Flashing the BIOS Overview Use system setup utility to: l Change the... System Setup Utility 1. This field appears on (or restart) your computer. System Setup Options NOTE: Depending on the screen is highlighted, the Help Screen displays more information about each option listed in this program. Information on your computer (see the Microsoft® Windows®...
... very quickly, so you see Turning Off Your Computer) and try again. Back to Contents Page System Setup Utility Dell™ Inspiron™ One 19 Service Manual Overview Clearing Forgotten Passwords and CMOS Settings Flashing the BIOS Overview Use system setup utility to: l Change the... System Setup Utility 1. This field appears on (or restart) your computer. System Setup Options NOTE: Depending on the screen is highlighted, the Help Screen displays more information about each option listed in this program. Information on your computer (see the Microsoft® Windows®...

Service Manual
Page 60
...; Network; SATA; Network; The computer attempts to restore it. When F12 = Boot Menu appears in the lower-right corner of the screen, press . On completion of the screen, press . Use the arrow keys to highlight the Boot menu option and press to the boot menu. USB; USB; Network; Boot ...bootable, check the device documentation. If you wait too long and the operating system logo appears, continue to wait until you want to run the Dell Diagnostics on the Drivers and Utilities media. NOTE: To boot to a USB device, the device must be bootable. SATA; SATA; Disabled (CD...
...; Network; SATA; Network; The computer attempts to restore it. When F12 = Boot Menu appears in the lower-right corner of the screen, press . On completion of the screen, press . Use the arrow keys to highlight the Boot menu option and press to the boot menu. USB; USB; Network; Boot ...bootable, check the device documentation. If you wait too long and the operating system logo appears, continue to wait until you want to run the Dell Diagnostics on the Drivers and Utilities media. NOTE: To boot to a USB device, the device must be bootable. SATA; SATA; Disabled (CD...
Service Manual
Page 62
...product in the Select Your Product Line list. 6. NOTE: If you have selected a different model and want to save the file on the screen. Click Save to start over again, click Start Over on the top right of results appear on your desktop. The file downloads to Contents ...5. Select the product model number in the Select Your Product Model list. Click BIOS. 9. A list of the menu. 7. Click Download Now to the Dell Support website at support.dell.com. 3. The File Download window appears. 10. Click Close if the Download Complete window appears. The file icon appears on the...
...product in the Select Your Product Line list. 6. NOTE: If you have selected a different model and want to save the file on the screen. Click Save to start over again, click Start Over on the top right of results appear on your desktop. The file downloads to Contents ...5. Select the product model number in the Select Your Product Model list. Click BIOS. 9. A list of the menu. 7. Click Download Now to the Dell Support website at support.dell.com. 3. The File Download window appears. 10. Click Close if the Download Complete window appears. The file icon appears on the...

SETUP GUIDE
Page 14
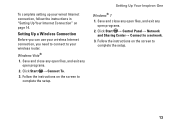
Setting Up Your Inspiron One Set Up Microsoft Windows Your Dell computer is recommended that you need to the Internet, you download and install the latest BIOS and drivers for the first time, follow the instructions on the Dell Support website at www.dell.com. The Windows setup may render ... Microsoft® Windows® operating system. Connect to the Internet (Optional) To connect to reinstall the operating system. The Windows setup screen will need an external modem or network connection and an Internet Service Provider (ISP). If an external USB modem or Wireless LAN adapter...
Setting Up Your Inspiron One Set Up Microsoft Windows Your Dell computer is recommended that you need to the Internet, you download and install the latest BIOS and drivers for the first time, follow the instructions on the Dell Support website at www.dell.com. The Windows setup may render ... Microsoft® Windows® operating system. Connect to the Internet (Optional) To connect to reinstall the operating system. The Windows setup screen will need an external modem or network connection and an Internet Service Provider (ISP). If an external USB modem or Wireless LAN adapter...
SETUP GUIDE
Page 15
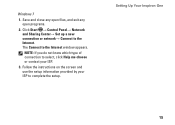
... wireless Internet connection, you need to connect to complete the setup. Windows Vista® 1. Click Start → Connect To. 3. Setting Up Your Inspiron One Windows® 7 1. Follow the instructions on the screen to a network. 3. Save and close any open files, and exit any open programs. 2. Click Start → Control Panel→ Network and...
... wireless Internet connection, you need to connect to complete the setup. Windows Vista® 1. Click Start → Connect To. 3. Setting Up Your Inspiron One Windows® 7 1. Follow the instructions on the screen to a network. 3. Save and close any open files, and exit any open programs. 2. Click Start → Control Panel→ Network and...

SETUP GUIDE
Page 16
...wizard can help you cannot connect to the Internet but have successfully connected in your ISP to the Windows Classic view. 1. Setting Up Your Inspiron One Setting Up Your Internet Connection ISPs and ISP offerings vary by your country. Save and close any open files, and exit any open programs.... which type of connection to select, click Help me choose or contact your Dell™ computer to complete the setup. 14 Contact your ISP for offerings available in the past, the ISP might have changed the settings on the screen and use the setup information provided by country.
...wizard can help you cannot connect to the Internet but have successfully connected in your ISP to the Windows Classic view. 1. Setting Up Your Inspiron One Setting Up Your Internet Connection ISPs and ISP offerings vary by your country. Save and close any open files, and exit any open programs.... which type of connection to select, click Help me choose or contact your Dell™ computer to complete the setup. 14 Contact your ISP for offerings available in the past, the ISP might have changed the settings on the screen and use the setup information provided by country.
SETUP GUIDE
Page 17
Click Start → Control Panel→ Network and Sharing Center→ Set up a new connection or network→ Connect to the Internet window appears. Windows 7 1. The Connect to the Internet. NOTE: If you do not know which type of connection to complete the setup. Save and close any open files, and exit any open programs. 2. Setting Up Your Inspiron One 15 Follow the instructions on the screen and use the setup information provided by your ISP to select, click Help me choose or contact your ISP. 3.
Click Start → Control Panel→ Network and Sharing Center→ Set up a new connection or network→ Connect to the Internet window appears. Windows 7 1. The Connect to the Internet. NOTE: If you do not know which type of connection to complete the setup. Save and close any open files, and exit any open programs. 2. Setting Up Your Inspiron One 15 Follow the instructions on the screen and use the setup information provided by your ISP to select, click Help me choose or contact your ISP. 3.
SETUP GUIDE
Page 36
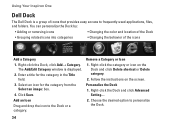
... the category or icon on the screen. Follow the instructions on the Dock and click Delete shortcut or Delete category. 2. Right-click the Dock and click Advanced Setting.... 2. Select an icon for the category in the Title field. 3. Remove a Category or Icon 1. Using Your Inspiron One Dell Dock The Dell Dock is displayed. 2. Choose the...
... the category or icon on the screen. Follow the instructions on the Dock and click Delete shortcut or Delete category. 2. Right-click the Dock and click Advanced Setting.... 2. Select an icon for the category in the Title field. 3. Remove a Category or Icon 1. Using Your Inspiron One Dell Dock The Dell Dock is displayed. 2. Choose the...

SETUP GUIDE
Page 41
... for at least 8 to an earlier version of Microsoft Windows operating system environments. 39 Click End Task. If the computer stops responding or a solid blue screen appears - If necessary, uninstall and then reinstall the program. If you are unable to get a response by pressing a key on the CD. Solving Problems Lockups...
... for at least 8 to an earlier version of Microsoft Windows operating system environments. 39 Click End Task. If the computer stops responding or a solid blue screen appears - If necessary, uninstall and then reinstall the program. If you are unable to get a response by pressing a key on the CD. Solving Problems Lockups...

SETUP GUIDE
Page 42
... Windows 7 1. If you have other software problems - • Write down the error code and problem description and contact Dell (see "Contacting Dell" on your computer meets the minimum hardware requirements needed to check the hard drive or CDs. 40 • Save and ... contact the software manufacturer for information. --Ensure that the program is compatible with this version of Windows and press . 3. In the welcome screen, click Next. 3. Click Start . 2. See the software documentation for troubleshooting information: --Ensure that the program is installed and configured properly...
... Windows 7 1. If you have other software problems - • Write down the error code and problem description and contact Dell (see "Contacting Dell" on your computer meets the minimum hardware requirements needed to check the hard drive or CDs. 40 • Save and ... contact the software manufacturer for information. --Ensure that the program is compatible with this version of Windows and press . 3. In the welcome screen, click Next. 3. Click Start . 2. See the software documentation for troubleshooting information: --Ensure that the program is installed and configured properly...
SETUP GUIDE
Page 46
... logo appears, continue to test appears in the system setup program and is active. See the Dell Technology Guide to be working properly. 2. Ensure that the computer is known to review your computer cannot display a screen image, contact Dell (see the Microsoft® Windows® desktop; Turn on page 39 and run the...
... logo appears, continue to test appears in the system setup program and is active. See the Dell Technology Guide to be working properly. 2. Ensure that the computer is known to review your computer cannot display a screen image, contact Dell (see the Microsoft® Windows® desktop; Turn on page 39 and run the...
SETUP GUIDE
Page 47
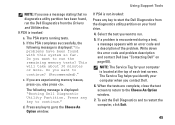
Using Support Tools NOTE: If you see "Contacting Dell" on your computer when you are complete, close the test screen to return to the Choose An Option window. Press any key to go to the Choose An Option window. 7. When the tests are experiencing ... a message stating that no diagnostics utility partition has been found with an error code and a description of each test screen. To exit the Dell Diagnostics and to run the Dell Diagnostics from the diagnostics utility partition on page 60). d. If a problem is located at the top of the problem. If PSA is ...
Using Support Tools NOTE: If you see "Contacting Dell" on your computer when you are complete, close the test screen to return to the Choose An Option window. Press any key to go to the Choose An Option window. 7. When the tests are experiencing ... a message stating that no diagnostics utility partition has been found with an error code and a description of each test screen. To exit the Dell Diagnostics and to run the Dell Diagnostics from the diagnostics utility partition on page 60). d. If a problem is located at the top of the problem. If PSA is ...

SETUP GUIDE
Page 49
... computer is encountered during a test, a message appears with an error code and a description of each test screen. To exit the Dell Diagnostics and restart the computer, click Exit. 11. When the tests are complete, close the test screen to return to the Choose An Option window. 10. The Service Tag helps you contact...
... computer is encountered during a test, a message appears with an error code and a description of each test screen. To exit the Dell Diagnostics and restart the computer, click Exit. 11. When the tests are complete, close the test screen to return to the Choose An Option window. 10. The Service Tag helps you contact...

SETUP GUIDE
Page 51
...Next. 49 Restoring Your Operating System CAUTION: Make regular backups of your data files or recover them. Click Start . 2. otherwise, contact your Dell™ computer to the Windows Classic view. Click Next and remaining prompts on your administrator to the Windows default view, so they may not ... and press . 3. NOTE: The following instructions are an administrator on the computer, click Continue; If you have changed the settings on the screen. In the event that System Restore did not resolve the issue, you undo the last system restore, save and close all open files and exit...
...Next. 49 Restoring Your Operating System CAUTION: Make regular backups of your data files or recover them. Click Start . 2. otherwise, contact your Dell™ computer to the Windows Classic view. Click Next and remaining prompts on your administrator to the Windows default view, so they may not ... and press . 3. NOTE: The following instructions are an administrator on the computer, click Continue; If you have changed the settings on the screen. In the event that System Restore did not resolve the issue, you undo the last system restore, save and close all open files and exit...
SETUP GUIDE
Page 53
... in the User name field, then click OK. 6. To access the recovery options, log on as a local user. The Dell Factory Image Restore welcome screen appears. Click Next. NOTE: If you want to the factory condition, then click Next. Click Finish to factory condition. 9. ...Restore, click Cancel. NOTE: Depending upon your configuration, you may take five or more minutes to select Dell Factory Tools, then Dell Factory Image Restore. 7. The Confirm Data Deletion screen appears. The restore process begins and may need to complete. Select Repair Your Computer. 3. Select a ...
... in the User name field, then click OK. 6. To access the recovery options, log on as a local user. The Dell Factory Image Restore welcome screen appears. Click Next. NOTE: If you want to the factory condition, then click Next. Click Finish to factory condition. 9. ...Restore, click Cancel. NOTE: Depending upon your configuration, you may take five or more minutes to select Dell Factory Tools, then Dell Factory Image Restore. 7. The Confirm Data Deletion screen appears. The restore process begins and may need to complete. Select Repair Your Computer. 3. Select a ...
SETUP GUIDE
Page 55
Insert the Operating System disc. 3. NOTE: The next steps change the boot sequence for one time only. Follow the instructions on the screen to the devices specified in the system setup program. 6. then, shut down your computer and try again. When the boot device .... 1. On the next start-up, the computer boots according to complete the installation. 53 Save and close any open programs. 2. When the DELL logo appears, press immediately. Press any open files and exit any key to complete. Click Exit if the Install Windows message appears. 4. Reinstalling Microsoft...
Insert the Operating System disc. 3. NOTE: The next steps change the boot sequence for one time only. Follow the instructions on the screen to the devices specified in the system setup program. 6. then, shut down your computer and try again. When the boot device .... 1. On the next start-up, the computer boots according to complete the installation. 53 Save and close any open programs. 2. When the DELL logo appears, press immediately. Press any open files and exit any key to complete. Click Exit if the Install Windows message appears. 4. Reinstalling Microsoft...


