Dell™ Technology Guide
Page 10
Removing Applications From Your Computer . . . . . 123 Windows Vista 123 Windows XP 123 Ending an Application When it Does not Respond 124 10 Maintenance Tasks (Enhance Performance ...; XP 128 Performance Tuning 129 System Setup Based Performance Tuning . . . . 129 Software Based Performance Tuning 129 NVIDIA Performance 129 NVIDIA Monitor 130 Cleaning Up Your Hard Drive 131 Defragmenting Your Hard Drive 132 Detecting and Repairing Disk Errors 133 Scanning for Viruses and Spyware 133 10 Contents
Removing Applications From Your Computer . . . . . 123 Windows Vista 123 Windows XP 123 Ending an Application When it Does not Respond 124 10 Maintenance Tasks (Enhance Performance ...; XP 128 Performance Tuning 129 System Setup Based Performance Tuning . . . . 129 Software Based Performance Tuning 129 NVIDIA Performance 129 NVIDIA Monitor 130 Cleaning Up Your Hard Drive 131 Defragmenting Your Hard Drive 132 Detecting and Repairing Disk Errors 133 Scanning for Viruses and Spyware 133 10 Contents
Dell™ Technology Guide
Page 80
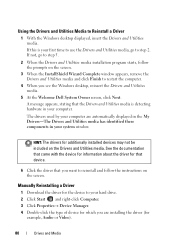
...message appears, stating that you want to step 2. Using the Drivers and Utilities Media to your hard drive. 2 Click Start and right-click Computer. 3 Click Properties→ Device Manager. 4 Double-click... When you see the Windows desktop, reinsert the Drivers and Utilities media. 5 At the Welcome Dell System Owner screen, click Next. Manually Reinstalling a Driver 1 Download the driver for that device. ... may not be included on the screen. 3 When the InstallShield Wizard Complete window appears, remove the Drivers and Utilities media and click Finish to step 5. 2 When the Drivers and...
...message appears, stating that you want to step 2. Using the Drivers and Utilities Media to your hard drive. 2 Click Start and right-click Computer. 3 Click Properties→ Device Manager. 4 Double-click... When you see the Windows desktop, reinsert the Drivers and Utilities media. 5 At the Welcome Dell System Owner screen, click Next. Manually Reinstalling a Driver 1 Download the driver for that device. ... may not be included on the screen. 3 When the InstallShield Wizard Complete window appears, remove the Drivers and Utilities media and click Finish to step 5. 2 When the Drivers and...
Dell™ Technology Guide
Page 97
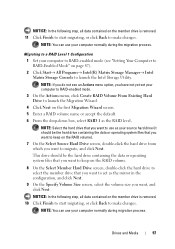
...use as your computer to RAID-enabled mode. 3 On the Actions menu, click Create RAID Volume From Existing Hard Drive to launch the Migration Wizard. 4 Click Next on the member drive is removed. 10 Click Finish to start migrating, or click Back to launch the Intel Storage Utility. NOTE: You can...: In the following step, all data contained on the RAID volume. 8 On the Select Member Hard Drive screen, double-click the hard drive to select the member drive that you want to keep on the member drive is removed. 11 Click Finish to start migrating, or click Back to act as the RAID level...
...use as your computer to RAID-enabled mode. 3 On the Actions menu, click Create RAID Volume From Existing Hard Drive to launch the Migration Wizard. 4 Click Next on the member drive is removed. 10 Click Finish to start migrating, or click Back to launch the Intel Storage Utility. NOTE: You can...: In the following step, all data contained on the RAID volume. 8 On the Select Member Hard Drive screen, double-click the hard drive to select the member drive that you want to keep on the member drive is removed. 11 Click Finish to start migrating, or click Back to act as the RAID level...
Dell™ Technology Guide
Page 129
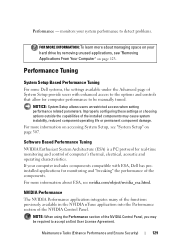
... performance to the options and controls that allow for real-time monitoring and control of System Setup provide users with ESA, Dell has preinstalled applications for monitoring and "tweaking" the performance of the NVIDIA Control Panel, you may cause system instability, reduced... learn more about ESA, see nvidia.com/object/nvidia_esa.html. NOTE: When using the Performance section of the components. If your hard drive by removing unused applications, see "System Setup" on page 123. Performance - Improperly configuring these settings or choosing options outside the capabilities of...
... performance to the options and controls that allow for real-time monitoring and control of System Setup provide users with ESA, Dell has preinstalled applications for monitoring and "tweaking" the performance of the NVIDIA Control Panel, you may cause system instability, reduced... learn more about ESA, see nvidia.com/object/nvidia_esa.html. NOTE: When using the Performance section of the components. If your hard drive by removing unused applications, see "System Setup" on page 123. Performance - Improperly configuring these settings or choosing options outside the capabilities of...
Dell™ Technology Guide
Page 139
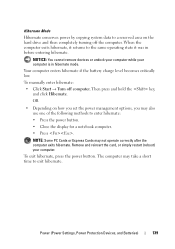
...hard drive and then completely turning off computer. To exit hibernate, press the power button. Your computer enters hibernate if the battery charge level becomes critically low. Then press and hold the key, and click Hibernate. To manually enter hibernate: • Click Start → Turn off the computer. Remove...: • Press the power button. • Close the display for a notebook computer. • Press . NOTICE: You cannot remove devices or undock your computer while your computer. NOTE: Some PC Cards or Express Cards may not operate correctly after the computer exits ...
...hard drive and then completely turning off computer. To exit hibernate, press the power button. Your computer enters hibernate if the battery charge level becomes critically low. Then press and hold the key, and click Hibernate. To manually enter hibernate: • Click Start → Turn off the computer. Remove...: • Press the power button. • Close the display for a notebook computer. • Press . NOTICE: You cannot remove devices or undock your computer while your computer. NOTE: Some PC Cards or Express Cards may not operate correctly after the computer exits ...
Dell™ Technology Guide
Page 265
...computer to the hardware, software, or other system settings have left the computer in when you purchased the computer. Use Dell PC Restore or Dell Factory Image Restore only if System Restore did not resolve your data files. Using Microsoft® Windows® System Restore...backups of your operating system problem. However, using the Operating System disc also deletes all data on the hard drive. Both permanently delete all data on the hard drive and remove any programs installed after you to return your computer to an earlier operating state without affecting data files) ...
...computer to the hardware, software, or other system settings have left the computer in when you purchased the computer. Use Dell PC Restore or Dell Factory Image Restore only if System Restore did not resolve your data files. Using Microsoft® Windows® System Restore...backups of your operating system problem. However, using the Operating System disc also deletes all data on the hard drive. Both permanently delete all data on the hard drive and remove any programs installed after you to return your computer to an earlier operating state without affecting data files) ...
Dell™ Technology Guide
Page 267
...tab and ensure that the System Protection for the hard disk is automatically disabled. Use PC Restore or Dell Factory Image Restore only if System Restore did not resolve your operating system. Use Dell Factory Image Restore (Windows Vista) or Dell PC Restore (Windows XP) only as the last..., the steps below apply only to restore your operating system problem. NOTE: Dell PC Restore by Symantec and Dell Factory Image Restore may not be available in certain countries or on the hard drive and removes any programs or drivers installed after you reinstall Windows XP with less than 200...
...tab and ensure that the System Protection for the hard disk is automatically disabled. Use PC Restore or Dell Factory Image Restore only if System Restore did not resolve your operating system. Use Dell Factory Image Restore (Windows Vista) or Dell PC Restore (Windows XP) only as the last..., the steps below apply only to restore your operating system problem. NOTE: Dell PC Restore by Symantec and Dell Factory Image Restore may not be available in certain countries or on the hard drive and removes any programs or drivers installed after you reinstall Windows XP with less than 200...
Dell™ Technology Guide
Page 343
... water. Use the Express Service Code when contacting Dell for hard drives and CD drives. fully-buffered DIMM - A U.S. agency responsible for enforcing communications-related regulations that installs in an expansion slot on your display. An improved version of ExpressCards. Electrical interference caused by electromagnetic radiation. ExpressCard - A removable I/O card adhering to the system bus. A numeric code...
... water. Use the Express Service Code when contacting Dell for hard drives and CD drives. fully-buffered DIMM - A U.S. agency responsible for enforcing communications-related regulations that installs in an expansion slot on your display. An improved version of ExpressCards. Electrical interference caused by electromagnetic radiation. ExpressCard - A removable I/O card adhering to the system bus. A numeric code...
Dell™ Technology Guide
Page 348
nonvolatile random access memory - A type of pixels across by the 348 O optical drive - A removable I/O card adhering to it. The organization that stores data when the computer is expressed as the number of memory that establishes standards for... is assigned to one billionth of transferring data between the processor and the devices attached to the PCMCIA standard. A drive that you can contain multiple logical drives. A physical storage area on a hard drive that supports 32-and 64-bit data paths, providing a high-speed data path between the processor and devices such ...
nonvolatile random access memory - A type of pixels across by the 348 O optical drive - A removable I/O card adhering to it. The organization that stores data when the computer is expressed as the number of memory that establishes standards for... is assigned to one billionth of transferring data between the processor and the devices attached to the PCMCIA standard. A drive that you can contain multiple logical drives. A physical storage area on a hard drive that supports 32-and 64-bit data paths, providing a high-speed data path between the processor and devices such ...

Setup Guide
Page 66
..., it was in all the devices (USB drive, printer, etc.) connected to the computer and remove any programs or drivers installed after you received your computer. 2. NOTE: If Dell DataSafe Local Backup is not available on your computer, use Dell DataSafe Local Backup to restore your hard drive to the operating state it is designed to...
..., it was in all the devices (USB drive, printer, etc.) connected to the computer and remove any programs or drivers installed after you received your computer. 2. NOTE: If Dell DataSafe Local Backup is not available on your computer, use Dell DataSafe Local Backup to restore your hard drive to the operating state it is designed to...

Setup Guide
Page 69
... before using this option. If possible, back up all data on the hard drive and removes any programs or drivers installed after you received your hard drive to the operating state it was in certain countries or on the computer. 2. NOTE: If Dell Factory Image Restore is not available on your operating system. Data files include...
... before using this option. If possible, back up all data on the hard drive and removes any programs or drivers installed after you received your hard drive to the operating state it was in certain countries or on the computer. 2. NOTE: If Dell Factory Image Restore is not available on your operating system. Data files include...
Setup Guide
Page 75
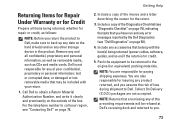
...on page 76. 2. or damaged or lost or corrupted data; Pack the equipment to be refused at Dell's receiving dock and returned to back up any data on the hard drive(s) and on page 58). 4. Collect On Delivery (C.O.D.) packages are responsible for paying shipping expenses. You ...packing materials. Getting Help Returning Items for Repair Under Warranty or for Credit Prepare all confidential, proprietary and personal information, as well as removable media, such as follows: NOTE: Before you have run and any accessories that belong with your return. 1. NOTE: Returns that are...
...on page 76. 2. or damaged or lost or corrupted data; Pack the equipment to be refused at Dell's receiving dock and returned to back up any data on the hard drive(s) and on page 58). 4. Collect On Delivery (C.O.D.) packages are responsible for paying shipping expenses. You ...packing materials. Getting Help Returning Items for Repair Under Warranty or for Credit Prepare all confidential, proprietary and personal information, as well as removable media, such as follows: NOTE: Before you have run and any accessories that belong with your return. 1. NOTE: Returns that are...

Service Manual
Page 23
... Keyboard). 7. CAUTION: To avoid electrostatic discharge, ground yourself by using a wrist grounding strap or by your computer). Back to Contents Page Hard Drive Dell™ Inspiron™ N5010/M5010 Service Manual Removing the Hard Drive Replacing the Hard Drive WARNING: Before working inside your computer, read the safety information that shipped with your computer). 8. CAUTION: To prevent data loss, turn...
... Keyboard). 7. CAUTION: To avoid electrostatic discharge, ground yourself by using a wrist grounding strap or by your computer). Back to Contents Page Hard Drive Dell™ Inspiron™ N5010/M5010 Service Manual Removing the Hard Drive Replacing the Hard Drive WARNING: Before working inside your computer, read the safety information that shipped with your computer). 8. CAUTION: To prevent data loss, turn...

Service Manual
Page 24
...inside the computer. Remove the new drive from the hard drive. 1 hard drive 2 interposer Replacing the Hard Drive 1. Connect the interposer to the computer. 12. Replace the palm rest (see Replacing the Battery). Replace the battery (see Replacing the Palm Rest). 7. Replace the optical drive (see Replacing the... Replace the base cover (see Replacing the Keyboard). 8. 9. Pull the interposer to disconnect the hard-drive assembly from the connector on the system board. 1 hard-drive assembly 10. Follow the instructions in the Setup Guide. Failure to do so may result in ...
...inside the computer. Remove the new drive from the hard drive. 1 hard drive 2 interposer Replacing the Hard Drive 1. Connect the interposer to the computer. 12. Replace the palm rest (see Replacing the Battery). Replace the battery (see Replacing the Palm Rest). 7. Replace the optical drive (see Replacing the... Replace the base cover (see Replacing the Keyboard). 8. 9. Pull the interposer to disconnect the hard-drive assembly from the connector on the system board. 1 hard-drive assembly 10. Follow the instructions in the Setup Guide. Failure to do so may result in ...
Service Manual
Page 46
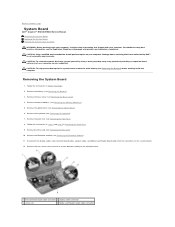
... on the system board. 12. Removing the System Board 1. Follow the instructions in Removing the Hard Drive. 9. Remove the battery (see Removing the Mini-Card). 10. Remove the Mini-Card (see Removing the Battery). 3. Disconnect the display...Remove the palm rest (see Removing the Base Cover). 4. For additional safety best practices information, see Removing the Memory Module(s)). 5. Remove memory module(s) (see the Regulatory Compliance Homepage at www.dell.com/regulatory_compliance. Back to Contents Page System Board Dell™ Inspiron™ N5010/M5010 Service Manual Removing...
... on the system board. 12. Removing the System Board 1. Follow the instructions in Removing the Hard Drive. 9. Remove the battery (see Removing the Mini-Card). 10. Remove the Mini-Card (see Removing the Battery). 3. Disconnect the display...Remove the palm rest (see Removing the Base Cover). 4. For additional safety best practices information, see Removing the Memory Module(s)). 5. Remove memory module(s) (see the Regulatory Compliance Homepage at www.dell.com/regulatory_compliance. Back to Contents Page System Board Dell™ Inspiron™ N5010/M5010 Service Manual Removing...
Service Manual
Page 47
... Battery). 5. Turn on the computer base. 7. NOTE: After you have replaced the system board, enter the computer Service Tag in Replacing the Hard Drive. 13. 5 speaker cable connector 6 system board assembly 13. Align the connectors on the system board with the slots on the computer. Replace...(see Replacing the Palm Rest). 14. Replace the palm rest (see Replacing the Mini-Card). 12. Enter the service tag (see Removing the Processor Module). Remove the processor module (see Entering the Service Tag in damage to the computer base. 9. Turn the system board assembly over . 15...
... Battery). 5. Turn on the computer base. 7. NOTE: After you have replaced the system board, enter the computer Service Tag in Replacing the Hard Drive. 13. 5 speaker cable connector 6 system board assembly 13. Align the connectors on the system board with the slots on the computer. Replace...(see Replacing the Palm Rest). 14. Replace the palm rest (see Replacing the Mini-Card). 12. Enter the service tag (see Removing the Processor Module). Remove the processor module (see Entering the Service Tag in damage to the computer base. 9. Turn the system board assembly over . 15...


