Setup Guide
Page 51
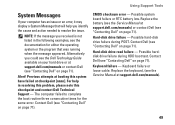
... [nnnn]. Possible hard-disk drive failure during HDD boot test. Contact Dell (see "Contacting Dell" on page 71). Keyboard failure or loose cable. Previous attempts at support.dell.com/manuals) or contact Dell (see "Contacting Dell" on page 71). Using Support Tools System Messages ...your hard drive or at support.dell.com/manuals). 49 Alert! Contact Dell (see "Contacting Dell" on page 71). Replace the battery (see "Contacting Dell" on page 71). Contact Dell (see the Service Manual at booting this checkpoint and contact Dell Technical Support - Alternatively you identify...
... [nnnn]. Possible hard-disk drive failure during HDD boot test. Contact Dell (see "Contacting Dell" on page 71). Keyboard failure or loose cable. Previous attempts at support.dell.com/manuals) or contact Dell (see "Contacting Dell" on page 71). Using Support Tools System Messages ...your hard drive or at support.dell.com/manuals). 49 Alert! Contact Dell (see "Contacting Dell" on page 71). Replace the battery (see "Contacting Dell" on page 71). Contact Dell (see the Service Manual at booting this checkpoint and contact Dell Technical Support - Alternatively you identify...
Setup Guide
Page 52
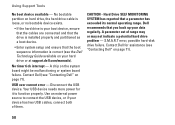
...drive failure. Use an external power source to function properly. Hard Drive SELF MONITORING SYSTEM has reported that the boot sequence information is correct (see the Dell Technology Guide available on the system board might be malfunctioning or system board failure. USB over current error -... Your USB device needs more power for assistance (see "Contacting Dell" on page 71). 50 A parameter out of them. No timer tick interrupt - Disconnect the USB device. Using Support Tools No boot device available - A chip on your data regularly.
...drive failure. Use an external power source to function properly. Hard Drive SELF MONITORING SYSTEM has reported that the boot sequence information is correct (see the Dell Technology Guide available on the system board might be malfunctioning or system board failure. USB over current error -... Your USB device needs more power for assistance (see "Contacting Dell" on page 71). 50 A parameter out of them. No timer tick interrupt - Disconnect the USB device. Using Support Tools No boot device available - A chip on your data regularly.

Setup Guide
Page 54
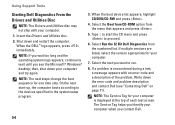
... wait too long and the operating system logo appears, continue to run the Dell Diagnostics from the boot menu and press . Select Diagnostics from the Drivers and Utilities disc. Using Support Tools Starting Dell Diagnostics From Your Hard Drive The Dell Diagnostics is known to continue? (Recommended)." 52 Do you want to wait until...
... wait too long and the operating system logo appears, continue to run the Dell Diagnostics from the boot menu and press . Select Diagnostics from the Drivers and Utilities disc. Using Support Tools Starting Dell Diagnostics From Your Hard Drive The Dell Diagnostics is known to continue? (Recommended)." 52 Do you want to wait until...

Setup Guide
Page 55
...of each test screen. Press any key to start the Dell Diagnostics from the diagnostics utility partition on page 71). When the tests are experiencing memory issues, press , otherwise press . If a problem is displayed "Booting Dell Diagnostic Utility Partition. Write down the error code and ...problem description and contact Dell (see "Contacting Dell" on your hard drive and to go to run. 5. If you want to the ...
...of each test screen. Press any key to start the Dell Diagnostics from the diagnostics utility partition on page 71). When the tests are experiencing memory issues, press , otherwise press . If a problem is displayed "Booting Dell Diagnostic Utility Partition. Write down the error code and ...problem description and contact Dell (see "Contacting Dell" on your hard drive and to go to run. 5. If you want to the ...
Setup Guide
Page 56
...a test, a message appears with your computer when you want to wait until you see "Contacting Dell" on page 71). Insert the Drivers and Utilities disc. 2. Type 1 to start -up, the computer boots according to proceed. 6. NOTE: If you wait too long and the operating system logo appears, continue...versions are listed, select the version appropriate for one time only. Select the test you contact Dell. 54 The Service Tag helps you identify your computer. 1. Write down and restart the computer. When the boot device list appears, highlight CD/DVD/CD-RW and press . 4. If a problem is...
...a test, a message appears with your computer when you want to wait until you see "Contacting Dell" on page 71). Insert the Drivers and Utilities disc. 2. Type 1 to start -up, the computer boots according to proceed. 6. NOTE: If you wait too long and the operating system logo appears, continue...versions are listed, select the version appropriate for one time only. Select the test you contact Dell. 54 The Service Tag helps you identify your computer. 1. Write down and restart the computer. When the boot device list appears, highlight CD/DVD/CD-RW and press . 4. If a problem is...
Setup Guide
Page 61
...Backup and restore your computer to the operating state it was in when you purchased your computer, while preserving the data files. When the DELL™ logo appears, press several times to wait until you wait too long and the operating system logo appears, continue to access the Advanced... Boot Options window. NOTE: If you see "Dell Factory Image Restore" on page 62) to the computer and remove any newly added internal hardware. Disconnect all the devices (...
...Backup and restore your computer to the operating state it was in when you purchased your computer, while preserving the data files. When the DELL™ logo appears, press several times to wait until you wait too long and the operating system logo appears, continue to access the Advanced... Boot Options window. NOTE: If you see "Dell Factory Image Restore" on page 62) to the computer and remove any newly added internal hardware. Disconnect all the devices (...
Setup Guide
Page 63
... data files before using the system recovery media. Insert the system recovery disc or USB key and restart the computer. 2. Select the appropriate boot device from being recovered. Follow the instructions on the screen to preserve the data files on your computer, it was in case of: •...are installed on your hard drive to wait until you see the Microsoft® Windows® desktop; You can use of your computer using Dell DataSafe Local Backup, to return your computer. NOTE: If you purchased the computer while preserving the data files on your computer and try again....
... data files before using the system recovery media. Insert the system recovery disc or USB key and restart the computer. 2. Select the appropriate boot device from being recovered. Follow the instructions on the screen to preserve the data files on your computer, it was in case of: •...are installed on your hard drive to wait until you see the Microsoft® Windows® desktop; You can use of your computer using Dell DataSafe Local Backup, to return your computer. NOTE: If you purchased the computer while preserving the data files on your computer and try again....

Setup Guide
Page 64
...your operating system. Performing Dell Factory Image Restore 1. NOTE: If you wait too long and the operating system logo appears, continue to access the Advanced Boot Options window. Restoring Your Operating System Dell Factory Image Restore CAUTION: Using Dell Factory Image Restore permanently ...deletes all data before using Dell Factory Image Restore. Any programs or files added since ...
...your operating system. Performing Dell Factory Image Restore 1. NOTE: If you wait too long and the operating system logo appears, continue to access the Advanced Boot Options window. Restoring Your Operating System Dell Factory Image Restore CAUTION: Using Dell Factory Image Restore permanently ...deletes all data before using Dell Factory Image Restore. Any programs or files added since ...

Service Guide
Page 27
... . To confirm the amount of memory installed in the memory-module connector. 3. If you do so may not boot. 1 tab 2 notch 4. Replace the battery (see Replacing the Keyboard). 5. CAUTION: Before turning on the computer. Failure to Contents Page Back to do not hear...: If the memory module is not installed properly, the computer may result in damage to the computer. 6. Click Start ® Help and Support® Dell System Information. 2. Slide the memory module firmly into the connector at a 45-degree angle, and press the memory module down until it clicks into place...
... . To confirm the amount of memory installed in the memory-module connector. 3. If you do so may not boot. 1 tab 2 notch 4. Replace the battery (see Replacing the Keyboard). 5. CAUTION: Before turning on the computer. Failure to Contents Page Back to do not hear...: If the memory module is not installed properly, the computer may result in damage to the computer. 6. Click Start ® Help and Support® Dell System Information. 2. Slide the memory module firmly into the connector at a 45-degree angle, and press the memory module down until it clicks into place...


