Owners Manual
Page 6
16 Processor 73 Removing the Processor 73 Replacing the Processor 75 17 Coin-Cell Battery 77 Removing the Coin-Cell Battery 77 Replacing the Coin-Cell Battery 79 18 Power Supply 81 Removing the Power Supply 81 Replacing the Power Supply 83 19 System Board 85 Removing the System Board 85 Replacing the System Board 87 Entering the Service Tag in the BIOS 88 20 System Setup 91 Overview 91 Entering System Setup 91 Clearing Forgotten Passwords 102 Clearing CMOS Passwords 104 6 Contents
16 Processor 73 Removing the Processor 73 Replacing the Processor 75 17 Coin-Cell Battery 77 Removing the Coin-Cell Battery 77 Replacing the Coin-Cell Battery 79 18 Power Supply 81 Removing the Power Supply 81 Replacing the Power Supply 83 19 System Board 85 Removing the System Board 85 Replacing the System Board 87 Entering the Service Tag in the BIOS 88 20 System Setup 91 Overview 91 Entering System Setup 91 Clearing Forgotten Passwords 102 Clearing CMOS Passwords 104 6 Contents
Owners Manual
Page 7
21 Flashing the BIOS 107 22 Specifications 109 Contents 7
21 Flashing the BIOS 107 22 Specifications 109 Contents 7
Owners Manual
Page 10
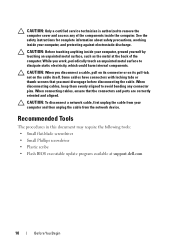
...and then unplug the cable from your computer, ground yourself by touching an unpainted metal surface, such as the metal at support.dell.com 10 Before You Begin CAUTION: To disconnect a network cable, first unplug the cable from the network device. See the ...document may require the following tools: • Small flat-blade screwdriver • Small Phillips screwdriver • Plastic scribe • Flash BIOS executable update program available at the back of the components inside your computer, and protecting against electrostatic discharge. CAUTION: When you work, periodically...
...and then unplug the cable from your computer, ground yourself by touching an unpainted metal surface, such as the metal at support.dell.com 10 Before You Begin CAUTION: To disconnect a network cable, first unplug the cable from the network device. See the ...document may require the following tools: • Small flat-blade screwdriver • Small Phillips screwdriver • Plastic scribe • Flash BIOS executable update program available at the back of the components inside your computer, and protecting against electrostatic discharge. CAUTION: When you work, periodically...
Owners Manual
Page 77
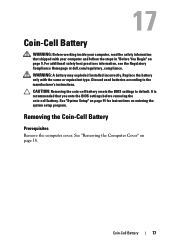
...Coin-Cell Battery Prerequisites Remove the computer cover. Replace the battery only with your computer, read the safety information that you note the BIOS settings before removing the coin-cell battery. Coin-Cell Battery WARNING: Before working inside your computer and follow the steps in "Before ...You Begin" on page 9. For additional safety best practices information, see the Regulatory Compliance Homepage at dell.com/regulatory_compliance. CAUTION: Removing the coin-cell battery resets the BIOS settings to the manufacturer's instructions. Coin-Cell Battery 77
...Coin-Cell Battery Prerequisites Remove the computer cover. Replace the battery only with your computer, read the safety information that you note the BIOS settings before removing the coin-cell battery. Coin-Cell Battery WARNING: Before working inside your computer and follow the steps in "Before ...You Begin" on page 9. For additional safety best practices information, see the Regulatory Compliance Homepage at dell.com/regulatory_compliance. CAUTION: Removing the coin-cell battery resets the BIOS settings to the manufacturer's instructions. Coin-Cell Battery 77
Owners Manual
Page 79
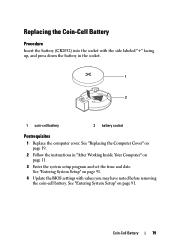
... (CR2032) into the socket with values you may have noted before removing the coin-cell battery. See "Entering System Setup" on page 91. 4 Update the BIOS settings with the side labeled "+" facing up, and press down the battery in "After Working Inside Your Computer" on page 91. Coin-Cell Battery 79
... (CR2032) into the socket with values you may have noted before removing the coin-cell battery. See "Entering System Setup" on page 91. 4 Update the BIOS settings with the side labeled "+" facing up, and press down the battery in "After Working Inside Your Computer" on page 91. Coin-Cell Battery 79
Owners Manual
Page 88
NOTE: The Service Tag Input field allows you to the main tab and enter the Service Tag in the BIOS 1 Turn on the computer. 2 Press during POST to enter the system setup program. 3 Navigate to enter the Service Tag manually only when the Service Tag is absent. 88 System Board Entering the Service Tag in the Service Tag Input field.
NOTE: The Service Tag Input field allows you to the main tab and enter the Service Tag in the BIOS 1 Turn on the computer. 2 Press during POST to enter the system setup program. 3 Navigate to enter the Service Tag manually only when the Service Tag is absent. 88 System Board Entering the Service Tag in the Service Tag Input field.
Owners Manual
Page 93
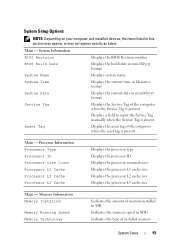
System Information BIOS Revision Displays the BIOS Revision number BIOS Build Date Displays the build date in mm/dd/yyyy format System Name Displays system name System Time Displays the current time in hh:mm:...
System Information BIOS Revision Displays the BIOS Revision number BIOS Build Date Displays the build date in mm/dd/yyyy format System Name Displays system name System Time Displays the current time in hh:mm:...

Owners Manual
Page 100
... is bootable, check the device documentation. • Network - See "System Setup" on the floppy disk, the computer generates an error message. • Hard Drive - The BIOS detects the device and adds the USB flash option to boot from the network. If no operating system, the computer generates an error message. •...
... is bootable, check the device documentation. • Network - See "System Setup" on the floppy disk, the computer generates an error message. • Hard Drive - The BIOS detects the device and adds the USB flash option to boot from the network. If no operating system, the computer generates an error message. •...
Owners Manual
Page 107
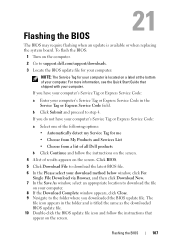
...at the bottom of results appears on the screen. To flash the BIOS: 1 Turn on the computer. 2 Go to step 4. If you have your computer. b Click Submit and proceed to support.dell.com/support/downloads. 3 Locate the BIOS update file for your computer: NOTE: The Service Tag for me &#... Choose from My Products and Services List • Choose from a list of all Dell products b Click Continue and follow the instructions that appear on the screen. 4 A list of your computer. Flashing the BIOS 107 For more information, see the Quick Start Guide that shipped with your computer's ...
...at the bottom of results appears on the screen. To flash the BIOS: 1 Turn on the computer. 2 Go to step 4. If you have your computer. b Click Submit and proceed to support.dell.com/support/downloads. 3 Locate the BIOS update file for your computer: NOTE: The Service Tag for me &#... Choose from My Products and Services List • Choose from a list of all Dell products b Click Continue and follow the instructions that appear on the screen. 4 A list of your computer. Flashing the BIOS 107 For more information, see the Quick Start Guide that shipped with your computer's ...

Owners Manual
Page 108
108 Flashing the BIOS
108 Flashing the BIOS


