Dell™ Technology Guide
Page 20
Dell Support Center 285 Solving Problems 287 Battery Problems 287 Drive Problems 287 Optical Drive Problems 288 E-Mail, Modem, and Internet Problems . . . . . 289 Error Messages 290 ... Problems 295 Network Problems 296 Power Problems 296 Printer Problems 298 Scanner Problems 299 Sound and Speaker Problems 299 Touch Pad or Mouse Problems for Laptop Computers 301 Video and Monitor Problems 302 Power Lights 304 Dell Technical Update Service 305 21 System Setup 307 Viewing System Settings With the System Setup...
Dell Support Center 285 Solving Problems 287 Battery Problems 287 Drive Problems 287 Optical Drive Problems 288 E-Mail, Modem, and Internet Problems . . . . . 289 Error Messages 290 ... Problems 295 Network Problems 296 Power Problems 296 Printer Problems 298 Scanner Problems 299 Sound and Speaker Problems 299 Touch Pad or Mouse Problems for Laptop Computers 301 Video and Monitor Problems 302 Power Lights 304 Dell Technical Update Service 305 21 System Setup 307 Viewing System Settings With the System Setup...

Dell™ Technology Guide
Page 56
..., see www.displayport.org. DisplayPort™ - Doing so can be found on the NVIDIA and ATI websites respectively. 56 Monitors and Displays Features and Benefits Dell, in or external speakers, microphone, and camera. •Better performance than dual link DVI (10.6 Gbps vs. 9.6 Gbps) •High-bandwidth audio.
..., see www.displayport.org. DisplayPort™ - Doing so can be found on the NVIDIA and ATI websites respectively. 56 Monitors and Displays Features and Benefits Dell, in or external speakers, microphone, and camera. •Better performance than dual link DVI (10.6 Gbps vs. 9.6 Gbps) •High-bandwidth audio.
Dell™ Technology Guide
Page 207
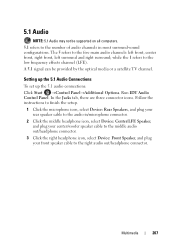
...Run IDT Audio Control Panel. Follow the instructions to finish the setup. 1 Click the microphone icon, select Device: Rear Speakers, and plug your rear speaker cable to the audio in most surround-sound configurations. The 5 refers to the right audio out/headphone connector. while the ... Click the middle headphone icon, select Device: Center/LFE Speaker, and plug your center/woofer speaker cable to the middle audio out/headphone connector. 3 Click the right headphone icon, select Device: Front Speaker, and plug your front speaker cable to the five main audio channels: left front, center...
...Run IDT Audio Control Panel. Follow the instructions to finish the setup. 1 Click the microphone icon, select Device: Rear Speakers, and plug your rear speaker cable to the audio in most surround-sound configurations. The 5 refers to the right audio out/headphone connector. while the ... Click the middle headphone icon, select Device: Center/LFE Speaker, and plug your center/woofer speaker cable to the middle audio out/headphone connector. 3 Click the right headphone icon, select Device: Front Speaker, and plug your front speaker cable to the five main audio channels: left front, center...
Dell™ Technology Guide
Page 211
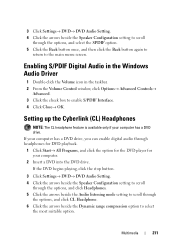
...If the DVD begins playing, click the stop button. 3 Click Settings→ DVD→ DVD Audio Setting. 4 Click the arrows beside the Speaker Configuration setting to scroll through the options, and click Headphones. 5 Click the arrows beside the Audio listening mode setting to scroll through the options...Dynamic range compression option to the main menu screen. 3 Click Settings→ DVD→ DVD Audio Setting. 4 Click the arrows beside the Speaker Configuration setting to scroll through the options, and select the SPDIF option. 5 Click the Back button once, and then click the Back button...
...If the DVD begins playing, click the stop button. 3 Click Settings→ DVD→ DVD Audio Setting. 4 Click the arrows beside the Speaker Configuration setting to scroll through the options, and click Headphones. 5 Click the arrows beside the Audio listening mode setting to scroll through the options...Dynamic range compression option to the main menu screen. 3 Click Settings→ DVD→ DVD Audio Setting. 4 Click the arrows beside the Speaker Configuration setting to scroll through the options, and select the SPDIF option. 5 Click the Back button once, and then click the Back button...
Dell™ Technology Guide
Page 217
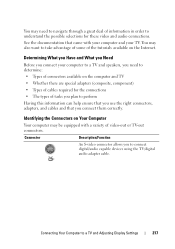
... and that came with a variety of video-out or TV-out connectors. You may be equipped with your computer and your computer to a TV and speakers, you connect your TV. You may need to determine: • Types of connectors available on Your Computer Your computer may also want to take advantage...
... and that came with a variety of video-out or TV-out connectors. You may be equipped with your computer and your computer to a TV and speakers, you connect your TV. You may need to determine: • Types of connectors available on Your Computer Your computer may also want to take advantage...
Dell™ Technology Guide
Page 219
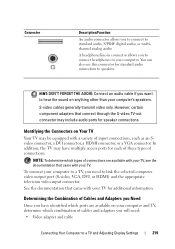
...audio, or multichannel analog audio. Determining the Combination of cables and adapters you have multiple access ports for standard audio connection to speakers. NOTE: To determine which ports are available with your TV, see the documentation that came with a variety of connections. See... the documentation that came with your computer's speakers. A headphone/line-in connector allows you want to hear the sound on anything other than your TV for speaker connections. S-video cables generally transmit video only. In addition, the TV...
...audio, or multichannel analog audio. Determining the Combination of cables and adapters you have multiple access ports for standard audio connection to speakers. NOTE: To determine which ports are available with your TV, see the documentation that came with a variety of connections. See... the documentation that came with your computer's speakers. A headphone/line-in connector allows you want to hear the sound on anything other than your TV for speaker connections. S-video cables generally transmit video only. In addition, the TV...
Dell™ Technology Guide
Page 288
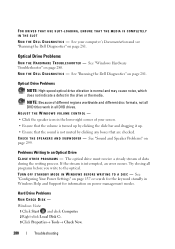
... up. • Ensure that the sound is not muted by clicking any boxes that are checked. See "Running the Dell Diagnostics" on page 280. ADJUST THE WINDOWS VOLUME CONTROL - • Click the speaker icon in Windows Help and Support for information on page 299. Optical Drive Problems R U N T H E H A R D W A R E TR O U B L E S H O O T E R - Problems Writing to the...
... up. • Ensure that the sound is not muted by clicking any boxes that are checked. See "Running the Dell Diagnostics" on page 280. ADJUST THE WINDOWS VOLUME CONTROL - • Click the speaker icon in Windows Help and Support for information on page 299. Optical Drive Problems R U N T H E H A R D W A R E TR O U B L E S H O O T E R - Problems Writing to the...

Dell™ Technology Guide
Page 299
...N E R D O C U M E N T A T I V E R - R E I N S T A L L T H E S C A N N E R D R I O N - Sound and Speaker Problems CAUTION: Before you begin any of the procedures in this section, follow the safety instructions shipped with your scanner is listed, Windows recognizes the ...THE SCANNER IS RECOGNIZED BY MICROSOFT WINDOWS - Troubleshooting 299 For additional safety best practices information, see the Regulatory Compliance Homepage at www.dell.com/regulatory_compliance. Windows XP 1 Click Start → Control Panel→ Printers and Other Hardware→ Scanners and Cameras. 2...
...N E R D O C U M E N T A T I V E R - R E I N S T A L L T H E S C A N N E R D R I O N - Sound and Speaker Problems CAUTION: Before you begin any of the procedures in this section, follow the safety instructions shipped with your scanner is listed, Windows recognizes the ...THE SCANNER IS RECOGNIZED BY MICROSOFT WINDOWS - Troubleshooting 299 For additional safety best practices information, see the Regulatory Compliance Homepage at www.dell.com/regulatory_compliance. Windows XP 1 Click Start → Control Panel→ Printers and Other Hardware→ Scanners and Cameras. 2...

Dell™ Technology Guide
Page 300
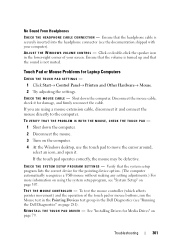
...fans, fluorescent lights, or halogen lamps to check for Media Drives" on page 280. 300 Troubleshooting E N S U R E T H A T T H E S U B W O O F E R A N D T H E S P E A K E R S A R E T U R N E D O N - TE S T T H E E L E C T R I S C O N N E C T H E A D P H O N E S F R O M T H E H E A D P H O N E C O N N E C T O R - RUN THE SPEAKER DIAGNOSTICS R E I N S T A L L T H E S O U N D D R I N D O W S V O L U M E C O N T R O L - See"Windows Hardware Troubleshooter" on page 79. A D J U S T T H E W I V E R - Ensure that the volume is automatically disabled when headphones are connected to the...
...fans, fluorescent lights, or halogen lamps to check for Media Drives" on page 280. 300 Troubleshooting E N S U R E T H A T T H E S U B W O O F E R A N D T H E S P E A K E R S A R E T U R N E D O N - TE S T T H E E L E C T R I S C O N N E C T H E A D P H O N E S F R O M T H E H E A D P H O N E C O N N E C T O R - RUN THE SPEAKER DIAGNOSTICS R E I N S T A L L T H E S O U N D D R I N D O W S V O L U M E C O N T R O L - See"Windows Hardware Troubleshooter" on page 79. A D J U S T T H E W I V E R - Ensure that the volume is automatically disabled when headphones are connected to the...
Dell™ Technology Guide
Page 301
..." on page 79. Verify that the headphone cable is not muted. TE S T T H E M O U S E C O N T R O L L E R - Click or double-click the speaker icon in the Dell Diagnostics (see "System Setup" on the computer. 4 At the Windows desktop, use the touch pad to move the cursor around, select an icon, and open ...
..." on page 79. Verify that the headphone cable is not muted. TE S T T H E M O U S E C O N T R O L L E R - Click or double-click the speaker icon in the Dell Diagnostics (see "System Setup" on the computer. 4 At the Windows desktop, use the touch pad to move the cursor around, select an icon, and open ...
Dell™ Technology Guide
Page 303
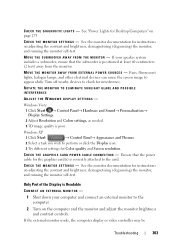
... and the monitor and adjust the monitor brightness and contrast controls. Only Part of the Display is Readable CONNECT AN EXTERNAL MONITOR - 1 Shut down your speaker system includes a subwoofer, ensure that the power cable for the graphics card(s) is positioned at least 60 centimeters (2 feet) away from the monitor. If the...
... and the monitor and adjust the monitor brightness and contrast controls. Only Part of the Display is Readable CONNECT AN EXTERNAL MONITOR - 1 Shut down your speaker system includes a subwoofer, ensure that the power cable for the graphics card(s) is positioned at least 60 centimeters (2 feet) away from the monitor. If the...
Dell™ Technology Guide
Page 329
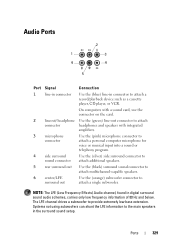
...card, use the connector on the card. 2 lineout/ headphone Use the (green) line-out connector to attach connector headphones and speakers with integrated amplifiers. 3 microphone connector Use the (pink) microphone connector to attach a personal computer microphone for voice or musical input ...surround connector to sound connector attach additional speakers. 5 rear surround out Use the (black) surround sound connector to attach multichannel-capable speakers. 6 center/LFE surround out Use the (orange) subwoofer connector to the main speakers in digital surround sound audio schemes, ...
...card, use the connector on the card. 2 lineout/ headphone Use the (green) line-out connector to attach connector headphones and speakers with integrated amplifiers. 3 microphone connector Use the (pink) microphone connector to attach a personal computer microphone for voice or musical input ...surround connector to sound connector attach additional speakers. 5 rear surround out Use the (black) surround sound connector to attach multichannel-capable speakers. 6 center/LFE surround out Use the (orange) subwoofer connector to the main speakers in digital surround sound audio schemes, ...
Dell™ Technology Guide
Page 352
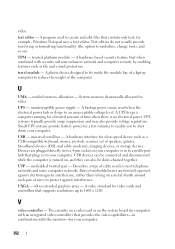
... - U UMA - Small UPS systems provide battery power for example, Windows Notepad uses a text editor. for a few minutes to enable you to reduce the weight of speakers, printer, broadband devices (DSL and cable modems), imaging devices, or storage devices. A hardware-based security feature that contain only text; USB devices can also be...
... - U UMA - Small UPS systems provide battery power for example, Windows Notepad uses a text editor. for a few minutes to enable you to reduce the weight of speakers, printer, broadband devices (DSL and cable modems), imaging devices, or storage devices. A hardware-based security feature that contain only text; USB devices can also be...

Setup Guide
Page 19
...the side with print or writing is blinking. Helps to a powered speaker or sound system, use the audio connectors on the optical drive tray.... reads or writes data. NOTE: To connect to identify your computer. 6 Line-in or microphone connector - Using Your Inspiron Desktop 8 Optical drive - Plays or records CDs, DVDs, and Blu‑ray Discs (optional). Connects to a microphone... is facing upward when placing the disc on the back of your computer when you access the Dell Support website or call technical support. 17 A blinking white light indicates hard-drive activity. Connects to...
...the side with print or writing is blinking. Helps to a powered speaker or sound system, use the audio connectors on the optical drive tray.... reads or writes data. NOTE: To connect to identify your computer. 6 Line-in or microphone connector - Using Your Inspiron Desktop 8 Optical drive - Plays or records CDs, DVDs, and Blu‑ray Discs (optional). Connects to a microphone... is facing upward when placing the disc on the back of your computer when you access the Dell Support website or call technical support. 17 A blinking white light indicates hard-drive activity. Connects to...
Setup Guide
Page 23
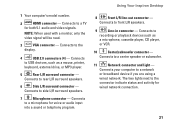
... VCR. 10 Center/subwoofer connector - Connects to a network or broadband device if you are using a wired network. Connects your computer to rear L/R surround speakers. 6 Side L/R surround connector - Using Your Inspiron Desktop 1 Your computer's model number. 2 HDMI connector - Connects to a microphone for both 5.1 audio and video signals. Connects to a TV for voice or...
... VCR. 10 Center/subwoofer connector - Connects to a network or broadband device if you are using a wired network. Connects your computer to rear L/R surround speakers. 6 Side L/R surround connector - Using Your Inspiron Desktop 1 Your computer's model number. 2 HDMI connector - Connects to a microphone for both 5.1 audio and video signals. Connects to a TV for voice or...


