Dell™ Technology Guide
Page 17
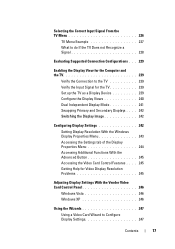
...Display Device 239 Configure the Display Views 240 Dual Independent Display Mode 241 Swapping Primary and Secondary Displays . . . . 242 Switching the Display Image 242 Configuring Display Settings 242 Setting Display Resolution With the Windows Display Properties Menu 243 Accessing the Settings tab of the Display Properties Menu 244 Accessing Additional Functions With the Advanced Button 245 Accessing the Video Card Control Features . . . . 245 Getting Help for Video Display Resolution Problems 245 Adjusting Display Settings With the Vendor Video Card Control Panel 246 Windows Vista...
...Display Device 239 Configure the Display Views 240 Dual Independent Display Mode 241 Swapping Primary and Secondary Displays . . . . 242 Switching the Display Image 242 Configuring Display Settings 242 Setting Display Resolution With the Windows Display Properties Menu 243 Accessing the Settings tab of the Display Properties Menu 244 Accessing Additional Functions With the Advanced Button 245 Accessing the Video Card Control Features . . . . 245 Getting Help for Video Display Resolution Problems 245 Adjusting Display Settings With the Vendor Video Card Control Panel 246 Windows Vista...

Dell™ Technology Guide
Page 20
... 1394 Device Problems 291 Keyboard Problems for External Keyboards . . . 292 Lockups and Software Problems 292 Memory Problems 294 Mouse Problems 295 Network Problems 296 Power Problems 296 Printer Problems 298 Scanner Problems 299 Sound and Speaker Problems 299 Touch Pad or Mouse Problems for Laptop Computers 301 Video and Monitor Problems 302 Power Lights 304 Dell Technical Update Service 305 21 System Setup 307 Viewing System Settings With the System Setup Program 307 Entering the System Setup Program 308 Working With Options on the System Setup Program Screen 308 Changing...
... 1394 Device Problems 291 Keyboard Problems for External Keyboards . . . 292 Lockups and Software Problems 292 Memory Problems 294 Mouse Problems 295 Network Problems 296 Power Problems 296 Printer Problems 298 Scanner Problems 299 Sound and Speaker Problems 299 Touch Pad or Mouse Problems for Laptop Computers 301 Video and Monitor Problems 302 Power Lights 304 Dell Technical Update Service 305 21 System Setup 307 Viewing System Settings With the System Setup Program 307 Entering the System Setup Program 308 Working With Options on the System Setup Program Screen 308 Changing...
Dell™ Technology Guide
Page 28
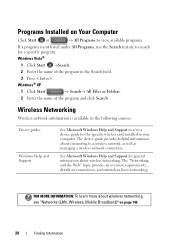
... Microsoft Windows Help and Support for the specific wireless card installed in the Search field. 3 Press . The device guide provides helpful information about wireless networking, see "Networks (LAN, Wireless, Mobile Broadband)" on Your Computer Click Start or → All Programs to view available programs. If a program is available in basic networking. FOR MORE INFORMATION: To learn more about connecting to access device guide for general information about wireless networking. Programs Installed on...
... Microsoft Windows Help and Support for the specific wireless card installed in the Search field. 3 Press . The device guide provides helpful information about wireless networking, see "Networks (LAN, Wireless, Mobile Broadband)" on Your Computer Click Start or → All Programs to view available programs. If a program is available in basic networking. FOR MORE INFORMATION: To learn more about connecting to access device guide for general information about wireless networking. Programs Installed on...
Dell™ Technology Guide
Page 64
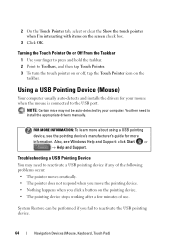
... hold the taskbar. 2 Point to install the appropriate drivers manually. System Restore can be auto-detected by your mouse when the mouse is connected to reactivate the USB pointing device. 64 Navigation Devices (Mouse, Keyboard, Touch Pad) FOR MORE INFORMATION: To learn more about using a USB pointing device, see Windows Help and Support: click Start or → Help and Support. NOTE: Certain mice may need to Toolbars, and then tap...
... hold the taskbar. 2 Point to install the appropriate drivers manually. System Restore can be auto-detected by your mouse when the mouse is connected to reactivate the USB pointing device. 64 Navigation Devices (Mouse, Keyboard, Touch Pad) FOR MORE INFORMATION: To learn more about using a USB pointing device, see Windows Help and Support: click Start or → Help and Support. NOTE: Certain mice may need to Toolbars, and then tap...
Dell™ Technology Guide
Page 79
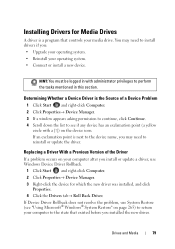
... install or update a driver, use System Restore (see if any device has an exclamation point (a yellow circle with administrator privileges to reinstall or update the driver. Drives and Media 79 Determining Whether a Device Driver is the Source of the Driver If a problem occurs on the device icon. You may need to the state that controls your operating system. • Connect or install a new device. If Device Driver Rollback does not resolve the problem, use Windows Device Driver Rollback. 1 Click Start...
... install or update a driver, use System Restore (see if any device has an exclamation point (a yellow circle with administrator privileges to reinstall or update the driver. Drives and Media 79 Determining Whether a Device Driver is the Source of the Driver If a problem occurs on the device icon. You may need to the state that controls your operating system. • Connect or install a new device. If Device Driver Rollback does not resolve the problem, use Windows Device Driver Rollback. 1 Click Start...
Dell™ Technology Guide
Page 81
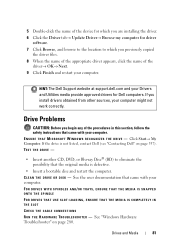
... are installing the driver. 6 Click the Driver tab→ Update Driver→ Browse my computer for Dell computers. See the user documentation that came with your computer might not work correctly. FOR DRIVES WITH SPINDLES AND/OR TRAYS, ENSURE THAT THE MEDIA IS SNAPPED ONTO THE SPINDLE FOR DRIVES THAT USE SLOT-LOADING, ENSURE THAT THE MEDIA IS COMPLETELY IN THE SLOT CHECK THE CABLE CONNECTIONS R U N T H E H A R D W A R E TR O U B L E S H O O T E R - Drive Problems...
... are installing the driver. 6 Click the Driver tab→ Update Driver→ Browse my computer for Dell computers. See the user documentation that came with your computer might not work correctly. FOR DRIVES WITH SPINDLES AND/OR TRAYS, ENSURE THAT THE MEDIA IS SNAPPED ONTO THE SPINDLE FOR DRIVES THAT USE SLOT-LOADING, ENSURE THAT THE MEDIA IS COMPLETELY IN THE SLOT CHECK THE CABLE CONNECTIONS R U N T H E H A R D W A R E TR O U B L E S H O O T E R - Drive Problems...
Dell™ Technology Guide
Page 151
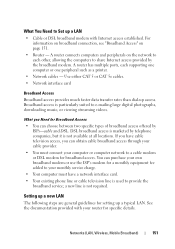
... your router for specific details. Use either CAT 5 or CAT 5e cables. • Network interface card Broadband Access Broadband access provides much faster data transfer rates than dial-up a typical LAN. Broadband access is not available at all locations. If you have cable television access, you Need for a monthly equipment fee added to e-mailing large digital photographs, downloading music, or viewing streaming videos. Networks (LAN, Wireless, Mobile Broadband) 151...
... your router for specific details. Use either CAT 5 or CAT 5e cables. • Network interface card Broadband Access Broadband access provides much faster data transfer rates than dial-up a typical LAN. Broadband access is not available at all locations. If you have cable television access, you Need for a monthly equipment fee added to e-mailing large digital photographs, downloading music, or viewing streaming videos. Networks (LAN, Wireless, Mobile Broadband) 151...

Dell™ Technology Guide
Page 166
.... Disable file and print sharing before using the Windows Vista or Windows XP operating system, ensure that the Windows firewall feature is located, refer to specify the type of your software. If you follow the preceding guidelines, do not access online banking or brokerage websites when using public wireless networks, update your computer has a wireless switch and where it is enabled. Locating Networks With the Dell Wi-Fi Catcher™ Network Locator Your...
.... Disable file and print sharing before using the Windows Vista or Windows XP operating system, ensure that the Windows firewall feature is located, refer to specify the type of your software. If you follow the preceding guidelines, do not access online banking or brokerage websites when using public wireless networks, update your computer has a wireless switch and where it is enabled. Locating Networks With the Dell Wi-Fi Catcher™ Network Locator Your...
Dell™ Technology Guide
Page 207
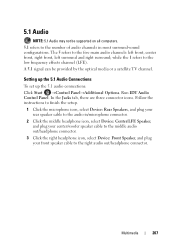
... icon, select Device: Center/LFE Speaker, and plug your center/woofer speaker cable to the middle audio out/headphone connector. 3 Click the right headphone icon, select Device: Front Speaker, and plug your front speaker cable to the audio in most surround-sound configurations. Run IDT Audio Control Panel. Setting up the 5.1 Audio Connections To set up the 5.1 audio connections: Click Start →Control Panel→Additional Options. Follow the instructions to finish the setup. 1 Click the microphone icon, select Device: Rear Speakers, and plug your rear speaker cable to the...
... icon, select Device: Center/LFE Speaker, and plug your center/woofer speaker cable to the middle audio out/headphone connector. 3 Click the right headphone icon, select Device: Front Speaker, and plug your front speaker cable to the audio in most surround-sound configurations. Run IDT Audio Control Panel. Setting up the 5.1 Audio Connections To set up the 5.1 audio connections: Click Start →Control Panel→Additional Options. Follow the instructions to finish the setup. 1 Click the microphone icon, select Device: Rear Speakers, and plug your rear speaker cable to the...
Dell™ Technology Guide
Page 276
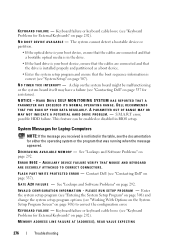
... drive is your boot device, ensure that the cables are connected and that a bootable optical media is in the drive. • If the hard drive is your boot device, ensure that the cables are connected and that the drive is installed properly and partitioned as a boot device. • Enter the system setup program and ensure that was running when the message appeared. See "Lockups and Software Problems" on page 292. I N V A L I D C O N F I G U R A T I O N I N F O R M A T I N T E R R U P T - Keyboard failure or keyboard cable loose (see "Keyboard Problems for External Keyboards...
... drive is your boot device, ensure that the cables are connected and that a bootable optical media is in the drive. • If the hard drive is your boot device, ensure that the cables are connected and that the drive is installed properly and partitioned as a boot device. • Enter the system setup program and ensure that was running when the message appeared. See "Lockups and Software Problems" on page 292. I N V A L I D C O N F I G U R A T I O N I N F O R M A T I N T E R R U P T - Keyboard failure or keyboard cable loose (see "Keyboard Problems for External Keyboards...
Dell™ Technology Guide
Page 285
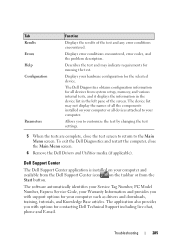
... test by changing the test settings. 5 When the tests are complete, close the Main Menu screen. 6 Remove the Dell Drivers and Utilities media (if applicable). Tab Results Errors Help Configuration Parameters Function Displays the results of the screen. Troubleshooting 285 The Dell Diagnostics obtains configuration information for contacting Dell Technical Support including live chat, phone and E-mail. Allows you with options for all devices attached to the Main Menu screen. The software automatically identifies your Service Tag Number, PC Model Number, Express Service Code...
... test by changing the test settings. 5 When the tests are complete, close the Main Menu screen. 6 Remove the Dell Drivers and Utilities media (if applicable). Tab Results Errors Help Configuration Parameters Function Displays the results of the screen. Troubleshooting 285 The Dell Diagnostics obtains configuration information for contacting Dell Technical Support including live chat, phone and E-mail. Allows you with options for all devices attached to the Main Menu screen. The software automatically identifies your Service Tag Number, PC Model Number, Express Service Code...
Dell™ Technology Guide
Page 296
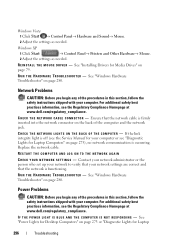
... A C K O F T H E C O M P U T E R - Windows Vista 1 Click Start → Control Panel→ Hardware and Sound→ Mouse. 2 Adjust the settings as needed . See "Windows Hardware Troubleshooter" on page 280. Ensure that the network is functioning. R U N T H E H A R D W A R E TR O U B L E S H O O T E R - For additional safety best practices information, see the Service Manual for Laptop Computers" on page 275), no network communication is firmly inserted into the network connector on page 79. See "Power Lights for Desktop Computers" on page 273 or "Diagnostic Lights for Media Drives...
... A C K O F T H E C O M P U T E R - Windows Vista 1 Click Start → Control Panel→ Hardware and Sound→ Mouse. 2 Adjust the settings as needed . See "Windows Hardware Troubleshooter" on page 280. Ensure that the network is functioning. R U N T H E H A R D W A R E TR O U B L E S H O O T E R - For additional safety best practices information, see the Service Manual for Laptop Computers" on page 275), no network communication is firmly inserted into the network connector on page 79. See "Power Lights for Desktop Computers" on page 273 or "Diagnostic Lights for Media Drives...
Dell™ Technology Guide
Page 303
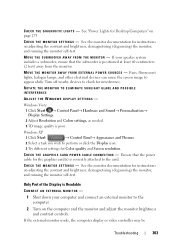
... CONNECT AN EXTERNAL MONITOR - 1 Shut down your speaker system includes a subwoofer, ensure that the power cable for instructions on the computer and the monitor and adjust the monitor brightness and contrast controls. Only Part of the Display is correctly attached to the computer. 2 Turn on adjusting the contrast and brightness, demagnetizing (degaussing) the monitor, and running the monitor self-test. C H E C K T H E M O N I T O R S E T T I O N - Windows Vista 1 Click Start → Control Panel→ Hardware and Sound→ Personalization→ Display Settings...
... CONNECT AN EXTERNAL MONITOR - 1 Shut down your speaker system includes a subwoofer, ensure that the power cable for instructions on the computer and the monitor and adjust the monitor brightness and contrast controls. Only Part of the Display is correctly attached to the computer. 2 Turn on adjusting the contrast and brightness, demagnetizing (degaussing) the monitor, and running the monitor self-test. C H E C K T H E M O N I T O R S E T T I O N - Windows Vista 1 Click Start → Control Panel→ Hardware and Sound→ Personalization→ Display Settings...
Dell™ Technology Guide
Page 310
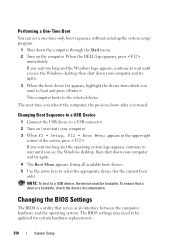
... between the computer hardware and the operating system. Changing Boot Sequence to a USB Device 1 Connect the USB device to a USB connector. 2 Turn on the computer. The BIOS settings may need to be bootable. Performing a One-Time Boot You can set a one-time-only boot sequence without entering the system setup program. 1 Shut down the computer through the Start menu. 2 Turn on (or restart) your computer and try again. 3 When the boot device list appears, highlight the...
... between the computer hardware and the operating system. Changing Boot Sequence to a USB Device 1 Connect the USB device to a USB connector. 2 Turn on the computer. The BIOS settings may need to be bootable. Performing a One-Time Boot You can set a one-time-only boot sequence without entering the system setup program. 1 Shut down the computer through the Start menu. 2 Turn on (or restart) your computer and try again. 3 When the boot device list appears, highlight the...
Dell™ Technology Guide
Page 332
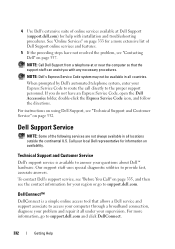
... see "Technical Support and Customer Service" on page 337. See "Online Services" on availability. NOTE: Dell's Express Service Code system may not be available in all under your region or go to access your computer through a broadband connection, diagnose your problem and repair it all locations outside the continental U.S. When prompted by Dell's automated telephone system, enter your questions about Dell™ hardware. For instructions on using Dell Support, see...
... see "Technical Support and Customer Service" on page 337. See "Online Services" on availability. NOTE: Dell's Express Service Code system may not be available in all under your region or go to access your computer through a broadband connection, diagnose your problem and repair it all locations outside the continental U.S. When prompted by Dell's automated telephone system, enter your questions about Dell™ hardware. For instructions on using Dell Support, see...
Dell™ Technology Guide
Page 351
... configure user-selectable options in the BIOS, such as date and time or system password. A power management mode that may occur during electrical storms. SVGA - surge protectors - Network connections cannot be used to attach a TV or digital audio device to 1400 x 1050. The number of colors and resolution that a program displays depends on computers equipped for video cards and controllers that supports resolutions up to the computer. super-extended graphics...
... configure user-selectable options in the BIOS, such as date and time or system password. A power management mode that may occur during electrical storms. SVGA - surge protectors - Network connections cannot be used to attach a TV or digital audio device to 1400 x 1050. The number of colors and resolution that a program displays depends on computers equipped for video cards and controllers that supports resolutions up to the computer. super-extended graphics...
Setup Guide
Page 5
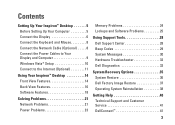
... and Mouse 8 Connect the Network Cable (Optional 8 Connect the Power Cables to Your Display and Computer 9 Windows Vista® Setup 10 Connect to the Internet (Optional 11 Using Your Inspiron™ Desktop 14 Front View Features 14 Back View Features 16 Software Features 18 Solving Problems 21 Network Problems 21 Power Problems 23 Memory Problems 24 Lockups and Software Problems 25 Using Support Tools 28 Dell Support Center 28 Beep Codes 29 System Messages 30 Hardware Troubleshooter 32 Dell Diagnostics 32 System Recovery Options 35 System Restore 36 Dell Factory Image...
... and Mouse 8 Connect the Network Cable (Optional 8 Connect the Power Cables to Your Display and Computer 9 Windows Vista® Setup 10 Connect to the Internet (Optional 11 Using Your Inspiron™ Desktop 14 Front View Features 14 Back View Features 16 Software Features 18 Solving Problems 21 Network Problems 21 Power Problems 23 Memory Problems 24 Lockups and Software Problems 25 Using Support Tools 28 Dell Support Center 28 Beep Codes 29 System Messages 30 Hardware Troubleshooter 32 Dell Diagnostics 32 System Recovery Options 35 System Restore 36 Dell Factory Image...
Setup Guide
Page 41
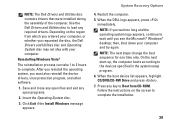
... computer. When the boot device list appears, highlight CD/DVD/CD-RW Drive and press . 7. Press any key to complete the installation. 39 System Recovery Options 4. NOTE: The Dell Drivers and Utilities disc contains drivers that were installed during the assembly of the computer. Click Exit if the Install Windows message appears. When the DELL logo appears, press immediately. NOTE: The next steps change the boot sequence for one time...
... computer. When the boot device list appears, highlight CD/DVD/CD-RW Drive and press . 7. Press any key to complete the installation. 39 System Recovery Options 4. NOTE: The Dell Drivers and Utilities disc contains drivers that were installed during the assembly of the computer. Click Exit if the Install Windows message appears. When the DELL logo appears, press immediately. NOTE: The next steps change the boot sequence for one time...
Setup Guide
Page 50
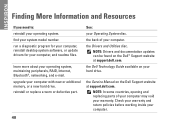
... Dell Technology Guide available on the Dell™ Support website at support.dell.com. the Drivers and Utilities disc. NOTE: In some countries, opening and replacing parts of your computer with new or additional memory, or a new hard drive. INSPIRON Finding More Information and Resources If you need to: reinstall your system model number. find your operating system. run a diagnostic program for your computer, reinstall desktop system software, or update drivers for your computer. 48 the Service Manual on the Dell Support...
... Dell Technology Guide available on the Dell™ Support website at support.dell.com. the Drivers and Utilities disc. NOTE: In some countries, opening and replacing parts of your computer with new or additional memory, or a new hard drive. INSPIRON Finding More Information and Resources If you need to: reinstall your system model number. find your operating system. run a diagnostic program for your computer, reinstall desktop system software, or update drivers for your computer. 48 the Service Manual on the Dell Support...
Tech Sheet Windows® 7
Page 4
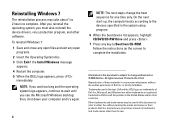
After you reinstall the operating system, you see the Microsoft Windows desktop; On the next start-up, the computer boots according to the devices specified in the U.S.A. All rights reserved. Printed in the system setup program. 6 When the boot device list appears, highlight CD/DVD/CD-RW Drive and press . 7 Press any key to either the entities claiming the marks and names or their...
After you reinstall the operating system, you see the Microsoft Windows desktop; On the next start-up, the computer boots according to the devices specified in the U.S.A. All rights reserved. Printed in the system setup program. 6 When the boot device list appears, highlight CD/DVD/CD-RW Drive and press . 7 Press any key to either the entities claiming the marks and names or their...


