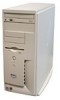
Dell Dimension 4100 System Solutions Guide
Page 23
... instructions on adjusting the contrast and brightness. S olving Pr oblems 23 CHECK THE POWER PROPERTIES IF THE MONITOR SCREEN O C C A S I N G S - See Windows Help. E L I M I N A T E P O S S I T O R S E L F - Turn off nearby fans, fluorescent lights, or halogen lamps to read A D J U S T T H E C O N T R A S T A N D B R I T O R - R UN T HE M O N I B L E IN T E R F E R E N C E - Eliminate sunlight glare, which can cause poor picture quality. See the monitor documentation for instructions...
Dell Dimension 4100 System Solutions Guide
Page 25
... select the Details tab. 2 Ensure that the electrical outlet is connected as a lamp. Ensure that the printer cable is LPT1 (Printer Port). Turn off nearby fans, fluorescent lights, or halogen lamps to Settings, and then click Printers. See page 34. Ensure that the Print to the following port: setting is connected...
Dell Dimension 4100 System Solutions Guide
Page 43
Looking Inside Your Computer CAUTION: Before you begin any of the computer. If necessary, use both latches while pushing the cover backward. Use your thumbs to press in this section, follow the safety instructions on page 7. Move the cover back slightly, and then lift it straight up. 5 Face the front of the procedures in both hands and work one side at a time. system board fan power supply filler brackets for empty card slots power cables drive cable bracket for second hard drive drive cage hard drive Addi ng Part s 43
Dell Dimension 4100 System Solutions Guide
Page 44
fan connector microprocessor (FAN 2) connector (CPU) auxiliary sound-in connector (AUX IN)* CD drive sound connector (CD IN)* speaker phone connector (TELEPHONY)* PCI card connectors * For computers with built-in parentheses indicates how items are identified on the system board. www.dell.com | support.dell.com System Board In the illustration, the text in sound...