
User Guide
Page 5
... mode ...208 Using Hibernate Mode...208 Setting Hibernate Timeout ...209 Using Schedule Power Modes ...209 Adjusting the brightness of the display ...210 Recycling...210 Recycling Dell products...210 Securing the printer 211 Statement of Volatility...211 Erasing volatile memory...211 Erasing non‑volatile memory...212 Erasing printer hard disk memory... pages 217 Ordering supplies...217 Ordering supplies using the Supplies Ordering Utility 217 Ordering supplies using Printer Home...218 Ordering toner cartridges ...218 Ordering an imaging unit ...218 Ordering a maintenance kit ...218
... mode ...208 Using Hibernate Mode...208 Setting Hibernate Timeout ...209 Using Schedule Power Modes ...209 Adjusting the brightness of the display ...210 Recycling...210 Recycling Dell products...210 Securing the printer 211 Statement of Volatility...211 Erasing volatile memory...211 Erasing non‑volatile memory...212 Erasing printer hard disk memory... pages 217 Ordering supplies...217 Ordering supplies using the Supplies Ordering Utility 217 Ordering supplies using Printer Home...218 Ordering toner cartridges ...218 Ordering an imaging unit ...218 Ordering a maintenance kit ...218
User Guide
Page 6
... pages from the finisher's accumulator. Contents 6 Ordering an ADF separator roller ...218 Storing supplies...218 Replacing supplies...219 Replacing the toner cartridge ...219 Replacing the imaging unit ...220 Replacing the staple cartridge ...223 Moving the printer...225 Before moving the printer ...225 Moving the printer to another location...226 Shipping the printer...
... pages from the finisher's accumulator. Contents 6 Ordering an ADF separator roller ...218 Storing supplies...218 Replacing supplies...219 Replacing the toner cartridge ...219 Replacing the imaging unit ...220 Replacing the staple cartridge ...223 Moving the printer...225 Before moving the printer ...225 Moving the printer to another location...226 Shipping the printer...
User Guide
Page 218
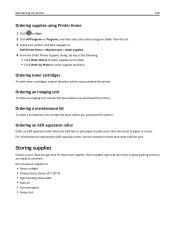
... then navigate to: Dell Printer Home > Maintenance > Order supplies 4 From the Order Printer Supplies dialog, do any of the following: • Click Order Online to order supplies on replacing the ADF separator roller, see the instruction sheet that came with the part. Ordering an imaging unit To order an imaging unit, contact the place where...
... then navigate to: Dell Printer Home > Maintenance > Order supplies 4 From the Order Printer Supplies dialog, do any of the following: • Click Order Online to order supplies on replacing the ADF separator roller, see the instruction sheet that came with the part. Ordering an imaging unit To order an imaging unit, contact the place where...
User Guide
Page 220
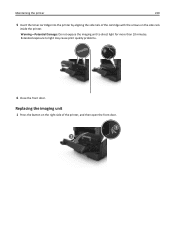
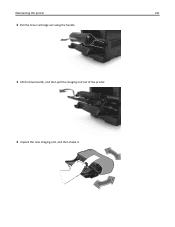
Replacing the imaging unit 1 Press the button on the side rails inside the printer. Extended exposure to direct light for more than 10 minutes. Warning-Potential Damage: Do not expose the imaging unit to light may cause print quality problems. 6 Close the front door. Maintaining the printer 220 5 Insert the toner cartridge into the printer by aligning the side rails of the cartridge with the arrows on the right side of the printer, and then open the front door. 1 2
Replacing the imaging unit 1 Press the button on the side rails inside the printer. Extended exposure to direct light for more than 10 minutes. Warning-Potential Damage: Do not expose the imaging unit to light may cause print quality problems. 6 Close the front door. Maintaining the printer 220 5 Insert the toner cartridge into the printer by aligning the side rails of the cartridge with the arrows on the right side of the printer, and then open the front door. 1 2
User Guide
Page 221
Maintaining the printer 221 2 Pull the toner cartridge out using the handle. 3 Lift the blue handle, and then pull the imaging unit out of the printer. 4 Unpack the new imaging unit, and then shake it.
Maintaining the printer 221 2 Pull the toner cartridge out using the handle. 3 Lift the blue handle, and then pull the imaging unit out of the printer. 4 Unpack the new imaging unit, and then shake it.
User Guide
Page 222
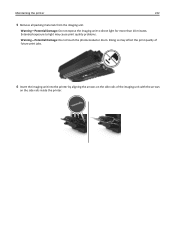
Maintaining the printer 222 5 Remove all packing materials from the imaging unit. Extended exposure to direct light for more than 10 minutes. Doing so may cause print quality problems. Warning-Potential Damage: Do not touch the photoconductor drum. Warning-Potential Damage: Do not expose the imaging unit to light may affect the print quality of future print jobs. 6 Insert the imaging unit into the printer by aligning the arrows on the side rails of the imaging unit with the arrows on the side rails inside the printer.
Maintaining the printer 222 5 Remove all packing materials from the imaging unit. Extended exposure to direct light for more than 10 minutes. Doing so may cause print quality problems. Warning-Potential Damage: Do not touch the photoconductor drum. Warning-Potential Damage: Do not expose the imaging unit to light may affect the print quality of future print jobs. 6 Insert the imaging unit into the printer by aligning the arrows on the side rails of the imaging unit with the arrows on the side rails inside the printer.
User Guide
Page 228
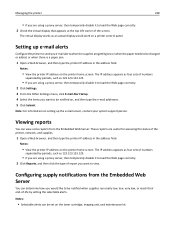
...‑of the screen. Note: For information on setting up e‑mail alerts Configure the printer to send you would work on the toner cartridge, imaging unit, and maintenance kit. Configuring supply notifications from the Embedded Web Server. The IP address appears as four sets of report you are using a proxy server...
...‑of the screen. Note: For information on setting up e‑mail alerts Configure the printer to send you would work on the toner cartridge, imaging unit, and maintenance kit. Configuring supply notifications from the Embedded Web Server. The IP address appears as four sets of report you are using a proxy server...
User Guide
Page 231
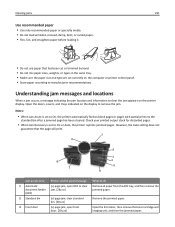
... control panel message What to do 1 Automatic [x]‑page jam, open front door. [20y.xx] Open the front door, then remove the toner cartridge and imaging unit, and then the jammed paper. Check your printed output stack for discarded pages. • When Jam Recovery is set to manufacturer recommendations. Open the doors...
... control panel message What to do 1 Automatic [x]‑page jam, open front door. [20y.xx] Open the front door, then remove the toner cartridge and imaging unit, and then the jammed paper. Check your printed output stack for discarded pages. • When Jam Recovery is set to manufacturer recommendations. Open the doors...
User Guide
Page 236
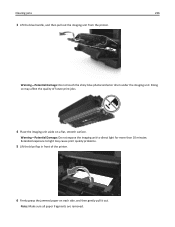
Doing so may cause print quality problems. 5 Lift the blue flap in front of future print jobs. 4 Place the imaging unit aside on each side, and then gently pull it out. Extended exposure to direct light for more than 10 minutes. Note: Make sure all paper ...fragments are removed. Clearing jams 236 3 Lift the blue handle, and then pull out the imaging unit from the printer. Warning-Potential Damage: Do not expose the imaging unit to light may affect the quality of the printer. 6 Firmly grasp the jammed paper on a flat, smooth surface. Warning-Potential...
Doing so may cause print quality problems. 5 Lift the blue flap in front of future print jobs. 4 Place the imaging unit aside on each side, and then gently pull it out. Extended exposure to direct light for more than 10 minutes. Note: Make sure all paper ...fragments are removed. Clearing jams 236 3 Lift the blue handle, and then pull out the imaging unit from the printer. Warning-Potential Damage: Do not expose the imaging unit to light may affect the quality of the printer. 6 Firmly grasp the jammed paper on a flat, smooth surface. Warning-Potential...
User Guide
Page 237
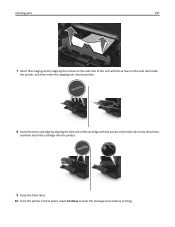
Clearing jams 237 7 Insert the imaging unit by aligning the arrows on the side rails of the unit with the arrows on the side rails inside the printer, and then insert the imaging unit into the printer. 8 Insert the toner cartridge by aligning the side rails of the cartridge with the arrows on the side rails inside the printer, and then insert the cartridge into the printer. 9 Close the front door. 10 From the printer control panel, select Continue to clear the message and continue printing.
Clearing jams 237 7 Insert the imaging unit by aligning the arrows on the side rails of the unit with the arrows on the side rails inside the printer, and then insert the imaging unit into the printer. 8 Insert the toner cartridge by aligning the side rails of the cartridge with the arrows on the side rails inside the printer, and then insert the cartridge into the printer. 9 Close the front door. 10 From the printer control panel, select Continue to clear the message and continue printing.
User Guide
Page 249
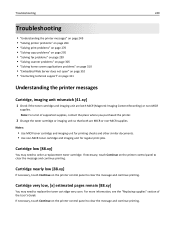
...does not open" on page 310 • "Contacting technical support" on page 311 Understanding the printer messages Cartridge, imaging unit mismatch [41.xy] 1 Check if the toner cartridge and imaging unit are MICR or non‑MICR supplies. Note: For a list of the User's Guide. Cartridge low [88... supplies" section of supported supplies, contact the place where you purchased the printer. 2 Change the toner cartridge or imaging unit so that both are both MICR (Magnetic Imaging Content Recording) or non-MICR supplies. Cartridge very low, [x] estimated pages remain [88.xy] You may need ...
...does not open" on page 310 • "Contacting technical support" on page 311 Understanding the printer messages Cartridge, imaging unit mismatch [41.xy] 1 Check if the toner cartridge and imaging unit are MICR or non‑MICR supplies. Note: For a list of the User's Guide. Cartridge low [88... supplies" section of supported supplies, contact the place where you purchased the printer. 2 Change the toner cartridge or imaging unit so that both are both MICR (Magnetic Imaging Content Recording) or non-MICR supplies. Cartridge very low, [x] estimated pages remain [88.xy] You may need ...

User Guide
Page 253
...8226; From the printer control panel, touch Continue to clear the message and continue printing without using the indicated tray. Contact system administrator. Imaging unit very low, [x] estimated pages remain [84.xy] You may need to clear the message and continue printing. Fax Station Number not set...If necessary, select Continue on the printer control panel to replace the imaging unit very soon. Fax Station Name not set up. Imaging unit low [84.xy] You may need to clear the message and continue printing. Imaging unit nearly low [84.xy] If necessary, touch Continue on the ...
...8226; From the printer control panel, touch Continue to clear the message and continue printing without using the indicated tray. Contact system administrator. Imaging unit very low, [x] estimated pages remain [84.xy] You may need to clear the message and continue printing. Fax Station Number not set...If necessary, select Continue on the printer control panel to replace the imaging unit very soon. Fax Station Name not set up. Imaging unit low [84.xy] You may need to clear the message and continue printing. Imaging unit nearly low [84.xy] If necessary, touch Continue on the ...
User Guide
Page 258
...8226; Install a flash memory card with the use of the printer and its imaging components. Paper changes needed Try one or more of third-party supplies or parts can either be a toner cartridge or imaging unit. All life indicators are not covered by the use of these risks, then remove... the third-party supply or part from your printer, and then install a genuine Dell supply or part. Warning-Potential Damage: Use of the following...
...8226; Install a flash memory card with the use of the printer and its imaging components. Paper changes needed Try one or more of third-party supplies or parts can either be a toner cartridge or imaging unit. All life indicators are not covered by the use of these risks, then remove... the third-party supply or part from your printer, and then install a genuine Dell supply or part. Warning-Potential Damage: Use of the following...
User Guide
Page 259
...Note: If you do not have a replacement cartridge, then visit our Web site or contact the place where you do not have a replacement imaging unit, then see the "Replacing supplies" section of the User's Guide. • If the toner cartridge is missing. Note: If you purchased...Check if the toner cartridge is installed, then remove the unresponsive toner cartridge, and then reinstall it. For more information, visit http://support.dell.com or contact technical support. Remove defective disk [61] Remove and replace the defective printer hard disk. If missing, install the toner...
...Note: If you do not have a replacement cartridge, then visit our Web site or contact the place where you do not have a replacement imaging unit, then see the "Replacing supplies" section of the User's Guide. • If the toner cartridge is missing. Note: If you purchased...Check if the toner cartridge is installed, then remove the unresponsive toner cartridge, and then reinstall it. For more information, visit http://support.dell.com or contact technical support. Remove defective disk [61] Remove and replace the defective printer hard disk. If missing, install the toner...
User Guide
Page 260
...Touch Scan from flatbed to clear the message and continue printing. Replace all originals if restarting job. Reinstall missing or unresponsive imaging unit [31.xy] Try one or more information, see the instruction sheet that came with the supply or see the "....xy] Contact technical support or your Dell printer dealer, and then report the message. Troubleshooting 260 Replace imaging unit, 0 estimated pages remain [84.xy] Replace the imaging unit to continue scanning from the scanner immediately after reinstalling the supply, then the imaging unit is defective. For more of the ...
...Touch Scan from flatbed to clear the message and continue printing. Replace all originals if restarting job. Reinstall missing or unresponsive imaging unit [31.xy] Try one or more information, see the instruction sheet that came with the supply or see the "....xy] Contact technical support or your Dell printer dealer, and then report the message. Troubleshooting 260 Replace imaging unit, 0 estimated pages remain [84.xy] Replace the imaging unit to continue scanning from the scanner immediately after reinstalling the supply, then the imaging unit is defective. For more of the ...
User Guide
Page 261
... the printer hard disk. • From the printer control panel, touch Do not restore if you purchased the printer. Troubleshooting 261 Replace unsupported imaging unit [32.xy] Remove the imaging unit, and then install a supported one or more of the following: • From the printer control panel, touch Restore to restore all originals ... [2yy.xx] Remove the jammed paper from the scanner. Restore held jobs stored in the Serial [x] menu. Note: If you do not have a replacement imaging unit, then visit our Web site or contact the place where you do not want to enable the scanner.
... the printer hard disk. • From the printer control panel, touch Do not restore if you purchased the printer. Troubleshooting 261 Replace unsupported imaging unit [32.xy] Remove the imaging unit, and then install a supported one or more of the following: • From the printer control panel, touch Restore to restore all originals ... [2yy.xx] Remove the jammed paper from the scanner. Restore held jobs stored in the Serial [x] menu. Note: If you do not have a replacement imaging unit, then visit our Web site or contact the place where you do not want to enable the scanner.
User Guide
Page 278
...support person. Is the printer still printing blank pages? a Redistribute the toner in the imaging unit. 1 Remove the toner cartridge, and then the imaging unit. 2 Firmly shake the imaging unit. Is the printer still printing blank pages? Extended exposure to light may cause print quality ...than 10 minutes. Extended exposure to light may cause print quality problems. 3 Reinstall the imaging unit, and then the cartridge. Warning-Potential Damage: Do not expose the imaging unit to direct light for more information, contact your computer. b Resend the print job. ...
...support person. Is the printer still printing blank pages? a Redistribute the toner in the imaging unit. 1 Remove the toner cartridge, and then the imaging unit. 2 Firmly shake the imaging unit. Is the printer still printing blank pages? Extended exposure to light may cause print quality ...than 10 minutes. Extended exposure to light may cause print quality problems. 3 Reinstall the imaging unit, and then the cartridge. Warning-Potential Damage: Do not expose the imaging unit to direct light for more information, contact your computer. b Resend the print job. ...
User Guide
Page 279
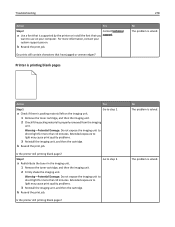
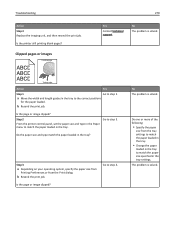
...279 Action Step 3 Replace the imaging unit, and then resend the print job. No The problem is solved. Go to the correct positions for the paper loaded. Do one or more of the following: • Specify the paper size from the Print dialog. Is the page or image clipped? Step 3 a Depending ... loaded in the Paper menu to step 3. b Resend the print job. Yes Contact technical support. The problem is solved. Clipped pages or images Leading edge ABCDE ABCDE ABCDE Trailing edge Action Yes Step 1 Go to match the paper size specified in the tray? Is the page or...
...279 Action Step 3 Replace the imaging unit, and then resend the print job. No The problem is solved. Go to the correct positions for the paper loaded. Do one or more of the following: • Specify the paper size from the Print dialog. Is the page or image clipped? Step 3 a Depending ... loaded in the Paper menu to step 3. b Resend the print job. Yes Contact technical support. The problem is solved. Clipped pages or images Leading edge ABCDE ABCDE ABCDE Trailing edge Action Yes Step 1 Go to match the paper size specified in the tray? Is the page or...
User Guide
Page 280
...? Action Yes Step 1 Go to Transparency. Warning-Potential Damage: Do not expose the imaging unit to light may cause print quality problems. 3 Install the imaging unit, and then the cartridge. Contact technical support. 1 Remove the toner cartridge. 2 Remove the imaging unit. Does the print on the color transparency look lighter? Extended exposure to direct light for...
...? Action Yes Step 1 Go to Transparency. Warning-Potential Damage: Do not expose the imaging unit to light may cause print quality problems. 3 Install the imaging unit, and then the cartridge. Contact technical support. 1 Remove the toner cartridge. 2 Remove the imaging unit. Does the print on the color transparency look lighter? Extended exposure to direct light for...
User Guide
Page 281
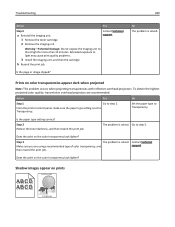
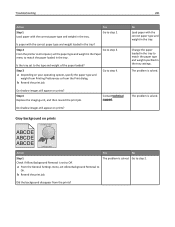
...Step 3 a Depending on prints Leading edge ABCDE ABCDE ABCDE Trailing edge Action Step 1 Check if Allow Background Removal is solved. Do shadow images still appear on prints? No Load paper with the correct paper type and weight in the tray settings. Gray background on your operating system..., specify the paper type and weight from Printing Preferences or from the prints? Step 4 Replace the imaging unit, and then resend the print job. a From the General Settings menu, set the paper type and weight in the Paper menu to ...
...Step 3 a Depending on prints Leading edge ABCDE ABCDE ABCDE Trailing edge Action Step 1 Check if Allow Background Removal is solved. Do shadow images still appear on prints? No Load paper with the correct paper type and weight in the tray settings. Gray background on your operating system..., specify the paper type and weight from Printing Preferences or from the prints? Step 4 Replace the imaging unit, and then resend the print job. a From the General Settings menu, set the paper type and weight in the Paper menu to ...

