User Guide
Page 6
... 233 [x]‑page jam, open front door. [20y.xx 235 [x]‑page jam, remove tray 1 to clear duplex. [23y.xx 238 [x]‑page jam, clear manual feeder. [25y.xx 239 [x]‑page jam, open tray [x]. [24y.xx]...240 [x]-page jam, remove all pages from the output bin. Leave paper in bin...
... 233 [x]‑page jam, open front door. [20y.xx 235 [x]‑page jam, remove tray 1 to clear duplex. [23y.xx 238 [x]‑page jam, clear manual feeder. [25y.xx 239 [x]‑page jam, open tray [x]. [24y.xx]...240 [x]-page jam, remove all pages from the output bin. Leave paper in bin...
User Guide
Page 31
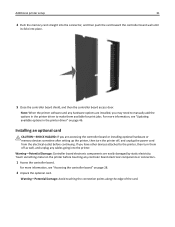
... Damage: Avoid touching the connection points along the edge of the card. Warning-Potential Damage: Controller board electronic components are installed, you may need to manually add the options in the printer driver" on page 46. Installing an optional card CAUTION-SHOCK HAZARD: If you have other devices attached to make...
... Damage: Avoid touching the connection points along the edge of the card. Warning-Potential Damage: Controller board electronic components are installed, you may need to manually add the options in the printer driver" on page 46. Installing an optional card CAUTION-SHOCK HAZARD: If you have other devices attached to make...
User Guide
Page 33
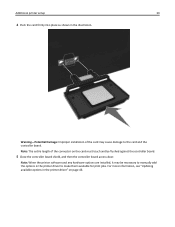
... the connector on page 46. For more information, see "Updating available options in the printer driver" on the card must touch and be necessary to manually add the options in the illustration. Note: When the printer software and any hardware options are installed, it may cause damage to the card and...
... the connector on page 46. For more information, see "Updating available options in the printer driver" on the card must touch and be necessary to manually add the options in the illustration. Note: When the printer software and any hardware options are installed, it may cause damage to the card and...
User Guide
Page 39
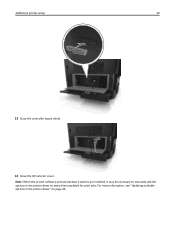
For more information, see "Updating available options in the printer driver to make them available for print jobs. Additional printer setup 39 13 Close the controller board shield. 14 Close the ISP exterior cover. Note: When the printer software and any hardware options are installed, it may be necessary to manually add the options in the printer driver" on page 46.
For more information, see "Updating available options in the printer driver to make them available for print jobs. Additional printer setup 39 13 Close the controller board shield. 14 Close the ISP exterior cover. Note: When the printer software and any hardware options are installed, it may be necessary to manually add the options in the printer driver" on page 46.

User Guide
Page 41
d Tighten the two screws. 3 Close the controller board shield, and then close the controller board access door. For more information, see "Updating available options in the printer driver to make them available for print jobs. Note: When the printer software and any hardware options are installed, you may need to manually add the options in the printer driver" on the controller board bracket, and then slide the printer hard disk onto the brackets. Additional printer setup 41 c Align the screws on the printer hard disk to the slots on page 46.
d Tighten the two screws. 3 Close the controller board shield, and then close the controller board access door. For more information, see "Updating available options in the printer driver to make them available for print jobs. Note: When the printer software and any hardware options are installed, you may need to manually add the options in the printer driver" on the controller board bracket, and then slide the printer hard disk onto the brackets. Additional printer setup 41 c Align the screws on the printer hard disk to the slots on page 46.
User Guide
Page 45
... OK. 3 Click Install, and then follow the instructions on the computer screen. If the installation dialog does not appear after a minute, then launch the CD manually: a Click , or click Start and then click Run. Note: To take advantage of the full features of your CD or DVD drive. b In the...2 1 Notes: • When the printer software and any hardware options are installed, you installed the printer software on the computer before but need to manually add the options in the printer driver" on page 46. • To uninstall the optional trays, slide the latch on the right side of the...
... OK. 3 Click Install, and then follow the instructions on the computer screen. If the installation dialog does not appear after a minute, then launch the CD manually: a Click , or click Start and then click Run. Note: To take advantage of the full features of your CD or DVD drive. b In the...2 1 Notes: • When the printer software and any hardware options are installed, you installed the printer software on the computer before but need to manually add the options in the printer driver" on page 46. • To uninstall the optional trays, slide the latch on the right side of the...

User Guide
Page 46
... during a lightning storm. Additional printer setup 46 Using the Internet An updated printer software may need to manually add the options in the printer driver to make any electrical or cabling connections, such as the fax feature... or to either of the following: • Click Update Now ‑ Ask Printer. • Under Configuration Options, manually add any installed hardware options. 6 Click Apply. a Click , or click Start and then click Run. Connect the printer...& Supplies > Driver 2 Add any hardware options are installed, you may be available at http://support.dell.com.
... during a lightning storm. Additional printer setup 46 Using the Internet An updated printer software may need to manually add the options in the printer driver to make any electrical or cabling connections, such as the fax feature... or to either of the following: • Click Update Now ‑ Ask Printer. • Under Configuration Options, manually add any installed hardware options. 6 Click Apply. a Click , or click Start and then click Run. Connect the printer...& Supplies > Driver 2 Add any hardware options are installed, you may be available at http://support.dell.com.
User Guide
Page 48
... printer on a network. You can make it easier for you to remember. If the installation dialog does not appear after a minute, then launch the CD manually: a Click , or click Start and then click Run. Note: If the configured printer does not appear in the list, then click Modify Search. 6 Follow the...
... printer on a network. You can make it easier for you to remember. If the installation dialog does not appear after a minute, then launch the CD manually: a Click , or click Start and then click Run. Note: If the configured printer does not appear in the list, then click Modify Search. 6 Follow the...
User Guide
Page 51
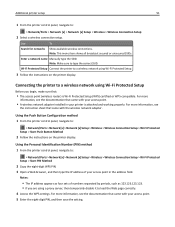
... documentation that : • The access point (wireless router) is attached and working properly. Use To Search for networks Show available wireless connections. Enter a network name Manually type the SSID. Wi‑Fi Protected Setup Connect the printer to type the correct SSID. Connecting the printer to a wireless network using Wi‑...
... documentation that : • The access point (wireless router) is attached and working properly. Use To Search for networks Show available wireless connections. Enter a network name Manually type the SSID. Wi‑Fi Protected Setup Connect the printer to type the correct SSID. Connecting the printer to a wireless network using Wi‑...

User Guide
Page 54
... COM port on the computer screen. a Insert the Software and Documentation CD. If the installation dialog does not appear after a minute, then launch the CD manually: 1 Click , or click Start and then click Run. 2 In the Start Search or Run dialog, type D:\setup.exe, where D is not in the COM port...
... COM port on the computer screen. a Insert the Software and Documentation CD. If the installation dialog does not appear after a minute, then launch the CD manually: 1 Click , or click Start and then click Run. 2 In the Start Search or Run dialog, type D:\setup.exe, where D is not in the COM port...
User Guide
Page 56
... the standard 550‑sheet tray (Tray 1) and the multipurpose feeder. • The Paper Size setting for Tray 1 and the multipurpose feeder must be set manually in the Paper Size menu. • The factory default Paper Type setting is Plain Paper. • The Paper Type setting must be set... manually for all other trays closed until needed. 1 Pull out the tray completely. Note: Do not remove trays while a job prints or while Busy appears on ...
... the standard 550‑sheet tray (Tray 1) and the multipurpose feeder. • The Paper Size setting for Tray 1 and the multipurpose feeder must be set manually in the Paper Size menu. • The factory default Paper Type setting is Plain Paper. • The Paper Type setting must be set... manually for all other trays closed until needed. 1 Pull out the tray completely. Note: Do not remove trays while a job prints or while Busy appears on ...
User Guide
Page 88
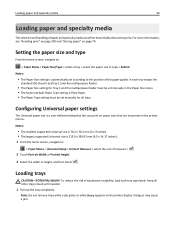
...Navigate to: Copy to > select the tray containing the letterhead > Copy It 5 If there are no trays that support letterhead, then navigate to: Manual Feeder > select the size of the transparencies > > Transparency > 4 Load transparencies into the ADF tray or facedown on letterhead 1 Load an original document... faceup, short edge first into the multipurpose feeder, and then touch Copy It. Customizing copy settings Copying to : Manual Feeder > > select the size of the letterhead > Letterhead 6 Load the letterhead faceup, top edge first into the ADF tray or facedown...
...Navigate to: Copy to > select the tray containing the letterhead > Copy It 5 If there are no trays that support letterhead, then navigate to: Manual Feeder > select the size of the transparencies > > Transparency > 4 Load transparencies into the ADF tray or facedown on letterhead 1 Load an original document... faceup, short edge first into the multipurpose feeder, and then touch Copy It. Customizing copy settings Copying to : Manual Feeder > > select the size of the letterhead > Letterhead 6 Load the letterhead faceup, top edge first into the ADF tray or facedown...
User Guide
Page 91
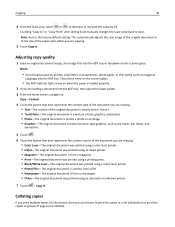
... printed using a mono laser printer. • Photo/Film-The original document is a photo from a film. • Newspaper-The original document is from " after setting Scale manually changes the scale value back to Auto. Place these items on the scanner glass. • The ADF indicator light comes on when the paper is...
... printed using a mono laser printer. • Photo/Film-The original document is a photo from a film. • Newspaper-The original document is from " after setting Scale manually changes the scale value back to Auto. Place these items on the scanner glass. • The ADF indicator light comes on when the paper is...
User Guide
Page 95
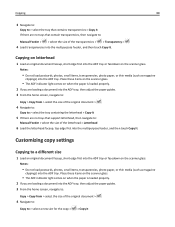
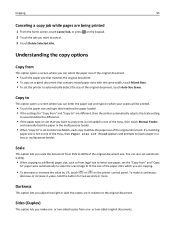
... original document that contains mixed paper sizes with the same width, touch Mixed Sizes. • To set to 400% of the trays, then touch Manual Feeder, and manually load the paper in the multipurpose feeder. • When "Copy to" is not in relation to cancel. 3 Touch Delete Selected Jobs. Sides (Duplex) This...
... original document that contains mixed paper sizes with the same width, touch Mixed Sizes. • To set to 400% of the trays, then touch Manual Feeder, and manually load the paper in the multipurpose feeder. • When "Copy to" is not in relation to cancel. 3 Touch Delete Selected Jobs. Sides (Duplex) This...
User Guide
Page 106
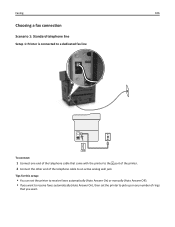
... Setup 1: Printer is connected to a dedicated fax line To connect: 1 Connect one end of the telephone cable to receive faxes automatically (Auto Answer On) or manually (Auto Answer Off). • If you want to receive faxes automatically (Auto Answer On), then set the printer to an active analog wall jack.
... Setup 1: Printer is connected to a dedicated fax line To connect: 1 Connect one end of the telephone cable to receive faxes automatically (Auto Answer On) or manually (Auto Answer Off). • If you want to receive faxes automatically (Auto Answer On), then set the printer to an active analog wall jack.
User Guide
Page 109
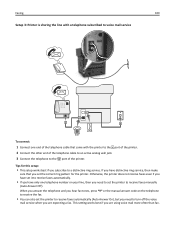
... even if you have set it to receive faxes automatically. • If you need to receive faxes manually (Auto Answer Off). When you answer the telephone and you hear fax tones, press *9* or the manual answer code on your line, then you have distinctive ring service, then make sure that came with...
... even if you have set it to receive faxes automatically. • If you need to receive faxes manually (Auto Answer Off). When you answer the telephone and you hear fax tones, press *9* or the manual answer code on your line, then you have distinctive ring service, then make sure that came with...
User Guide
Page 118
... every fax you are using a proxy server, then temporarily disable it to load the Web page correctly. 2 Click Security > Set Date and Time. 3 In the Manually Set Date & Time field, enter the current date and time. 4 Click Submit. Sending a fax using the printer control panel 1 Load an original document faceup, short...
... every fax you are using a proxy server, then temporarily disable it to load the Web page correctly. 2 Click Security > Set Date and Time. 3 In the Manually Set Date & Time field, enter the current date and time. 4 Click Submit. Sending a fax using the printer control panel 1 Load an original document faceup, short...

User Guide
Page 119
... job to verify the recipient information before the fax is sent automatically as magazine clippings) into the ADF tray. A shortcut number (1-999) can be entered manually or by using the Phone Book feature 4 If necessary, enter a prefix in the "Dialing prefix" field. 5 Select the appropriate paper size and page orientation. 6 If...
... job to verify the recipient information before the fax is sent automatically as magazine clippings) into the ADF tray. A shortcut number (1-999) can be entered manually or by using the Phone Book feature 4 If necessary, enter a prefix in the "Dialing prefix" field. 5 Select the appropriate paper size and page orientation. 6 If...

User Guide
Page 123
... to cancel. 3 Touch Delete Selected Jobs. touch the down arrow until they are deleted, and then the home screen appears. Held faxes can be released manually or at a scheduled day or time. 1 Open a Web browser, and then type the printer IP address in the address field. The Deleting Selected Jobs screen...
... to cancel. 3 Touch Delete Selected Jobs. touch the down arrow until they are deleted, and then the home screen appears. Held faxes can be released manually or at a scheduled day or time. 1 Open a Web browser, and then type the printer IP address in the address field. The Deleting Selected Jobs screen...
User Guide
Page 124
... held faxes released. Understanding the fax options Content This option lets you selected Scheduled, then continue with the following : • Off • Always On • Manual • Scheduled 4 If you specify the content type and source of text, graphics, and photos. • Photo-The original document is mostly a photo or an...
... held faxes released. Understanding the fax options Content This option lets you selected Scheduled, then continue with the following : • Off • Always On • Manual • Scheduled 4 If you specify the content type and source of text, graphics, and photos. • Photo-The original document is mostly a photo or an...


