
Owner's Manual
Page 12
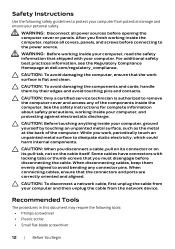
When disconnecting cables, keep them by touching an unpainted metal surface, such as the metal at dell.com/regulatory_compliance. Recommended Tools The procedures in this document may require the following safety guidelines to protect your computer, read ...metal surface to remove the computer cover and access any connector pins. CAUTION: To avoid damaging the computer, ensure that the connectors and ports are correctly oriented and aligned. Some cables have connectors with your computer, and protecting against electrostatic discharge. While you must disengage before ...
When disconnecting cables, keep them by touching an unpainted metal surface, such as the metal at dell.com/regulatory_compliance. Recommended Tools The procedures in this document may require the following safety guidelines to protect your computer, read ...metal surface to remove the computer cover and access any connector pins. CAUTION: To avoid damaging the computer, ensure that the connectors and ports are correctly oriented and aligned. Some cables have connectors with your computer, and protecting against electrostatic discharge. While you must disengage before ...
Owner's Manual
Page 113
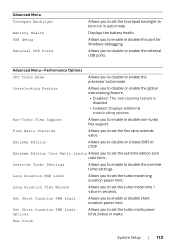
... Mode Allows you to disable or enable the processor turbo mode. Bus Clock System Setup | 113 Allows you to disable or enable the external USB ports. Overclocking Feature Allows you to disable or enable the global overclocking feature. • Disabled: The overclocking feature is disabled. • Enabled: Displays ... Allows you to set the turbo mode time 1 value in watts. Displays the battery health. Allows you to enable or disable this port for Windows debugging. Set Short Duration PWR Limit Allows you to enable or disable short duration power limit.
... Mode Allows you to disable or enable the processor turbo mode. Bus Clock System Setup | 113 Allows you to disable or enable the external USB ports. Overclocking Feature Allows you to disable or enable the global overclocking feature. • Disabled: The overclocking feature is disabled. • Enabled: Displays ... Allows you to set the turbo mode time 1 value in watts. Displays the battery health. Allows you to enable or disable this port for Windows debugging. Set Short Duration PWR Limit Allows you to enable or disable short duration power limit.

Owner's Manual
Page 116
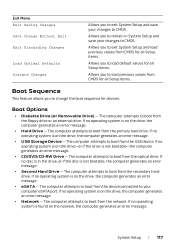
... an error message. The computer attempts to boot from the device connected to boot from the USB device. The computer attempts to your computer eSATA port. The computer attempts to boot from the optical drive. The computer attempts to boot from the secondary hard-drive. If no operating system is on...
... an error message. The computer attempts to boot from the device connected to boot from the USB device. The computer attempts to your computer eSATA port. The computer attempts to boot from the optical drive. The computer attempts to boot from the secondary hard-drive. If no operating system is on...
Owner's Manual
Page 117
... is on the drive, the computer generates an error message. • eSATA - The computer attempts to boot from the device connected to your computer eSATA port. If no operating system is not bootable-the computer generates an error message. • CD/DVD/CD-RW Drive - The computer attempts to boot from...
... is on the drive, the computer generates an error message. • eSATA - The computer attempts to boot from the device connected to your computer eSATA port. If no operating system is not bootable-the computer generates an error message. • CD/DVD/CD-RW Drive - The computer attempts to boot from...

Owner's Manual
Page 118
... wait too long and the operating system logo appears, continue to wait until you are booting from a USB device, connect the USB device to a USB port. 2 Turn on page 109. 2 Use the arrow keys to highlight the Boot menu option and press to boot from the Drivers and Utilities disc. See... then press immediately. and down your computer and try again. This prompt can use this keystroke is displayed, watch for the F2 prompt to run Dell Diagnostics from . Then shut down -arrow keys to select LEGACY BOOT or UEFI BOOT. 4 Press plus (+) or minus (-) to a USB memory key, highlight USB ...
... wait too long and the operating system logo appears, continue to wait until you are booting from a USB device, connect the USB device to a USB port. 2 Turn on page 109. 2 Use the arrow keys to highlight the Boot menu option and press to boot from the Drivers and Utilities disc. See... then press immediately. and down your computer and try again. This prompt can use this keystroke is displayed, watch for the F2 prompt to run Dell Diagnostics from . Then shut down -arrow keys to select LEGACY BOOT or UEFI BOOT. 4 Press plus (+) or minus (-) to a USB memory key, highlight USB ...
Quick Start Guide
Page 1
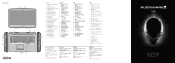
... keyboard 14 15 16. Mini DisplayPort 21. 小型 DisplayPort 22. Alienware™、AlienFX AlienHead Alienware Corporation Dell™ は、Dell Inc 2013 - 04 P19E P19E001 Alienware 18 R1 18 Quick Start Guide USB 3.0 端口 12. 具 PowerShare 的 USB 3.0 13. Headphones/Speakers port 18 19 19. USB 3.0 端口(2 个) 21. HDMI In...
... keyboard 14 15 16. Mini DisplayPort 21. 小型 DisplayPort 22. Alienware™、AlienFX AlienHead Alienware Corporation Dell™ は、Dell Inc 2013 - 04 P19E P19E001 Alienware 18 R1 18 Quick Start Guide USB 3.0 端口 12. 具 PowerShare 的 USB 3.0 13. Headphones/Speakers port 18 19 19. USB 3.0 端口(2 个) 21. HDMI In...


