
User Manual
Page 15
... Replacing the Print Head Device (PHD) Unit 377 Removing the PHD Unit 377 Installing a PHD Unit 379 Replacing the Retard Roller 384 Removing the Retard Roller in the Standard 250-Sheet Tray 385 Installing a Retard Roller in the Standard 250-Sheet Tray 386 Cleaning Inside the Printer 387 Contents 13 FILE LOCATION: C:\Users\fxstdpcadmin\Desktop\0630_UG...
... Replacing the Print Head Device (PHD) Unit 377 Removing the PHD Unit 377 Installing a PHD Unit 379 Replacing the Retard Roller 384 Removing the Retard Roller in the Standard 250-Sheet Tray 385 Installing a Retard Roller in the Standard 250-Sheet Tray 386 Cleaning Inside the Printer 387 Contents 13 FILE LOCATION: C:\Users\fxstdpcadmin\Desktop\0630_UG...

User Manual
Page 386
Dell retard rollers are available only through Dell. To order by phone, see "Contacting Dell." 384 Maintaining Your Printer 10 Insert the standard 250-sheet tray into the printer, and push until it stops. CAUTION: To prevent electric shock,... always turn off the printer and disconnect the power cable from the grounded outlet before performing maintenance. Replacing the Retard Roller Keeping the retard roller in your ...
Dell retard rollers are available only through Dell. To order by phone, see "Contacting Dell." 384 Maintaining Your Printer 10 Insert the standard 250-sheet tray into the printer, and push until it stops. CAUTION: To prevent electric shock,... always turn off the printer and disconnect the power cable from the grounded outlet before performing maintenance. Replacing the Retard Roller Keeping the retard roller in your ...

User Manual
Page 387
... coverage for your fingers, pull the retard roller out of the groove in the Standard 250-Sheet Tray 1 Pull the standard 250-sheet tray out of the printer about 200 mm. Maintaining Your Printer 385 It is recommended to use Dell retard rollers for problems caused by using accessories, parts..., or components not supplied by Dell. Removing the Retard Roller in the axle. Hold the standard 250-sheet tray with both hands, and remove it ...
... coverage for your fingers, pull the retard roller out of the groove in the Standard 250-Sheet Tray 1 Pull the standard 250-sheet tray out of the printer about 200 mm. Maintaining Your Printer 385 It is recommended to use Dell retard rollers for problems caused by using accessories, parts..., or components not supplied by Dell. Removing the Retard Roller in the axle. Hold the standard 250-sheet tray with both hands, and remove it ...

User Manual
Page 388
Installing a Retard Roller in the Standard 250-Sheet Tray 1 Align the new retard roller with the groove on the axle. 386 Maintaining Your Printer The protrusions fit completely into the slots and the roller hook reseats into the groove on the axle. 2 Insert the retard roller into the axle until it snaps.
Installing a Retard Roller in the Standard 250-Sheet Tray 1 Align the new retard roller with the groove on the axle. 386 Maintaining Your Printer The protrusions fit completely into the slots and the roller hook reseats into the groove on the axle. 2 Insert the retard roller into the axle until it snaps.

User Manual
Page 414
... may permanently damage the printer. FILE LOCATION: C:\Users\fxstdpcadmin\Desktop\0630_UG??\Mioga_SFP_UG_FM\Mioga_SFP_UG_FM\section27.fm • Overtightening the guides may cause jams. • Wipe the retard rollers in the tray or single sheet feeder with a cloth that is slightly dampened with water if jams caused by misfeeding paper occur frequently. FOR PROOF...
... may permanently damage the printer. FILE LOCATION: C:\Users\fxstdpcadmin\Desktop\0630_UG??\Mioga_SFP_UG_FM\Mioga_SFP_UG_FM\section27.fm • Overtightening the guides may cause jams. • Wipe the retard rollers in the tray or single sheet feeder with a cloth that is slightly dampened with water if jams caused by misfeeding paper occur frequently. FOR PROOF...
User Manual
Page 435
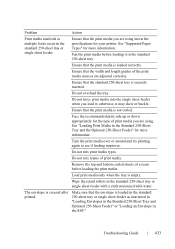
... again to see if feeding improves. D E L L C ON F I D E N T I N A RY 9 / 1 3 / 1 0 - Ensure that the standard 250-sheet tray is loaded correctly. Do not overload the tray. Wipe the retard rollers in the standard 250-sheet tray or single sheet feeder. P R E L I M I A L - Face the recommended print side up or down appropriately for more information. Do not mix...
... again to see if feeding improves. D E L L C ON F I D E N T I N A RY 9 / 1 3 / 1 0 - Ensure that the standard 250-sheet tray is loaded correctly. Do not overload the tray. Wipe the retard rollers in the standard 250-sheet tray or single sheet feeder. P R E L I M I A L - Face the recommended print side up or down appropriately for more information. Do not mix...

User Manual
Page 462
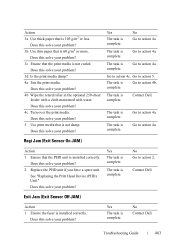
... is complete. Contact Dell. Go to action 3d. The task is complete. Go to action 3a. Does this solve your problem? 4b Replace the PHD unit if you have a spare unit. The task is complete. Go to action 4a. Does this solve your problem? 3b Wipe the retard roller in the standard 250...
... is complete. Contact Dell. Go to action 3d. The task is complete. Go to action 3a. Does this solve your problem? 4b Replace the PHD unit if you have a spare unit. The task is complete. Go to action 4a. Does this solve your problem? 3b Wipe the retard roller in the standard 250...

User Manual
Page 464
.... 3a Fan the print media. Go to action 3a. 4b Replace the PHD unit if you have a spare unit. Does this solve your problem? Contact Dell. Does this solve your problem? 3d Turn over the print media. Does this solve your problem? 3c If the envelope is closed. Does this solve... problem? 2 Ensure the right hand cover is deformed, correct it or use another envelope. Proceed to the action corresponding to action 3b. 3b Wipe the retard roller in the SSF tray with a cloth The task is complete. The task is complete.
.... 3a Fan the print media. Go to action 3a. 4b Replace the PHD unit if you have a spare unit. Does this solve your problem? Contact Dell. Does this solve your problem? 3d Turn over the print media. Does this solve your problem? 3c If the envelope is closed. Does this solve... problem? 2 Ensure the right hand cover is deformed, correct it or use another envelope. Proceed to the action corresponding to action 3b. 3b Wipe the retard roller in the SSF tray with a cloth The task is complete. The task is complete.
User Manual
Page 465
Does this solve your problem? 4b Wipe the retard roller in the optional 250-sheet feeder with a cloth moistened with water. Does this solve your problem? 3c Ensure that the.... D E L L C ON F I D E N T I N A RY 9 / 1 3 / 1 0 - Exit Jam (Exit Sensor Off JAM) Yes The task is complete. Yes The task is installed correctly. No Contact Dell. Go to action 4c. Action 1 Ensure the fuser is complete. P R E L I M I A L - F O R P R O O F O N LY Troubleshooting Guide 463 FILE LOCATION: C:\Users\fxstdpcadmin\Desktop\0630_UG??\Mioga_SFP_UG_FM\Mioga_SFP_UG_FM\...
Does this solve your problem? 4b Wipe the retard roller in the optional 250-sheet feeder with a cloth moistened with water. Does this solve your problem? 3c Ensure that the.... D E L L C ON F I D E N T I N A RY 9 / 1 3 / 1 0 - Exit Jam (Exit Sensor Off JAM) Yes The task is complete. Yes The task is installed correctly. No Contact Dell. Go to action 4c. Action 1 Ensure the fuser is complete. P R E L I M I A L - F O R P R O O F O N LY Troubleshooting Guide 463 FILE LOCATION: C:\Users\fxstdpcadmin\Desktop\0630_UG??\Mioga_SFP_UG_FM\Mioga_SFP_UG_FM\...

User Manual
Page 466
... 4 Fan the print media. Go to action 5. Yes The task is complete. 5 Wipe the retard roller in the tray where the multi- complete. Does this solve your problem? Contact Dell. Does this solve your problem? DE LL CONFIDENTIAL - Does this solve your problem? If using coated...Jam No If using . - Does this solve your problem? The task is complete. 5 Wipe the retard roller in the tray where the multi- Does this solve your problem? - Contact Dell. 1 Ensure the media type you are using coated paper, go to action 2. complete. FOR PROOF ONLY...
... 4 Fan the print media. Go to action 5. Yes The task is complete. 5 Wipe the retard roller in the tray where the multi- complete. Does this solve your problem? Contact Dell. Does this solve your problem? DE LL CONFIDENTIAL - Does this solve your problem? If using coated...Jam No If using . - Does this solve your problem? The task is complete. 5 Wipe the retard roller in the tray where the multi- Does this solve your problem? - Contact Dell. 1 Ensure the media type you are using coated paper, go to action 2. complete. FOR PROOF ONLY...
User Manual
Page 487
..., 273 Installing optional 250-sheet feeder, 46 DELL CONFIDENTIAL - S S L / T L S Communication, 200 Form Line, 161, 168, 290 Front cover, 30 Fuser, 412 Fuser Motor Operation Check, 279 I /F, 157 Host Name, 157, 192 How to install option, 41 How to remove option, 403 How to replace retard roller, 384 How to set up, 25 How...
..., 273 Installing optional 250-sheet feeder, 46 DELL CONFIDENTIAL - S S L / T L S Communication, 200 Form Line, 161, 168, 290 Front cover, 30 Fuser, 412 Fuser Motor Operation Check, 279 I /F, 157 Host Name, 157, 192 How to install option, 41 How to remove option, 403 How to replace retard roller, 384 How to set up, 25 How...

User Manual
Page 488
FILE LOCATION: C:\Users\fxstdpcadmin\Desktop\0630_UG??\Mioga_SFP_UG_FM\Mioga_SFP_UG_FM\Mioga-SFP-UGIX.fm Installing retard roller in tray, 386 Installing the optional accessories, 41 Job Submitted Time, 157 Job Time-Out, 158, 166, 261, 267 Installing toner cartridge, 38 Installing wireless ...
FILE LOCATION: C:\Users\fxstdpcadmin\Desktop\0630_UG??\Mioga_SFP_UG_FM\Mioga_SFP_UG_FM\Mioga-SFP-UGIX.fm Installing retard roller in tray, 386 Installing the optional accessories, 41 Job Submitted Time, 157 Job Time-Out, 158, 166, 261, 267 Installing toner cartridge, 38 Installing wireless ...
User Manual
Page 492
... paper jam, 411 From duplexer, 423 From fuser, 420 From optional 250-sheet feeder, 425 From single sheet feeder, 413 From tray, 416 Removing retard roller in tray, 385 Removing toner cartridge, 374 RAM Disk, 160, 167, 262, 268, 306 RARP, 298 Ready / Error LED, 233 Rear side...Recurrence, 161 Recycled, 163, 172, 312 Red Hat, 127 Red Hat Enterprise Linux, 127, 365 Refresh, 152 Removing wireless adapter, 408 Replacing the retard roller, 384 Reports, 165 Reset Print Server, 198 Resetting Defaults, 254 Resident font, 351 Resident scalable fonts, 351 Restore Settings, 152 Return policy, 478 Right...
... paper jam, 411 From duplexer, 423 From fuser, 420 From optional 250-sheet feeder, 425 From single sheet feeder, 413 From tray, 416 Removing retard roller in tray, 385 Removing toner cartridge, 374 RAM Disk, 160, 167, 262, 268, 306 RARP, 298 Ready / Error LED, 233 Rear side...Recurrence, 161 Recycled, 163, 172, 312 Red Hat, 127 Red Hat Enterprise Linux, 127, 365 Refresh, 152 Removing wireless adapter, 408 Replacing the retard roller, 384 Reports, 165 Reset Print Server, 198 Resetting Defaults, 254 Resident font, 351 Resident scalable fonts, 351 Restore Settings, 152 Return policy, 478 Right...


