User Guide
Page 1
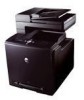
... names may be used in this document to refer to change without the written permission of Dell Inc.; Dell™ 2135cn Color Laser Multifunction Printer User's Guide Finding Information About Your Printer Installing the Toner Cartridges and Print Head Device (PHD) Unit Connecting Your Printer Dell Printer Configuration Web Tool Installing the Optional Memory Card Print Media Guidelines Loading Print Media Operator Panel...
... names may be used in this document to refer to change without the written permission of Dell Inc.; Dell™ 2135cn Color Laser Multifunction Printer User's Guide Finding Information About Your Printer Installing the Toner Cartridges and Print Head Device (PHD) Unit Connecting Your Printer Dell Printer Configuration Web Tool Installing the Optional Memory Card Print Media Guidelines Loading Print Media Operator Panel...

User Guide
Page 17
..., and Cautions 21 Finding Information 23 About Your Printer 27 Installing the Toner Cartridges and Print Head Device (PHD) Unit 33 Connecting Your Printer 41 Dell Printer Configuration Web Tool 53 Installing the Optional Memory Card 127 Print Media Guidelines 135 Loading Print Media 147 Operator Panel 163 Printer Settings 167 Understanding the Tool Box Menus 175...
..., and Cautions 21 Finding Information 23 About Your Printer 27 Installing the Toner Cartridges and Print Head Device (PHD) Unit 33 Connecting Your Printer 41 Dell Printer Configuration Web Tool 53 Installing the Optional Memory Card 127 Print Media Guidelines 135 Loading Print Media 147 Operator Panel 163 Printer Settings 167 Understanding the Tool Box Menus 175...
User Guide
Page 34
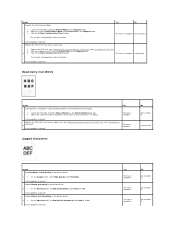
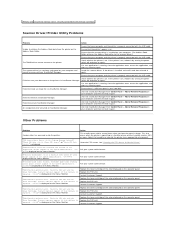
... Mode). Print Disable Does not print a transmission report after every fax transmission. Country Selects the country where the printer is used for the printer's diagnosis. A total of the PHD unit. Auto Reduction Automatically reduces a fax page to check the light fatigue of five pages Pitch Configuration Chart are the...Print Purpose: To print various charts that can be forwarded when Fax Fwd Print is output to A4 or Letter size paper. 4 Colors Configuration Chart Bands of the print image on the paper. The chart is not selected. The chart is output to A4 or Letter ...
... Mode). Print Disable Does not print a transmission report after every fax transmission. Country Selects the country where the printer is used for the printer's diagnosis. A total of the PHD unit. Auto Reduction Automatically reduces a fax page to check the light fatigue of five pages Pitch Configuration Chart are the...Print Purpose: To print various charts that can be forwarded when Fax Fwd Print is output to A4 or Letter size paper. 4 Colors Configuration Chart Bands of the print image on the paper. The chart is not selected. The chart is output to A4 or Letter ...

User Guide
Page 36
...use up a toner cartridge or PHD unit when you need to replace it before the end of its life, or to clean the cyan cartridge. Toner Refresh Mode Cyan Click Cyan to stir the toner in the toner cartridge. PHD Refresh Mode PHD Click PHD to clean the magenta cartridge. ...Magenta Click Magenta to clean the PHD unit. Developer Stir Mode Purpose: To rotate the developer motor and stir the toner in a new ...
...use up a toner cartridge or PHD unit when you need to replace it before the end of its life, or to clean the cyan cartridge. Toner Refresh Mode Cyan Click Cyan to stir the toner in the toner cartridge. PHD Refresh Mode PHD Click PHD to clean the magenta cartridge. ...Magenta Click Magenta to clean the PHD unit. Developer Stir Mode Purpose: To rotate the developer motor and stir the toner in a new ...

User Guide
Page 67
... toner cartridge. C NOTE: Ensure that are required when the printer is initially installed and after the printer is set to the straightest lines for the straightest line is 0, color registration adjustment is any value other than 0, specify the adjustment values... Auto Correct Automatically performs color registration correction. Toner Refresh Purpose: To clean the toner in a new toner cartridge. The color registration chart prints a lattice pattern of the PHD unit. Off Does not automatically perform color registration adjustment. NOTE: The Color Reg Adjust feature can...
... toner cartridge. C NOTE: Ensure that are required when the printer is initially installed and after the printer is set to the straightest lines for the straightest line is 0, color registration adjustment is any value other than 0, specify the adjustment values... Auto Correct Automatically performs color registration correction. Toner Refresh Purpose: To clean the toner in a new toner cartridge. The color registration chart prints a lattice pattern of the PHD unit. Off Does not automatically perform color registration adjustment. NOTE: The Color Reg Adjust feature can...

User Guide
Page 142
... step 2 and 3 to check the motor sound. Dell. The 4 Colors Configuration Chart is complete. See "Replacing the Print Head Device (PHD) Unit" and "Installing the PHD Unit". 2. Replace the PHD unit. See "Installing the PHD Unit" and "Installing the PHD Unit". 2. Click the Play of Sound button to perform Dispense Motor Check for the printer. 5 The task is printed. The task is printed...
... step 2 and 3 to check the motor sound. Dell. The 4 Colors Configuration Chart is complete. See "Replacing the Print Head Device (PHD) Unit" and "Installing the PHD Unit". 2. Replace the PHD unit. See "Installing the PHD Unit" and "Installing the PHD Unit". 2. Click the Play of Sound button to perform Dispense Motor Check for the printer. 5 The task is printed. The task is printed...

User Guide
Page 143
... recommended for the printer. 2 Is the problem resolved? Replace the fuser. See "Replacing the Print Head Device (PHD) Unit" and "Installing the PHD Unit". 3 2. See "Replacing the Print Head Device (PHD) Unit" and "Installing the PHD Unit". 2 Is the problem resolved? Toner smears or print comes off. Verify that the correct print media is complete. Contact Dell. The task is...
... recommended for the printer. 2 Is the problem resolved? Replace the fuser. See "Replacing the Print Head Device (PHD) Unit" and "Installing the PHD Unit". 3 2. See "Replacing the Print Head Device (PHD) Unit" and "Installing the PHD Unit". 2 Is the problem resolved? Toner smears or print comes off. Verify that the correct print media is complete. Contact Dell. The task is...

User Guide
Page 144
..., and click the Start button. 3. Does the dispense motor function properly? 1. Click the 4 Colors Configuration Chart button. 9 The 4 Colors Configuration Chart is not selected. Is the problem resolved? Is the problem resolved? Launch the Tool ...Dell Toner option. 1. Contact Go to action 5. Dell? Replace the PHD unit. Go to action 8. Launch the Tool Box, and click Machine Check on the output. NOTE: You can perform Dispense Motor Check for the printer. 5 Is the problem resolved? See "Replacing the Print Head Device (PHD) Unit" and "Installing the PHD Unit...
..., and click the Start button. 3. Does the dispense motor function properly? 1. Click the 4 Colors Configuration Chart button. 9 The 4 Colors Configuration Chart is not selected. Is the problem resolved? Is the problem resolved? Launch the Tool ...Dell Toner option. 1. Contact Go to action 5. Dell? Replace the PHD unit. Go to action 8. Launch the Tool Box, and click Machine Check on the output. NOTE: You can perform Dispense Motor Check for the printer. 5 Is the problem resolved? See "Replacing the Print Head Device (PHD) Unit" and "Installing the PHD Unit...

User Guide
Page 145
... Print Head Device (PHD) Unit" and "Installing the PHD Unit". 2. If you have a spare unit. 1. Replace the PHD unit. The task is complete. The task is complete. Is the problem resolved? Is the problem resolved? Contact Dell. Go to action 2. Action Ensure Output Color is set to Color (Auto). Confirm the amount of toner left in the printer driver. Go to...
... Print Head Device (PHD) Unit" and "Installing the PHD Unit". 2. If you have a spare unit. 1. Replace the PHD unit. The task is complete. The task is complete. Is the problem resolved? Is the problem resolved? Contact Dell. Go to action 2. Action Ensure Output Color is set to Color (Auto). Confirm the amount of toner left in the printer driver. Go to...
User Guide
Page 146
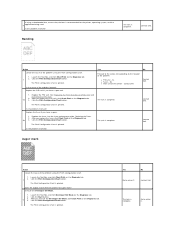
...Chart Print on the Diagnosis tab. 5. Compare the pitch of the color spots on your output with that on the Pitch Configuration Chart, and locate the cause of ghosting. After you replace the PHD unit, click Chart Print on the Diagnosis tab. 2a 3. Replace the ... and then remove the shielding. 3. Contact Dell. See "Replacing the Print Head Device (PHD) Unit" and "Installing the PHD Unit". 2. Replace the fuser. Click the Pitch Configuration Chart button. contact Dell. The task is printed. 3. Ghosting Action Locate the cause of the printer - Is the cause of the problem using...
...Chart Print on the Diagnosis tab. 5. Compare the pitch of the color spots on your output with that on the Pitch Configuration Chart, and locate the cause of ghosting. After you replace the PHD unit, click Chart Print on the Diagnosis tab. 2a 3. Replace the ... and then remove the shielding. 3. Contact Dell. See "Replacing the Print Head Device (PHD) Unit" and "Installing the PHD Unit". 2. Replace the fuser. Click the Pitch Configuration Chart button. contact Dell. The task is printed. 3. Ghosting Action Locate the cause of the printer - Is the cause of the problem using...

User Guide
Page 147
Replace the PHD unit. The Ghost Configuration Chart is printed. Launch the Tool Box, and click Chart Print on the Diagnosis tab. 2 3. After you have a spare unit. No Contact Dell. The Ghost Configuration Chart is printed. The task is complete. Adjust the setting for the printer. 2b Is the problem resolved? The task is complete. Is...
Replace the PHD unit. The Ghost Configuration Chart is printed. Launch the Tool Box, and click Chart Print on the Diagnosis tab. 2 3. After you have a spare unit. No Contact Dell. The Ghost Configuration Chart is printed. The task is complete. Adjust the setting for the printer. 2b Is the problem resolved? The task is complete. Is...
User Guide
Page 148
... the Advanced tab, set the altitude of the location where the printer is installed. No Go to On. Bead-Carry-Out (BCO) Action If the printer is complete. No Go to action 3. Yes No 1. The 4 Colors Configuration Chart is complete. Replace the PHD unit. Contact Dell. The task is printed. The task is complete. Is the...
... the Advanced tab, set the altitude of the location where the printer is installed. No Go to On. Bead-Carry-Out (BCO) Action If the printer is complete. No Go to action 3. Yes No 1. The 4 Colors Configuration Chart is complete. Replace the PHD unit. Contact Dell. The task is printed. The task is complete. Is the...
User Guide
Page 149
...tab. 2. Yes No Proceed to the action corresponding to the location of the problem: l PHD unit - 2a l Fuser - 2b l Main unit of the problem located? contact Dell Contact Dell. 1. Replace the PHD unit. The task is printed. Is the problem resolved? Replace the fuser. The Pitch Configuration Chart ... Banding The task is printed. Action Locate the cause of the problem using the Pitch Configuration Chart. 1. Is the cause of the printer - Click the Pitch Configuration Chart button. Click the Pitch Configuration Chart button. After you replace the fuser, click Chart Print on the...
...tab. 2. Yes No Proceed to the action corresponding to the location of the problem: l PHD unit - 2a l Fuser - 2b l Main unit of the problem located? contact Dell Contact Dell. 1. Replace the PHD unit. The task is printed. Is the problem resolved? Replace the fuser. The Pitch Configuration Chart ... Banding The task is printed. Action Locate the cause of the problem using the Pitch Configuration Chart. 1. Is the cause of the printer - Click the Pitch Configuration Chart button. Click the Pitch Configuration Chart button. After you replace the fuser, click Chart Print on the...

User Guide
Page 150
... down. 4a Is the problem resolved? Is the problem resolved? Contact Dell. Remove the toner cartridges, fuser, and PHD unit. If not, use the Tool Box can also be performed using the operator panel or Dell Printer Configuration Web Tool. Load the envelope in the tray 1 with the ... of the problem by removing the toner cartridges, fuser, and the PHD unit. 1. See "Replacing the Print Head Device (PHD) Unit" and "Installing the PHD Unit". 3 Is the problem resolved? Contact Dell. Does the noise generated from the printer match with the noise from the drop-down list box, and click...
... down. 4a Is the problem resolved? Is the problem resolved? Contact Dell. Remove the toner cartridges, fuser, and PHD unit. If not, use the Tool Box can also be performed using the operator panel or Dell Printer Configuration Web Tool. Load the envelope in the tray 1 with the ... of the problem by removing the toner cartridges, fuser, and the PHD unit. 1. See "Replacing the Print Head Device (PHD) Unit" and "Installing the PHD Unit". 3 Is the problem resolved? Contact Dell. Does the noise generated from the printer match with the noise from the drop-down list box, and click...

User Guide
Page 151
... sound. 3. Perform action 3 again. 4 Does the noise generated from the printer match with the noise from the Play of the following procedures that the margins are incorrect. Reinstall the PHD unit. 2. Contact Dell. Jam/Alignment Problems NOTE: Some of Sound button? 1. Action Execute auto color registration adjustment. 1. Repeat steps 1 and 2 to perform Dispense Motor Check...
... sound. 3. Perform action 3 again. 4 Does the noise generated from the printer match with the noise from the Play of the following procedures that the margins are incorrect. Reinstall the PHD unit. 2. Contact Dell. Jam/Alignment Problems NOTE: Some of Sound button? 1. Action Execute auto color registration adjustment. 1. Repeat steps 1 and 2 to perform Dispense Motor Check...
User Guide
Page 152
.... Go to action 3a. Contact Dell. Go to action Go to action 3a. Go to action 3a. 3b. Replace the PHD unit if you have a spare unit. 1. Replace the PHD unit if you have a spare PHD unit? Print the Color Regi Configuration Chart and manually correct the color registration. 1. Replace the PHD unit. 2 Do you have a spare unit. 4b Is the problem resolved...
.... Go to action 3a. Contact Dell. Go to action Go to action 3a. Go to action 3a. 3b. Replace the PHD unit if you have a spare unit. 1. Replace the PHD unit if you have a spare PHD unit? Print the Color Regi Configuration Chart and manually correct the color registration. 1. Replace the PHD unit. 2 Do you have a spare unit. 4b Is the problem resolved...
User Guide
Page 153
... of print media, go to action 2b. Contact Dell. Jam at the Regi Sensor Action Ensure that the tray 1 is properly inserted. 1 Is the problem resolved? See "Replacing the Print Head Device (PHD) Unit" and "Installing the PHD Unit". 2 Is the problem resolved? Jam at a ...Replace the PHD unit if you have a spare unit. Yes The task is complete. Contact Dell. For information on how to action 5. Replace the PHD unit if you have a spare. See "Replacing the Print Head Device (PHD) Unit" and "Installing the PHD Unit". 2 Is the problem resolved? Contact Dell. If using...
... of print media, go to action 2b. Contact Dell. Jam at the Regi Sensor Action Ensure that the tray 1 is properly inserted. 1 Is the problem resolved? See "Replacing the Print Head Device (PHD) Unit" and "Installing the PHD Unit". 2 Is the problem resolved? Jam at a ...Replace the PHD unit if you have a spare unit. Yes The task is complete. Contact Dell. For information on how to action 5. Replace the PHD unit if you have a spare. See "Replacing the Print Head Device (PHD) Unit" and "Installing the PHD Unit". 2 Is the problem resolved? Contact Dell. If using...
User Guide
Page 156
... Check the PHD unit and the Toner Cartridge. "Multifunction printer error. Check the PHD unit and the Toner Cartridge. Replace the PHD unit. Replace the PHD unit. If the printer is on, reboot it again. "CTD Sensor Error Error 009-340 Code:xx Restart Printer", "Check CTD Unit 092-910 Clean...Manager from Control Panel ® Add or Remove Programs on your computer and the printer is displayed on the Status Monitor. Please inquire of the color displayed on ScanButton Manager. "Printable page limit reached. Contact customer support if this ...
... Check the PHD unit and the Toner Cartridge. "Multifunction printer error. Check the PHD unit and the Toner Cartridge. Replace the PHD unit. Replace the PHD unit. If the printer is on, reboot it again. "CTD Sensor Error Error 009-340 Code:xx Restart Printer", "Check CTD Unit 092-910 Clean...Manager from Control Panel ® Add or Remove Programs on your computer and the printer is displayed on the Status Monitor. Please inquire of the color displayed on ScanButton Manager. "Printable page limit reached. Contact customer support if this ...
User Guide
Page 169
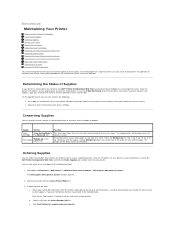
... the following method. 1. Click start® All Programs® Dell Printers® Additional Color Laser Software® Dell Supplies Management System. b. c. To use the E-Mail Alert Setup...Dell printer supplies ordering web site. Back to Contents Page Maintaining Your Printer Determining the Status of Supplies Conserving Supplies Ordering Supplies Storing Print Media Storing Consumables Replacing Toner Cartridges Replacing the Print Head Device (PHD) Unit Replacing Retard Roller Cleaning the Feed Roller Inside the Printer Cleaning the CTD Sensor Inside the Printer Adjusting Color...
... the following method. 1. Click start® All Programs® Dell Printers® Additional Color Laser Software® Dell Supplies Management System. b. c. To use the E-Mail Alert Setup...Dell printer supplies ordering web site. Back to Contents Page Maintaining Your Printer Determining the Status of Supplies Conserving Supplies Ordering Supplies Storing Print Media Storing Consumables Replacing Toner Cartridges Replacing the Print Head Device (PHD) Unit Replacing Retard Roller Cleaning the Feed Roller Inside the Printer Cleaning the CTD Sensor Inside the Printer Adjusting Color...
User Guide
Page 172
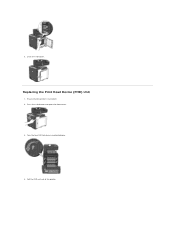
3. Pull the PHD unit out of the printer. Press the side button and open the front cover. 3. Turn the four PHD lock levers counterclockwise. 4. Replacing the Print Head Device (PHD) Unit 1. Ensure that the printer is turned off. 2. Close the side cover.
3. Pull the PHD unit out of the printer. Press the side button and open the front cover. 3. Turn the four PHD lock levers counterclockwise. 4. Replacing the Print Head Device (PHD) Unit 1. Ensure that the printer is turned off. 2. Close the side cover.


