
User Guide
Page 6
Contents Wall Mounting the Appliance ...30 Securing the Appliance against Theft 32 Network Installation...35 Setting Up the NetDefend firewall...36 Getting Started ...39 Initial Login to the NetDefend Portal 39 Logging on to the NetDefend Portal 42 Accessing the NetDefend Portal Remotely Using HTTPS 44 Using the NetDefend Portal ...46 ... Setup...63 Using a LAN Connection...65 Using a Cable Modem Connection 67 Using a PPPoE Connection...69 Using a PPTP Connection...71 Using a Telstra (BPA) Connection 73 ii D-Link NetDefend firewall User Guide
Contents Wall Mounting the Appliance ...30 Securing the Appliance against Theft 32 Network Installation...35 Setting Up the NetDefend firewall...36 Getting Started ...39 Initial Login to the NetDefend Portal 39 Logging on to the NetDefend Portal 42 Accessing the NetDefend Portal Remotely Using HTTPS 44 Using the NetDefend Portal ...46 ... Setup...63 Using a LAN Connection...65 Using a Cable Modem Connection 67 Using a PPPoE Connection...69 Using a PPTP Connection...71 Using a Telstra (BPA) Connection 73 ii D-Link NetDefend firewall User Guide
User Guide
Page 18
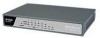
...8226; DFL-CP310 Security VPN Firewall • DFL-CPG310 Wireless Security VPN Firewall You can upgrade your reseller for console access and dialup modem connection • Supported Internet connection methods: Static IP, DHCP Client, Cable Modem, PPTP Client, PPPoE Client, Telstra BPA login, Dialup ...• Concurrent firewall connections: 8,000 • DHCP server, client, and relay • MAC cloning 2 D-Link NetDefend firewall User Guide Contact your NetDefend firewall to include additional features without replacing the hardware by installing the DFL-CP310 Power ...
...8226; DFL-CP310 Security VPN Firewall • DFL-CPG310 Wireless Security VPN Firewall You can upgrade your reseller for console access and dialup modem connection • Supported Internet connection methods: Static IP, DHCP Client, Cable Modem, PPTP Client, PPPoE Client, Telstra BPA login, Dialup ...• Concurrent firewall connections: 8,000 • DHCP server, client, and relay • MAC cloning 2 D-Link NetDefend firewall User Guide Contact your NetDefend firewall to include additional features without replacing the hardware by installing the DFL-CP310 Power ...

User Guide
Page 53
... Internet connection Using the Internet Wizard on page 54 Setting the Time on your NetDefend firewall Setting the Time on the Appliance on page 397 Setting up a wireless network (DFL-CPG310 only) Configuring a Wireless Network on page 161 Installing the Product Key Upgrading Your Software Product on page 379 Registering...Setting up the NetDefend firewall 37 Setting Up the NetDefend firewall Logging on to the NetDefend Portal and setting up your password Initial Login to a Service Center on page 281 You can access the Setup Wizard at any time after initial setup, using the procedure below.
... Internet connection Using the Internet Wizard on page 54 Setting the Time on your NetDefend firewall Setting the Time on the Appliance on page 397 Setting up a wireless network (DFL-CPG310 only) Configuring a Wireless Network on page 161 Installing the Product Key Upgrading Your Software Product on page 379 Registering...Setting up the NetDefend firewall 37 Setting Up the NetDefend firewall Logging on to the NetDefend Portal and setting up your password Initial Login to a Service Center on page 281 You can access the Setup Wizard at any time after initial setup, using the procedure below.

User Guide
Page 55
... for the first time 1. To log on to the NetDefend Portal, you need in order to get started using your password. Initial Login to the NetDefend Portal Chapter 3 Getting Started This chapter contains all the information you must set up your NetDefend firewall. This chapter includes... the following topics: Initial Login to the NetDefend Portal 39 Logging on to the NetDefend Portal 42 Accessing the NetDefend Portal Remotely Using HTTPS 44 Using the NetDefend Portal...
... for the first time 1. To log on to the NetDefend Portal, you need in order to get started using your password. Initial Login to the NetDefend Portal Chapter 3 Getting Started This chapter contains all the information you must set up your NetDefend firewall. This chapter includes... the following topics: Initial Login to the NetDefend Portal 39 Logging on to the NetDefend Portal 42 Accessing the NetDefend Portal Remotely Using HTTPS 44 Using the NetDefend Portal...

User Guide
Page 56
Click OK. 40 D-Link NetDefend firewall User Guide For further information, see Changing Your Password. 3. Initial Login to 25 characters (letters or numbers). Type a password both in the Password and the Confirm Password fields. Note: You can change your password at any time. Note: The password must be five to the NetDefend Portal The initial login page appears. 2.
Click OK. 40 D-Link NetDefend firewall User Guide For further information, see Changing Your Password. 3. Initial Login to 25 characters (letters or numbers). Type a password both in the Password and the Confirm Password fields. Note: You can change your password at any time. Note: The password must be five to the NetDefend Portal The initial login page appears. 2.

User Guide
Page 57
... Wizard, and it takes you through basic Internet connection setup, step by step. For information on page 63. Chapter 3: Getting Started 41 Initial Login to guide you through appliance setup. After you have completed the Internet Wizard, the Setup Wizard continues to the NetDefend Portal The NetDefend Setup Wizard opens, with the...
... Wizard, and it takes you through basic Internet connection setup, step by step. For information on page 63. Chapter 3: Getting Started 41 Initial Login to guide you through appliance setup. After you have completed the Internet Wizard, the Setup Wizard continues to the NetDefend Portal The NetDefend Setup Wizard opens, with the...

User Guide
Page 59
Type your username and password. 3. Click OK. Logging on to the NetDefend Portal 2. Chapter 3: Getting Started 43 The login page appears.
Type your username and password. 3. Click OK. Logging on to the NetDefend Portal 2. Chapter 3: Getting Started 43 The login page appears.

User Guide
Page 60
Note: In order to the NetDefend Portal on page 390. 44 D-Link NetDefend firewall User Guide See Configuring HTTPS on page 39. • Configure HTTPS Remote Access. See Initial Login to access the NetDefend Portal remotely using HTTP. If desired, you must first do both of the following: • Configure your ... HTTPS. Accessing the NetDefend Portal Remotely Using HTTPS You can also use HTTPS to transfer confidential user information. It is a protocol for accessing a secure Web server. Accessing the TNetDefendT Portal Remotely Using HTTPS The Welcome page appears.
Note: In order to the NetDefend Portal on page 390. 44 D-Link NetDefend firewall User Guide See Configuring HTTPS on page 39. • Configure HTTPS Remote Access. See Initial Login to access the NetDefend Portal remotely using HTTP. If desired, you must first do both of the following: • Configure your ... HTTPS. Accessing the NetDefend Portal Remotely Using HTTPS You can also use HTTPS to transfer confidential user information. It is a protocol for accessing a secure Web server. Accessing the TNetDefendT Portal Remotely Using HTTPS The Welcome page appears.

User Guide
Page 276
...field... Your changes are saved. You can use before accessing the network. The Allow a user to login from more than one computer at the same time. 260 D-Link NetDefend firewall User Guide Using Secure HotSpot 4. Click Apply. My HotSpot Terms Type the terms to My HotSpot". My HotSpot Title Type the..."Welcome to which the user must agree before accessing the Internet. Table 56: My HotSpot Fields In this option to require users to login from more than one computer at the same time Select this option to allow a single user to log on the My HotSpot page.
...field... Your changes are saved. You can use before accessing the network. The Allow a user to login from more than one computer at the same time. 260 D-Link NetDefend firewall User Guide Using Secure HotSpot 4. Click Apply. My HotSpot Terms Type the terms to My HotSpot". My HotSpot Title Type the..."Welcome to which the user must agree before accessing the Internet. Table 56: My HotSpot Fields In this option to require users to login from more than one computer at the same time Select this option to allow a single user to log on the My HotSpot page.

User Guide
Page 300
Enter your service provider, then click Next. • The Connecting... screen appears. • The Confirmation dialog box appears with a list of services to which you by your gateway ID and registration key in the appropriate fields, as given to a Service Center • If the Service Center requires authentication, the Service Center Login dialog box appears. Connecting to you are subscribed. 284 D-Link NetDefend firewall User Guide
Enter your service provider, then click Next. • The Connecting... screen appears. • The Confirmation dialog box appears with a list of services to which you by your gateway ID and registration key in the appropriate fields, as given to a Service Center • If the Service Center requires authentication, the Service Center Login dialog box appears. Connecting to you are subscribed. 284 D-Link NetDefend firewall User Guide

User Guide
Page 330
Click Next. • If you selected Username and Password, the VPN Login dialog box appears. 1. Complete the fields using the information in VPN Login Fields on page 322. 2. Adding and Editing VPN Sites Username and Password Authentication Method If you selected Automatic Login, the Connect dialog box appears. 314 D-Link NetDefend firewall User Guide
Click Next. • If you selected Username and Password, the VPN Login dialog box appears. 1. Complete the fields using the information in VPN Login Fields on page 322. 2. Adding and Editing VPN Sites Username and Password Authentication Method If you selected Automatic Login, the Connect dialog box appears. 314 D-Link NetDefend firewall User Guide

User Guide
Page 338
Certificate Select this option, a certificate must enter a four-digit PIN code and the SecurID passcode shown in Remote Access manual login mode. 322 D-Link NetDefend firewall User Guide When authenticating to the VPN site, you select this option to use an RSA SecurID token for VPN authentication. The RSA ...
Certificate Select this option, a certificate must enter a four-digit PIN code and the SecurID passcode shown in Remote Access manual login mode. 322 D-Link NetDefend firewall User Guide When authenticating to the VPN site, you select this option to use an RSA SecurID token for VPN authentication. The RSA ...

User Guide
Page 339
... configure the site for logging on to the VPN site. For further information on Automatic and Manual Login, see Logging on to a VPN Site on page 341. For further information on Automatic and Manual Login, see , Logging on to a VPN Site on page 341. Chapter 12: Working With VPNs 323 ...Password Type the password to be used for Manual Login. Adding and Editing VPN Sites Table 65: VPN Login Fields In this option to enable the NetDefend firewall to log on your internal network with constant access to the VPN...
... configure the site for logging on to the VPN site. For further information on Automatic and Manual Login, see Logging on to a VPN Site on page 341. For further information on Automatic and Manual Login, see , Logging on to a VPN Site on page 341. Chapter 12: Working With VPNs 323 ...Password Type the password to be used for Manual Login. Adding and Editing VPN Sites Table 65: VPN Login Fields In this option to enable the NetDefend firewall to log on your internal network with constant access to the VPN...

User Guide
Page 357
... confirmation message appears. Logging on to a Remote Access VPN Site You need to manually log on to a Remote Access VPN Server configured for Automatic Login or a Site-to Remote Access VPN Servers configured for each VPN destination gateway. Logging on to it. To disable a VPN site, do not ...the my.vpn page. Click the icon in your network have constant access to a Remote Access VPN Site 3. Manual Login can use a single user name and password for Manual Login. Only the computer from those computers, using the same user name and password. To share the tunnel with other computers...
... confirmation message appears. Logging on to a Remote Access VPN Site You need to manually log on to a Remote Access VPN Server configured for Automatic Login or a Site-to Remote Access VPN Servers configured for each VPN destination gateway. Logging on to it. To disable a VPN site, do not ...the my.vpn page. Click the icon in your network have constant access to a Remote Access VPN Site 3. Manual Login can use a single user name and password for Manual Login. Only the computer from those computers, using the same user name and password. To share the tunnel with other computers...

User Guide
Page 358
Click VPN in the appropriate fields. 4. Click Login. 342 D-Link NetDefend firewall User Guide The VPN Login page appears. 2. From the Site Name list, select the site to which you want to log on to a VPN site through the NetDefend Portal Note: You can only login to a Remote Access VPN Site Logging on through the NetDefend Portal 1. To manually log on . Type your user name and password in the main menu, and click the VPN Login tab. Logging on to sites that are configured for Manual Login. Note: Disabled VPN sites will not appear in the Site Name list. 3.
Click VPN in the appropriate fields. 4. Click Login. 342 D-Link NetDefend firewall User Guide The VPN Login page appears. 2. From the Site Name list, select the site to which you want to log on to a VPN site through the NetDefend Portal Note: You can only login to a Remote Access VPN Site Logging on through the NetDefend Portal 1. To manually log on . Type your user name and password in the main menu, and click the VPN Login tab. Logging on to sites that are configured for Manual Login. Note: Disabled VPN sites will not appear in the Site Name list. 3.

User Guide
Page 359
...know the my.firewall page administrator's password in order to use the my.vpn page. The Status field displays "Connected". • The VPN Login Status box remains open until you specified a network configuration, the NetDefend firewall attempts to create a tunnel to the VPN site. • Once... the NetDefend firewall has finished connecting, the VPN Login Status box appears. Logging on through the my.vpn page 1. Logging on to a Remote Access VPN Site • If the NetDefend firewall ...
...know the my.firewall page administrator's password in order to use the my.vpn page. The Status field displays "Connected". • The VPN Login Status box remains open until you specified a network configuration, the NetDefend firewall attempts to create a tunnel to the VPN site. • Once... the NetDefend firewall has finished connecting, the VPN Login Status box appears. Logging on through the my.vpn page 1. Logging on to a Remote Access VPN Site • If the NetDefend firewall ...

User Guide
Page 360
...'s progress. • Once the NetDefend firewall has finished connecting, the Status field changes to "Connected". • The VPN Login Status box remains open until you specified a network configuration, the NetDefend firewall attempts to create a tunnel to the VPN site. •...Login screen appears. 2. Logging on . 3. In the Site Name list, select the site to which you want to log on to automatically download the network configuration, the NetDefend firewall downloads the network configuration. • If when adding the VPN site you manually log off of the VPN site. 344 D-Link...
...'s progress. • Once the NetDefend firewall has finished connecting, the Status field changes to "Connected". • The VPN Login Status box remains open until you specified a network configuration, the NetDefend firewall attempts to create a tunnel to the VPN site. •...Login screen appears. 2. Logging on . 3. In the Site Name list, select the site to which you want to log on to automatically download the network configuration, the NetDefend firewall downloads the network configuration. • If when adding the VPN site you manually log off of the VPN site. 344 D-Link...

User Guide
Page 361
...displayed in the certificates. The certificate also includes a fingerprint, a unique text used to the VPN site are closed, and the VPN Login Status box closes. All open tunnels from the NetDefend firewall to identify the certificate. Installing a Certificate A digital certificate is identical to identify... to the fingerprint received. You can begin encrypting information between themselves using the public keys in the SecuRemote VPN Client is a secure means of the entity, as well as gateways, users, or computers. Upon connecting to the remote user. Chapter 12: Working...
...displayed in the certificates. The certificate also includes a fingerprint, a unique text used to the VPN site are closed, and the VPN Login Status box closes. All open tunnels from the NetDefend firewall to identify the certificate. Installing a Certificate A digital certificate is identical to identify... to the fingerprint received. You can begin encrypting information between themselves using the public keys in the SecuRemote VPN Client is a secure means of the entity, as well as gateways, users, or computers. Upon connecting to the remote user. Chapter 12: Working...

User Guide
Page 369
...kind of communication with the name of communication with the site, the tunnel will be reestablished. • Remote Access VPN sites configured for Manual Login A tunnel is closed when you have manually logged on to communicate with a computer at the VPN site. All open , and if you ...Gateways A tunnel is uninstalled. Click OK. Viewing VPN Tunnels You can view a list of time. Click OK. Click VPN in use for Automatic Login and Site-to the site are created and closed as follows: • Remote Access VPN sites configured for a period of currently established VPN tunnels...
...kind of communication with the name of communication with the site, the tunnel will be reestablished. • Remote Access VPN sites configured for Manual Login A tunnel is closed when you have manually logged on to communicate with a computer at the VPN site. All open , and if you ...Gateways A tunnel is uninstalled. Click OK. Viewing VPN Tunnels You can view a list of time. Click OK. Click VPN in use for Automatic Login and Site-to the site are created and closed as follows: • Remote Access VPN sites configured for a period of currently established VPN tunnels...

User Guide
Page 435
This may take a few minutes. • The Login page appears. Resetting the NetDefend firewall to the firmware version that shipped with the appliance, select the check box. 4. Chapter 14: Maintenance 419 To revert to Defaults 3. A confirmation message appears. Click OK. • The Please Wait screen appears. • The NetDefend firewall returns to its factory defaults. • The NetDefend firewall is restarted (the PWR/SEC LED flashes quickly).
This may take a few minutes. • The Login page appears. Resetting the NetDefend firewall to the firmware version that shipped with the appliance, select the check box. 4. Chapter 14: Maintenance 419 To revert to Defaults 3. A confirmation message appears. Click OK. • The Please Wait screen appears. • The NetDefend firewall returns to its factory defaults. • The NetDefend firewall is restarted (the PWR/SEC LED flashes quickly).


