Wireless Setup Guide
Page 7
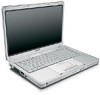
...-air" interface using high-frequency radio waves between wireless devices. WPA (Wi-Fi Protected Access)-A specificationbased, interoperable wireless security feature for 802.11 wireless network technology that is required. 7 Wi-Fi (wireless fidelity)-The name for which a pass phrase (password) is connected to a network. TCP/IP (Transmission Control Protocol/Internet Protocol)-A network protocol for sharing resources such as an Internet connection, printers, files, and drives. Radio Frequency...
...-air" interface using high-frequency radio waves between wireless devices. WPA (Wi-Fi Protected Access)-A specificationbased, interoperable wireless security feature for 802.11 wireless network technology that is required. 7 Wi-Fi (wireless fidelity)-The name for which a pass phrase (password) is connected to a network. TCP/IP (Transmission Control Protocol/Internet Protocol)-A network protocol for sharing resources such as an Internet connection, printers, files, and drives. Radio Frequency...

Hardware-Software Guide
Page 38
...+f5 hotkey is conserved. In all Windows operating system windows, references to the sleep button apply to the "Setting Other Power Preferences" section in random access memory (RAM), the screen clears, and power is set the fn+f5 hotkey to Chapter 3, "Power." When standby is initiated, your work is saved in Chapter 3, "Power." For more information about changing the function of the fn+f5 hotkey, refer to the fn+f5 hotkey. The function of...
...+f5 hotkey is conserved. In all Windows operating system windows, references to the sleep button apply to the "Setting Other Power Preferences" section in random access memory (RAM), the screen clears, and power is set the fn+f5 hotkey to Chapter 3, "Power." When standby is initiated, your work is saved in Chapter 3, "Power." For more information about changing the function of the fn+f5 hotkey, refer to the fn+f5 hotkey. The function of...
Hardware-Software Guide
Page 50
... replace the hard drive. ■ Do not connect or disconnect an external device. ■ Do not insert or remove a CD, DVD, PC Card, or digital memory card. When you left off. Hibernation is enabled by default but is much faster than resuming from hibernation. Hardware and Software Guide 3-5 Power Hibernation Ä CAUTION: If the configuration of the notebook system is changed during a battery pack calibration. » To verify that hibernation is enabled, select Start > Control Panel...
... replace the hard drive. ■ Do not connect or disconnect an external device. ■ Do not insert or remove a CD, DVD, PC Card, or digital memory card. When you left off. Hibernation is enabled by default but is much faster than resuming from hibernation. Hardware and Software Guide 3-5 Power Hibernation Ä CAUTION: If the configuration of the notebook system is changed during a battery pack calibration. » To verify that hibernation is enabled, select Start > Control Panel...

Hardware-Software Guide
Page 54
... down list.) ■ Power/standby lights are turned off . ■ Screen is cleared. Allow the system to the screen. *Depending on . ■ Your work is returned to initiate hibernation. Hibernation is selected. Press the power button.† ■ Power/standby lights are turned on your network connections, the Turn Off Computer button may not respond if the drained battery pack is the only power source.) Hardware and Software Guide 3-9 Power Initiating or Restoring from...
... down list.) ■ Power/standby lights are turned off . ■ Screen is cleared. Allow the system to the screen. *Depending on . ■ Your work is returned to initiate hibernation. Hibernation is selected. Press the power button.† ■ Power/standby lights are turned on your network connections, the Turn Off Computer button may not respond if the drained battery pack is the only power source.) Hardware and Software Guide 3-9 Power Initiating or Restoring from...

Hardware-Software Guide
Page 55
... notebook does not respond to the "Replacing a Battery Pack" section later in the sequence provided: ■ Press ctrl+alt+del. Then ❏ In Windows XP Home, select Shut Down > Turn Off. ❏ In Windows XP Professional, select Shut down the power button for your operating system, try the following emergency shutdown procedures in this chapter. 3-10 Hardware and Software Guide For battery pack removal instructions...
... notebook does not respond to the "Replacing a Battery Pack" section later in the sequence provided: ■ Press ctrl+alt+del. Then ❏ In Windows XP Home, select Shut Down > Turn Off. ❏ In Windows XP Professional, select Shut down the power button for your operating system, try the following emergency shutdown procedures in this chapter. 3-10 Hardware and Software Guide For battery pack removal instructions...
Hardware-Software Guide
Page 65
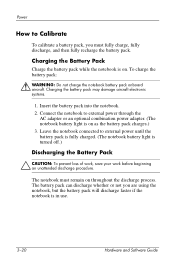
... must remain on as the battery pack charges.) 3. Power How to Calibrate To calibrate a battery pack, you are using the notebook, but the battery pack will discharge faster if the notebook is in use. 3-20 Hardware and Software Guide Connect the notebook to external power through the AC adapter or an optional combination power adapter. (The notebook battery light is on throughout the discharge process. The notebook must fully charge, fully discharge, and then fully...
... must remain on as the battery pack charges.) 3. Power How to Calibrate To calibrate a battery pack, you are using the notebook, but the battery pack will discharge faster if the notebook is in use. 3-20 Hardware and Software Guide Connect the notebook to external power through the AC adapter or an optional combination power adapter. (The notebook battery light is on throughout the discharge process. The notebook must fully charge, fully discharge, and then fully...
Hardware-Software Guide
Page 68
... a battery pack can be adjusted with the volume buttons. ■ Minimize screen brightness. ❏ To decrease screen brightness, press the fn+f7 hotkey. ❏ To increase screen brightness, press the fn+f8 hotkey. ■ If you leave your work : ■ Prevent devices you are not plugged into an external power source. ❏ Stop or remove an inserted PC Card. ❏ Disable or remove an inserted digital memory card. ❏ Turn off wireless and local area network (LAN) connections...
... a battery pack can be adjusted with the volume buttons. ■ Minimize screen brightness. ❏ To decrease screen brightness, press the fn+f7 hotkey. ❏ To increase screen brightness, press the fn+f8 hotkey. ■ If you leave your work : ■ Prevent devices you are not plugged into an external power source. ❏ Stop or remove an inserted PC Card. ❏ Disable or remove an inserted digital memory card. ❏ Turn off wireless and local area network (LAN) connections...

Hardware-Software Guide
Page 102
... the Setup utility. 6 Security Security Features ✎ Security solutions are designed to use your notebook can be configured in this guide for using ■ Antivirus software ■ Windows updates ■ Firewall software In addition to the Windows operating system security measures, the following table may be unnecessary. Depending on how and where you decide which other security features to act as deterrents. Hardware and Software Guide...
... the Setup utility. 6 Security Security Features ✎ Security solutions are designed to use your notebook can be configured in this guide for using ■ Antivirus software ■ Windows updates ■ Firewall software In addition to the Windows operating system security measures, the following table may be unnecessary. Depending on how and where you decide which other security features to act as deterrents. Hardware and Software Guide...

Hardware-Software Guide
Page 118
... connected to external power. ■ Unpowered hubs must be connected to a USB port on the notebook or to other USB hubs. The 3 USB ports on a powered hub. USB hubs can be either to a USB port on the notebook or to the notebook or an optional docking device. Hubs support varying numbers of USB devices and are used to connect an external device such as a USB keyboard, mouse, drive, printer, scanner, or hub to a port on the notebook support USB 2.0-compliant, USB 1.1-compliant, and USB 1.0-compliant devices. 7-2 Hardware and Software Guide...
... connected to external power. ■ Unpowered hubs must be connected to a USB port on the notebook or to other USB hubs. The 3 USB ports on a powered hub. USB hubs can be either to a USB port on the notebook or to the notebook or an optional docking device. Hubs support varying numbers of USB devices and are used to connect an external device such as a USB keyboard, mouse, drive, printer, scanner, or hub to a port on the notebook support USB 2.0-compliant, USB 1.1-compliant, and USB 1.0-compliant devices. 7-2 Hardware and Software Guide...

Hardware-Software Guide
Page 131
... operating system. ■ Disconnect all open applications, and shut down . 2. To replace the internal hard drive: 1. Turn the notebook upside down the notebook. If you ■ Save your work , do not begin this procedure until you are unsure whether the notebook is the internal hard drive. Hardware and Software Guide 7-15 For battery pack removal instructions, refer to the notebook. ■ Disconnect the notebook from external power and remove the battery pack. Loosen the 2 hard drive security screws. Hardware Upgrades...
... operating system. ■ Disconnect all open applications, and shut down . 2. To replace the internal hard drive: 1. Turn the notebook upside down the notebook. If you ■ Save your work , do not begin this procedure until you are unsure whether the notebook is the internal hard drive. Hardware and Software Guide 7-15 For battery pack removal instructions, refer to the notebook. ■ Disconnect the notebook from external power and remove the battery pack. Loosen the 2 hard drive security screws. Hardware Upgrades...

Hardware-Software Guide
Page 136
... in hibernation, turn the notebook on the notebook. For more information about preventing electrostatic damage, refer to the "Electrostatic Discharge" chapter in Chapter 3, "Power." 7-20 Hardware and Software Guide If you are the only user-accessible internal compartments on , and then shut it down the notebook. For instructions, refer to the "Replacing a Battery Pack" section in Regulatory and Safety Notices guide. 1. Hardware Upgrades and Replacements Removing or Inserting a Memory Module Å...
... in hibernation, turn the notebook on the notebook. For more information about preventing electrostatic damage, refer to the "Electrostatic Discharge" chapter in Chapter 3, "Power." 7-20 Hardware and Software Guide If you are the only user-accessible internal compartments on , and then shut it down the notebook. For instructions, refer to the "Replacing a Battery Pack" section in Regulatory and Safety Notices guide. 1. Hardware Upgrades and Replacements Removing or Inserting a Memory Module Å...
Hardware-Software Guide
Page 156
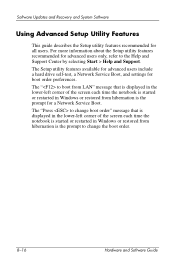
The "Press to change the boot order. 8-16 Hardware and Software Guide Software Updates and Recovery and System Software Using Advanced Setup Utility Features This guide describes the Setup utility features recommended for boot order preferences. The " to change boot order" message that is displayed in the lower-left corner of the screen each time the notebook is started or restarted in Windows or restored from hibernation is the prompt to boot from LAN" message that is displayed in the lower...
The "Press to change the boot order. 8-16 Hardware and Software Guide Software Updates and Recovery and System Software Using Advanced Setup Utility Features This guide describes the Setup utility features recommended for boot order preferences. The " to change boot order" message that is displayed in the lower-left corner of the screen each time the notebook is started or restarted in Windows or restored from hibernation is the prompt to boot from LAN" message that is displayed in the lower...
Hardware-Software Guide
Page 168
...-45 (network) jack 1-11 ROM determining current version of 8-3 downloading and installing 8-5 obtaining updates 8-4 ROMPaq 8-4 S scanner 7-3 screen saver 3-24 scroll lock key 2-7 scrolling regions, TouchPad 1-3, 2-2 Secure Digital (SD) Memory Card 7-5 security cable lock, connecting 6-15 security cable slot 1-13 security features 6-1 See also software serial number, notebook 1-19, 2-7 series, notebook 8-2 Service Tag 1-19 Setup 6-5 Setup utility changing language 8-12 displaying system information 8-14 navigation and selection 8-13 Network Service Boot 7-4, 8-16 opening 8-11 restoring default...
...-45 (network) jack 1-11 ROM determining current version of 8-3 downloading and installing 8-5 obtaining updates 8-4 ROMPaq 8-4 S scanner 7-3 screen saver 3-24 scroll lock key 2-7 scrolling regions, TouchPad 1-3, 2-2 Secure Digital (SD) Memory Card 7-5 security cable lock, connecting 6-15 security cable slot 1-13 security features 6-1 See also software serial number, notebook 1-19, 2-7 series, notebook 8-2 Service Tag 1-19 Setup 6-5 Setup utility changing language 8-12 displaying system information 8-14 navigation and selection 8-13 Network Service Boot 7-4, 8-16 opening 8-11 restoring default...
Getting Started
Page 21
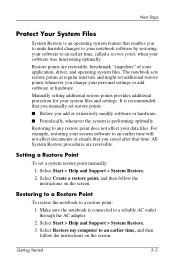
... instructions on the screen. Make sure the notebook is connected to a restore point: 1. Restoring to an earlier time, called a restore point, when your software was functioning optimally. All System Restore procedures are restorable, benchmark "snapshots" of your application, driver, and operating system files. Select Start > Help and Support > System Restore. 2. It is recommended that time. Setting a Restore Point To set additional restore points whenever you to undo harmful changes to your notebook software by restoring...
... instructions on the screen. Make sure the notebook is connected to a restore point: 1. Restoring to an earlier time, called a restore point, when your software was functioning optimally. All System Restore procedures are restorable, benchmark "snapshots" of your application, driver, and operating system files. Select Start > Help and Support > System Restore. 2. It is recommended that time. Setting a Restore Point To set additional restore points whenever you to undo harmful changes to your notebook software by restoring...

Compaq Presario V2000 Notebook PC - Hardware and Software Guide
Page 53
... than returning to restore from an expansion product. ■ Do not add or remove any memory modules. ■ Do not insert remove or replace any hard drives or optical drives. ■ Do not connect or disconnect an external device. ■ Do not insert or remove an external media card such as an ExpressCard or a Memory Reader card. Power Hibernation Ä CAUTION: If the configuration of the computer system is changed during hibernation...
... than returning to restore from an expansion product. ■ Do not add or remove any memory modules. ■ Do not insert remove or replace any hard drives or optical drives. ■ Do not connect or disconnect an external device. ■ Do not insert or remove an external media card such as an ExpressCard or a Memory Reader card. Power Hibernation Ä CAUTION: If the configuration of the computer system is changed during hibernation...

Compaq Presario V2000 Notebook PC - Hardware and Software Guide
Page 76
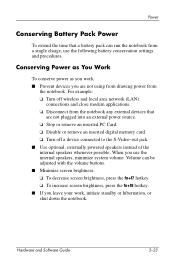
... work : ■ Prevent devices you work , initiate standby or hibernation, or shut down the computer. 3-30 Hardware and Software Guide Power Conserving Battery Pack Power To extend the time that you use the following battery conservation settings and procedures. When you are not using . ❏ Disable or remove an inserted digital card. ❏ Turn off wireless and local area network (LAN) connections and close modem applications. ❏ Disconnect from a single charge, use the internal...
... work : ■ Prevent devices you work , initiate standby or hibernation, or shut down the computer. 3-30 Hardware and Software Guide Power Conserving Battery Pack Power To extend the time that you use the following battery conservation settings and procedures. When you are not using . ❏ Disable or remove an inserted digital card. ❏ Turn off wireless and local area network (LAN) connections and close modem applications. ❏ Disconnect from a single charge, use the internal...

Compaq Presario V2000 Notebook PC - Hardware and Software Guide
Page 113
... if it is thereafter entered with embedded numeric keypad number keys. ✎ Select models include a separate numeric keypad, which functions exactly like the keyboard number keys. ■ A password set in the Setup Utility: ■ Can be any combination of up to 8 letters and numbers and is not case sensitive. ■ Must be set in the Setup Utility must be entered at a Windows prompt. A password set and entered with the same keys. Hardware and Software Guide 6-7
... if it is thereafter entered with embedded numeric keypad number keys. ✎ Select models include a separate numeric keypad, which functions exactly like the keyboard number keys. ■ A password set in the Setup Utility: ■ Can be any combination of up to 8 letters and numbers and is not case sensitive. ■ Must be set in the Setup Utility must be entered at a Windows prompt. A password set and entered with the same keys. Hardware and Software Guide 6-7

Compaq Presario V2000 Notebook PC - Hardware and Software Guide
Page 114
... the Setup Utility, press f10 and follow the instructions on or restarting the computer, and then pressing f10 while the Setup message is set , it must be identical. ■ Is not displayed as it in the Setup Utility. Use the arrow keys to access the Setup Utility. Managing an Administrator Password To set, change an administrator password, type your current password in the Enter Current Password field, type the new password in the Enter New Password and Confirm New Password...
... the Setup Utility, press f10 and follow the instructions on or restarting the computer, and then pressing f10 while the Setup message is set , it must be identical. ■ Is not displayed as it in the Setup Utility. Use the arrow keys to access the Setup Utility. Managing an Administrator Password To set, change an administrator password, type your current password in the Enter Current Password field, type the new password in the Enter New Password and Confirm New Password...
Compaq Presario V2000 Notebook PC - Hardware and Software Guide
Page 177
...power light 1-8 resuming from 3-11 setting preferences 3-15 stereo speakers external 4-4 internal 1-9, 4-1 S-Video-out jack 1-15, 4-6 switch, display identifying 1-4, 3-5 setting preferences 3-16 system information, displaying 8-3, 8-13 system lock-up 3-14 System Restore 8-9 Index-8 Hardware and Software Guide Index series, computer 8-2 service tag 1-21 Setup Utility Advanced menu 8-18 changing language 8-12 Diagnostics menu 8-18 displaying system information 8-13 Main menu 8-17 navigation and selection 8-13 Network Service Boot 7-6 opening 8-11 passwords 6-4, 6-5 restoring default settings...
...power light 1-8 resuming from 3-11 setting preferences 3-15 stereo speakers external 4-4 internal 1-9, 4-1 S-Video-out jack 1-15, 4-6 switch, display identifying 1-4, 3-5 setting preferences 3-16 system information, displaying 8-3, 8-13 system lock-up 3-14 System Restore 8-9 Index-8 Hardware and Software Guide Index series, computer 8-2 service tag 1-21 Setup Utility Advanced menu 8-18 changing language 8-12 Diagnostics menu 8-18 displaying system information 8-13 Main menu 8-17 navigation and selection 8-13 Network Service Boot 7-6 opening 8-11 passwords 6-4, 6-5 restoring default settings...

Compaq Presario V2600 Notebook PC - Maintenance and Service Guide
Page 19
.... num lock key Enables numeric lock, turns on the embedded numeric keypad, and turns on an external numeric keypad. For example, pressing fn+f7 decreases screen brightness. Keypad keys (15) In Windows, can be used like the keys on the num lock light. Windows applications key In Windows, displays a shortcut menu for items beneath the pointer. caps lock key Enables caps lock and turns on the caps lock light. Windows logo key In Windows, displays the Windows Start menu. Maintenance and Service Guide 1-13 Arrows keys Move the...
.... num lock key Enables numeric lock, turns on the embedded numeric keypad, and turns on an external numeric keypad. For example, pressing fn+f7 decreases screen brightness. Keypad keys (15) In Windows, can be used like the keys on the num lock light. Windows applications key In Windows, displays a shortcut menu for items beneath the pointer. caps lock key Enables caps lock and turns on the caps lock light. Windows logo key In Windows, displays the Windows Start menu. Maintenance and Service Guide 1-13 Arrows keys Move the...


