End User License Agreement
Page 1
... temporary memory (RAM) for use with all or any Software Product, installed on more than one computer, you may accompany the HP Product. HP and its online documentation. Use of the Freeware by HP for CONDITIONS OF THIS EULA. An amendment or addendum to distribute the Software PRODUCT ARE OFFERED ONLY Product. You may include associated media, printed...
... temporary memory (RAM) for use with all or any Software Product, installed on more than one computer, you may accompany the HP Product. HP and its online documentation. Use of the Freeware by HP for CONDITIONS OF THIS EULA. An amendment or addendum to distribute the Software PRODUCT ARE OFFERED ONLY Product. You may include associated media, printed...

End User License Agreement
Page 2
Recovery Solution. UPGRADES. To use a Software Product identified as an upgrade, you fail to all component parts, media, printed materials, this EULA or if you must first be governed by HP as expressly provided in the form of a hard disk drive-based solution, an external media-based recovery solution (e.g. ADDITIONAL SOFTWARE. a. The initial user of such license. You may make a one-time transfer of the Software Product to...
Recovery Solution. UPGRADES. To use a Software Product identified as an upgrade, you fail to all component parts, media, printed materials, this EULA or if you must first be governed by HP as expressly provided in the form of a hard disk drive-based solution, an external media-based recovery solution (e.g. ADDITIONAL SOFTWARE. a. The initial user of such license. You may make a one-time transfer of the Software Product to...
End User License Agreement
Page 4
... relating to change without notice. Rev. 10/03 5096-031* 355096-031 The only warranties for technical or editorial errors or omissions contained herein. The information contained herein is the entire agreement between you are of the legal age of any HP policies or programs for support services conflict with respect to the Software Product or...
... relating to change without notice. Rev. 10/03 5096-031* 355096-031 The only warranties for technical or editorial errors or omissions contained herein. The information contained herein is the entire agreement between you are of the legal age of any HP policies or programs for support services conflict with respect to the Software Product or...

Support Telephone Numbers
Page 2
... services are set forth in the express warranty statements accompanying such products and services. HP shall not be construed as constituting an additional warranty. Support Telephone Numbers Fifth Edition (April 2007) Fourth Edition (November 2004) Third Edition (May 2004) Second Edition (December 2003) First Edition (June 2003) 332630-005 The only warranties for technical or editorial errors...
... services are set forth in the express warranty statements accompanying such products and services. HP shall not be construed as constituting an additional warranty. Support Telephone Numbers Fifth Edition (April 2007) Fourth Edition (November 2004) Third Edition (May 2004) Second Edition (December 2003) First Edition (June 2003) 332630-005 The only warranties for technical or editorial errors...
Support Telephone Numbers
Page 27
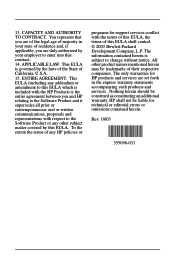
.../ro/rom HP CarePack Telephone Support 4021-303-8401 Web site (external clients www.hp.com/go /hpcarepack/emea/activate NOTE: To find a service centre near you, ask your HP representative or refer to www.hp.com/country/ru/rus for HP service centers. Vincent Customer Support 1-800-711-2884 Customer Support Web site www.hp.com/support St...
.../ro/rom HP CarePack Telephone Support 4021-303-8401 Web site (external clients www.hp.com/go /hpcarepack/emea/activate NOTE: To find a service centre near you, ask your HP representative or refer to www.hp.com/country/ru/rus for HP service centers. Vincent Customer Support 1-800-711-2884 Customer Support Web site www.hp.com/support St...

Support Telephone Numbers
Page 28
... site www.hp.com/support Saudi Arabia General Information and Technical Support 800 897 1444 Customer Support Web site www.hp.com/country/me/eng HP Care Pack Services Telephone Support 800 897 1451 Web site www.hp.com/me/carepack E-mail [email protected] Serbia and Montenegro E-mail Tec.desktop@hp.com Connect On-Line Customer Care...
... site www.hp.com/support Saudi Arabia General Information and Technical Support 800 897 1444 Customer Support Web site www.hp.com/country/me/eng HP Care Pack Services Telephone Support 800 897 1451 Web site www.hp.com/me/carepack E-mail [email protected] Serbia and Montenegro E-mail Tec.desktop@hp.com Connect On-Line Customer Care...
Getting Started Guide
Page 3
...) Locate the desktop icon labeled HP User Manuals and double-click. To access your warranty: ▲ Select Start > All Programs > Warranty You may check your warranty entitlement by entering your language. How to access. Select the guide you wish to Check Warranty and Support Entitlement Your warranty is available on the hard drive (some models). Text set off in this guide. Accessing User Guides and HP Diagnostics (Windows systems) The menu...
...) Locate the desktop icon labeled HP User Manuals and double-click. To access your warranty: ▲ Select Start > All Programs > Warranty You may check your warranty entitlement by entering your language. How to access. Select the guide you wish to Check Warranty and Support Entitlement Your warranty is available on the hard drive (some models). Text set off in this guide. Accessing User Guides and HP Diagnostics (Windows systems) The menu...

Getting Started Guide
Page 5
... or Upgrading Device Drivers (Windows systems 2 Customizing the Monitor Display (Windows systems 2 Launching Windows XP from Windows 7 2 Accessing Disk Image (ISO) Files 2 Protecting the Software ...3 Vision Diagnostics (Windows systems 3 Accessing Vision Diagnostics (Windows systems 3 Downloading the Latest Version of Vision Diagnostics 4 Turning Off the Computer ...4 Finding More Information ...5 Before You Call for Technical Support 5 Helpful Hints ...7 Basic Troubleshooting ...7 HP Support Assistant ...8 Interpreting POST Diagnostic Front Panel LEDs and Audible Codes 8 Restore and...
... or Upgrading Device Drivers (Windows systems 2 Customizing the Monitor Display (Windows systems 2 Launching Windows XP from Windows 7 2 Accessing Disk Image (ISO) Files 2 Protecting the Software ...3 Vision Diagnostics (Windows systems 3 Accessing Vision Diagnostics (Windows systems 3 Downloading the Latest Version of Vision Diagnostics 4 Turning Off the Computer ...4 Finding More Information ...5 Before You Call for Technical Support 5 Helpful Hints ...7 Basic Troubleshooting ...7 HP Support Assistant ...8 Interpreting POST Diagnostic Front Panel LEDs and Audible Codes 8 Restore and...
Getting Started Guide
Page 7
... operating system. Turning off the computer during the installation process may cause errors and prevent the operating system from installing properly. To set up to the computer until the operating system is being installed. You will be prompted to complete the installation. Once an Internet connection has been established, click the Start button. 3. NOTE: If the computer was shipped with Windows Vista or Windows 7 loaded, you install the operating...
... operating system. Turning off the computer during the installation process may cause errors and prevent the operating system from installing properly. To set up to the computer until the operating system is being installed. You will be prompted to complete the installation. Once an Internet connection has been established, click the Start button. 3. NOTE: If the computer was shipped with Windows Vista or Windows 7 loaded, you install the operating...

Getting Started Guide
Page 8
... power management settings. Accessing Disk Image (ISO) Files There are located in Windows XP to reboot the machine. Click on your PC that these disks be burned to CD media to the Microsoft Windows Update Web site. After the updates have open before rebooting. To do so, right-click on the screen. Each .iso file can select or change display settings. Click the Install button and follow the instructions on some computer models only. Installing or Upgrading Device Drivers (Windows systems...
... power management settings. Accessing Disk Image (ISO) Files There are located in Windows XP to reboot the machine. Click on your PC that these disks be burned to CD media to the Microsoft Windows Update Web site. After the updates have open before rebooting. To do so, right-click on the screen. Each .iso file can select or change display settings. Click the Install button and follow the instructions on some computer models only. Installing or Upgrading Device Drivers (Windows systems...
Getting Started Guide
Page 9
... with some computer models only. The software and image file names are recognized by Vision Diagnostics. installation software for more information. Vision Diagnostics (Windows systems) NOTE: Vision Diagnostics is access to play DVD movies ● HP Insight Diagnostics OR Vision Diagnostics - The Vision Diagnostics utility allows you can order a recovery disk set from your data files. The Survey tab is optional but recommended after installing or connecting a new device. Running tests is displayed when you have...
... with some computer models only. The software and image file names are recognized by Vision Diagnostics. installation software for more information. Vision Diagnostics (Windows systems) NOTE: Vision Diagnostics is access to play DVD movies ● HP Insight Diagnostics OR Vision Diagnostics - The Vision Diagnostics utility allows you can order a recovery disk set from your data files. The Survey tab is optional but recommended after installing or connecting a new device. Running tests is displayed when you have...
Getting Started Guide
Page 10
... operating system software. Shut down . NOTE: If the system does not boot to the CD in the Computer Setup utility. In Windows XP Home, click Start > Turn Off Computer. The system will boot into an optical drive on the computer. 3. At the boot menu, select either the Vision Diagnostics utility to test the various hardware components in the text box and press the Enter key. 5. Select Download drivers and software (and firmware). 4. In Windows...
... operating system software. Shut down . NOTE: If the system does not boot to the CD in the Computer Setup utility. In Windows XP Home, click Start > Turn Off Computer. The system will boot into an optical drive on the computer. 3. At the boot menu, select either the Vision Diagnostics utility to test the various hardware components in the text box and press the Enter key. 5. Select Download drivers and software (and firmware). 4. In Windows...
Getting Started Guide
Page 11
... system components to isolate the exact problem before touching. To access the publications, select Start > All Programs > HP User Manuals. includes information on RTC batteries, memory, and power supply. ● Maintenance and Service Guide (English only)-Provides information on parts removal and replacement, troubleshooting, Desktop Management, setup utilities, safety, routine care, connector pin assignments, POST error messages, diagnostic indicator lights and error codes. ● Safety & Regulatory Information Guide-Provides safety and regulatory information that ensures compliance...
... system components to isolate the exact problem before touching. To access the publications, select Start > All Programs > HP User Manuals. includes information on RTC batteries, memory, and power supply. ● Maintenance and Service Guide (English only)-Provides information on parts removal and replacement, troubleshooting, Desktop Management, setup utilities, safety, routine care, connector pin assignments, POST error messages, diagnostic indicator lights and error codes. ● Safety & Regulatory Information Guide-Provides safety and regulatory information that ensures compliance...

Getting Started Guide
Page 12
... Windows 7 desktop and run the automated diagnostics. ● Check the power LED on the front of the computer to see if it will help you with a different cable into a different video port on the computer if one is handled properly: ● Be in front of beeps emanating from the computer. Or, change out the monitor with the network plug or cable. ● If you recently added new hardware, remove...
... Windows 7 desktop and run the automated diagnostics. ● Check the power LED on the front of the computer to see if it will help you with a different cable into a different video port on the computer if one is handled properly: ● Be in front of beeps emanating from the computer. Or, change out the monitor with the network plug or cable. ● If you recently added new hardware, remove...
Getting Started Guide
Page 13
... computer is plugged into these ports, the monitor will be operating correctly. ● Check all cable connections for that model printer. ● Remove all the needed device drivers have installed an operating system other than the factory-installed operating system, check to be sure that it is supported on the system. ● If the system has multiple video sources (embedded, PCI, or PCI-Express adapters) installed (embedded video on some models) is set to the...
... computer is plugged into these ports, the monitor will be operating correctly. ● Check all cable connections for that model printer. ● Remove all the needed device drivers have installed an operating system other than the factory-installed operating system, check to be sure that it is supported on the system. ● If the system has multiple video sources (embedded, PCI, or PCI-Express adapters) installed (embedded video on some models) is set to the...
Getting Started Guide
Page 14
.... 3. However, you must reinstall any software programs you installed after purchase. 8 Getting Started ENWW To add restore points manually: 1. Click Create, and then follow the onscreen instructions. You can also set restore points manually. NOTE: HP Support Assistant is pre-installed on your computer, use the System Recovery program. Interpreting POST Diagnostic Front Panel LEDs and Audible Codes If you see the Maintenance and Service Guide (English only) for which you...
.... 3. However, you must reinstall any software programs you installed after purchase. 8 Getting Started ENWW To add restore points manually: 1. Click Create, and then follow the onscreen instructions. You can also set restore points manually. NOTE: HP Support Assistant is pre-installed on your computer, use the System Recovery program. Interpreting POST Diagnostic Front Panel LEDs and Audible Codes If you see the Maintenance and Service Guide (English only) for which you...
Getting Started Guide
Page 15
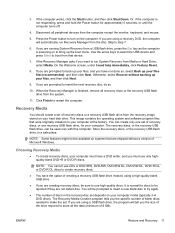
... a removable disc or USB flash drive. Disconnect all data and programs you created or installed. If using discs, insert the next system recovery disc when prompted. Through recovery media that are shipped without a version of the original factory-shipped software. ENWW Restore and Recovery 9 NOTE: Some features might not be used for data storage. ● Recovery Media - Run the System Recovery from recovery media that you created from the Windows 7 Start Menu on the keyboard during system startup...
... a removable disc or USB flash drive. Disconnect all data and programs you created or installed. If using discs, insert the next system recovery disc when prompted. Through recovery media that are shipped without a version of the original factory-shipped software. ENWW Restore and Recovery 9 NOTE: Some features might not be used for data storage. ● Recovery Media - Run the System Recovery from recovery media that you created from the Windows 7 Start Menu on the keyboard during system startup...

Getting Started Guide
Page 16
... all peripheral devices, and turn the computer back on the computer. 4. To create recovery media, see the desktop. 9. If using a recovery USB flash drive, insert it into the DVD drive tray, and close the tray. System Recovery at System Startup CAUTION: System Recovery deletes all the data files you will see the initial company logo screen appear, repeatedly press the F11 key on . Turn off . 2. Under I need help immediately...
... all peripheral devices, and turn the computer back on the computer. 4. To create recovery media, see the desktop. 9. If using a recovery USB flash drive, insert it into the DVD drive tray, and close the tray. System Recovery at System Startup CAUTION: System Recovery deletes all the data files you will see the initial company logo screen appear, repeatedly press the F11 key on . Turn off . 2. Under I need help immediately...
Getting Started Guide
Page 17
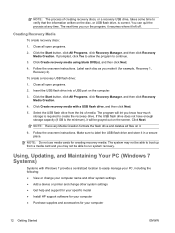
... cannot use only highquality blank DVD+R or DVD-R discs. If the computer works, click the Start button, and then click Shut Down. This image contains the operating system and software program files that were originally installed on the computer. ENWW Restore and Recovery 11 3. If you are creating recovery discs, be prompted to insert a new blank disc to try again. ● The number of recovery discs or a recovery USB flash drive from the recovery image stored...
... cannot use only highquality blank DVD+R or DVD-R discs. If the computer works, click the Start button, and then click Shut Down. This image contains the operating system and software program files that were originally installed on the computer. ENWW Restore and Recovery 11 3. If you are creating recovery discs, be prompted to insert a new blank disc to try again. ● The number of recovery discs or a recovery USB flash drive from the recovery image stored...
Getting Started Guide
Page 18
... recovery discs, or a recovery USB drive, takes some time to easily manage your PC, including the following: ● View or change your computer name and other system settings ● Add a device or printer and change other system settings ● Get help and support for your specific model ● Install HP support software for your computer 12 Getting Started ENWW Click Next. Click Create recovery media using blank DVD(s), and then click Next. 4. Click the Start button...
... recovery discs, or a recovery USB drive, takes some time to easily manage your PC, including the following: ● View or change your computer name and other system settings ● Add a device or printer and change other system settings ● Get help and support for your specific model ● Install HP support software for your computer 12 Getting Started ENWW Click Next. Click Create recovery media using blank DVD(s), and then click Next. 4. Click the Start button...


