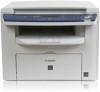
imageCLASS D460/D440/D420 Basic Operation Guide
Page 6
PROGRAM 8-18 Canadian Program - The Canon Cartridge Return Program 8-17 U.S.A. Programme au Canada 8-21 Transporting the Machine 8-23 D460 8-23 For D440/D420 8-26 9 Troubleshooting 9-1 Clearing Jams 9-2 Document Jams 9-2 Paper Jams 9-5 Contents Enlarge/Reduce Images 3-10 Preset Zoom 3-10 Custom Copy Ratio 3-11 Collating Copies 3-13 Multiple Documents onto One Sheet (2 on 1 3-15 2 on 1 Combination 3-15 ...
imageCLASS D460/D440/D420 Basic Operation Guide
Page 11
...wall outlet and contact your local authorized Canon dealer. Do not subject the machine to light. - For all warnings and instructions marked on the machine since they may require extensive work by the instructions in the machine while printing. - To avoid paper jams, never unplug the power cord, ...open the left cover or add or remove paper in this guide, do not eat or drink near it . - Unplug the machine from the machine....
imageCLASS D460/D440/D420 Basic Operation Guide
Page 24
...one manually. ⑯Scanning platform Open this platform when replacing the toner cartridge or clearing paper jams. ⑰Main power switch Turns the power ON or OFF. 1-3 ● D420 Machine Components Before Using the Machine ①ADF (Automatic Document Feeder) Holds documents and ...tray Receives documents. ⑤Operation panel Controls the machine. ⑥Output tray Receives copies and prints. ⑦Paper cassette (For D460)/Paper feeding tray (D440/D420) Loads the paper supply. ⑧Scanning area Scans documents from the ADF. ⑨Platen glass Place documents. ⑩Output ...
imageCLASS D460/D440/D420 Basic Operation Guide
Page 28
● D420 Machine Components Before Using the Machine ①Ethernet port (D460 Only) Connect the network cable. ②USB port Connect the USB (Universal Serial Bus) cable. ③Rear cover Open this cover when clearing paper jams. ④Power socket Connect the power cord. 1-7
imageCLASS D460/D440/D420 Basic Operation Guide
Page 37
...Processing/Data indicator lights or blinks • a message appears on the operation panel • a print job is loaded in the multi-purpose tray • a paper jam occurs in the machine - The machine will leave the Sleep mode when: • you place documents in the ADF • you press [Energy Saver] on... the display and the Error indicator blinks • paper is sent from 3 to 30 minutes (in one-minute increments). - AUTO SLEEP TIME 5MIN. - You can set the Sleep Mode. To enter the Sleep...
imageCLASS D460/D440/D420 Basic Operation Guide
Page 42
..., clean them. (See "Cleaning the Machine," on p. 8-2.) 2-5 When closing the ADF, be careful not to avoid paper jams. - Remove the document from the document delivery tray to get your fingers caught, as this may cause paper jams. - Documents and Print Media 4 Gently lower the ADF. The document is complete. When scanned repeatedly, documents can...
imageCLASS D460/D440/D420 Basic Operation Guide
Page 43
... Plain Paper, Plain Paper L, Heavy Paper, Heavy Paper H, Transparency The default paper size is LTR. Canon recommends you need to change the paper size settings. (See "Setting Paper Size and Type," on p. 2-14.) ˔ To prevent paper jams, do not use any of the following: • Wrinkled or creased paper • Curled or rolled paper • Coated paper • Torn paper • Damp paper •...
imageCLASS D460/D440/D420 Basic Operation Guide
Page 138
Clearing Jams 9-2 Document Jams 9-2 Paper Jams 9-5 Error Messages 9-16 If is displayed 9-18 Reloading the Paper 9-18 Changing the Paper Size Setting 9-18 If a Power Failure Occurs 9-19 If You Cannot Solve a Problem 9-20 Customer Support (U.S.A 9-20 Customer Support (Canada 9-20 Troubleshooting Troubleshooting 9 This chapter describes how to respond to paper and document jams, as well as to error messages.
imageCLASS D460/D440/D420 Basic Operation Guide
Page 139
...(See "Paper Requirements," on the display, remove jammed paper from the machine first, then from the paper cassette or multi-purpose tray if necessary. Warm water will set the toner. Contact Canon Customer Care Center if needed. Document Jams When appears on the display, remove a jammed document from ...the inside of the machine. - Troubleshooting Do not force a jammed document out of any scraps of paper from the ADF. ● For D460 ...
imageCLASS D460/D440/D420 Basic Operation Guide
Page 142
Clearing Jams Paper Jams When or appears on the display, remove jammed paper from the inside of the machine first, then from the paper cassette or multi-purpose tray if necessary. ● For D460 1 Hold the front side of any jammed documents and gently pull them out. 6 Close the ADF. 5 Open the ADF and then hold both sides of the operation panel with your fingers caught. 2 Lift the scanning platform (A) until it is locked. (You will hear an audible "click.") Troubleshooting 9-5 Be careful not to get your hands.
imageCLASS D460/D440/D420 Basic Operation Guide
Page 148
This operation is locked (A), and open the printer cover (B). 2 Remove the paper in the paper feeding tray. ● For D440/D420 1 Remove the dust cover from the paper feeding tray. Troubleshooting 3 Open the rear cover. Clearing Jams 4 Lift the scanning platform until it is required only when appears on the display. 9-11
imageCLASS D460/D440/D420 Basic Operation Guide
Page 150
...touch the fixing assembly (A) as this can damage the machine. 8 Hold both sides of the jammed paper and slowly pull it out in the direction of the arrow. 7 Gently pull the jammed paper between the fixing assembly (A) and transfer roller (B) until the leading edge emerges from the machine.... 10 Hold both sides of the jammed paper and carefully pull it out. - If the jammed paper is required only when appears on the display. - Clearing Jams 9 Hold both sides of the jammed paper and gently pull it becomes very hot during use. -
imageCLASS D460/D440/D420 Basic Operation Guide
Page 152
...been successful. Clearing Jams 17 Set the dust cover on the display. After all the procedures are complete, the machine should be ready for operating. 15 Close the rear cover. To reset the machine, open the toner cover and then close it. 16 Load the paper into the paper feeding tray. ...If the machine does not return to the standby mode, check if jammed paper is required only when appears on the paper feeding tray. This operation is still left in the machine. If the machine...
imageCLASS D460/D440/D420 Basic Operation Guide
Page 153
...COVER LIFT PANEL TO OPEN OPEN TONER COVER LOAD CORRECT PAPER LOAD PAPER MEMORY FULL OUT OF TONER CHANGE TONER PAPER JAM PAPER JAM OPEN REAR COVER PLEASE WAIT REMOVE MP PAPER Description The paper size is loaded in the paper cassette or multipurpose tray when copying or printing. Appears alternately... messages. It will not print the USER DATA LIST when paper is completely closed to or . Action Set the paper size to resume the current job. Then press [OK] when using the paper cassette. Paper jams have occurred in the multipurpose tray. Troubleshooting 9-16 This message...
imageCLASS D460/D440/D420 Basic Operation Guide
Page 174
xiii, 9-20 D Density Copying 3-8 Density key 1-9 Display 1-9 Messages 9-16 Standby mode 1-10 Document Copying 3-4 Jams 9-2 Placing 2-4 Requirements 2-2 Scanning area 2-3 Document delivery tray 1-3 Document feeder tray 1-3 Dust cover 1-3 E Energy Saver key 1-9 Enlarge/Reduce key 1-9 ...11 Scan job 5-5 Checking Print job 4-11 Cleaning ADF 8-7 Exterior 8-2 Fuser Roller 8-5 Interior 8-2 Platen Glass 8-6 Scanning Area 8-6 Clearing jams 9-2 Document jams 9-2 Paper jams 9-5 Clear key 1-9 Collate/2 on 1 key 1-9 Collating Copies 3-13 Copying 3-1 COPY key 1-9 Customer support Canada xiii, 9-20 U.S.A.
imageCLASS D460/D440/D420 Basic Operation Guide
Page 175
... 1-9 Multi-purpose tray 1-3 N Numeric keys 1-9 O OK key 1-9 Operation panel 1-3 Output tray 1-3 Output tray extension 1-3 Overview Machine functions ii P Paper Jams 9-5 Loading 2-8 Printable area 2-7 Requirements 2-6 Paper cassette 1-3 Paper guide rail 1-3 Paper Settings key 1-9 Paper Size and type 2-14 11-6 Paper stopper 1-3 Platen glass 1-3 Platen glass cover 1-4 Power socket 1-7 Power supply xiii Printable area 2-7 Printing 4-1 Processing/Data indicator 1-9 R Rear...
imageCLASS D480 Basic Operation Guide
Page 8
The Canon Cartridge Return Program.......... 10-15 U.S.A. Programme au Canada 10-19 Transporting the Machine 10-21 11 Troubleshooting 11-1 Clearing Jams 11-2 Document Jams 11-2 Paper Jams 11-4 Error Messages 11-10 Error Codes 11-13 If is displayed 11-14 Reloading the Paper 11-14 Changing the Paper Size Setting 11-14 If a Power Failure Occurs...
imageCLASS D480 Basic Operation Guide
Page 11
...original protective bag or wrap it . - This could result in the machine while printing. - To avoid paper jams, never unplug the power cord, open the left cover or add or remove paper in fire or electric shock. - Do not allow small objects (such as required by a qualified technician ...marked on the sides of other risks. Dust accumulation can prevent the machine from the machine. - Follow all service, contact your local authorized Canon dealer in performance, indicating a need for at least seven (7) years (or any of this guide. To avoid spillage in or around the ...
imageCLASS D480 Basic Operation Guide
Page 30
.... ⑯Scanning platform Open this platform when replacing the toner cartridge or clearing paper jams. ⑰Main power switch Turns the power ON or OFF. Machine Components ⑪Paper stopper Prevents the paper from falling off the output tray. Open the paper stopper from its original position for the output tray. ①ADF (Automatic Document...
imageCLASS D480 Basic Operation Guide
Page 31
Before Using the Machine Machine Components External View (Back) ①Ethernet port Connect the network cable. ②USB port Connect the USB (Universal Serial Bus) cable. ③Rear cover Open this cover when clearing paper jams. ④Power socket Connect the power cord. ⑤Telephone line jack Connect the telephone cable. ⑥External device jack Connect an external device. 1-4