User Guide
Page 37
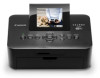
... on the left ) is displayed, select [Use with a wireless network], and then click [Next]. OO Follow the on SELPHY. 2 Install the software. Items to Prepare OO Computer OO Supplied CD-ROM (SELPHY CP900 Solution Disk) (p. 2) Windows 1 Connect SELPHY to restart the computer. 37 OO When the installation finishes, click [Restart] to the wireless LAN. Install the...
... on the left ) is displayed, select [Use with a wireless network], and then click [Next]. OO Follow the on SELPHY. 2 Install the software. Items to Prepare OO Computer OO Supplied CD-ROM (SELPHY CP900 Solution Disk) (p. 2) Windows 1 Connect SELPHY to restart the computer. 37 OO When the installation finishes, click [Restart] to the wireless LAN. Install the...

User Guide
Page 38
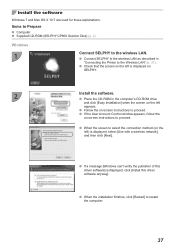
... the wireless LAN as described in the CD-ROM. OO When the installation finishes, click [Yes] to the Wireless LAN" (p. 31). Connect SELPHY to select the printer name (pp. 29, 41) from the menu, and click [System Preferences] r [Print & Fax] to display files in "...OO If [ ] is displayed on handling the computer, refer to proceed. OO Select [ ] from the pop-up window, then click [Add]. OO For details on SELPHY. 3 Register the printer. Macintosh 1 2 Install the software. Click [Finder] in the Dock (the bar at the bottom of the desktop) and double click [ ] in ...
... the wireless LAN as described in the CD-ROM. OO When the installation finishes, click [Yes] to the Wireless LAN" (p. 31). Connect SELPHY to select the printer name (pp. 29, 41) from the menu, and click [System Preferences] r [Print & Fax] to display files in "...OO If [ ] is displayed on handling the computer, refer to proceed. OO Select [ ] from the pop-up window, then click [Add]. OO For details on SELPHY. 3 Register the printer. Macintosh 1 2 Install the software. Click [Finder] in the Dock (the bar at the bottom of the desktop) and double click [ ] in ...
User Guide
Page 39
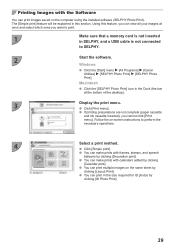
...which ones you want to SELPHY. 2 Start the software. OO You can print in this feature, you cannot click [Print menu]. Windows OO Click the [Start] menu r [All Programs] r [Canon Utilities] r [SELPHY Photo Print] r [SELPHY Photo Print]. Macintosh OO Click the [SELPHY Photo Print] icon in SELPHY, and a USB cable ...sheet by clicking [Calendar print]. OO You can print images saved on the computer using the installed software (SELPHY Photo Print). OO You can make prints with the Software You can make prints with frames, stamps, and speech balloons by clicking [ID Photo Print]. 39...
...which ones you want to SELPHY. 2 Start the software. OO You can print in this feature, you cannot click [Print menu]. Windows OO Click the [Start] menu r [All Programs] r [Canon Utilities] r [SELPHY Photo Print] r [SELPHY Photo Print]. Macintosh OO Click the [SELPHY Photo Print] icon in SELPHY, and a USB cable ...sheet by clicking [Calendar print]. OO You can print images saved on the computer using the installed software (SELPHY Photo Print). OO You can make prints with the Software You can make prints with frames, stamps, and speech balloons by clicking [ID Photo Print]. 39...
User Guide
Page 44
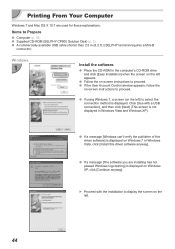
... the left ) to Prepare OO Computer (p. 36) OO Supplied CD-ROM (SELPHY CP900 Solution Disk) (p. 2) OO A commercially available USB cable shorter than 2.5 m (8.2 ft.) (SELPHY terminal requires a Mini-B connector) Windows 1 Install the software. OO If a message [The software you are used for these explanations. Printing From Your Computer Windows 7 and Mac OS X 10.7 are installing has not passed...
... the left ) to Prepare OO Computer (p. 36) OO Supplied CD-ROM (SELPHY CP900 Solution Disk) (p. 2) OO A commercially available USB cable shorter than 2.5 m (8.2 ft.) (SELPHY terminal requires a Mini-B connector) Windows 1 Install the software. OO If a message [The software you are used for these explanations. Printing From Your Computer Windows 7 and Mac OS X 10.7 are installing has not passed...

User Guide
Page 45
... Print as described in Steps 2 to 7 on . OO You can start the software automatically when SELPHY and the computer are used at the same time. OO Print as described in Step 1 on SELPHY. 4 Finish installation. Click [+] to select [CP900] from the menu, and click [System Preferences] r [Print & Fax] to 7 ...included with your computer into SELPHY (pp. 7 - 10). OO For details on SELPHY. OO Turn off SELPHY and remove the memory card or USB flash memory. OO Select [ ] from the pop-up window, then click [Add]. OO Use the USB cable to connect SELPHY to restart the computer and...
... Print as described in Steps 2 to 7 on . OO You can start the software automatically when SELPHY and the computer are used at the same time. OO Print as described in Step 1 on SELPHY. 4 Finish installation. Click [+] to select [CP900] from the menu, and click [System Preferences] r [Print & Fax] to 7 ...included with your computer into SELPHY (pp. 7 - 10). OO For details on SELPHY. OO Turn off SELPHY and remove the memory card or USB flash memory. OO Select [ ] from the pop-up window, then click [Add]. OO Use the USB cable to connect SELPHY to restart the computer and...
User Guide
Page 49
.... 49 Printing Problems OOCannot print • Make sure SELPHY is turned on the included customer support list. If connected to a wireless LAN, disable wireless LAN (p. 41) and restart the software. • Problems Exclusive to Windows: Make sure the printer is not set (p. 21)....Make sure your digital camera supports PictBridge (p. 46). • Make sure SELPHY and the digital camera are connected correctly (p. 46). • Make sure the rechargeable battery/disposable batteries in your problem, contact a Canon Customer Support Help Desk as listed on (p. 11). • Make ...
.... 49 Printing Problems OOCannot print • Make sure SELPHY is turned on the included customer support list. If connected to a wireless LAN, disable wireless LAN (p. 41) and restart the software. • Problems Exclusive to Windows: Make sure the printer is not set (p. 21)....Make sure your digital camera supports PictBridge (p. 46). • Make sure SELPHY and the digital camera are connected correctly (p. 46). • Make sure the rechargeable battery/disposable batteries in your problem, contact a Canon Customer Support Help Desk as listed on (p. 11). • Make ...


