
Quick Setup Guide - English
Page 12
...No Do you connecting an external telephone or external telephone answering device to your machine to pick up the call as a fax. No Manual You control the phone line and must answer every call . Yes Do you using the voice message function of the User's Guide. ...will ring for faxes only? Fax Only Yes Your machine automatically answers every call . Fax messages are four possible receive modes: Fax Only, Fax/Tel, Manual and External TAD. Choose the Receive Mode which best suits your needs. Voice messages are stored on page 6.) 1 Press Menu. 2 Press 0. 3 ...
...No Do you connecting an external telephone or external telephone answering device to your machine to pick up the call as a fax. No Manual You control the phone line and must answer every call . Yes Do you using the voice message function of the User's Guide. ...will ring for faxes only? Fax Only Yes Your machine automatically answers every call . Fax messages are four possible receive modes: Fax Only, Fax/Tel, Manual and External TAD. Choose the Receive Mode which best suits your needs. Voice messages are stored on page 6.) 1 Press Menu. 2 Press 0. 3 ...

Quick Setup Guide - English
Page 28
... wireless router or access point. Press Menu, 6, 2, 4 (or Menu, 6, 0) and then press 1 to accept the change. 2 Place the Brother machine close to the SecureEasySetup™ router or access point (less than configuring it manually. Setup WLAN WLAN Enable? The wired network interface will become inactive with this setting. 26 Your router or... the wireless settings again. Windows® Wireless Network Note Routers or access points that support SecureEasySetup™ have previously configured the wireless settings of the Brother machine. 22.
... wireless router or access point. Press Menu, 6, 2, 4 (or Menu, 6, 0) and then press 1 to accept the change. 2 Place the Brother machine close to the SecureEasySetup™ router or access point (less than configuring it manually. Setup WLAN WLAN Enable? The wired network interface will become inactive with this setting. 26 Your router or... the wireless settings again. Windows® Wireless Network Note Routers or access points that support SecureEasySetup™ have previously configured the wireless settings of the Brother machine. 22.

Quick Setup Guide - English
Page 31
... Improper Setup If you can configure the wireless settings again. Setup WLAN WLAN Enable? If the machine finds more than one of the options below: If your network is set to manually add the SSID name. Go to step 6. 22. For information how to type text, see the SSID you must reset...or and press OK. Setup WLAN SSID: Enter & OK key 7 Press or to choose Infrastructure, then press OK. 8 Use the , and OK keys to choose one network use the or to step 11. Authentication with WEP Encryption: Choose Shared Key, press OK. Go to choose WEP for Encryption Type and press...
... Improper Setup If you can configure the wireless settings again. Setup WLAN WLAN Enable? If the machine finds more than one of the options below: If your network is set to manually add the SSID name. Go to step 6. 22. For information how to type text, see the SSID you must reset...or and press OK. Setup WLAN SSID: Enter & OK key 7 Press or to choose Infrastructure, then press OK. 8 Use the , and OK keys to choose one network use the or to step 11. Authentication with WEP Encryption: Choose Shared Key, press OK. Go to choose WEP for Encryption Type and press...

Quick Setup Guide - English
Page 32
...settings. STEP 2 Installing the Driver & Software Windows® 9 Choose the appropriate key number and press OK. 22. Most access points and routers can use one key, but they will now try again. (See Restoring the network settings to enter the letter a, press the 2 key on the dial pad once. To... running before installing the MFL-Pro Suite. Go to step 12. 11 Enter the user and press OK. If successful, Connected will need to manually configure the IP address, subnet mask and gateway of the machine to apply your language. Press OK when you have DHCP enabled you are using...
...settings. STEP 2 Installing the Driver & Software Windows® 9 Choose the appropriate key number and press OK. 22. Most access points and routers can use one key, but they will now try again. (See Restoring the network settings to enter the letter a, press the 2 key on the dial pad once. To... running before installing the MFL-Pro Suite. Go to step 12. 11 Enter the user and press OK. If successful, Connected will need to manually configure the IP address, subnet mask and gateway of the machine to apply your language. Press OK when you have DHCP enabled you are using...

Quick Setup Guide - English
Page 46
...settings again. Press Menu, 6, 2, 4 (or Menu, 6, 0) and then press 1 to accept the change. 2 Place the Brother machine close to the SecureEasySetup™ router or access point (less than 5 m/16 feet). 3 Push the SecureEasySetup™ button on...Network 44 Note Routers or access points that support SecureEasySetup™ have previously configured the wireless settings of the Brother machine. 22. If your machine for a wireless network The SecureEasySetup™ software allows you can complete setup...before you to configure the wireless network easier than configuring it manually.
...settings again. Press Menu, 6, 2, 4 (or Menu, 6, 0) and then press 1 to accept the change. 2 Place the Brother machine close to the SecureEasySetup™ router or access point (less than 5 m/16 feet). 3 Push the SecureEasySetup™ button on...Network 44 Note Routers or access points that support SecureEasySetup™ have previously configured the wireless settings of the Brother machine. 22. If your machine for a wireless network The SecureEasySetup™ software allows you can complete setup...before you to configure the wireless network easier than configuring it manually.

Quick Setup Guide - English
Page 49
...the SSID you wrote down earlier. The wired network interface will search for the Encryption Type and press OK. If the machine finds more than one of the options below: If your network, then press OK. Authentication with this setting. 4 The machine will become inactive with WEP Encryption: Choose... with WPA-PSK (TKIP or AES Encryption): Choose WPA/WPA2-PSK, press OK. Setup WLAN SSID Improper Setup If you have to manually add the SSID name. Go to choose one network use the or to step 11. Press Menu, 6, 2, 4 (or Menu, 6, 0) and then press 1 to step 12. Go to...
...the SSID you wrote down earlier. The wired network interface will search for the Encryption Type and press OK. If the machine finds more than one of the options below: If your network, then press OK. Authentication with this setting. 4 The machine will become inactive with WEP Encryption: Choose... with WPA-PSK (TKIP or AES Encryption): Choose WPA/WPA2-PSK, press OK. Setup WLAN SSID Improper Setup If you have to manually add the SSID name. Go to choose one network use the or to step 11. Press Menu, 6, 2, 4 (or Menu, 6, 0) and then press 1 to step 12. Go to...

Quick Setup Guide - English
Page 50
... language screen appears, choose your router or access point. To enter the number 3, press the 3 key on page 55.) 13 The machine will need to manually configure the IP address, subnet mask and gateway of the machine to suit your access point (router) if DHCP is enabled (DHCP is displayed again.... 16 Double-click the Start Here OSX icon to choose TKIP or AES for details. Macintosh® Wireless Network 48 You can store more than one key, but they will appear briefly on your Macintosh®. 15 Put the supplied CD-ROM into your settings. If successful, Connected will only use...
... language screen appears, choose your router or access point. To enter the number 3, press the 3 key on page 55.) 13 The machine will need to manually configure the IP address, subnet mask and gateway of the machine to suit your access point (router) if DHCP is enabled (DHCP is displayed again.... 16 Double-click the Start Here OSX icon to choose TKIP or AES for details. Macintosh® Wireless Network 48 You can store more than one key, but they will appear briefly on your Macintosh®. 15 Put the supplied CD-ROM into your settings. If successful, Connected will only use...

Quick Setup Guide - English
Page 59
... the latest product descriptions and specifications. PaperPort is a registered trademark of Brother Industries, Ltd. Each company whose software title is mentioned in this manual has a Software License Agreement specific to change without notice in the specifications...Corporation. Presto! PageManager is a registered trademark of Brother International Corporation. The contents of this manual and the specifications of this product are trademarks or registered trademarks of Brother Industries Ltd., this manual are subject to its proprietary programs. All other countries...
... the latest product descriptions and specifications. PaperPort is a registered trademark of Brother Industries, Ltd. Each company whose software title is mentioned in this manual has a Software License Agreement specific to change without notice in the specifications...Corporation. Presto! PageManager is a registered trademark of Brother International Corporation. The contents of this manual and the specifications of this product are trademarks or registered trademarks of Brother Industries Ltd., this manual are subject to its proprietary programs. All other countries...
Software Users Manual - English
Page 2
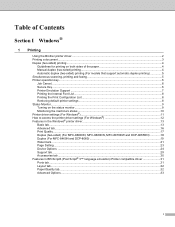
...Brother printer driver...2 Printing a document...3 Duplex (two-sided) printing ...4 Guidelines for printing on both sides of the paper 4 Manual duplex (two-sided) printing...4 Automatic duplex (two-sided) printing (For models that support automatic duplex printing 5 Simultaneous scanning, printing and faxing 5 Printer operation key...6 Job Cancel...6 Secure Key ...6 Printer Emulation Support ...7 Printing the Internal......16 Print Quality ...17 Duplex (two-sided) (For MFC-8660DN, MFC-8860DN, MFC-8870DW and DCP-8065DN 18 Duplex (For MFC-8460N and DCP-8060 19 Watermark ...21 Page Setting ......
...Brother printer driver...2 Printing a document...3 Duplex (two-sided) printing ...4 Guidelines for printing on both sides of the paper 4 Manual duplex (two-sided) printing...4 Automatic duplex (two-sided) printing (For models that support automatic duplex printing 5 Simultaneous scanning, printing and faxing 5 Printer operation key...6 Job Cancel...6 Secure Key ...6 Printer Emulation Support ...7 Printing the Internal......16 Print Quality ...17 Duplex (two-sided) (For MFC-8660DN, MFC-8860DN, MFC-8870DW and DCP-8065DN 18 Duplex (For MFC-8460N and DCP-8060 19 Watermark ...21 Page Setting ......
Software Users Manual - English
Page 4
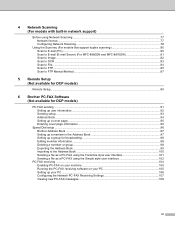
... (PC)...80 Scan to E-mail (E-mail Server) (For MFC-8860DN and MFC-8870DW 81 Scan to Image ...82 Scan to OCR ...83 Scan to File...84 Scan to FTP...85 Scan to FTP Manual Method...87 5 Remote Setup (Not available for DCP models) Remote Setup...89 6 Brother PC-FAX Software (Not available for DCP models...
... (PC)...80 Scan to E-mail (E-mail Server) (For MFC-8860DN and MFC-8870DW 81 Scan to Image ...82 Scan to OCR ...83 Scan to File...84 Scan to FTP...85 Scan to FTP Manual Method...87 5 Remote Setup (Not available for DCP models) Remote Setup...89 6 Brother PC-FAX Software (Not available for DCP models...
Software Users Manual - English
Page 6
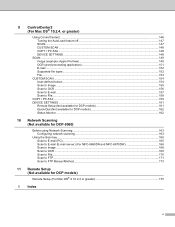
... Scan key...165 Scan to E-mail (PC)...165 Scan to E-mail (E-mail server) (For MFC-8860DN and MFC-8870DW 166 Scan to Image ...168 Scan to OCR ...169 Scan to File...170 Scan to FTP...171 Scan to FTP Manual Method...173 11 Remote Setup (Not available for DCP models) Remote Setup (For Mac...
... Scan key...165 Scan to E-mail (PC)...165 Scan to E-mail (E-mail server) (For MFC-8860DN and MFC-8870DW 166 Scan to Image ...168 Scan to OCR ...169 Scan to File...170 Scan to FTP...171 Scan to FTP Manual Method...173 11 Remote Setup (Not available for DCP models) Remote Setup (For Mac...
Software Users Manual - English
Page 10
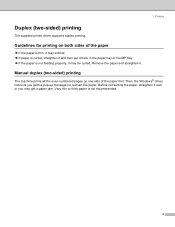
1. Then, the Windows® driver instructs you may be curled. Before reinserting the paper, straighten it . Guidelines for printing on one side of the paper 1 „ If the paper is thin, it may wrinkle. „ If paper is curled, straighten it and then put it back ... not feeding properly, it may get a paper jam. Remove the paper and straighten it well, or you (with a pop-up message) to reinsert the paper. Manual duplex (two-sided) printing 1 The machine prints all the even-numbered pages on both sides of the paper first. Printing Duplex (two-sided) printing 1 The...
1. Then, the Windows® driver instructs you may be curled. Before reinserting the paper, straighten it . Guidelines for printing on one side of the paper 1 „ If the paper is thin, it may wrinkle. „ If paper is curled, straighten it and then put it back ... not feeding properly, it may get a paper jam. Remove the paper and straighten it well, or you (with a pop-up message) to reinsert the paper. Manual duplex (two-sided) printing 1 The machine prints all the even-numbered pages on both sides of the paper first. Printing Duplex (two-sided) printing 1 The...
Software Users Manual - English
Page 13
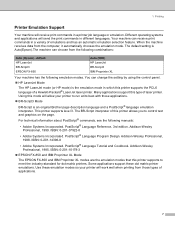
...those applications. „ BR-Script3 Mode BR-Script is an original Brother page description language and a PostScript® language emulation interpreter. Addison-...commands in different languages. Many applications support this printer supports the PCL6 language of laser printer. For technical information about PostScript® commands, see the following emulation ...FX-850 Auto (IBM) HP LaserJet BR-Script3 IBM Proprinter XL Your machine has the following manuals: • Adobe Systems Incorporated. This printer supports level 3. PostScript® Language Reference, 3rd ...
...those applications. „ BR-Script3 Mode BR-Script is an original Brother page description language and a PostScript® language emulation interpreter. Addison-...commands in different languages. Many applications support this printer supports the PCL6 language of laser printer. For technical information about PostScript® commands, see the following emulation ...FX-850 Auto (IBM) HP LaserJet BR-Script3 IBM Proprinter XL Your machine has the following manuals: • Adobe Systems Incorporated. This printer supports level 3. PostScript® Language Reference, 3rd ...

Software Users Manual - English
Page 14
... List 1 You can print a list of the machine's internal (or resident) fonts to the default settings. The machine prints the settings. The machine prints the list. Restoring default printer settings 1 You can ... 2. (For DCP models, press Menu, 3, 2, 2.) b Press Start. c Press Stop/Exit. c Press Stop/Exit. 8 If the setting does not work properly, choose the required emulation mode manually using the control panel buttons of current printer settings. c Press Stop/Exit. Printing Setting the Emulation mode 1 a Press Menu, 4, 1. (For DCP models press Menu, 3, 1.) b Pressa...
... List 1 You can print a list of the machine's internal (or resident) fonts to the default settings. The machine prints the settings. The machine prints the list. Restoring default printer settings 1 You can ... 2. (For DCP models, press Menu, 3, 2, 2.) b Press Start. c Press Stop/Exit. c Press Stop/Exit. 8 If the setting does not work properly, choose the required emulation mode manually using the control panel buttons of current printer settings. c Press Stop/Exit. Printing Setting the Emulation mode 1 a Press Menu, 4, 1. (For DCP models press Menu, 3, 1.) b Pressa...

Software Users Manual - English
Page 21
...paper (19 to use envelopes, choose Envelopes. for printing from the Advanced tab, choose a Duplex Type (See Duplex (two-sided) (For MFC-8660DN, MFC-8860DN, MFC-8870DW and DCP-8065DN) on page 18). Thick Thicker Paper Env. If the envelope is not fixed to print a booklet or do duplex printing... toner is crumpled when Envelopes has been selected, choose Env. Printing Media Type 1 You can choose Auto Select, Tray1, MP Tray or Manual and specify separate trays for printing the first page and for OHP transparencies, choose Transparencies. • When you want to the envelope correctly ...
...paper (19 to use envelopes, choose Envelopes. for printing from the Advanced tab, choose a Duplex Type (See Duplex (two-sided) (For MFC-8660DN, MFC-8860DN, MFC-8870DW and DCP-8065DN) on page 18). Thick Thicker Paper Env. If the envelope is not fixed to print a booklet or do duplex printing... toner is crumpled when Envelopes has been selected, choose Env. Printing Media Type 1 You can choose Auto Select, Tray1, MP Tray or Manual and specify separate trays for printing the first page and for OHP transparencies, choose Transparencies. • When you want to the envelope correctly ...

Software Users Manual - English
Page 23
... print settings for printing Photo or Grayscale images. Print Setting 1 You can change the settings manually by choosing Manual and clicking the Setting... Note We do not recommend Toner Save Mode for your print job. „ Manual You can manually change the resolution as follows: „ 1200 dpi „ HQ 1200 „ 600 dpi...
... print settings for printing Photo or Grayscale images. Print Setting 1 You can change the settings manually by choosing Manual and clicking the Setting... Note We do not recommend Toner Save Mode for your print job. „ Manual You can manually change the resolution as follows: „ 1200 dpi „ HQ 1200 „ 600 dpi...
Software Users Manual - English
Page 24
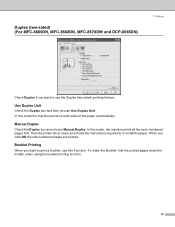
... prints on both sides of the paper automatically. Use Duplex Unit 1 Check the Duplex box and then choose Use Duplex Unit. Duplex (two-sided) (For MFC-8660DN, MFC-8860DN, MFC-8870DW and DCP-8065DN) 1. Manual Duplex 1 Check the Duplex box and choose...
... prints on both sides of the paper automatically. Use Duplex Unit 1 Check the Duplex box and then choose Use Duplex Unit. Duplex (two-sided) (For MFC-8660DN, MFC-8860DN, MFC-8870DW and DCP-8065DN) 1. Manual Duplex 1 Check the Duplex box and choose...
Software Users Manual - English
Page 25
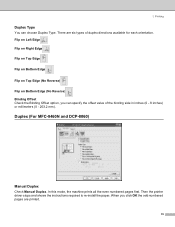
... Offset option, you click OK the odd numbered pages are six types of the binding side in inches (0 - 8 inches) or millimeters (0 - 203.2 mm). Duplex (For MFC-8460N and DCP-8060) 1 Manual Duplex 1 Check Manual Duplex.
... Offset option, you click OK the odd numbered pages are six types of the binding side in inches (0 - 8 inches) or millimeters (0 - 203.2 mm). Duplex (For MFC-8460N and DCP-8060) 1 Manual Duplex 1 Check Manual Duplex.

Software Users Manual - English
Page 36
...'s Guide.) Auto detection of printer options The Auto Detect function finds the currently installed options and shows the available settings in the driver. You can manually add or remove options. 30 Highlight the model number from the control panel menu on the machine. (See Paper Size and Tray use the optional...
...'s Guide.) Auto detection of printer options The Auto Detect function finds the currently installed options and shows the available settings in the driver. You can manually add or remove options. 30 Highlight the model number from the control panel menu on the machine. (See Paper Size and Tray use the optional...
Software Users Manual - English
Page 60
...applications on the Desktop. „ You can also use this section to manage the folders and items shown in Desktop View. „ You can manually create a link using the New Program Link... This sample Send To Bar shows several applications with links to choose an item and then fax it... those linked applications. command. (See PaperPort® SE in folders 2 PaperPort® SE has an easy-to-use a link, drag an item onto one of the icons to other applications 2 ScanSoft® PaperPort® SE automatically recognizes many other folders. „ When you can simply drag and drop an...
...applications on the Desktop. „ You can also use this section to manage the folders and items shown in Desktop View. „ You can manually create a link using the New Program Link... This sample Send To Bar shows several applications with links to choose an item and then fax it... those linked applications. command. (See PaperPort® SE in folders 2 PaperPort® SE has an easy-to-use a link, drag an item onto one of the icons to other applications 2 ScanSoft® PaperPort® SE automatically recognizes many other folders. „ When you can simply drag and drop an...


