
Cordless Handset Users Manual - English
Page 3
... your Fax Machine/Multi-Function Center needs. Brother numbers IMPORTANT For technical help, you bought the machine/cordless handset. FAQs (frequently asked questions) The Brother Solutions Center is our one-stop resource for the hearing-impaired) 1-877-BROTHER (voice) (514) 685-4898 (fax)... Service Center Locator (USA only) For the location of a Brother authorized service center, call 1-...
... your Fax Machine/Multi-Function Center needs. Brother numbers IMPORTANT For technical help, you bought the machine/cordless handset. FAQs (frequently asked questions) The Brother Solutions Center is our one-stop resource for the hearing-impaired) 1-877-BROTHER (voice) (514) 685-4898 (fax)... Service Center Locator (USA only) For the location of a Brother authorized service center, call 1-...
Cordless Handset Users Manual - English
Page 4
.... In USA: In Canada: 1-877-552-MALL (6255) 1-800-947-1445 (fax) http://www.brothermall.com 1-877-BROTHER http://www.brother.ca Description Cordless Handset Battery User's Guide Item BCL-D10 BCL-BT10 LS2932001 (English for USA and Canada) LS2932002 (French for purchase.) Note In Canada, only Visa and MasterCard ...
.... In USA: In Canada: 1-877-552-MALL (6255) 1-800-947-1445 (fax) http://www.brothermall.com 1-877-BROTHER http://www.brother.ca Description Cordless Handset Battery User's Guide Item BCL-D10 BCL-BT10 LS2932001 (English for USA and Canada) LS2932002 (French for purchase.) Note In Canada, only Visa and MasterCard ...

Cordless Handset Users Manual - English
Page 7
BROTHER CORDLESS HANDSET LIMITED WARRANTY (Canada only) Pursuant to the limited warranty of 1 year from the date of purchase for labour and parts, Brother International Corporation (Canada) Ltd. ("Brother"), or its Authorized Service Centres, Distributors, Dealers, Agents or employees, shall create another warranty or ...in the form of 90 days or the rated life, whichever comes first. Internet support: support@brother.ca or browse Brother's Web Site www.brother.ca. The warranty states Brother's entire liability and your Operation Manual for a period of a Sales Receipt. No oral or...
BROTHER CORDLESS HANDSET LIMITED WARRANTY (Canada only) Pursuant to the limited warranty of 1 year from the date of purchase for labour and parts, Brother International Corporation (Canada) Ltd. ("Brother"), or its Authorized Service Centres, Distributors, Dealers, Agents or employees, shall create another warranty or ...in the form of 90 days or the rated life, whichever comes first. Internet support: support@brother.ca or browse Brother's Web Site www.brother.ca. The warranty states Brother's entire liability and your Operation Manual for a period of a Sales Receipt. No oral or...

Cordless Handset Users Manual - English
Page 10
... 1 General Information Using the documentation 1 Symbols and conventions used in the documentation 1 Introduction ...1 Optional Cordless Handset 2 Carton Components 2 Connecting the power cord to the cradle 2 Installing the battery 2 Setting your country 3 Registering additional cordless handsets 3 Deregistering cordless handsets 4 Choosing a location 5 Important safety instructions 5 Control panel overview 6 LCD display screen 7 2 Telephone Basic operation ...8 Making...
... 1 General Information Using the documentation 1 Symbols and conventions used in the documentation 1 Introduction ...1 Optional Cordless Handset 2 Carton Components 2 Connecting the power cord to the cradle 2 Installing the battery 2 Setting your country 3 Registering additional cordless handsets 3 Deregistering cordless handsets 4 Choosing a location 5 Important safety instructions 5 Control panel overview 6 LCD display screen 7 2 Telephone Basic operation ...8 Making...

Cordless Handset Users Manual - English
Page 11
...15 Memory storage 15 Menu Table...16 Entering Text ...17 General setup ...18 Ring Volume 18 Beeper Volume 18 Speaker Volume 18 Handset Volume 18 Handset Volume (For Volume Amplify 18 Ring Pattern 19 Automatic Daylight Savings Time 19 LCD Contrast 20 Date and Time 20 Choosing your ...20 Voice Enhance 20 Echo Control 21 4 Troubleshooting and Routine Maintenance Troubleshooting 22 If you are having difficulty with your cordless handset 22 Error messages 23 Routine maintenance 24 Charging the battery 24 Cleaning ...24 Replacing the battery 25 5 Specifications General...27 Cordless...
...15 Memory storage 15 Menu Table...16 Entering Text ...17 General setup ...18 Ring Volume 18 Beeper Volume 18 Speaker Volume 18 Handset Volume 18 Handset Volume (For Volume Amplify 18 Ring Pattern 19 Automatic Daylight Savings Time 19 LCD Contrast 20 Date and Time 20 Choosing your ...20 Voice Enhance 20 Echo Control 21 4 Troubleshooting and Routine Maintenance Troubleshooting 22 If you are having difficulty with your cordless handset 22 Error messages 23 Routine maintenance 24 Charging the battery 24 Cleaning ...24 Replacing the battery 25 5 Specifications General...27 Cordless...

Cordless Handset Users Manual - English
Page 12
...be identified on the control panel of the cordless handset. If you have additional optional cordless handsets (4 max.) you can also make an intercom call to another cordless handset. „ Intercom: Use the intercom feature to choose one of your Brother machine. „ Redial: Allows you must ... You can also transfer a call to another cordless handset. „ Three-way calling: Three-way calling allows two users to speak with a third party from your telephone company the incoming caller will help you make internal calls between the cordless handset and the machine (base unit).
...be identified on the control panel of the cordless handset. If you have additional optional cordless handsets (4 max.) you can also make an intercom call to another cordless handset. „ Intercom: Use the intercom feature to choose one of your Brother machine. „ Redial: Allows you must ... You can also transfer a call to another cordless handset. „ Three-way calling: Three-way calling allows two users to speak with a third party from your telephone company the incoming caller will help you make internal calls between the cordless handset and the machine (base unit).

Cordless Handset Users Manual - English
Page 13
...1 a Insert the connector (1) of 4 cordless handsets. General Information Optional Cordless Handset 1 Your Brother machine can support 3 additional cordless handsets for a total of the new battery (2) in the Quick Setup Guide. For the cordless handset that was included with your machine please follow the ...1 Make sure you have all the components below . 2 1 1 AC adapter 2 Cordless Handset 3 User's Guide 4 Battery 5 Battery Cover 6 Cradle 2 If you have purchased an optional cordless handset please follow the setup steps in the direction shown below . 3 2 1 4 5 Connecting ...
...1 a Insert the connector (1) of 4 cordless handsets. General Information Optional Cordless Handset 1 Your Brother machine can support 3 additional cordless handsets for a total of the new battery (2) in the Quick Setup Guide. For the cordless handset that was included with your machine please follow the ...1 Make sure you have all the components below . 2 1 1 AC adapter 2 Cordless Handset 3 User's Guide 4 Battery 5 Battery Cover 6 Cradle 2 If you have purchased an optional cordless handset please follow the setup steps in the direction shown below . 3 2 1 4 5 Connecting ...

Cordless Handset Users Manual - English
Page 14
...HS Mode on Base Unit on the control panel of the machine (base unit). Press Menu/OK. You will hear one long beep when the cordless handset is already registered with your country so that you do not catch the battery connector cord. • After replacement, you... time. Note • Be careful that the cordless handset works correctly on . Press Menu/OK. c Press Menu, 0, 6 on the cordless handset. c Press 1 to choose your country. Registering additional cordless handsets 1 You can continue to the machine (base unit). For non-Color LCD models (base unit) 1 a Press Menu/OK...
...HS Mode on Base Unit on the control panel of the machine (base unit). Press Menu/OK. You will hear one long beep when the cordless handset is already registered with your country so that you do not catch the battery connector cord. • After replacement, you... time. Note • Be careful that the cordless handset works correctly on . Press Menu/OK. c Press Menu, 0, 6 on the cordless handset. c Press 1 to choose your country. Registering additional cordless handsets 1 You can continue to the machine (base unit). For non-Color LCD models (base unit) 1 a Press Menu/OK...

Cordless Handset Users Manual - English
Page 15
... on the control panel of the machine (base unit). Deregistering cordless handsets 1 If you want to install another cordless handset, repeat steps a through f. c Press Stop/Exit. You will hear one cordless handset, deregistration will remove all handsets registered with the machine (base unit). For Color LCD models (base unit) 1 a Press Menu on the control panel of...
... on the control panel of the machine (base unit). Deregistering cordless handsets 1 If you want to install another cordless handset, repeat steps a through f. c Press Stop/Exit. You will hear one cordless handset, deregistration will remove all handsets registered with the machine (base unit). For Color LCD models (base unit) 1 a Press Menu on the control panel of...
Cordless Handset Users Manual - English
Page 16
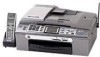
...rarely leaks out. It can cause a short circuit of a used battery in your eyes wash them with this cordless handset. Use only a genuine Brother rechargeable battery. DO NOT dispose of the battery. Call a doctor if you are concerned. It may explode. CAUTION DO...battery. 5 Chapter 1 Choosing a location 1 „ Choose a location where the temperature remains between the machine (base unit) or cordless handset and other electronic devices. (MFC-885CW) 9.8 ft (3 m) 9.8 ft (3 m) Important safety instructions 1 WARNING Use only the AC adapter and the cradle supplied with water at...
...rarely leaks out. It can cause a short circuit of a used battery in your eyes wash them with this cordless handset. Use only a genuine Brother rechargeable battery. DO NOT dispose of the battery. Call a doctor if you are concerned. It may explode. CAUTION DO...battery. 5 Chapter 1 Choosing a location 1 „ Choose a location where the temperature remains between the machine (base unit) or cordless handset and other electronic devices. (MFC-885CW) 9.8 ft (3 m) 9.8 ft (3 m) Important safety instructions 1 WARNING Use only the AC adapter and the cradle supplied with water at...

Cordless Handset Users Manual - English
Page 17
...jack You can connect an external headset with a prefix number by many local telephone companies. (Canada only) You can connect any of the cordless handset. You can make or receive a phone call. 6 Dial Pad Use these keys to dial a telephone number and as a keyboard for entering...1 2 9 3 10 4 11 5 12 6 7 13 1 LCD (liquid crystal display) Displays messages on the screen to help you set up and use your cordless handset. 1 2 Redial/Pause Redials any standard headsets that use a 2.5 mm mini style plug. 4 Clear Press to back up the cursor and delete a letter. 5 Talk Press...
...jack You can connect an external headset with a prefix number by many local telephone companies. (Canada only) You can connect any of the cordless handset. You can make or receive a phone call. 6 Dial Pad Use these keys to dial a telephone number and as a keyboard for entering...1 2 9 3 10 4 11 5 12 6 7 13 1 LCD (liquid crystal display) Displays messages on the screen to help you set up and use your cordless handset. 1 2 Redial/Pause Redials any standard headsets that use a 2.5 mm mini style plug. 4 Clear Press to back up the cursor and delete a letter. 5 Talk Press...

Cordless Handset Users Manual - English
Page 18
... speaking with the machine (base unit). 4 Ring volume status Lets you place telephone calls on the intercom, to transfer an incoming call to the cordless handset or to make a three-way call. Also, press this key to speak on hold. Chapter 1 10 Menu keys: „ Volume keys d c You can ...press these keys to adjust the ring, speaker or handset volume of the cordless handset. „a Lets you look up numbers that have been registered with the Speaker Phone. 3 Cordless handset number Lets you see when the ring volume is set to off. 5 Battery status A four ...
... speaking with the machine (base unit). 4 Ring volume status Lets you place telephone calls on the intercom, to transfer an incoming call to the cordless handset or to make a three-way call. Also, press this key to speak on hold. Chapter 1 10 Menu keys: „ Volume keys d c You can ...press these keys to adjust the ring, speaker or handset volume of the cordless handset. „a Lets you look up numbers that have been registered with the Speaker Phone. 3 Cordless handset number Lets you see when the ring volume is set to off. 5 Battery status A four ...

Cordless Handset Users Manual - English
Page 19
...only) 2 If you want to send tone signals. To end the call , the machine (base unit) will not need to use the handset. a Pick up the cordless handset. c Press (Talk). If you have a Touch Tone service, you will receive the fax automatically. (See Easy Receive in the User's Guide....) Hold 2 If you have a pulse dialing service, but need this problem, pick up the cordless handset and press Speaker Phone to send tone signals (for example, for telephone banking), follow the instructions below. If you can also transfer a call ...
...only) 2 If you want to send tone signals. To end the call , the machine (base unit) will not need to use the handset. a Pick up the cordless handset. c Press (Talk). If you have a Touch Tone service, you will receive the fax automatically. (See Easy Receive in the User's Guide....) Hold 2 If you have a pulse dialing service, but need this problem, pick up the cordless handset and press Speaker Phone to send tone signals (for example, for telephone banking), follow the instructions below. If you can also transfer a call ...

Cordless Handset Users Manual - English
Page 20
... to step d. Press Menu/OK. Call History/Redial 2 The last 10 numbers you hang up the cordless handset. Then, confirm the Delete by pressing Menu/OK. c Press a or b to choose a number and do one of these numbers to make a call . c Press a or b to choose Set Tel-Index. b ...Press Redial/Pause. Press Menu/OK. a Pick up the cordless handset. You can choose one of these numbers to make a call , add it from the history. You can also choose Call History by pressing 1. d Press (Off). b Press ...
... to step d. Press Menu/OK. Call History/Redial 2 The last 10 numbers you hang up the cordless handset. Then, confirm the Delete by pressing Menu/OK. c Press a or b to choose a number and do one of these numbers to make a call . c Press a or b to choose Set Tel-Index. b ...Press Redial/Pause. Press Menu/OK. a Pick up the cordless handset. You can choose one of these numbers to make a call , add it from the history. You can also choose Call History by pressing 1. d Press (Off). b Press ...

Cordless Handset Users Manual - English
Page 21
e Do one of the USA and Canada. • (USA only) If you redial from the ... 1. „ If you want to delete all the stored numbers, press a or b to choose All Delete. The cordless handset can identify local calls from the Call History on page 10.) • (Canada only) You can press Redial/Pause as many...you can make a call within your area code in advance. (See Setting up your area code (USA only) 2 Your cordless handset will be dialed using only 7-digits. Note • This feature may experience problems returning calls automatically from the caller ID history to ...
e Do one of the USA and Canada. • (USA only) If you redial from the ... 1. „ If you want to delete all the stored numbers, press a or b to choose All Delete. The cordless handset can identify local calls from the Call History on page 10.) • (Canada only) You can press Redial/Pause as many...you can make a call within your area code in advance. (See Setting up your area code (USA only) 2 Your cordless handset will be dialed using only 7-digits. Note • This feature may experience problems returning calls automatically from the caller ID history to ...

Cordless Handset Users Manual - English
Page 22
... the following: „ Enter the name (up to 14 characters) using the dial pad. a Pick up the cordless handset. e Press a or b to choose Set Tel-Index. f Do one of the following : „ Enter the name (up to choose Call History. Chapter 2 Storing numbers for easy dialing 2 You can ...set up your cordless handset for example: a , a or b and (Talk)). c Press a or b to choose Set Tel-Index. Press Menu/OK. ...
... the following: „ Enter the name (up to 14 characters) using the dial pad. a Pick up the cordless handset. e Press a or b to choose Set Tel-Index. f Do one of the following : „ Enter the name (up to choose Call History. Chapter 2 Storing numbers for easy dialing 2 You can ...set up your cordless handset for example: a , a or b and (Talk)). c Press a or b to choose Set Tel-Index. Press Menu/OK. ...

Cordless Handset Users Manual - English
Page 23
... Caller ID subscriber service from your telephone company you can change or delete a name or number that has already been stored. Press Menu/OK. e Do one of the following : „ Enter the new number. Note If you want to 14 characters) using the dial pad. Changing numbers 2 You can also store... Tel-Index numbers from incoming calls in the Caller ID history. (See Caller ID in the User's Guide.) a Pick up the cordless handset. 2 b Press a . f Do one of the following : „ Enter the name (up to store. Press Menu/OK. a Pick up the cordless...
... Caller ID subscriber service from your telephone company you can change or delete a name or number that has already been stored. Press Menu/OK. e Do one of the following : „ Enter the new number. Note If you want to 14 characters) using the dial pad. Changing numbers 2 You can also store... Tel-Index numbers from incoming calls in the Caller ID history. (See Caller ID in the User's Guide.) a Pick up the cordless handset. 2 b Press a . f Do one of the following : „ Enter the name (up to store. Press Menu/OK. a Pick up the cordless...

Cordless Handset Users Manual - English
Page 24
...unit). From the machine (base unit) 2 a When you have finished speaking. Note If no one is on page 3. c After you confirm the other person is already registered as Handset 1. Note • If no one is on the line, press Hold/Intercom to release the call from hold . • If... you have optional cordless handsets you must register the handset with your machine (base unit) is on the line, ...
...unit). From the machine (base unit) 2 a When you have finished speaking. Note If no one is on page 3. c After you confirm the other person is already registered as Handset 1. Note • If no one is on the line, press Hold/Intercom to release the call from hold . • If... you have optional cordless handsets you must register the handset with your machine (base unit) is on the line, ...

Cordless Handset Users Manual - English
Page 25
... have finished speaking, hang up. b Press the number of the cordless handset you want to speak with . After you can make internal calls between the cordless handset and the machine (base unit). If you have the optional cordless handset, you speak with another cordless handset in a three-way call to speak with . Note If you...
... have finished speaking, hang up. b Press the number of the cordless handset you want to speak with . After you can make internal calls between the cordless handset and the machine (base unit). If you have the optional cordless handset, you speak with another cordless handset in a three-way call to speak with . Note If you...

Cordless Handset Users Manual - English
Page 26
... incorrect letter when you will then show the next option. Scroll through the menu selections and programming options. When you program your cordless handset has to reset the date and time. 15 Accept an option. The LCD will not lose your menu settings because they guide you ...take full advantage of all the menu selections your cordless handset. You may have finished setting an option, the LCD shows Accepted. Go to choose an option. c Press Menu/OK when that option appears...
... incorrect letter when you will then show the next option. Scroll through the menu selections and programming options. When you program your cordless handset has to reset the date and time. 15 Accept an option. The LCD will not lose your menu settings because they guide you ...take full advantage of all the menu selections your cordless handset. You may have finished setting an option, the LCD shows Accepted. Go to choose an option. c Press Menu/OK when that option appears...
