

User Guide
Page 2
... as source code archives, etc. Product warranty or service will be extended if: (1) the product is repaired, modified or altered, unless such repair, modification of alteration is dependent on the preferred carrier and the location where you want to infringe. SPECIFICATIONS AND INFORMATION CONTAINED IN THIS MANUAL ARE FURNISHED FOR INFORMATIONAL USE ONLY, AND ARE SUBJECT TO CHANGE AT...
... as source code archives, etc. Product warranty or service will be extended if: (1) the product is repaired, modified or altered, unless such repair, modification of alteration is dependent on the preferred carrier and the location where you want to infringe. SPECIFICATIONS AND INFORMATION CONTAINED IN THIS MANUAL ARE FURNISHED FOR INFORMATIONAL USE ONLY, AND ARE SUBJECT TO CHANGE AT...
User Guide
Page 5
4.3 Software information 4-4 4.4 AI Suite 3...4-4 4.4.1 Ai Charger 4-7 4.4.2 USB 3.0 Boost 4-8 4.4.3 EZ Update 4-9 4.4.4 USB BIOS Flashback 4-11 4.4.5 USB Charger 4-13 4.4.6 Push Notice 4-14 4.4.7 System Information 4-17 4.5 Audio configurations 4-18 Chapter 5: RAID support 5.1 RAID configurations 5-1 5.1.1 RAID definitions 5-1 5.1.2 Installing Serial ATA hard disks 5-2 5.1.3 Setting the RAID item in BIOS 5-2 5.1.4 Intel® Rapid Storage Technology Option ROM utility 5-3 5.2 Creating a RAID driver disk 5-7 5.2.1 Creating a RAID driver disk in Windows 5-7 5.2.2 ...
4.3 Software information 4-4 4.4 AI Suite 3...4-4 4.4.1 Ai Charger 4-7 4.4.2 USB 3.0 Boost 4-8 4.4.3 EZ Update 4-9 4.4.4 USB BIOS Flashback 4-11 4.4.5 USB Charger 4-13 4.4.6 Push Notice 4-14 4.4.7 System Information 4-17 4.5 Audio configurations 4-18 Chapter 5: RAID support 5.1 RAID configurations 5-1 5.1.1 RAID definitions 5-1 5.1.2 Installing Serial ATA hard disks 5-2 5.1.3 Setting the RAID item in BIOS 5-2 5.1.4 Intel® Rapid Storage Technology Option ROM utility 5-3 5.2 Creating a RAID driver disk 5-7 5.2.1 Creating a RAID driver disk in Windows 5-7 5.2.2 ...
User Guide
Page 10
.../s controller*** - 2 x SATA 6 Gb/s ports (black) LAN Wireless Data Network Bluetooth Audio * M.2 Socket 3 shares bandwidth with SATA Express, and supports M Key and type 2260/2280 storage devices. ** These functions work depending on the next page) x Intel® I218-V Gigabit LAN - Dual interconnect between the integrated Media Access Controller (MAC) and physical layer (PHY) Speedy Wi-Fi 802.11 a/b/g/n/ac supports dual frequency band 2.4/5 GHz ASUS Wi-Fi GO! Utility Bluetooth v4.0 Realtek® ALC1150 8-channel high definition audio...
.../s controller*** - 2 x SATA 6 Gb/s ports (black) LAN Wireless Data Network Bluetooth Audio * M.2 Socket 3 shares bandwidth with SATA Express, and supports M Key and type 2260/2280 storage devices. ** These functions work depending on the next page) x Intel® I218-V Gigabit LAN - Dual interconnect between the integrated Media Access Controller (MAC) and physical layer (PHY) Speedy Wi-Fi 802.11 a/b/g/n/ac supports dual frequency band 2.4/5 GHz ASUS Wi-Fi GO! Utility Bluetooth v4.0 Realtek® ALC1150 8-channel high definition audio...

User Guide
Page 13
... Q-Connector 5X Protection featuring all-round protection provides the best quality, reliability, and durability USB 3.0 Boost USB Charger+ Ai Charger+ Disk Unlocker AI Suite 3 MemOK! vPCH: 88-step Chipset voltage control SFS (Stepless Frequency Selection) - ASUS Fan Xpert 3 - ASUS Q-LED (CPU, DRAM, VGA, Boot Device LED) - iGPU: Adjustable CPU Graphics voltage at 0.001 V increment - ASUS C.P.R. (CPU Parameter Recall) 1 x PS/2 Keyboard/mouse combo port 1 x DisplayPort 1 x HDMI port 1 x DVI-D 1 x RGB 1 x ASUS Wi-Fi GO! ASUS Q-Code - Overclocking Protection - Z97-PRO specifications...
... Q-Connector 5X Protection featuring all-round protection provides the best quality, reliability, and durability USB 3.0 Boost USB Charger+ Ai Charger+ Disk Unlocker AI Suite 3 MemOK! vPCH: 88-step Chipset voltage control SFS (Stepless Frequency Selection) - ASUS Fan Xpert 3 - ASUS Q-LED (CPU, DRAM, VGA, Boot Device LED) - iGPU: Adjustable CPU Graphics voltage at 0.001 V increment - ASUS C.P.R. (CPU Parameter Recall) 1 x PS/2 Keyboard/mouse combo port 1 x DisplayPort 1 x HDMI port 1 x DVI-D 1 x RGB 1 x ASUS Wi-Fi GO! ASUS Q-Code - Overclocking Protection - Z97-PRO specifications...

User Guide
Page 14
..., and ASUS DRAM SPD (Serial Presence Detect) memory information WfM 2.0, DMI 2.7, WOL by PME, PXE Drivers ASUS Utilities EZ Update Anti-virus software (OEM version) Windows® 8.1 Windows® 8 Windows® 7 ATX form factor: 12 in . (30.5 cm x 24.4 cm) Specifications are subject to change without notice. button 1 x Clear CMOS jumper 1 x USB BIOS Flashback button 1 x DRCT (Direct Key) connector 1 x TPU switch (advanced two-stage adjustments) 1 x EPU switch 1 x EZ XMP switch 1 x Power-on card support 1 x TPM connector 1 x 24-pin EATX Power connector 1 x 8-pin EATX 12V Power connector...
..., and ASUS DRAM SPD (Serial Presence Detect) memory information WfM 2.0, DMI 2.7, WOL by PME, PXE Drivers ASUS Utilities EZ Update Anti-virus software (OEM version) Windows® 8.1 Windows® 8 Windows® 7 ATX form factor: 12 in . (30.5 cm x 24.4 cm) Specifications are subject to change without notice. button 1 x Clear CMOS jumper 1 x USB BIOS Flashback button 1 x DRCT (Direct Key) connector 1 x TPU switch (advanced two-stage adjustments) 1 x EPU switch 1 x EZ XMP switch 1 x Power-on card support 1 x TPM connector 1 x 24-pin EATX Power connector 1 x 8-pin EATX 12V Power connector...

User Guide
Page 17
...PCIe 1.0/2.0 devices. It provides an optimal graphics performance, unprecedented data speed and seamless transition with its complete backward compatibility to six USB 3.0 ports, six SATA 6 Gb/s ports, and M.2 support for Intel® integrated graphics performance. SATA Express support SATA Express provides faster data transfer speeds of three technologies: Intel® Rapid Start Technology, Intel® Smart Response Technology, and Intel® Smart Connect Technology. It provides great graphics and system performance with its GPU, dual-channel DDR3 memory slots and PCI...
...PCIe 1.0/2.0 devices. It provides an optimal graphics performance, unprecedented data speed and seamless transition with its complete backward compatibility to six USB 3.0 ports, six SATA 6 Gb/s ports, and M.2 support for Intel® integrated graphics performance. SATA Express support SATA Express provides faster data transfer speeds of three technologies: Intel® Rapid Start Technology, Intel® Smart Response Technology, and Intel® Smart Connect Technology. It provides great graphics and system performance with its GPU, dual-channel DDR3 memory slots and PCI...

User Guide
Page 21
... slots 5. USB 2.0 connectors (10-1 pin USB1112; Thunderbolt header (5-pin TB_HEADER) 23. Q-Code LEDs Page 1-39 1-6 1-38 1-7 1-25 1-21 1-20 1-36 1-23 1-33 1-34 1-34 1-42 1-41 1-40 1-24 1-37 1-22 1-41 2-12 1-20 1-42 1-35 1-35 1-28 Chapter 1 ASUS Z97-PRO Series 1-5 Layout contents Connectors/Jumpers/Buttons and switches/Slots 1. LGA1150 CPU socket 3. ASMedia® Serial ATA 6 Gb/s connectors (7-pin SATA6G_E12) 12. M.2 Socket 3 13. System panel connector (20-8 pin PANEL) 16. Digital audio connector (4-1 pin SPDIF_OUT) 25. Intel® Z97 Serial ATA 6 Gb/s connectors (7-pin...
... slots 5. USB 2.0 connectors (10-1 pin USB1112; Thunderbolt header (5-pin TB_HEADER) 23. Q-Code LEDs Page 1-39 1-6 1-38 1-7 1-25 1-21 1-20 1-36 1-23 1-33 1-34 1-34 1-42 1-41 1-40 1-24 1-37 1-22 1-41 2-12 1-20 1-42 1-35 1-35 1-28 Chapter 1 ASUS Z97-PRO Series 1-5 Layout contents Connectors/Jumpers/Buttons and switches/Slots 1. LGA1150 CPU socket 3. ASMedia® Serial ATA 6 Gb/s connectors (7-pin SATA6G_E12) 12. M.2 Socket 3 13. System panel connector (20-8 pin PANEL) 16. Digital audio connector (4-1 pin SPDIF_OUT) 25. Intel® Z97 Serial ATA 6 Gb/s connectors (7-pin...

User Guide
Page 37
... DRAM_LED lights continuously. button lights continuously. ASUS Z97-PRO Series 1-21 Chapter 1 Turn off the computer and unplug the power cord for the exact location of failsafe settings. MemOK! Press and hold the MemOK! Replace the DIMMs with the motherboard may cause system boot failure, and the DRAM_LED near the MemOK! button Installing DIMMs that you turn off the system and reinstall the DIMM before using the MemOK! button does...
... DRAM_LED lights continuously. button lights continuously. ASUS Z97-PRO Series 1-21 Chapter 1 Turn off the computer and unplug the power cord for the exact location of failsafe settings. MemOK! Press and hold the MemOK! Replace the DIMMs with the motherboard may cause system boot failure, and the DRAM_LED near the MemOK! button Installing DIMMs that you turn off the system and reinstall the DIMM before using the MemOK! button does...

User Guide
Page 41
CPU Over Voltage jumper (3-pin CPU_OV) The CPU Overclocking jumper allows you to pins 1-2. To go back to its default CPU voltage setting, insert the jumper to set a higher CPU voltage for a flexible overclocking system, depending on the type of the installed CPU. 2. To gain more CPU voltage setting, insert the jumper to pins 2-3. Chapter 1 ASUS Z97-PRO Series 1-25
CPU Over Voltage jumper (3-pin CPU_OV) The CPU Overclocking jumper allows you to pins 1-2. To go back to its default CPU voltage setting, insert the jumper to set a higher CPU voltage for a flexible overclocking system, depending on the type of the installed CPU. 2. To gain more CPU voltage setting, insert the jumper to pins 2-3. Chapter 1 ASUS Z97-PRO Series 1-25

User Guide
Page 47
... Codes section below) Ready To Boot event Legacy Boot event Exit Boot Services event Runtime Set Virtual Address MAP Begin Runtime Set Virtual Address MAP End Legacy Option ROM Initialization System Reset USB hot plug PCI bus hot plug Clean-up of NVRAM Configuration Reset (reset of the Architectural Protocols are found Invalid password Error loading Boot Option (LoadImage returned error) Boot Option is failed (StartImage returned error) Flash update is failed Reset protocol is started IDE Reset IDE Detect IDE Enable SCSI initialization is not available Chapter 1 ASUS Z97-PRO Series...
... Codes section below) Ready To Boot event Legacy Boot event Exit Boot Services event Runtime Set Virtual Address MAP Begin Runtime Set Virtual Address MAP End Legacy Option ROM Initialization System Reset USB hot plug PCI bus hot plug Clean-up of NVRAM Configuration Reset (reset of the Architectural Protocols are found Invalid password Error loading Boot Option (LoadImage returned error) Boot Option is failed (StartImage returned error) Flash update is failed Reset protocol is started IDE Reset IDE Detect IDE Enable SCSI initialization is not available Chapter 1 ASUS Z97-PRO Series...

User Guide
Page 49
... two SATA devices. Refer to [AHCI Mode] by default. If you installed Serial ATA hard disk drives, you intend to create a Serial ATA RAID set using these connectors and set a higher priority to section 5.1 RAID configurations or the manual bundled in the BIOS to Serial ATA 6 Gb/s hard disk drives via Serial ATA 6 Gb/s signal cables. Chapter 1 • These connectors are set to section 3.6.4 PCH Storage Configuration of this user guide for details. • Before creating a RAID set the SATA Mode item in the motherboard support DVD. • The M.2 Socket...
... two SATA devices. Refer to [AHCI Mode] by default. If you installed Serial ATA hard disk drives, you intend to create a Serial ATA RAID set using these connectors and set a higher priority to section 5.1 RAID configurations or the manual bundled in the BIOS to Serial ATA 6 Gb/s hard disk drives via Serial ATA 6 Gb/s signal cables. Chapter 1 • These connectors are set to section 3.6.4 PCH Storage Configuration of this user guide for details. • Before creating a RAID set the SATA Mode item in the motherboard support DVD. • The M.2 Socket...
User Guide
Page 69
Chapter 2 ASUS Z97-PRO Series 2-11 The I/O port layout may vary with models, but the Wi-Fi antenna installation procedure is for all models. KY LINE IN CTR BASS FRONT REAR SPK MIC IN POWER eSATA 6G USB3.0 S/PDIF USB BIOS Flashback USB3.0 2.1.9 Wi-Fi antenna installation (Optional) Installing the ASUS 2T2R dual band W-Fi antenna Connect the bundled ASUS 2T2R dual band Wi-Fi antenna connector to install the Bluetooth driver before installing the...
Chapter 2 ASUS Z97-PRO Series 2-11 The I/O port layout may vary with models, but the Wi-Fi antenna installation procedure is for all models. KY LINE IN CTR BASS FRONT REAR SPK MIC IN POWER eSATA 6G USB3.0 S/PDIF USB BIOS Flashback USB3.0 2.1.9 Wi-Fi antenna installation (Optional) Installing the ASUS 2T2R dual band W-Fi antenna Connect the bundled ASUS 2T2R dual band Wi-Fi antenna connector to install the Bluetooth driver before installing the...

User Guide
Page 116
... POST (Power-on random workloads by allowing the drive to internally optimize the order of SATA ports are disabled. The following item appears only when you set the SATA configuration. [Disabled] Disables the SATA function. [IDE] Set to [IDE] when you want the SATA hard disk drives to use the AHCI (Advanced Host Controller Interface). When disabled, the hot plug function of commands. [RAID] Set to [RAID] when you want to use the Serial ATA hard disk drives as follows: PCIe M.2 > SATA Mode M.2 > PCIe SATA Express > SATA Mode SATA Express > SATA devices. Configuration options...
... POST (Power-on random workloads by allowing the drive to internally optimize the order of SATA ports are disabled. The following item appears only when you set the SATA configuration. [Disabled] Disables the SATA function. [IDE] Set to [IDE] when you want the SATA hard disk drives to use the AHCI (Advanced Host Controller Interface). When disabled, the hot plug function of commands. [RAID] Set to [RAID] when you want to use the Serial ATA hard disk drives as follows: PCIe M.2 > SATA Mode M.2 > PCIe SATA Express > SATA Mode SATA Express > SATA devices. Configuration options...

User Guide
Page 117
... Standby [Auto] This item allows you to reduce iGPU power when the system is idle. The CPU graphics shared system memory size is fixed 64 MB. 3.6.4 System Agent Configuration CPU Display Audio [Enabled] Enable this item to empower both integrated and discrete graphics devices for certain DVI monitors. Configuration options: [Auto] [Disabled] [Enabled] CPU Graphics Multi-Monitor [Disabled] This item allows you to enable the Intel® Graphics Render Standby support to enable the iGPU Multi-Monitor. Configuration options: [Enabled] [Disabled] ASUS Z97-PRO Series 3-39 Chapter...
... Standby [Auto] This item allows you to reduce iGPU power when the system is idle. The CPU graphics shared system memory size is fixed 64 MB. 3.6.4 System Agent Configuration CPU Display Audio [Enabled] Enable this item to empower both integrated and discrete graphics devices for certain DVI monitors. Configuration options: [Auto] [Disabled] [Enabled] CPU Graphics Multi-Monitor [Disabled] This item allows you to enable the Intel® Graphics Render Standby support to enable the iGPU Multi-Monitor. Configuration options: [Enabled] [Disabled] ASUS Z97-PRO Series 3-39 Chapter...

User Guide
Page 119
... xHCI driver supports the USB 3.0 mode during both POST and operating system. [Enabled] Enables the xHCI controller. [Disabled] Disables the xHCI controller. Configuration options: [Auto] [Floppy] [Forced FDD] [Hard Disk] [CD-ROM] USB Single Port Control This item allows you to their media formats. Mass Storage Devices [Auto] This item allows your system to detect the devices according to configure the platform-related features. Chapter 3 ASUS Z97-PRO Series 3-41 Intel xHCI Mode [Smart Auto] [Auto] The xHCI is automatically enabled and runs at USB 3.0 mode when...
... xHCI driver supports the USB 3.0 mode during both POST and operating system. [Enabled] Enables the xHCI controller. [Disabled] Disables the xHCI controller. Configuration options: [Auto] [Floppy] [Forced FDD] [Hard Disk] [CD-ROM] USB Single Port Control This item allows you to their media formats. Mass Storage Devices [Auto] This item allows your system to detect the devices according to configure the platform-related features. Chapter 3 ASUS Z97-PRO Series 3-41 Intel xHCI Mode [Smart Auto] [Auto] The xHCI is automatically enabled and runs at USB 3.0 mode when...

User Guide
Page 131
... button. [Enabled] Allows the system to power on state of the chassis reset buton cable to display during POST. [Full Screen] Sets the boot logo display in full screen during POST. [Disabled] Disables the boot logo display during POST. Connect the 2-pin connector of the NumLock. Configuration options: [Disabled] [Enabled] Option ROM Messages [Enabled] [Enabled] The third-party ROM messages will only power on or off when you to [Disabled]. The system will be pressed when error occurs. Boot Logo Display [Auto] [Auto] Sets the boot logo to the onboard DRCT header...
... button. [Enabled] Allows the system to power on state of the chassis reset buton cable to display during POST. [Full Screen] Sets the boot logo display in full screen during POST. [Disabled] Disables the boot logo display during POST. Connect the 2-pin connector of the NumLock. Configuration options: [Disabled] [Enabled] Option ROM Messages [Enabled] [Enabled] The third-party ROM messages will only power on or off when you to [Disabled]. The system will be pressed when error occurs. Boot Logo Display [Auto] [Auto] Sets the boot logo to the onboard DRCT header...
User Guide
Page 140
... update the motherboard BIOS in Windows® environment. • EZ Update requires an Internet connection either through a network or an ISP (Internet Service Provider). • This utility is potentially risky. Inappropriate BIOS updating may result to system's failure to update your BIOS when necessary. ASUS BIOS Updater: Updates the BIOS in DOS environment using the current version of this user guide for this chapter to boot. If there is no problem using the motherboard support DVD and a USB flash disk drive. 3.11.1 EZ Update...
... update the motherboard BIOS in Windows® environment. • EZ Update requires an Internet connection either through a network or an ISP (Internet Service Provider). • This utility is potentially risky. Inappropriate BIOS updating may result to system's failure to update your BIOS when necessary. ASUS BIOS Updater: Updates the BIOS in DOS environment using the current version of this user guide for this chapter to boot. If there is no problem using the motherboard support DVD and a USB flash disk drive. 3.11.1 EZ Update...
User Guide
Page 148
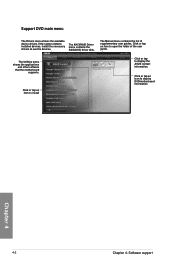
... list of the user guide. Click or tap an icon to display the ASUS contact information. The AHCI/RAID Driver menu contains the RAID/AHCI driver disk. The Utilities menu shows the applications and other software that the motherboard supports. Click or tap an item to install Click or tap to display DVD/motherboard information Chapter 4 4-2 Chapter 4: Software support Install the necessary drivers to open the folder of supplementary user guides. Click or tap an item to use the devices. Support DVD main menu...
... list of the user guide. Click or tap an icon to display the ASUS contact information. The AHCI/RAID Driver menu contains the RAID/AHCI driver disk. The Utilities menu shows the applications and other software that the motherboard supports. Click or tap an item to install Click or tap to display DVD/motherboard information Chapter 4 4-2 Chapter 4: Software support Install the necessary drivers to open the folder of supplementary user guides. Click or tap an item to use the devices. Support DVD main menu...
User Guide
Page 173
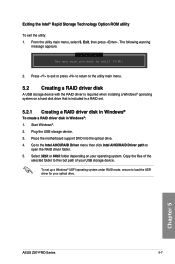
.... 5. To set . 5.2.1 Creating a RAID driver disk in Windows® To create a RAID driver disk in a RAID set up a Windows® UEFI operating system under RAID mode, ensure to load the UEFI driver for your optical drive. Go to the Intel AHCI/RAID Driver menu then click Intel AHCI/RAID Driver path to exit? (Y/N): 2. Copy the files of the selected folder to the utility main menu. 5.2 Creating a RAID driver disk A USB storage device with the RAID driver is required when installing a Windows® operating system on your USB storage device. Place the motherboard support DVD into...
.... 5. To set . 5.2.1 Creating a RAID driver disk in Windows® To create a RAID driver disk in a RAID set up a Windows® UEFI operating system under RAID mode, ensure to load the UEFI driver for your optical drive. Go to the Intel AHCI/RAID Driver menu then click Intel AHCI/RAID Driver path to exit? (Y/N): 2. Copy the files of the selected folder to the utility main menu. 5.2 Creating a RAID driver disk A USB storage device with the RAID driver is required when installing a Windows® operating system on your USB storage device. Place the motherboard support DVD into...
User Guide
Page 174
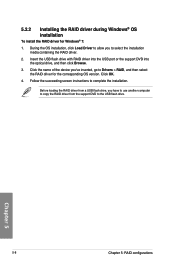
... the OS installation, click Load Driver to allow you have to use another computer to copy the RAID driver from the support DVD to complete the installation. Before loading the RAID driver from a USB flash drive, you to Drivers > RAID, and then select the RAID driver for Windows® 7: 1. Click OK. 4. Insert the USB flash drive with RAID driver into the USB port or the support DVD into the optical drive, and then click Browse. 3. Follow the succeeding screen instructions to the USB flash drive.
... the OS installation, click Load Driver to allow you have to use another computer to copy the RAID driver from the support DVD to complete the installation. Before loading the RAID driver from a USB flash drive, you to Drivers > RAID, and then select the RAID driver for Windows® 7: 1. Click OK. 4. Insert the USB flash drive with RAID driver into the USB port or the support DVD into the optical drive, and then click Browse. 3. Follow the succeeding screen instructions to the USB flash drive.


