
TUSL2 User Manual
Page 2
...Microsoft Corporation. Manual updates are registered trademarks of the product is defaced or missing. Product Name: ASUS TUSL2 Manual Revision: 1.03 E811 Release Date: July 2001 2 ASUS TUSL2 User's Manual Products and corporate names appearing in this manual, including the products and software described ...the manual revision number. Copyright © 2001 ASUSTeK COMPUTER INC. For previous or updated manuals, BIOS, drivers, or product release information, contact ASUS at http://www.asus.com.tw or through any means, except documentation kept by the purchaser for backup purposes, without...
...Microsoft Corporation. Manual updates are registered trademarks of the product is defaced or missing. Product Name: ASUS TUSL2 Manual Revision: 1.03 E811 Release Date: July 2001 2 ASUS TUSL2 User's Manual Products and corporate names appearing in this manual, including the products and software described ...the manual revision number. Copyright © 2001 ASUSTeK COMPUTER INC. For previous or updated manuals, BIOS, drivers, or product release information, contact ASUS at http://www.asus.com.tw or through any means, except documentation kept by the purchaser for backup purposes, without...

TUSL2 User Manual
Page 4
... the Computer System 47 4.1.2 Updating BIOS Procedures 48 4.2 BIOS Setup Program 51 4.2.1 BIOS Menu Bar 52 4.2.2 Legend Bar 52 4.3 Main Menu 54 4.3.1 Primary & Secondary Master/Slave 55 4.3.2 Keyboard Features 58 4.4 Advanced Menu 60 4.4.1 4.4.2 4.4.3 4.4.4 Chip Configuration 63 I/O Device Configuration 66 PCI Configuration 68 Shadow Configuration 70 4 ASUS TUSL2 User's Manual FEATURES 8 2.1 The ASUS TUSL2 8 2.2 TUSL2 Motherboard Components 12 3. CONTENTS...
... the Computer System 47 4.1.2 Updating BIOS Procedures 48 4.2 BIOS Setup Program 51 4.2.1 BIOS Menu Bar 52 4.2.2 Legend Bar 52 4.3 Main Menu 54 4.3.1 Primary & Secondary Master/Slave 55 4.3.2 Keyboard Features 58 4.4 Advanced Menu 60 4.4.1 4.4.2 4.4.3 4.4.4 Chip Configuration 63 I/O Device Configuration 66 PCI Configuration 68 Shadow Configuration 70 4 ASUS TUSL2 User's Manual FEATURES 8 2.1 The ASUS TUSL2 8 2.2 TUSL2 Motherboard Components 12 3. CONTENTS...
TUSL2 User Manual
Page 7
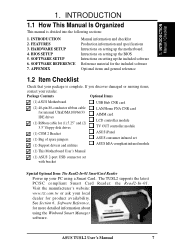
... bracket Special Optional Item: The Read2-In-01 SmartCard Reader Power up the motherboard. 1. BIOS SETUP 5. The TUSL2 supports the latest PC/SC compliant Smart Card Reader: the Read2-In-01. ASUS TUSL2 User's Manual 7 Intructions on setting up the BIOS Intructions on setting up your package is divided into the following sections: 1. INTRODUCTION Manual...
... bracket Special Optional Item: The Read2-In-01 SmartCard Reader Power up the motherboard. 1. BIOS SETUP 5. The TUSL2 supports the latest PC/SC compliant Smart Card Reader: the Read2-In-01. ASUS TUSL2 User's Manual 7 Intructions on setting up the BIOS Intructions on setting up your package is divided into the following sections: 1. INTRODUCTION Manual...
TUSL2 User Manual
Page 8
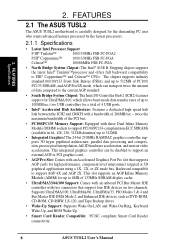
2. FEATURES 2.1 The ASUS TUSL2 The ASUS TUSL2 motherboard is carefully designed for UltraDMA/100, which allows burst mode data transfer rates of the PCI bus. • PC100/PC133 Memory Support: Equipped with ... Backup drives. • Wake-Up Support: Supports Wake-On-LAN and Wake-On-Ring, Keyboard Wake-Up, and BIOS Wake-Up. • Smart Card Reader Compatible: PC/SC compliant Smart Card Reader connectivity. 8 ASUS TUSL2 User's Manual This integrated graphics controller can transport twice the amount of data compared to the current AGP...
2. FEATURES 2.1 The ASUS TUSL2 The ASUS TUSL2 motherboard is carefully designed for UltraDMA/100, which allows burst mode data transfer rates of the PCI bus. • PC100/PC133 Memory Support: Equipped with ... Backup drives. • Wake-Up Support: Supports Wake-On-LAN and Wake-On-Ring, Keyboard Wake-Up, and BIOS Wake-Up. • Smart Card Reader Compatible: PC/SC compliant Smart Card Reader connectivity. 8 ASUS TUSL2 User's Manual This integrated graphics controller can transport twice the amount of data compared to the current AGP...

TUSL2 User Manual
Page 9
...system information LED display, front I/O ports, and space reserved for Windows 98/ME/2000 compatibility, built-in 1 MHz increments through the BIOS. ASUS TUSL2 User's Manual 9 UART2 can support Bus Master PCI cards, such as not to damage the motherboard, peripherals, and/or components. &#...8226; One Touch Management: Supports an optional ASUS iPanel, an easy to the Infrared Module for wireless connections. • Enhanced ACPI & Anti-Boot Virus Protection: Programmable BIOS (Flash EEPROM), offering enhanced ACPI for a hard disk drive. Provides Vcore ...
...system information LED display, front I/O ports, and space reserved for Windows 98/ME/2000 compatibility, built-in 1 MHz increments through the BIOS. ASUS TUSL2 User's Manual 9 UART2 can support Bus Master PCI cards, such as not to damage the motherboard, peripherals, and/or components. &#...8226; One Touch Management: Supports an optional ASUS iPanel, an easy to the Infrared Module for wireless connections. • Enhanced ACPI & Anti-Boot Virus Protection: Programmable BIOS (Flash EEPROM), offering enhanced ACPI for a hard disk drive. Provides Vcore ...

TUSL2 User Manual
Page 10
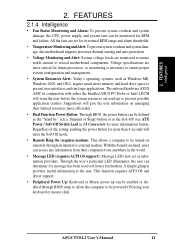
... Suspend and Go: Suspend-to wait for a long time for system bootup. • New Compliancy: Both the BIOS and hardware levels of purchase: • Onboard Audio: C-Media Audio Chip CMI8738 supporting the latest PCI 6 channel and... procedures for PC 99 certification. FEATURES 2.1.2 Specifications-Optional Components The following onboard components are based on the TUSL2, the Promise IDE controller chip supports the ATA-100 protocol and Ultra DMA/100 data transfer speeds. FEATURES...Color-coded connectors and descriptive icons make identification easy. 10 ASUS TUSL2 User's Manual
... Suspend and Go: Suspend-to wait for a long time for system bootup. • New Compliancy: Both the BIOS and hardware levels of purchase: • Onboard Audio: C-Media Audio Chip CMI8738 supporting the latest PCI 6 channel and... procedures for PC 99 certification. FEATURES 2.1.2 Specifications-Optional Components The following onboard components are based on the TUSL2, the Promise IDE controller chip supports the ATA-100 protocol and Ultra DMA/100 data transfer speeds. FEATURES...Color-coded connectors and descriptive icons make identification easy. 10 ASUS TUSL2 User's Manual
TUSL2 User Manual
Page 11
... prevent system overheat and system damage, this benefit on-hand, users can access any information from their limited resources more information) button. ASUS TUSL2 User's Manual 11 Suspend or Sleep) button or as the "Stand by" (a.k.a. A simple glimpse provides useful information to critical motherboard ... more memory and hard drive space to be monitored for more than 4 seconds will give the user information on remotely through BIOS setup to allow the computer to present user interfaces and run large applications. Through the way a particular LED illuminates, the user...
... prevent system overheat and system damage, this benefit on-hand, users can access any information from their limited resources more information) button. ASUS TUSL2 User's Manual 11 Suspend or Sleep) button or as the "Stand by" (a.k.a. A simple glimpse provides useful information to critical motherboard ... more memory and hard drive space to be monitored for more than 4 seconds will give the user information on remotely through BIOS setup to allow the computer to present user interfaces and run large applications. Through the way a particular LED illuminates, the user...

TUSL2 User Manual
Page 18
...the switches in the OFF position. HARDWARE SETUP Motherboard Feature Settings The motherboard's onboard functions are either adjusted through the BIOS setup (see 4.4 Advanced Menu). Frequency Selection 2. H/W SETUP Motherboard Settings 1) JumperFree™ Mode (JEN) This jumper allows...12345 ® TUSL2 TUSL2 DIP Switches ON OFF 1. Setting JEN Disable (Jumper) [1-2] Enable (JumperFree) [2-3] (default) DSW COM1 ON 12345 JEN 12 ® TUSL2 Disable Jumper Mode TUSL2 JumperFree™ Mode Setting OFF JEN 23 Enable JumperFree Mode (Default) 18 ASUS TUSL2 User's Manual...
...the switches in the OFF position. HARDWARE SETUP Motherboard Feature Settings The motherboard's onboard functions are either adjusted through the BIOS setup (see 4.4 Advanced Menu). Frequency Selection 2. H/W SETUP Motherboard Settings 1) JumperFree™ Mode (JEN) This jumper allows...12345 ® TUSL2 TUSL2 DIP Switches ON OFF 1. Setting JEN Disable (Jumper) [1-2] Enable (JumperFree) [2-3] (default) DSW COM1 ON 12345 JEN 12 ® TUSL2 Disable Jumper Mode TUSL2 JumperFree™ Mode Setting OFF JEN 23 Enable JumperFree Mode (Default) 18 ASUS TUSL2 User's Manual...

TUSL2 User Manual
Page 22
....3MHz 103.0MHz 100.30MHz AGP 66.8MHz 66.8MHz 68.7MHz 66.85MHz ® ON 12345 ON 12345 ON 12345 ON 12345 TUSL2 TUSL2 CPU External CPU DRAM Clock (BUS) Frequency AGP Selection 140MHz 133.70MHz 105MHz 133.70MHz 70MHz 66.85MHz 140MHz (JumperFree Mode) 140MHz 70MHz... Speed in Advanced Menu in place of the CPU's External frequency. H/W SETUP Motherboard Settings 22 ASUS TUSL2 User's Manual In JumperFree mode, all dip switches must use BIOS setup in BIOS Setup). Multiple in BIOS setup will have a locked Frequency Multiple, you must be set the Frequency Multiple. If the Frequency...
....3MHz 103.0MHz 100.30MHz AGP 66.8MHz 66.8MHz 68.7MHz 66.85MHz ® ON 12345 ON 12345 ON 12345 ON 12345 TUSL2 TUSL2 CPU External CPU DRAM Clock (BUS) Frequency AGP Selection 140MHz 133.70MHz 105MHz 133.70MHz 70MHz 66.85MHz 140MHz (JumperFree Mode) 140MHz 70MHz... Speed in Advanced Menu in place of the CPU's External frequency. H/W SETUP Motherboard Settings 22 ASUS TUSL2 User's Manual In JumperFree mode, all dip switches must use BIOS setup in BIOS Setup). Multiple in BIOS setup will have a locked Frequency Multiple, you must be set the Frequency Multiple. If the Frequency...

TUSL2 User Manual
Page 25
... Chip Configuration. NOTE: For PC133 SDRAM to run at 133MHz, the system CPU bus must also operate at that speed. ASUS TUSL2 User's Manual 25 Memory speed setup is recommended through SDRAM Configuration in any combination as follows: DIMM Location 168-pin DIMM Total...). Otherwise, the system may hang during startup. 3.5.1 General DIMM Notes • ASUS motherboards support SPD (Serial Presence Detect) DIMMs. This is required after adding or removing memory. stability. • BIOS shows SDRAM memory on the motherboard. 3. H/W SETUP Motherboard Settings 3. Sockets are available...
... Chip Configuration. NOTE: For PC133 SDRAM to run at 133MHz, the system CPU bus must also operate at that speed. ASUS TUSL2 User's Manual 25 Memory speed setup is recommended through SDRAM Configuration in any combination as follows: DIMM Location 168-pin DIMM Total...). Otherwise, the system may hang during startup. 3.5.1 General DIMM Notes • ASUS motherboards support SPD (Serial Presence Detect) DIMMs. This is required after adding or removing memory. stability. • BIOS shows SDRAM memory on the motherboard. 3. H/W SETUP Motherboard Settings 3. Sockets are available...
TUSL2 User Manual
Page 28
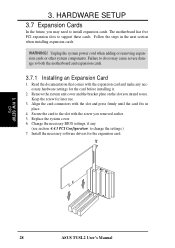
... cards. Unplug the system power cord when adding or removing expansion cards or other system components. Change the necessary BIOS settings, if any necessary hardware settings for the expansion card. 3. H/W SETUP CPU 28 ASUS TUSL2 User's Manual WARNING! Remove the system unit cover and the bracket plate on the slot you intend to...
... cards. Unplug the system power cord when adding or removing expansion cards or other system components. Change the necessary BIOS settings, if any necessary hardware settings for the expansion card. 3. H/W SETUP CPU 28 ASUS TUSL2 User's Manual WARNING! Remove the system unit cover and the bracket plate on the slot you intend to...

TUSL2 User Manual
Page 36
... support extra IDE devices. BIOS now supports specific device bootup (see 4.6 Boot Menu.) If you will need to Slave mode. See 5.4 Software Setup for more than two UltraDMA100/66 devices, you have more information about setting up a RAID array. Connect the cable's blue connector to PIN 1. 36 ASUS TUSL2 User's Manual HARDWARE SETUP...
... support extra IDE devices. BIOS now supports specific device bootup (see 4.6 Boot Menu.) If you will need to Slave mode. See 5.4 Software Setup for more than two UltraDMA100/66 devices, you have more information about setting up a RAID array. Connect the cable's blue connector to PIN 1. 36 ASUS TUSL2 User's Manual HARDWARE SETUP...

TUSL2 User Manual
Page 45
... to your system user's manual. 4. The power LED on the chain) c. While the tests are made, close the system case cover. 2. Award BIOS Beep Codes Beep One short beep when displaying logo Long beeps in some systems, marked with ), and the power input voltage is equipped with the... need to comply with a surge protector. 5. Connect the power supply cord into a power outlet that all connections are running at a lower frequency ASUS TUSL2 User's Manual 45 For ATX power supplies, the system LED will light when the ATX power switch is working Meaning No error during POST No...
... to your system user's manual. 4. The power LED on the chain) c. While the tests are made, close the system case cover. 2. Award BIOS Beep Codes Beep One short beep when displaying logo Long beeps in some systems, marked with ), and the power input voltage is equipped with the... need to comply with a surge protector. 5. Connect the power supply cord into a power outlet that all connections are running at a lower frequency ASUS TUSL2 User's Manual 45 For ATX power supplies, the system LED will light when the ATX power switch is working Meaning No error during POST No...

TUSL2 User Manual
Page 46
... Off your computer: You must first exit or shut down your operating system before switching off after exiting or shutting down to enter BIOS setup. If you can now safely turn off the power switch. 3. For ATX power supplies, you use Windows 9X, click the Start button, click Shut ... after Windows shuts down. During power-on, hold down your computer" will not appear when shutting down the computer? HARDWARE SETUP 7. H/W SETUP Powering Up 46 ASUS TUSL2 User's Manual The power supply should turn off your operating system. Follow the instructions in 4.
... Off your computer: You must first exit or shut down your operating system before switching off after exiting or shutting down to enter BIOS setup. If you can now safely turn off the power switch. 3. For ATX power supplies, you use Windows 9X, click the Start button, click Shut ... after Windows shuts down. During power-on, hold down your computer" will not appear when shutting down the computer? HARDWARE SETUP 7. H/W SETUP Powering Up 46 ASUS TUSL2 User's Manual The power supply should turn off your operating system. Follow the instructions in 4.
TUSL2 User Manual
Page 47
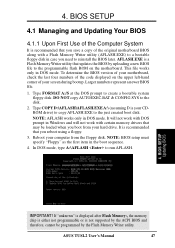
... you boot from the floppy disk. AFLASH.EXE is recommended that updates the BIOS by the Flash Memory Writer utility. NOTE: AFLASH works only in DOS mode. ASUS TUSL2 User's Manual 47 To determine the BIOS version of your hard drive. Type FORMAT A:/S at the DOS prompt to run... AFLASH. 4. It is a Flash Memory Writer utility that you need to reinstall the BIOS later. Reboot your computer from your ...
... you boot from the floppy disk. AFLASH.EXE is recommended that updates the BIOS by the Flash Memory Writer utility. NOTE: AFLASH works only in DOS mode. ASUS TUSL2 User's Manual 47 To determine the BIOS version of your hard drive. Type FORMAT A:/S at the DOS prompt to run... AFLASH. 4. It is a Flash Memory Writer utility that you need to reinstall the BIOS later. Reboot your computer from your ...
TUSL2 User Manual
Page 48
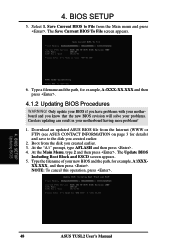
.... 6. Type the filename of your motherboard having more problems! 1. Select 1. Boot from the Main menu and press . BIOS SETUP Updating BIOS 48 ASUS TUSL2 User's Manual Type a filename and the path, for example, A:\XXXXX.XXX, and then press . Only update your BIOS if you have problems with your motherboard and you know that the new...
.... 6. Type the filename of your motherboard having more problems! 1. Select 1. Boot from the Main menu and press . BIOS SETUP Updating BIOS 48 ASUS TUSL2 User's Manual Type a filename and the path, for example, A:\XXXXX.XXX, and then press . Only update your BIOS if you have problems with your motherboard and you know that the new...

TUSL2 User Manual
Page 49
... automatically only when necessary. BIOS SETUP Updating BIOS NOTE: When you may still press to update the BIOS. BIOS SETUP 6. When prompted to confirm the BIOS update, press Y to program the new BIOS information into the flash ROM. Yet if the update fails, your system will prevent your system from booting up. ASUS TUSL2 User's Manual 49 The...
... automatically only when necessary. BIOS SETUP Updating BIOS NOTE: When you may still press to update the BIOS. BIOS SETUP 6. When prompted to confirm the BIOS update, press Y to program the new BIOS information into the flash ROM. Yet if the update fails, your system will prevent your system from booting up. ASUS TUSL2 User's Manual 49 The...

TUSL2 User Manual
Page 50
If you saved to continue. If this might prevent your system from booting up . Just repeat the process, and if the problem still persists, update the original BIOS file you encounter problems while updating the new BIOS, DO NOT turn off your system since this happens, your system may not be able to successfully update a complete BIOS file, your system will need servicing. 4. BIOS SETUP Updating BIOS 50 ASUS TUSL2 User's Manual BIOS SETUP 8. If the Flash Memory Writer utility was not able to boot up . WARNING! Follow the onscreen instructions to disk above. 4.
If you saved to continue. If this might prevent your system from booting up . Just repeat the process, and if the problem still persists, update the original BIOS file you encounter problems while updating the new BIOS, DO NOT turn off your system since this happens, your system may not be able to successfully update a complete BIOS file, your system will need servicing. 4. BIOS SETUP Updating BIOS 50 ASUS TUSL2 User's Manual BIOS SETUP 8. If the Flash Memory Writer utility was not able to boot up . WARNING! Follow the onscreen instructions to disk above. 4.
TUSL2 User Manual
Page 51
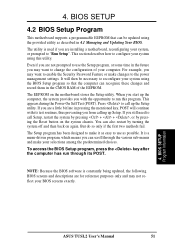
... (POST). Press to call up the computer, the system provides you can recognize these changes and record them in 4.1 Managing and Updating Your BIOS. BIOS SETUP Program Information ASUS TUSL2 User's Manual 51 4. If you may want to enable the Security Password Feature or make changes to change the configuration of the EEPROM. It...
... (POST). Press to call up the computer, the system provides you can recognize these changes and record them in 4.1 Managing and Updating Your BIOS. BIOS SETUP Program Information ASUS TUSL2 User's Manual 51 4. If you may want to enable the Security Password Feature or make changes to change the configuration of the EEPROM. It...
TUSL2 User Manual
Page 52
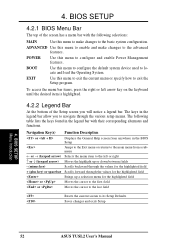
... the first field or Moves the cursor to the last field Resets the current screen to the basic system configuration. BIOS SETUP Menu Introduction 52 ASUS TUSL2 User's Manual BIOS SETUP 4.2.1 BIOS Menu Bar The top of the Setup screen you to the left arrow key on the keyboard until the desired item.... 4. BOOT Use this menu to make changes to locate and load the Operating System. The following table lists the keys found in the BIOS Setup Jumps to the Exit menu or returns to the main menu from anywhere in the legend bar with the following selections: MAIN Use this...
... the first field or Moves the cursor to the last field Resets the current screen to the basic system configuration. BIOS SETUP Menu Introduction 52 ASUS TUSL2 User's Manual BIOS SETUP 4.2.1 BIOS Menu Bar The top of the Setup screen you to the left arrow key on the keyboard until the desired item.... 4. BOOT Use this menu to make changes to locate and load the Operating System. The following table lists the keys found in the BIOS Setup Jumps to the Exit menu or returns to the main menu from anywhere in the legend bar with the following selections: MAIN Use this...


