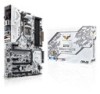
SABERTOOTH Z170 S Users manual English
Page 3
Guardian Angel 1-3 1.1.5 ASUS EZ DIY 1-4 1.1.6 ASUS Exclusive Features 1-5 1.1.7 Other special features 1-5 1.2 Motherboard overview 1-6 1.2.1 Before you proceed 1-6 1.2.2 Motherboard layout 1-7 1.2.3 Central Processing Unit ...installation 2-8 2.1.5 DIMM installation 2-10 2.1.6 ATX Power connection 2-11 2.1.7 SATA device connection 2-12 2.1.8 Front I/O Connector 2-13 2.1.9 Expansion Card installation 2-14 2.2 BIOS update utility 2-15 iii Contents Safety information...vi About this guide...vii SABERTOOTH Z170 S specifications summary ix Package contents...xiv ...
SABERTOOTH Z170 S Users manual English
Page 13
...SABERTOOTH Z170 S specifications summary BIOS Features Manageability Support DVD contents Operating System Support Form factor 128 Mb Flash ROM, UEFI AMI BIOS, PnP, DMI3.0, WfM2.0, SM BIOS 3.0, ACPI 5.0, Multi-language BIOS, ASUS... EZ Flash 3, CrashFree BIOS 3, F11 EZ Tuning Wizard, F6 Qfan Control, F3 My Favorites, Quick Note, Last Modified log, F12 PrintScreen and ASUS DRAM SPD (Serial... Presence Detect) memory information WfM 2.0, DMI 3.0, WOL by PME, PXE Drivers ASUS Utilities EZ Update Anti-virus software (OEM...
SABERTOOTH Z170 S Users manual English
Page 22
... you install motherboard components or change any motherboard settings. • Unplug the power cord from the wall socket before touching any component, ensure that the ATX power supply is switched off or the power cord is detached from the power supply.
SABERTOOTH Z170 S Users manual English
Page 24
... 1-25 1-24 1-33 1-32 1-31 1-27 1-21 1-32 1-33 1-22 1-29 1-26 1-8 Chapter 1: Product Introduction T-SENSOR3) 7. M.2 Socket 3 10. System panel connector (20-3 pin PANEL) 12. ATX power connectors (24-pin EATXPWR, 8-pin EATX12V) 2. CPU, water pump, CPU optional, assistant fan, extension, and chassis fan connectors (4-pin CPU_FAN; 4-pin W_PUMP; 4-pin CPU_OPT...
SABERTOOTH Z170 S Users manual English
Page 40
ATX power connectors (24-pin EATXPWR; 8-pin EATX12V) These connectors are designed to ensure the system stability. 1-24 Chapter 1: Product Introduction.... • If you use a PSU with a higher power output when configuring a system with more high-end PCI Express x16 cards, use a PSU with ATX 12 V Specification 2.0 (or later version) and provides a minimum power of 350 W. • DO NOT forget to use a power supply unit (PSU) ... For a fully configured system, we recommend that you use two or more power-consuming devices. The power supply plugs are for ATX power supply plugs.
SABERTOOTH Z170 S Users manual English
Page 41
... connector supports several chassis-mounted functions. Pressing the power button turns the system on the operating system settings. SABERTOOTH Z170 S 1-25 9. Connect the chassis power LED cable to hear system beeps and warnings. • ATX power button/soft-off button (2-pin PWRSW) This connector is for the system power button. The HDD LED...
SABERTOOTH Z170 S Users manual English
Page 55
2.1.6 ATX Power connection Chapter 2 OR OR SABERTOOTH Z170 S 2-11
SABERTOOTH Z170 S Users manual English
Page 64
... regardless of the system chassis. 4. Check the jumper settings and connections or call your monitor complies with ATX power supplies, the system LED lights up or change from the time you press the ATX power button. After applying power, the system power LED on the system front panel case lights up for...