

User Manual
Page 2
However, the manufacturer makes no guarantee regarding the accuracy of this manual may or may be registered trademarks or copyrights of ASUSTeK COMPUTER, INC. ("ASUS"). No part of this manual, including the products and software described in it, may not be reproduced, transmitted, transcribed, stored in a retrieval system, or translated ... to ensure that the contents of its contents, and reserves the right to date. English E5308 Third Edition V3 January 2010 Copyright © 2010 ASUSTeK COMPUTER INC. All Rights Reserved.
However, the manufacturer makes no guarantee regarding the accuracy of this manual may or may be registered trademarks or copyrights of ASUSTeK COMPUTER, INC. ("ASUS"). No part of this manual, including the products and software described in it, may not be reproduced, transmitted, transcribed, stored in a retrieval system, or translated ... to ensure that the contents of its contents, and reserves the right to date. English E5308 Third Edition V3 January 2010 Copyright © 2010 ASUSTeK COMPUTER INC. All Rights Reserved.

User Manual
Page 15
... to DC power for analog audio transfer. 8 Headphone/Audio Out jack The stereo headphone jack (3.5mm) is recommended that prevent the computer to be secured using Kensington® compatible security products. Using this jack automatically disables the builtin speakers. 9 USB port The Universal ...Audio In jack Plug a 3.5mm mini-jack audio cable into this jack for use with the computer stand. 10 Kensington® Lock port The Kensington® lock port allows the computer to be removed from your body. 6 Microphone jack The microphone jack is designed to connect ...
... to DC power for analog audio transfer. 8 Headphone/Audio Out jack The stereo headphone jack (3.5mm) is recommended that prevent the computer to be secured using Kensington® compatible security products. Using this jack automatically disables the builtin speakers. 9 USB port The Universal ...Audio In jack Plug a 3.5mm mini-jack audio cable into this jack for use with the computer stand. 10 Kensington® Lock port The Kensington® lock port allows the computer to be removed from your body. 6 Microphone jack The microphone jack is designed to connect ...

User Manual
Page 16
...; Do not disconnect the AC power after turning off rather than entering the sleep mode. • When a power failure occurs, the computer enters the sleep mode in five minutes. English The EeeTop PC ET1603 model comes with USB devices such as keyboards, mouse devices, cameras...• Batteries are consumables.To replace the battery, seek local technical support services or visit the ASUS website www.asus.com. Note the following diagram to disconnect the AC power, ensure that your computer is compatible with a battery that supports the Uninterruptible Power Supply (UPS) function.
...; Do not disconnect the AC power after turning off rather than entering the sleep mode. • When a power failure occurs, the computer enters the sleep mode in five minutes. English The EeeTop PC ET1603 model comes with USB devices such as keyboards, mouse devices, cameras...• Batteries are consumables.To replace the battery, seek local technical support services or visit the ASUS website www.asus.com. Note the following diagram to disconnect the AC power, ensure that your computer is compatible with a battery that supports the Uninterruptible Power Supply (UPS) function.
User Manual
Page 35
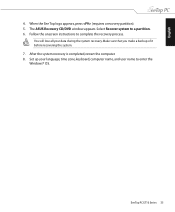
Select Recover system to enter the Windows® OS. After the system recovery is completed, restart the computer. 8. Set up your data during the system recovery. When the Eee Top logo appears, press (requires a recovery partition). 5. You will lose all your language, time zone, keyboard, computer name, and user name to a partition. 6. EeeTop PC ET16 Series 35 Follow the onscreen instructions to complete the recovery process. English 4. The ASUS Recovery CD/DVD window appears. Make sure that you make a backup of it before recovering the system. 7.
Select Recover system to enter the Windows® OS. After the system recovery is completed, restart the computer. 8. Set up your data during the system recovery. When the Eee Top logo appears, press (requires a recovery partition). 5. You will lose all your language, time zone, keyboard, computer name, and user name to a partition. 6. EeeTop PC ET16 Series 35 Follow the onscreen instructions to complete the recovery process. English 4. The ASUS Recovery CD/DVD window appears. Make sure that you make a backup of it before recovering the system. 7.
User Manual
Page 36
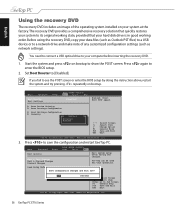
... Exit & Save Changes Exit & Discard Changes Discard Changes BIOS SETUP UTILITY Boot Tools Exit Exit system setup after saving the changes. Press again to your computer before inserting the recovery DVD. 1. Load Setup Defaults Save configuration changes and exit now? [Ok] [Cancel] ←→ Select Screen ↑↓ Select Item Enter...
... Exit & Save Changes Exit & Discard Changes Discard Changes BIOS SETUP UTILITY Boot Tools Exit Exit system setup after saving the changes. Press again to your computer before inserting the recovery DVD. 1. Load Setup Defaults Save configuration changes and exit now? [Ok] [Cancel] ←→ Select Screen ↑↓ Select Item Enter...
User Manual
Page 37
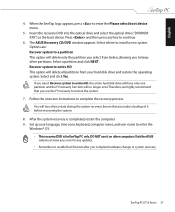
... you use the F9 recovery to restore the system. 7. Select and click Yes. After the system recovery is completed, restart the computer. 9. Ensure that you select from your hard disk drive and restore the operating system. English 4. Follow the onscreen instructions to install a... new system. The ASUS Recovery CD/DVD window appears. Options are: Recover system to a partition This option will delete all your language, time zone, keyboard, computer name, and user name to enter the Windows® OS. ・ ...
... you use the F9 recovery to restore the system. 7. Select and click Yes. After the system recovery is completed, restart the computer. 9. Ensure that you select from your hard disk drive and restore the operating system. English 4. Follow the onscreen instructions to install a... new system. The ASUS Recovery CD/DVD window appears. Options are: Recover system to a partition This option will delete all your language, time zone, keyboard, computer name, and user name to enter the Windows® OS. ・ ...

User Manual
Page 2
English E5199 Second Edition V2 November 2009 Copyright © 2009 ASUSTeK COMPUTER INC. Every effort has been made to ensure that the contents of their respective companies, and are correct and up to make changes without prior ... may be reproduced, transmitted, transcribed, stored in a retrieval system, or translated into any language in it, may not be registered trademarks or copyrights of ASUSTeK COMPUTER, INC. ("ASUS"). However, the manufacturer makes no guarantee regarding the accuracy of its contents, and reserves the right to date.
English E5199 Second Edition V2 November 2009 Copyright © 2009 ASUSTeK COMPUTER INC. Every effort has been made to ensure that the contents of their respective companies, and are correct and up to make changes without prior ... may be reproduced, transmitted, transcribed, stored in a retrieval system, or translated into any language in it, may not be registered trademarks or copyrights of ASUSTeK COMPUTER, INC. ("ASUS"). However, the manufacturer makes no guarantee regarding the accuracy of its contents, and reserves the right to date.

User Manual
Page 13
...headphones. Do not cover the adapter and keep it away from a fixed object. Using this jack. It is recommended that prevent the computer to be removed from your body. 6 Microphone jack The microphone jack is designed to connect a microphone used to connect the system's ... In jack Plug a 3.5mm mini-jack audio cable into this port to prevent conflict with the computer stand. 10 Kensington® Lock port The Kensington® lock port allows the computer to be secured using Kensington® compatible security products. English 4 USB port The Universal Serial Bus...
...headphones. Do not cover the adapter and keep it away from a fixed object. Using this jack. It is recommended that prevent the computer to be removed from your body. 6 Microphone jack The microphone jack is designed to connect a microphone used to connect the system's ... In jack Plug a 3.5mm mini-jack audio cable into this port to prevent conflict with the computer stand. 10 Kensington® Lock port The Kensington® lock port allows the computer to be secured using Kensington® compatible security products. English 4 USB port The Universal Serial Bus...

User Manual
Page 14
...; If you move the computer, the battery provides power for five minutes without AC power connected. • Batteries are consumables.To replace the battery, seek local technical support services or visit the ASUS website www.asus.com. Side view Refer to disconnect the AC power, ensure... that supports the Uninterruptible Power Supply (UPS) function. English The EeeTop PC ET1603 model comes with a battery that your computer is compatible with USB devices such ...
...; If you move the computer, the battery provides power for five minutes without AC power connected. • Batteries are consumables.To replace the battery, seek local technical support services or visit the ASUS website www.asus.com. Side view Refer to disconnect the AC power, ensure... that supports the Uninterruptible Power Supply (UPS) function. English The EeeTop PC ET1603 model comes with a battery that your computer is compatible with USB devices such ...

User Manual
Page 33
You will lose all your language, time zone, keyboard, computer name, and user name to a partition. 6. EeeTop PC ET16 Series 33 Set up your data during the system recovery. After the system recovery is completed, restart the computer. 8. The ASUS Recovery CD/DVD window appears. Make sure that you make a backup of it before recovering the system. 7. When the Eee Top logo appears, press (requires a recovery partition). 5. Select Recover system to enter the Windows® OS. English 4. Follow the onscreen instructions to complete the recovery process.
You will lose all your language, time zone, keyboard, computer name, and user name to a partition. 6. EeeTop PC ET16 Series 33 Set up your data during the system recovery. After the system recovery is completed, restart the computer. 8. The ASUS Recovery CD/DVD window appears. Make sure that you make a backup of it before recovering the system. 7. When the Eee Top logo appears, press (requires a recovery partition). 5. Select Recover system to enter the Windows® OS. English 4. Follow the onscreen instructions to complete the recovery process.

User Manual
Page 34
... setup by doing the instruction above, restart the system and try pressing repeatedly on bootup to its original working state, provided that quickly restores your computer before inserting the recovery DVD. 1. Change Option F1 General Help F10 Save and Exit ESC Exit v02.61 (C)Copyright 1985-2009, American Megatrends, Inc. 3. Set...
... setup by doing the instruction above, restart the system and try pressing repeatedly on bootup to its original working state, provided that quickly restores your computer before inserting the recovery DVD. 1. Change Option F1 General Help F10 Save and Exit ESC Exit v02.61 (C)Copyright 1985-2009, American Megatrends, Inc. 3. Set...

User Manual
Page 35
...system to continue. 6. Options are: Recover system to a partition This option will delete all your language, time zone, keyboard, computer name, and user name to enter the Windows® OS. ・ ��T�h�i�s�r�e�c�o&#...65533;e�r�s�.�V�i�s�i�t�t�h�e��A�S�U�S�� website at www.asus.com for any key to entire HD This option will delete only the partition you select from your hard disk drive and restore...
...system to continue. 6. Options are: Recover system to a partition This option will delete all your language, time zone, keyboard, computer name, and user name to enter the Windows® OS. ・ ��T�h�i�s�r�e�c�o&#...65533;e�r�s�.�V�i�s�i�t�t�h�e��A�S�U�S�� website at www.asus.com for any key to entire HD This option will delete only the partition you select from your hard disk drive and restore...


