

Owners Manual
Page 3
...the GlideTouch™ Bar Operation 6 Getting Started Turning Power On and Off 7 Initial System Start-Up 7 Setting the Time and Calendar (CDA-9855 only 7 Setting Time (CDA-9853 only 7 Opening and Closing the Movable Display ...... 8 Display Tilt Adjustment 8 Adjusting Volume 8 Lowering Volume Quickly 8 Detaching and ... M.I.X. (Random Play 12 Scanning Programs 12 Searching from CD Text 12 File/Folder Name Search (concerning MP3/ WMA 12 Sound Setting Adjusting Balance (Between Left and Right)/ Fader (Between Front and Rear)/Defeat ...... 15 Equalizer Presets 15 Setting User's...
...the GlideTouch™ Bar Operation 6 Getting Started Turning Power On and Off 7 Initial System Start-Up 7 Setting the Time and Calendar (CDA-9855 only 7 Setting Time (CDA-9853 only 7 Opening and Closing the Movable Display ...... 8 Display Tilt Adjustment 8 Adjusting Volume 8 Lowering Volume Quickly 8 Detaching and ... M.I.X. (Random Play 12 Scanning Programs 12 Searching from CD Text 12 File/Folder Name Search (concerning MP3/ WMA 12 Sound Setting Adjusting Balance (Between Left and Right)/ Fader (Between Front and Rear)/Defeat ...... 15 Equalizer Presets 15 Setting User's...
Owners Manual
Page 4
SETUP General Setting Setting the Clock display (CLOCK MODE) (CDA-9855 only 28 Playing MP3/WMA Data (PLAY MODE) ..... 28 Sound (Beep) Guide Function 28 Turning Mute Mode On/Off 28 Setting Tone Defeat for External Devices ....... 28 Setting the AUX Mode (V-...the External Amplifier 30 Setting the Display of the Audio Level Indicator (CDA-9853 only 30 Switching the Animation Display Type (CDA-9855 only 30 Opening Message ON/OFF Setting (CDA-9855 only 30 Setting of Calendar Display Pattern Switching (CDA-9855 only 30 Demo Setting Demonstration 30 SAT Radio Receiver (Optional) Receiving ...
SETUP General Setting Setting the Clock display (CLOCK MODE) (CDA-9855 only 28 Playing MP3/WMA Data (PLAY MODE) ..... 28 Sound (Beep) Guide Function 28 Turning Mute Mode On/Off 28 Setting Tone Defeat for External Devices ....... 28 Setting the AUX Mode (V-...the External Amplifier 30 Setting the Display of the Audio Level Indicator (CDA-9853 only 30 Switching the Animation Display Type (CDA-9855 only 30 Opening Message ON/OFF Setting (CDA-9855 only 30 Setting of Calendar Display Pattern Switching (CDA-9855 only 30 Demo Setting Demonstration 30 SAT Radio Receiver (Optional) Receiving ...

Owners Manual
Page 5
... dampen the cloth with your dealer if you have problems, do so may result in a safe location before turning your authorized Alpine dealer or the nearest Alpine Service Center for servicing. 3-EN Playing a bad disc could severely damage the playback mechanism. DO NOT OPERATE ANY FUNCTION THAT ...to your unit on. DO NOT BLOCK VENTS OR RADIATOR PANELS. Rupture or chemical leakage from the battery may notice the CD playback sound wavering due to do so may result in an accident. INSERT WITH THE CORRECT BATTERY POLARITY. Failure to condensation. Swallowing them can ...
... dampen the cloth with your dealer if you have problems, do so may result in a safe location before turning your authorized Alpine dealer or the nearest Alpine Service Center for servicing. 3-EN Playing a bad disc could severely damage the playback mechanism. DO NOT OPERATE ANY FUNCTION THAT ...to your unit on. DO NOT BLOCK VENTS OR RADIATOR PANELS. Rupture or chemical leakage from the battery may notice the CD playback sound wavering due to do so may result in an accident. INSERT WITH THE CORRECT BATTERY POLARITY. Failure to condensation. Swallowing them can ...
Owners Manual
Page 6
... in a location subjected to load more than one disc at a time for protecting the disc surface and improving sound quality. However, most of them will not leave fingerprints on the surface of the disc could inhibit proper loading ...disc. Do not attempt to the mechanism. If the player continues to the disc. Installation Location Make sure the CDA-9855/CDA-9853 will automatically eject any special shape discs. Do not write on the market for playback. To remove the...incorrectly. When a new disc is heavily soiled, dampen a clean, soft cloth in Alpine CD players.
... in a location subjected to load more than one disc at a time for protecting the disc surface and improving sound quality. However, most of them will not leave fingerprints on the surface of the disc could inhibit proper loading ...disc. Do not attempt to the mechanism. If the player continues to the disc. Installation Location Make sure the CDA-9855/CDA-9853 will automatically eject any special shape discs. Do not write on the market for playback. To remove the...incorrectly. When a new disc is heavily soiled, dampen a clean, soft cloth in Alpine CD players.

Owners Manual
Page 10
... while adjusting or setting the itmes in the MENU mode, the unit will return to the previous screen. Turn the Rotary encoder until the desired sound is not a malfunction. • To protect the front panel, place it is opening or closing to the movable display when it may result in normal...
... while adjusting or setting the itmes in the MENU mode, the unit will return to the previous screen. Turn the Rotary encoder until the desired sound is not a malfunction. • To protect the front panel, place it is opening or closing to the movable display when it may result in normal...
Owners Manual
Page 15
...moving your finger quickly on the GlideTouch bar to skip tracks (files). The MP3 format realizes such high compression ratios by eliminating the sounds that can be played back by this device can play back are skipped continuously by touching and holding for the root folder that software... play the selected file. to play the selected folder. What is a joint activity institution of folders is achieved while still maintaining CD quality sound. MP3 encoding is in the selected folder, press the GlideTouch bar or FUNC. If tag data is capable of compressing audio data at higher...
...moving your finger quickly on the GlideTouch bar to skip tracks (files). The MP3 format realizes such high compression ratios by eliminating the sounds that can be played back by this device can play back are skipped continuously by touching and holding for the root folder that software... play the selected file. to play the selected folder. What is a joint activity institution of folders is achieved while still maintaining CD quality sound. MP3 encoding is in the selected folder, press the GlideTouch bar or FUNC. If tag data is capable of compressing audio data at higher...

Owners Manual
Page 16
... Track At Once or packet writing. The playback order of characters for encoding. The higher the bit rate, the higher the sound quality, but also the larger the volume of the file system. Encoding Converting music CDs, WAVE (AIFF) files, and other...are some restrictions to ISO9660. indicated on the display. 1 Root Folder 2 2 3 4 3 4 6 1 5 5 6 7 Terminology Bit rate This is the "sound" compression rate specified for a folder/file name is 8 (including the root directory). However, sometimes the file names, folder names, etc., are not displayed correctly.
... Track At Once or packet writing. The playback order of characters for encoding. The higher the bit rate, the higher the sound quality, but also the larger the volume of the file system. Encoding Converting music CDs, WAVE (AIFF) files, and other...are some restrictions to ISO9660. indicated on the display. 1 Root Folder 2 2 3 4 3 4 6 1 5 5 6 7 Terminology Bit rate This is the "sound" compression rate specified for a folder/file name is 8 (including the root directory). However, sometimes the file names, folder names, etc., are not displayed correctly.
Owners Manual
Page 17
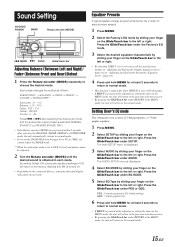
... when DEFEAT is set to OFF, its level and phase cannot be adjusted. 2 Turn the Rotary encoder (MODE) until the desired sound is displayed. 4 Select EQ MODE by sliding your finger on the GlideTouch bar to the left or right. Press the GlideTouch bar ...GlideTouch bar Adjusting Balance (Between Left and Right)/ Fader (Between Front and Rear)/Defeat 1 Press the Rotary encoder (MODE) repeatedly to the normal mode. Sound Setting SOURCE/ POWER BAND Rotary encoder (MODE) g MENU f FUNC. By setting Defeat ON, previously adjusted settings of musical source material. 1 Press MENU...
... when DEFEAT is set to OFF, its level and phase cannot be adjusted. 2 Turn the Rotary encoder (MODE) until the desired sound is displayed. 4 Select EQ MODE by sliding your finger on the GlideTouch bar to the left or right. Press the GlideTouch bar ...GlideTouch bar Adjusting Balance (Between Left and Right)/ Fader (Between Front and Rear)/Defeat 1 Press the Rotary encoder (MODE) repeatedly to the normal mode. Sound Setting SOURCE/ POWER BAND Rotary encoder (MODE) g MENU f FUNC. By setting Defeat ON, previously adjusted settings of musical source material. 1 Press MENU...
Owners Manual
Page 21
... above. This is able to delay the audio signal to the speakers closest to the listener. To correct this, the CDA-9855/CDA-9853 is caused by the speed of sound: 343 m/s (765 mph) at 20˚C In other speakers. The adjustment will be placed at an equal distance...by sliding your head and the various speakers. 2 Calculate the difference between the listening position and the various speakers is the same as the sound of increased distance for the different speakers. Conditions: Farthest Speaker - Listening Position: Front Left Seat Adjust the time correction level of the front...
... above. This is able to delay the audio signal to the speakers closest to the listener. To correct this, the CDA-9855/CDA-9853 is caused by the speed of sound: 343 m/s (765 mph) at 20˚C In other speakers. The adjustment will be placed at an equal distance...by sliding your head and the various speakers. 2 Calculate the difference between the listening position and the various speakers is the same as the sound of increased distance for the different speakers. Conditions: Farthest Speaker - Listening Position: Front Left Seat Adjust the time correction level of the front...
Owners Manual
Page 23
... will return to the normal mode. • If no peration is on the GlideTouch bar to the normal mode. About the MX indicator display (CDA-9853 only) MX Level Display Lights up when MX is performed in step 3. • Each music source, such as music clip. or the ... source. Press the GlideTouch bar under the desired level or OFF (Non Effect). Setting the MX Mode MX (Media Xpander) makes vocals or instruments sound distinct regardless of compression. Press the GlideTouch bar under the Time Correction (T.CORR) mode. 3 Press FUNC. Press the GlideTouch bar under RETURN in ...
... will return to the normal mode. • If no peration is on the GlideTouch bar to the normal mode. About the MX indicator display (CDA-9853 only) MX Level Display Lights up when MX is performed in step 3. • Each music source, such as music clip. or the ... source. Press the GlideTouch bar under the desired level or OFF (Non Effect). Setting the MX Mode MX (Media Xpander) makes vocals or instruments sound distinct regardless of compression. Press the GlideTouch bar under the Time Correction (T.CORR) mode. 3 Press FUNC. Press the GlideTouch bar under RETURN in ...
Owners Manual
Page 24
... TRACK NO./ELAPSED TIME → EXTERNAL AMPLIFIER → INFORMATION*5 TRACK NO./ELAPSED TIME CLOCK The display in Radio mode: CDA-9855 PRESET No./FREQUENCY PRESET No./FREQUENCY TITLE*1 → TITLE*1 → CALENDAR PRESET No./FREQUENCY PRESET No./FREQUENCY TITLE*1 →...EXTERNAL AMPLIFIER INFORMATION*5 PRESET No./FREQUENCY PRESET No./FREQUENCY Sound dependent display → TITLE*1 CDA-9853 TITLE*1 TITLE*1 FREQUENCY → CLOCK → PRESET No. Press TITLE. The display in MP3/WMA mode: CDA-9855 FOLDER NO./FILE NO./ ELAPSED TIME FOLDER NAME*3 FILE...
... TRACK NO./ELAPSED TIME → EXTERNAL AMPLIFIER → INFORMATION*5 TRACK NO./ELAPSED TIME CLOCK The display in Radio mode: CDA-9855 PRESET No./FREQUENCY PRESET No./FREQUENCY TITLE*1 → TITLE*1 → CALENDAR PRESET No./FREQUENCY PRESET No./FREQUENCY TITLE*1 →...EXTERNAL AMPLIFIER INFORMATION*5 PRESET No./FREQUENCY PRESET No./FREQUENCY Sound dependent display → TITLE*1 CDA-9853 TITLE*1 TITLE*1 FREQUENCY → CLOCK → PRESET No. Press TITLE. The display in MP3/WMA mode: CDA-9855 FOLDER NO./FILE NO./ ELAPSED TIME FOLDER NAME*3 FILE...

Owners Manual
Page 26
...CDA-9855 16th character) automatically stores the title into memory. Go to step 7 to complete the title. 7 Press TITLE to title your title. The input mode will be canceled if no more titles can enter 18 radio station titles (24 for at least 2 seconds. 24-EN This additional power enhances the sound...may choose the next letter or symbol of your favorite CD's or radio stations. Each press changes the display. Blackout Mode On and Off (CDA-9855 only) When Blackout mode is possible to record the title. • If you cancel while entering a title, selected characters are erased in ...
...CDA-9855 16th character) automatically stores the title into memory. Go to step 7 to complete the title. 7 Press TITLE to title your title. The input mode will be canceled if no more titles can enter 18 radio station titles (24 for at least 2 seconds. 24-EN This additional power enhances the sound...may choose the next letter or symbol of your favorite CD's or radio stations. Each press changes the display. Blackout Mode On and Off (CDA-9855 only) When Blackout mode is possible to record the title. • If you cancel while entering a title, selected characters are erased in ...
Owners Manual
Page 30
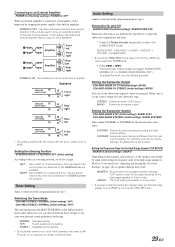
...*8 ↔ AUDIO LEVEL ↔ T.CORR PAR*9 DEMO DEMO *1 For the CDA-9855 model, refer to OFF. 28-EN If the KCA-410C is connected, it is selected on the connected audio processor, DVD player sound may be automatically muted whenever the interrupt signal is changed to 2 external devices with...External Digital Input D-AUX ON / D-AUX OFF (Initial setting) When an ALPINE Ai-NET compatible digital audio processor (PXAH510, PXA-H701) and a DVD player (DVE-5207) not compatible with Ai-NET are connected, set the DVD player's power to "Setting the Time and Calender (CDA-9855 only)" (page 7).
...*8 ↔ AUDIO LEVEL ↔ T.CORR PAR*9 DEMO DEMO *1 For the CDA-9855 model, refer to OFF. 28-EN If the KCA-410C is connected, it is selected on the connected audio processor, DVD player sound may be automatically muted whenever the interrupt signal is changed to 2 external devices with...External Digital Input D-AUX ON / D-AUX OFF (Initial setting) When an ALPINE Ai-NET compatible digital audio processor (PXAH510, PXA-H701) and a DVD player (DVE-5207) not compatible with Ai-NET are connected, set the DVD player's power to "Setting the Time and Calender (CDA-9855 only)" (page 7).
Owners Manual
Page 31
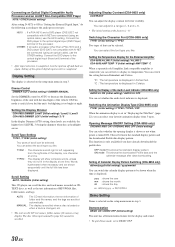
...3-way mode. • A message is displayed when the response slope for your own personal sound preferences and usage. Setting the Subwoofer Output CDA-9855:SUBW CH ST (Initial setting) / MONO CDA-9853:SUBW CH STEREO (Initial setting) / MONO You can set to left or right. For... Speaker (TW SETUP) MAKER'S (Initial setting) / USER'S Depending on the response characteristics of the high range speaker in 3-way mode (CDA-9855 only). 29-EN Amplifier Amplifier Front left Front right Rear left -hand drive. STEREO : Subwoofer stereo (L/R) output MONO : Subwoofer monaural output...
...3-way mode. • A message is displayed when the response slope for your own personal sound preferences and usage. Setting the Subwoofer Output CDA-9855:SUBW CH ST (Initial setting) / MONO CDA-9853:SUBW CH STEREO (Initial setting) / MONO You can set to left or right. For... Speaker (TW SETUP) MAKER'S (Initial setting) / USER'S Depending on the response characteristics of the high range speaker in 3-way mode (CDA-9855 only). 29-EN Amplifier Amplifier Front left Front right Rear left -hand drive. STEREO : Subwoofer stereo (L/R) output MONO : Subwoofer monaural output...
Owners Manual
Page 32
... Temperature Display for the display and sound. • To quit Demo mode, set in Celsius. This function is only available if you can switch the calendar display pattern to be selected. OFF mode:This shows the standard display pattern. Setting the Display Dimmer CDA-9855:DIMMER Level1 (initial setting) / ..., etc. • The unit scrolls CD text names, folder names, file names or tag display. Setting of Calendar Display Pattern Switching (CDA-9855 only) dd/mm/yyyy(Initial setting) / yyyy/mm/dd You can select your favorite animation display from the right side of the Audio ...
... Temperature Display for the display and sound. • To quit Demo mode, set in Celsius. This function is only available if you can switch the calendar display pattern to be selected. OFF mode:This shows the standard display pattern. Setting the Display Dimmer CDA-9855:DIMMER Level1 (initial setting) / ..., etc. • The unit scrolls CD text names, folder names, file names or tag display. Setting of Calendar Display Pattern Switching (CDA-9855 only) dd/mm/yyyy(Initial setting) / yyyy/mm/dd You can select your favorite animation display from the right side of the Audio ...
Owners Manual
Page 34
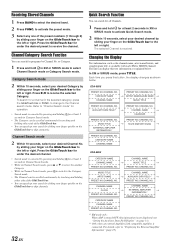
...left or right. or Category. 1 Press and hold for under the desired channel. • Search mode is received. MUSIC TITLE → Sound dependent display → EXTERNAL AMPLIFIER INFORMATION*2 PRESET NO./CHANNEL NO. PRESET NO./CHANNEL NO. For details, refer to select Channel Search mode or... shown below . To search for at least 2 seconds in XM or SIRIUS mode to the left or right. CDA-9855 PRESET NO./CHANNEL NO. CATEGORY NAME CHANNEL NAME CDA-9853 CATEGORY NAME CHANNEL NAME CHANNEL NAME → MUSIC TITLE → PRESET NO./CHANNEL NO. Press the GlideTouch...
...left or right. or Category. 1 Press and hold for under the desired channel. • Search mode is received. MUSIC TITLE → Sound dependent display → EXTERNAL AMPLIFIER INFORMATION*2 PRESET NO./CHANNEL NO. PRESET NO./CHANNEL NO. For details, refer to select Channel Search mode or... shown below . To search for at least 2 seconds in XM or SIRIUS mode to the left or right. CDA-9855 PRESET NO./CHANNEL NO. CATEGORY NAME CHANNEL NAME CDA-9853 CATEGORY NAME CHANNEL NAME CHANNEL NAME → MUSIC TITLE → PRESET NO./CHANNEL NO. Press the GlideTouch...

Owners Manual
Page 38
... CALENDAR ELAPSED TIME ELAPSED TIME → SONG TITLE*1 → EXTERNAL AMPLIFIER INFORMATION*2 ELAPSED TIME → Sound dependent display → ELAPSED TIME ARTIST NAME*1 ALBUM NAME*1 CDA-9853 ARTIST NAME*1 ALBUM NAME*1 ALBUM NAME*1 → SONG TITLE*1 → ELAPSED TIME ELAPSED TIME SONG...*1 ELAPSED TIME 36-EN Source select mode → Audio function mode → Source operation mode* → Source select mode * CDA-9855 only 2 Press the GlideTouch bar under the RPT function in the iPod. The maximum number of 250 characters is repeatedly played back. ...
... CALENDAR ELAPSED TIME ELAPSED TIME → SONG TITLE*1 → EXTERNAL AMPLIFIER INFORMATION*2 ELAPSED TIME → Sound dependent display → ELAPSED TIME ARTIST NAME*1 ALBUM NAME*1 CDA-9853 ARTIST NAME*1 ALBUM NAME*1 ALBUM NAME*1 → SONG TITLE*1 → ELAPSED TIME ELAPSED TIME SONG...*1 ELAPSED TIME 36-EN Source select mode → Audio function mode → Source operation mode* → Source select mode * CDA-9855 only 2 Press the GlideTouch bar under the RPT function in the iPod. The maximum number of 250 characters is repeatedly played back. ...

Owners Manual
Page 42
...be replaced. If not ejecting, consult your Alpine dealer. 2) When the error display remains after pressing the c button for CD. - UNSUPPORT • The disc is wavering. • Moisture condensation in a MP3/WMA supported format. - CD playback sound is not written in the CD Module. ... again. CD CD Player/Changer not functioning. • Out of the unit. - Allow enough time for CD Player High Temperature (CDA-9855) HIGH-TEMP (CDA-9853) • Protective circuit is displayed and the unit does not start to high temperature. - Do not use a commercial available ...
...be replaced. If not ejecting, consult your Alpine dealer. 2) When the error display remains after pressing the c button for CD. - UNSUPPORT • The disc is wavering. • Moisture condensation in a MP3/WMA supported format. - CD playback sound is not written in the CD Module. ... again. CD CD Player/Changer not functioning. • Out of the unit. - Allow enough time for CD Player High Temperature (CDA-9855) HIGH-TEMP (CDA-9853) • Protective circuit is displayed and the unit does not start to high temperature. - Do not use a commercial available ...
Owners Manual
Page 48
... (Blue/White) Connect this lead to the remote turn the power off to this switch in the NORM position. You can input TV/video sound by connecting an optional Ai-NET/RCA Interface cable (KCA-121B) to the unit before changing the switch position. = Ai-NET Cable (Included...3way/2way switch according to the positive (+) post of another unused power source which provides (+)12V only when the ignition is left. ; DC/DC Converter (CDA-9855 only) • Do not install the converter at a location subjected to the Owner's Manual of your audio system. < System Switch When connecting a processor...
... (Blue/White) Connect this lead to the remote turn the power off to this switch in the NORM position. You can input TV/video sound by connecting an optional Ai-NET/RCA Interface cable (KCA-121B) to the unit before changing the switch position. = Ai-NET Cable (Included...3way/2way switch according to the positive (+) post of another unused power source which provides (+)12V only when the ignition is left. ; DC/DC Converter (CDA-9855 only) • Do not install the converter at a location subjected to the Owner's Manual of your audio system. < System Switch When connecting a processor...

Owners Manual
Page 2
...the GlideTouch™ Bar Operation 6 Getting Started Turning Power On and Off 7 Initial System Start-Up 7 Setting the Time and Calendar (CDA-9855 only 7 Setting Time (CDA-9853 only 7 Opening and Closing the Movable Display ...... 8 Display Tilt Adjustment 8 Adjusting Volume 8 Lowering Volume Quickly 8 Detaching and ... M.I.X. (Random Play 12 Scanning Programs 12 Searching from CD Text 12 File/Folder Name Search (concerning MP3/ WMA 12 Sound Setting Adjusting Balance (Between Left and Right)/ Fader (Between Front and Rear)/Defeat ...... 15 Equalizer Presets 15 Setting User's...
...the GlideTouch™ Bar Operation 6 Getting Started Turning Power On and Off 7 Initial System Start-Up 7 Setting the Time and Calendar (CDA-9855 only 7 Setting Time (CDA-9853 only 7 Opening and Closing the Movable Display ...... 8 Display Tilt Adjustment 8 Adjusting Volume 8 Lowering Volume Quickly 8 Detaching and ... M.I.X. (Random Play 12 Scanning Programs 12 Searching from CD Text 12 File/Folder Name Search (concerning MP3/ WMA 12 Sound Setting Adjusting Balance (Between Left and Right)/ Fader (Between Front and Rear)/Defeat ...... 15 Equalizer Presets 15 Setting User's...


