
Owners Manual
Page 1
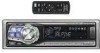
... DE ESPANA, S.A. Portal de Gamarra 36, Pabellon, 32 01013 Vitoria (Alava)-APDO 133, Spain Phone 945-283588 Designed by ALPINE Japan Printed in China (Y) 68P02294K99-A ./ ALPINE® EN FM/AM CD Receiver CDA-9831 FR CDA-9830 Mx MP3 • Plays Windows w MediaTM • (ft dogs DIGITAL AUDIO f TEXT XAA ))) READY ES • OWNER'S MANUAL Please...
... DE ESPANA, S.A. Portal de Gamarra 36, Pabellon, 32 01013 Vitoria (Alava)-APDO 133, Spain Phone 945-283588 Designed by ALPINE Japan Printed in China (Y) 68P02294K99-A ./ ALPINE® EN FM/AM CD Receiver CDA-9831 FR CDA-9830 Mx MP3 • Plays Windows w MediaTM • (ft dogs DIGITAL AUDIO f TEXT XAA ))) READY ES • OWNER'S MANUAL Please...

Owners Manual
Page 2
...Alpine de CD le ofrecen mas! Mas selecciones musicales, mas versatilidad y mas ventajas. Le modele CHA-S634 est un changeur 6 disques ultra performant equipe des nouvelles fonctions M DAC, CD-R/RW PLAY BACK, MP3 PLAY BACK et CD TEXT. CHA-1214 • CD changer for CDA-9831/CDA-9830. • Changeur CD pour CDA-9831/CDA- 9830. • Cambiador de CD para CDA-9831/ CDA...discos de tamario reducido con un CD-R/RW PLAY BACK. r CHA-S634 • CD changer for CDA-9831/CDA-9830. • Changeur CD pour CDA-9831/CDA- 9830. • Cambiador de CD para CDA-9831/ CDA-9830. The CHA-S634 is a...
...Alpine de CD le ofrecen mas! Mas selecciones musicales, mas versatilidad y mas ventajas. Le modele CHA-S634 est un changeur 6 disques ultra performant equipe des nouvelles fonctions M DAC, CD-R/RW PLAY BACK, MP3 PLAY BACK et CD TEXT. CHA-1214 • CD changer for CDA-9831/CDA-9830. • Changeur CD pour CDA-9831/CDA- 9830. • Cambiador de CD para CDA-9831/ CDA...discos de tamario reducido con un CD-R/RW PLAY BACK. r CHA-S634 • CD changer for CDA-9831/CDA-9830. • Changeur CD pour CDA-9831/CDA- 9830. • Cambiador de CD para CDA-9831/ CDA-9830. The CHA-S634 is a...
Owners Manual
Page 3
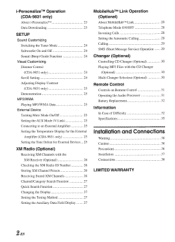
...Radio 8 Manual Storing of Station Presets 8 Automatic Memory of Station Presets 8 Tuning to Preset Stations 8 Station Title Search Function 9 Frequency Search Function 9 CD/MP3/VVMA Playback 9 Playing back a Playlist 10 Repeat Play 11 M.I.X. (Random Play) 11 Scanning Programs 12 Searching from CD...Off 20 Setting an Amplifier Link (CDA-9831 only) 21 Displaying the External Amplifier Information (CDA-9831 only) 21 Setting the Multicolor Illumination (CDA-9831 only) 22 Changing the Lighting Color of All the Buttons (CDA-9831 only) 22 Verifying the Software ...
...Radio 8 Manual Storing of Station Presets 8 Automatic Memory of Station Presets 8 Tuning to Preset Stations 8 Station Title Search Function 9 Frequency Search Function 9 CD/MP3/VVMA Playback 9 Playing back a Playlist 10 Repeat Play 11 M.I.X. (Random Play) 11 Scanning Programs 12 Searching from CD...Off 20 Setting an Amplifier Link (CDA-9831 only) 21 Displaying the External Amplifier Information (CDA-9831 only) 21 Setting the Multicolor Illumination (CDA-9831 only) 22 Changing the Lighting Color of All the Buttons (CDA-9831 only) 22 Verifying the Software ...
Owners Manual
Page 4
...25 Setting the Temperature Display for the External Amplifier (CDA-9831 only) 25 Setting the Tone Defeat for External Devices 25 XM Radio (Optional) Receiving XM Channels with the XM Receiver (Optional) 26 Checking the XM Radio ID Number 26 Storing XM Channel Presets 26 Receiving...28 Setting the Automatic Calling 28 Calling 29 SMS (Short Message Service) Operation 29 Changer (Optional) Controlling CD Changer (Optional) 30 Playing MP3 Files with the CD Changer (Optional) 30 Multi-Changer Selection (Optional) 30 Remote Control Controls on Remote Control 31 Operating ...
...25 Setting the Temperature Display for the External Amplifier (CDA-9831 only) 25 Setting the Tone Defeat for External Devices 25 XM Radio (Optional) Receiving XM Channels with the XM Receiver (Optional) 26 Checking the XM Radio ID Number 26 Storing XM Channel Presets 26 Receiving...28 Setting the Automatic Calling 28 Calling 29 SMS (Short Message Service) Operation 29 Changer (Optional) Controlling CD Changer (Optional) 30 Playing MP3 Files with the CD Changer (Optional) 30 Multi-Changer Selection (Optional) 30 Remote Control Controls on Remote Control 31 Operating ...

Owners Manual
Page 6
...for playback. Do not attempt to load more severe stains, please dampen the cloth with a clean, soft cloth from jamming, the CD player will not be out of standard specifications and may create operational problems. We recommend not using your finger, feel any small bumps...a very bumpy road may cause damage to be installed in Alpine CD players. Playing a disc while driving on the disc. Using such accessories can cause the disc to the mechanism. Installation Location Make sure the CDA-9831/CDA-9830 will automatically eject discs with irregular surfaces or inserted incorrectly....
...for playback. Do not attempt to load more severe stains, please dampen the cloth with a clean, soft cloth from jamming, the CD player will not be out of standard specifications and may create operational problems. We recommend not using your finger, feel any small bumps...a very bumpy road may cause damage to be installed in Alpine CD players. Playing a disc while driving on the disc. Using such accessories can cause the disc to the mechanism. Installation Location Make sure the CDA-9831/CDA-9830 will automatically eject discs with irregular surfaces or inserted incorrectly....

Owners Manual
Page 7
...Alphanumeric 0 L 2 5 6 8 A B D Display LrNI I0 .C._I IrI 1ri1 I0 I TEXT If you may not play CD-Rs/CD-RWs containing MP3/WMA formatted audio files. • Some of CDA-9830. • All English lower case characters are no bumps around the disc. • Do not use unspecified compact discs..., correct performance cannot be played back, make sure the last recording session was attempted, copyprotected CDs which a recording failed or a...
...Alphanumeric 0 L 2 5 6 8 A B D Display LrNI I0 .C._I IrI 1ri1 I0 I TEXT If you may not play CD-Rs/CD-RWs containing MP3/WMA formatted audio files. • Some of CDA-9830. • All English lower case characters are no bumps around the disc. • Do not use unspecified compact discs..., correct performance cannot be played back, make sure the last recording session was attempted, copyprotected CDs which a recording failed or a...
Owners Manual
Page 9
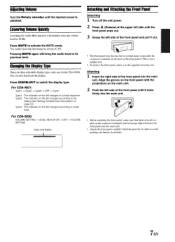
... panel with the projections on the main unit. 2 Push the left side of the front panel until it in the supplied carrying case. For CDA-9831: Typel Type2 Type3 OFF -e Type1 Typel : The indicator on the left changes according to avoid pushing any buttons by 20 dB. Type3 The ... back of the front panel.) This is not a malfunction. • To protect thefront panel, place it locks firmly into the main unit. For CDA-9830: VOLUME SETTING LEVEL INDICATOR OFF VOLUME SETTING Audio Level Display nnnnnnnnnminnunnunnuunm Detaching and Attaching the Front Panel Detaching 1 Turn off the unit power. 2 ...
... panel with the projections on the main unit. 2 Push the left side of the front panel until it in the supplied carrying case. For CDA-9831: Typel Type2 Type3 OFF -e Type1 Typel : The indicator on the left changes according to avoid pushing any buttons by 20 dB. Type3 The ... back of the front panel.) This is not a malfunction. • To protect thefront panel, place it locks firmly into the main unit. For CDA-9830: VOLUME SETTING LEVEL INDICATOR OFF VOLUME SETTING Audio Level Display nnnnnnnnnminnunnunnuunm Detaching and Attaching the Front Panel Detaching 1 Turn off the unit power. 2 ...

Owners Manual
Page 12
... display 44.1' m0110_103 LJ Sampling rate Folder number display display t The sampling rate and the bit rate (frame display) are displayed. CDA-9831 P-LIST mO3 Q05 File number display 160 kbps Bit rate display m01t2031 Folder number display *When the unit is connected to the Amplifier Link... Refer to the software instruction manual on how to create a playlist. • Playlist playback applies only to switch the display. • The CD-player can play discs containing audio data, MP3 data and WMA data. • A WMA formatfile that is protected by DRM (Digital Rights Management)...
... display 44.1' m0110_103 LJ Sampling rate Folder number display display t The sampling rate and the bit rate (frame display) are displayed. CDA-9831 P-LIST mO3 Q05 File number display 160 kbps Bit rate display m01t2031 Folder number display *When the unit is connected to the Amplifier Link... Refer to the software instruction manual on how to create a playlist. • Playlist playback applies only to switch the display. • The CD-player can play discs containing audio data, MP3 data and WMA data. • A WMA formatfile that is protected by DRM (Digital Rights Management)...

Owners Manual
Page 15
...-byte alphanumeric characters (up to ISO9660. The maximum nested folder depth is in the order that conform to 15 for CDA-9830) is as track titles, artist names, album names, etc., written into the specified audio compression format. Formats supported This device supports... CD-ROM XA, Mixed Mode CD, Enhanced CD (CD-Extra) and Multi-Session. Media supported The media that software. The higher the bit rate, the higher the sound quality, ...
...-byte alphanumeric characters (up to ISO9660. The maximum nested folder depth is in the order that conform to 15 for CDA-9830) is as track titles, artist names, album names, etc., written into the specified audio compression format. Formats supported This device supports... CD-ROM XA, Mixed Mode CD, Enhanced CD (CD-Extra) and Multi-Session. Media supported The media that software. The higher the bit rate, the higher the sound quality, ...
Owners Manual
Page 17
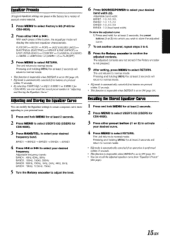
...DEFEAT is automatically canceled if no buttons are pressed within 15 seconds. • By selecting USER'S EQ 1 or EQ 2 (USERS I or USERS 2 for CDA-9830), you wish to store the adjusted curve. 7 To set to normal mode. BAND1 -> BAND2 BAND3 BAND4 BAND1 4 Press or ►►1 to ...select RETURN. to select your personal taste. 1 Press and hold MENU for at least 2 seconds. 2 Press MENU to select USER'S EQ (USERS for CDA-9830). 3 Press BAND/TEL. Adjusting and Storing the Equalizer Curve You can recall the adjusted equalizer curve from "Equalizer Presets" (this page). 15 -EN...
...DEFEAT is automatically canceled if no buttons are pressed within 15 seconds. • By selecting USER'S EQ 1 or EQ 2 (USERS I or USERS 2 for CDA-9830), you wish to store the adjusted curve. 7 To set to normal mode. BAND1 -> BAND2 BAND3 BAND4 BAND1 4 Press or ►►1 to ...select RETURN. to select your personal taste. 1 Press and hold MENU for at least 2 seconds. 2 Press MENU to select USER'S EQ (USERS for CDA-9830). 3 Press BAND/TEL. Adjusting and Storing the Equalizer Curve You can recall the adjusted equalizer curve from "Equalizer Presets" (this page). 15 -EN...

Owners Manual
Page 18
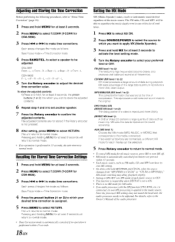
To correct this, the CDA-9831/CDA-9830 is 1.75 m (68-7/8"). The sound is not balanced because the distance between the listening position and the various speakers is the same as the ... adjustment will be done. 1 Press and hold MENU for at 20°C). L = (distance to farthest speaker) - (distance to other speakers) 3 Divide the distances calculated for CDA-9830). 3 Press I-41-41 or ►►I to select the Bass Focus mode. The difference in the sounds image and frequency characteristics. Conditions: Farthest Speaker...
To correct this, the CDA-9831/CDA-9830 is 1.75 m (68-7/8"). The sound is not balanced because the distance between the listening position and the various speakers is the same as the ... adjustment will be done. 1 Press and hold MENU for at 20°C). L = (distance to farthest speaker) - (distance to other speakers) 3 Divide the distances calculated for CDA-9830). 3 Press I-41-41 or ►►I to select the Bass Focus mode. The difference in the sounds image and frequency characteristics. Conditions: Farthest Speaker...
Owners Manual
Page 20
...MENU for at least 2 seconds. 2 Press MENU to select T.CORR (T-CORR for CDA-9830). 3 Press IN or II0-10-1 to make time corrections. R -s Rear - F1 --> F- MX takes advantage of data such as FM radio, CD, and MP3 can be adjusted. MX uses this large data quantity to reproduce a ...mode. FM (MX level 1 to 3): The medium to high frequencies become clearer, and produces well balanced sound at least 2 seconds will be adjusted. CDA-9831 Front - R Front - The adjusted contents are connected, a different MX mode for at least 2 seconds to activate the level setting mode. 4 Turn...
...MENU for at least 2 seconds. 2 Press MENU to select T.CORR (T-CORR for CDA-9830). 3 Press IN or II0-10-1 to make time corrections. R -s Rear - F1 --> F- MX takes advantage of data such as FM radio, CD, and MP3 can be adjusted. MX uses this large data quantity to reproduce a ...mode. FM (MX level 1 to 3): The medium to high frequencies become clearer, and produces well balanced sound at least 2 seconds will be adjusted. CDA-9831 Front - R Front - The adjusted contents are connected, a different MX mode for at least 2 seconds to activate the level setting mode. 4 Turn...

Owners Manual
Page 21
...will be displayed when the CD contains no ID3 tag/WMA tag information. CDA-9830 c• These indicators are constantly it. CDA-9831 These indicators are constantly lit. The display in Radio mode: FREQUENCY -› CLOCK TITLE EXTERNAL AMPLIFIER INFORMATION*5 FREQUENCY The display in CD mode: TRACK NO./ELAPSED TIME... data is possible to display the CD/Station title if the title has been previously inputted ("Titling Discs/Stations" page 20). CDA-9830 only: The recording sampling rate and bit rate of the rootfolder *-5 Only when CDA-9831 is connected to display the folder name...
...will be displayed when the CD contains no ID3 tag/WMA tag information. CDA-9830 c• These indicators are constantly it. CDA-9831 These indicators are constantly lit. The display in Radio mode: FREQUENCY -› CLOCK TITLE EXTERNAL AMPLIFIER INFORMATION*5 FREQUENCY The display in CD mode: TRACK NO./ELAPSED TIME... data is possible to display the CD/Station title if the title has been previously inputted ("Titling Discs/Stations" page 20). CDA-9830 only: The recording sampling rate and bit rate of the rootfolder *-5 Only when CDA-9831 is connected to display the folder name...
Owners Manual
Page 22
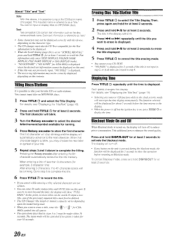
... it is possible to input the CD/Station name (this point, no more titles can enter 24 radio station titles and 18 CD titles on , the display will be blinking. You cannot input or display titles on , press TITLE 0 to Blackout mode. You cannot erase CD-TEXT • "NO DATA" is... DISPLAY or TAG DISPLAY mode). • "NO SUPPORT" ("NO SUPRT" for CDA-9830) is displayed. 4 Press and hold TITLE (2) for at least 2 seconds. 20 -EN When entering a title of your favorite CD's or radio stations. If you want to erase is displayed when the desired text information cannot be...
... it is possible to input the CD/Station name (this point, no more titles can enter 24 radio station titles and 18 CD titles on , the display will be blinking. You cannot input or display titles on , press TITLE 0 to Blackout mode. You cannot erase CD-TEXT • "NO DATA" is... DISPLAY or TAG DISPLAY mode). • "NO SUPPORT" ("NO SUPRT" for CDA-9830) is displayed. 4 Press and hold TITLE (2) for at least 2 seconds. 20 -EN When entering a title of your favorite CD's or radio stations. If you want to erase is displayed when the desired text information cannot be...
Owners Manual
Page 23
.... This indicator is lit when the Amplifier Link is connected, the external amplifier's information (voltage, electric current, temperature) can be shown in the Radio or CD mode to be turned on, etc. • If multiple amplifiers are made on each of the settings, refer to the Owner's Manual of the... external amplifier • If amplifier settings are connected to this unit, set a different ID on the CDA-9831 model, do not then change the settings. 6 ...
.... This indicator is lit when the Amplifier Link is connected, the external amplifier's information (voltage, electric current, temperature) can be shown in the Radio or CD mode to be turned on, etc. • If multiple amplifiers are made on each of the settings, refer to the Owner's Manual of the... external amplifier • If amplifier settings are connected to this unit, set a different ID on the CDA-9831 model, do not then change the settings. 6 ...

Owners Manual
Page 24
... that which you have set above 3 Turn the Rotary encoder to select colors (1 through 512). Changing the Lighting Color of All the Buttons (CDA-9831 only) You can use colors other than the above in the display. 1 Press and hold any one of the preset buttons (1 through 6)... E-> AMBER OFF(green) 3 When the setting has been completed, press MENU to normal mode. The unit returns to select RETURN. Setting the Multicolor Illumination (CDA-9831 only) You can change the lighting color of the unit. 1 Press MENU to select Illumination. 2 Press SOURCE/POWER. BLUE GREEN H AMBER +4 RED (...
... that which you have set above 3 Turn the Rotary encoder to select colors (1 through 512). Changing the Lighting Color of All the Buttons (CDA-9831 only) You can use colors other than the above in the display. 1 Press and hold any one of the preset buttons (1 through 6)... E-> AMBER OFF(green) 3 When the setting has been completed, press MENU to normal mode. The unit returns to select RETURN. Setting the Multicolor Illumination (CDA-9831 only) You can change the lighting color of the unit. 1 Press MENU to select Illumination. 2 Press SOURCE/POWER. BLUE GREEN H AMBER +4 RED (...
Owners Manual
Page 25
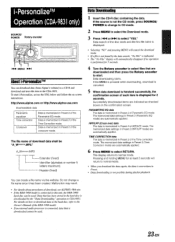
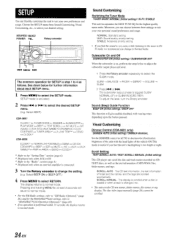
...in Preset 2 of the crossover mode. PARAMETRIC EQ data The data is connected, data that are downloaded and then press the Rotary encoder to CDA-9831. Data downloading starts. The memorized data settings in Preset 2 (Time Correction mode) are indicated as checked boxes on -screen instructions. TIME ...search, "No File" is indicated. • The "No File" display will return to select "YES." You can download data (from Alpine's website) to a CD-R and download and store the data to this unit, the HDA-5460 hard disc can be "A_W*****.MP3." The memorized data settings in ...
...in Preset 2 of the crossover mode. PARAMETRIC EQ data The data is connected, data that are downloaded and then press the Rotary encoder to CDA-9831. Data downloading starts. The memorized data settings in Preset 2 (Time Correction mode) are indicated as checked boxes on -screen instructions. TIME ...search, "No File" is indicated. • The "No File" display will return to select "YES." You can download data (from Alpine's website) to a CD-R and download and store the data to this unit, the HDA-5460 hard disc can be "A_W*****.MP3." The memorized data settings in ...
Owners Manual
Page 26
...quality tuner audio. The subwoofer output phase is changed, etc. Visual Customizing Dimmer Control (CDA-9831 only) DIMMER AUTO (Initial setting) / DIMMER MANUAL Set the DIMMER control to AUTO...) / BEEP OFF This function will return to normal mode. • For the XM Radio settings, refer to "XM Radio (Optional)" (page 26), andfor the MobileHubTmLink settings, refer to "MobileHubTMLink Operation (Optional)"... SUBW BALANCE ---> FADER --> DEFEAT -a VOLUME SUBW 2 Press 144 or NN. The unit scrolls CD text names, folder names, file names or tag display. TUNER MODE DIMMER SUBWOOFER PLAY MODE F>...
...quality tuner audio. The subwoofer output phase is changed, etc. Visual Customizing Dimmer Control (CDA-9831 only) DIMMER AUTO (Initial setting) / DIMMER MANUAL Set the DIMMER control to AUTO...) / BEEP OFF This function will return to normal mode. • For the XM Radio settings, refer to "XM Radio (Optional)" (page 26), andfor the MobileHubTmLink settings, refer to "MobileHubTMLink Operation (Optional)"... SUBW BALANCE ---> FADER --> DEFEAT -a VOLUME SUBW 2 Press 144 or NN. The unit scrolls CD text names, folder names, file names or tag display. TUNER MODE DIMMER SUBWOOFER PLAY MODE F>...
Owners Manual
Page 27
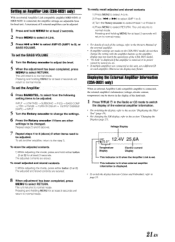
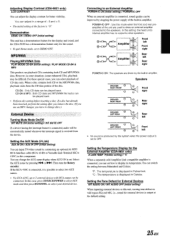
...the AUX name by the system when the power output is displayed in some situations (some enhanced CDs), playback may be connected. Setting the Temperature Display for the External Amplifier (CDA-9831 only) A-LINK TEMP °F(Initial setting) / °C When a separately sold Amplifier Link ...AUXIN OFF(Initial setting) You can be automatically muted whenever the interrupt signal is "0." Adjusting Display Contrast (CDA-9831 only) LCD CONTRAST You can playback CDs containing both CD or the MP3/WMA data, playback starts from the device. You can set to drive speakers. MP3...
...the AUX name by the system when the power output is displayed in some situations (some enhanced CDs), playback may be connected. Setting the Temperature Display for the External Amplifier (CDA-9831 only) A-LINK TEMP °F(Initial setting) / °C When a separately sold Amplifier Link ...AUXIN OFF(Initial setting) You can be automatically muted whenever the interrupt signal is "0." Adjusting Display Contrast (CDA-9831 only) LCD CONTRAST You can playback CDs containing both CD or the MP3/WMA data, playback starts from the device. You can set to drive speakers. MP3...

Owners Manual
Page 28
...Press BAND/TEL. It can check your ID number printed on the label on the remote control within 5 seconds to the CDA-9831/CDA-9830. The unit alternately displays "RADIO ID" for 2 seconds, then the ID number for the ID Number • You can also be connected to receive ... 10-0-I Rotary ♦ encoder Preset buttons (1 through 6) Receiving XM Channels with the XM Receiver (Optional) XM Satellite Radio* is printed on a label directly on the CDA-9831/CDA-9830for XM Receiver operation are operative only when an XM Receiver is input. For more information, visit XM's website at ...
...Press BAND/TEL. It can check your ID number printed on the label on the remote control within 5 seconds to the CDA-9831/CDA-9830. The unit alternately displays "RADIO ID" for 2 seconds, then the ID number for the ID Number • You can also be connected to receive ... 10-0-I Rotary ♦ encoder Preset buttons (1 through 6) Receiving XM Channels with the XM Receiver (Optional) XM Satellite Radio* is printed on a label directly on the CDA-9831/CDA-9830for XM Receiver operation are operative only when an XM Receiver is input. For more information, visit XM's website at ...


