
Aspire easyStore H340 Home Server Service Guide
Page 7
...Utility 9 Entering BIOS setup 10 Navigating Through the Setup Utility 11 Setup Utility Menus 12 System Disassembly 21 Disassembly Requirements 21 Pre-disassembly Procedure 22 Main Unit Disassembly 23 Removing the Hard Disk 24 Removing the System Cover 27 Removing the Front Bezel 28 Removing the Front I/O Board 30 Removing the Backplane Board 32 Removing the Power Supply 35 Removing the System Fan 38 Removing the Memory Module 39 Removing the Mainboard 41 Removing the HDD Access LED cables 42 System Troubleshooting 43 Hardware Diagnostic Procedure 43 H340...
...Utility 9 Entering BIOS setup 10 Navigating Through the Setup Utility 11 Setup Utility Menus 12 System Disassembly 21 Disassembly Requirements 21 Pre-disassembly Procedure 22 Main Unit Disassembly 23 Removing the Hard Disk 24 Removing the System Cover 27 Removing the Front Bezel 28 Removing the Front I/O Board 30 Removing the Backplane Board 32 Removing the Power Supply 35 Removing the System Fan 38 Removing the Memory Module 39 Removing the Mainboard 41 Removing the HDD Access LED cables 42 System Troubleshooting 43 Hardware Diagnostic Procedure 43 H340...

Aspire easyStore H340 Home Server Service Guide
Page 20
Setup Utility Menus Information Main PhoenixBIOS Setup Utility Advanced Boot CPU Type: Genuine Intel ® CPU 230 @ 1.60 GHz CPU Speed: 1.60 GHz BIOS Version: BIOS Release Date: mm/dd/yyyy Product Name: Aspire easyStore H340 Product Serial Number: N/A Asset Tag Number: N/A Exit Item Specific Help , , or selects field. F1 Help Esc Exit Select Item -/+ Change Values F9 Setup Defaults Select Menu Enter Select Sub-Menu F10 Save and Exit The Setup Main menu includes the following main...
Setup Utility Menus Information Main PhoenixBIOS Setup Utility Advanced Boot CPU Type: Genuine Intel ® CPU 230 @ 1.60 GHz CPU Speed: 1.60 GHz BIOS Version: BIOS Release Date: mm/dd/yyyy Product Name: Aspire easyStore H340 Product Serial Number: N/A Asset Tag Number: N/A Exit Item Specific Help , , or selects field. F1 Help Esc Exit Select Item -/+ Change Values F9 Setup Defaults Select Menu Enter Select Sub-Menu F10 Save and Exit The Setup Main menu includes the following main...

Aspire easyStore H340 Home Server Service Guide
Page 21
... Select Item -/+ Change Values F9 Setup Defaults Select Menu Enter Select Sub-Menu F10 Save and Exit Chapter 2 13 These entries are for your reference only and are not user-configurable. Information Main PhoenixBIOS Setup Utility Advanced Boot CPU Type: Genuine Intel ® CPU 230 @ 1.60 GHz CPU Speed: 1.60 GHz BIOS Version: BIOS Release Date: mm/dd/yyyy Product Name: Aspire easyStore H340 Product Serial Number: N/A Asset Tag Number: N/A Exit Item Specific Help , , or...
... Select Item -/+ Change Values F9 Setup Defaults Select Menu Enter Select Sub-Menu F10 Save and Exit Chapter 2 13 These entries are for your reference only and are not user-configurable. Information Main PhoenixBIOS Setup Utility Advanced Boot CPU Type: Genuine Intel ® CPU 230 @ 1.60 GHz CPU Speed: 1.60 GHz BIOS Version: BIOS Release Date: mm/dd/yyyy Product Name: Aspire easyStore H340 Product Serial Number: N/A Asset Tag Number: N/A Exit Item Specific Help , , or...

Aspire easyStore H340 Home Server Service Guide
Page 22
Indicates the total size of system memory used by devices. 14 Chapter 2 Displays SATA device status. Indicates the total size of system memory available to OS Used by devices F1 Help Esc Exit Select Item -/+ Change Values F9 Setup Defaults Select Menu Enter Select Sub-Menu F10 Save and Exit Description Set the system time following the month-day-year format. Set the date following the hour-minute...
Indicates the total size of system memory used by devices. 14 Chapter 2 Displays SATA device status. Indicates the total size of system memory available to OS Used by devices F1 Help Esc Exit Select Item -/+ Change Values F9 Setup Defaults Select Menu Enter Select Sub-Menu F10 Save and Exit Description Set the system time following the month-day-year format. Set the date following the hour-minute...

Aspire easyStore H340 Home Server Service Guide
Page 23
... -/+ Change Values F9 Setup Defaults Select Menu Enter Select Sub-Menu F10 Save and Exit Parameter Hardware Monitor Advanced Chipset Control After Power Failure Description Press Enter to Stay Off, the system remains off after a system shutdown that is due to malfunction. When set to configure the Hardware Monitor feature. Defines the power state to resume to after power shutdown. Advanced Information Main PhoenixBIOS Setup Utility Advanced Boot Exit Setup Warning Item Specific...
... -/+ Change Values F9 Setup Defaults Select Menu Enter Select Sub-Menu F10 Save and Exit Parameter Hardware Monitor Advanced Chipset Control After Power Failure Description Press Enter to Stay Off, the system remains off after a system shutdown that is due to malfunction. When set to configure the Hardware Monitor feature. Defines the power state to resume to after power shutdown. Advanced Information Main PhoenixBIOS Setup Utility Advanced Boot Exit Setup Warning Item Specific...

Aspire easyStore H340 Home Server Service Guide
Page 24
... Sub-Menu F10 Save and Exit 16 Chapter 2 Information PhoenixBIOS Setup Utility Main Advanced Boot Hardware Monitor Exit Item Specific Help V+1.5 = 5VTR = VBAT = V+5 = Vccp = VCC = VTR = CPU Temperature = SYS Temperature = All items on this menu cannot be modified in user mode. If any items require changes, please consult your system supervisor. Hardware Monitor The Hardware Monitor submenu displays options for measuring voltages and monitoring the system and processor temperature and fan speeds.
... Sub-Menu F10 Save and Exit 16 Chapter 2 Information PhoenixBIOS Setup Utility Main Advanced Boot Hardware Monitor Exit Item Specific Help V+1.5 = 5VTR = VBAT = V+5 = Vccp = VCC = VTR = CPU Temperature = SYS Temperature = All items on this menu cannot be modified in user mode. If any items require changes, please consult your system supervisor. Hardware Monitor The Hardware Monitor submenu displays options for measuring voltages and monitoring the system and processor temperature and fan speeds.

Aspire easyStore H340 Home Server Service Guide
Page 26
BIOS setup will display an error message if the drive specified is fixed or removable, or press to exclude or include the device to boot, or press to enable or disable the device, or press to escape the menu. Information Main PhoenixBIOS Setup Utility Security Boot Boot Priority order: 1: 2: 3: 4: 5: 6: 7: 8: Excluded from boot order Exit Item Specific Help Use < > or < > to select a device, then press or to specify if the device is not...
BIOS setup will display an error message if the drive specified is fixed or removable, or press to exclude or include the device to boot, or press to enable or disable the device, or press to escape the menu. Information Main PhoenixBIOS Setup Utility Security Boot Boot Priority order: 1: 2: 3: 4: 5: 6: 7: 8: Excluded from boot order Exit Item Specific Help Use < > or < > to select a device, then press or to specify if the device is not...

Aspire easyStore H340 Home Server Service Guide
Page 52
... system test PQAF memory test HDD 0 HDD LED status (normal) HDD 1 HDD 2 HDD 3 HDD 0 HDD LED status (failed) HDD 1 HDD 2 HDD 3 44 Chapter 4 Immediately press and release the Recovery/reset button with the paper clip end. Test Items Boot from DMI data check l. Prepare a bootable USB device by failing hardware, such as system fan, LED board, hard disk drive, memory, etc. MB voltage check g. PQAF memory test j. To run the tests on the system. Plug the bootable USB device to the table below for detailed diagnostic conditions. Onboard memory flash...
... system test PQAF memory test HDD 0 HDD LED status (normal) HDD 1 HDD 2 HDD 3 HDD 0 HDD LED status (failed) HDD 1 HDD 2 HDD 3 44 Chapter 4 Immediately press and release the Recovery/reset button with the paper clip end. Test Items Boot from DMI data check l. Prepare a bootable USB device by failing hardware, such as system fan, LED board, hard disk drive, memory, etc. MB voltage check g. PQAF memory test j. To run the tests on the system. Plug the bootable USB device to the table below for detailed diagnostic conditions. Onboard memory flash...
Aspire easyStore H340 User's Guide
Page 14
... USB backup feature 91 Set up Wake On LAN on the home server 93 Set the home server uptime and down time 96 Monitor server health and performance 99 Set up email alerts 100 Explore the Windows Home Server icon 105 5 Configuring the hard disk drive Adding a hard disk drive Removing a hard disk drive Replacing a failed hard disk drive 107 107 112 114 6 Troubleshooting First steps checklist Recovering or restoring the home server Restoring a home computer Restoring files from a backup Update your home server with Aspire easyStore H340 Software Update Specific problems...
... USB backup feature 91 Set up Wake On LAN on the home server 93 Set the home server uptime and down time 96 Monitor server health and performance 99 Set up email alerts 100 Explore the Windows Home Server icon 105 5 Configuring the hard disk drive Adding a hard disk drive Removing a hard disk drive Replacing a failed hard disk drive 107 107 112 114 6 Troubleshooting First steps checklist Recovering or restoring the home server Restoring a home computer Restoring files from a backup Update your home server with Aspire easyStore H340 Software Update Specific problems...

Aspire easyStore H340 User's Guide
Page 15
... storage and digital media content server for backing up data from a USB storage device, and a recovery/reset button to recover from a system failure or reset the system to digital media. * Only hard disk drives installed in the drive bays 2, 3, and 4 are hot-swappable. The system hard drive located on page 4 for choosing Aspire easyStore H340. 1 1 Introduction Thank you to consolidate your content library yet maintain instant access to factory default. Aspire easyStore H340 can store and share...
... storage and digital media content server for backing up data from a USB storage device, and a recovery/reset button to recover from a system failure or reset the system to digital media. * Only hard disk drives installed in the drive bays 2, 3, and 4 are hot-swappable. The system hard drive located on page 4 for choosing Aspire easyStore H340. 1 1 Introduction Thank you to consolidate your content library yet maintain instant access to factory default. Aspire easyStore H340 can store and share...
Aspire easyStore H340 User's Guide
Page 26
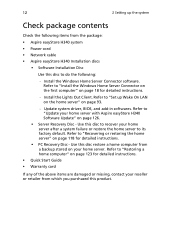
... package: • Aspire easyStore H340 system • Power cord • Network cable • Aspire easyStore H340 Installation discs • Software Installation Disc Use this disc to recover your home server after a system failure or restore the home server to "Set up the system Check package contents Check the following : - Refer to its factory default. Refer to "Install the Windows Home Server Connector on the first computer" on page 18 for detailed instructions. • PC Recovery Disc - Install the Lights Out Client. Refer...
... package: • Aspire easyStore H340 system • Power cord • Network cable • Aspire easyStore H340 Installation discs • Software Installation Disc Use this disc to recover your home server after a system failure or restore the home server to "Set up the system Check package contents Check the following : - Refer to its factory default. Refer to "Install the Windows Home Server Connector on the first computer" on page 18 for detailed instructions. • PC Recovery Disc - Install the Lights Out Client. Refer...
Aspire easyStore H340 User's Guide
Page 45
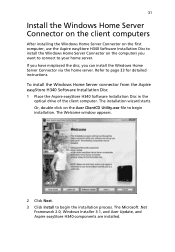
... Windows Home Server Connector on the first computer, use the Aspire easyStore H340 Software Installation Disc to install the Windows Home Server Connector on the Acer ClientCD Utility.exe file to begin the installation process. To install the Windows Home Server connector from the Aspire easyStore H340 Software Installation Disc 1 Place the Aspire easyStore H340 Software Installation Disc in the optical drive of the client computer. The Microsoft .Net Framework 2.0, Windows Installer 3.1, and Acer Update, and Aspire easyStore H340 components are installed. The installation wizard starts...
... Windows Home Server Connector on the first computer, use the Aspire easyStore H340 Software Installation Disc to install the Windows Home Server Connector on the Acer ClientCD Utility.exe file to begin the installation process. To install the Windows Home Server connector from the Aspire easyStore H340 Software Installation Disc 1 Place the Aspire easyStore H340 Software Installation Disc in the optical drive of the client computer. The Microsoft .Net Framework 2.0, Windows Installer 3.1, and Acer Update, and Aspire easyStore H340 components are installed. The installation wizard starts...
Aspire easyStore H340 User's Guide
Page 91
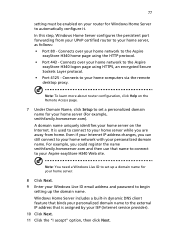
... home server on the Remote Access page. 7 Under Domain Name, click Setup to your Aspire easyStore H340 Web site. Even if your Internet IP address changes, you could register the name smithfamily.homeserver.com and then use that is assigned by your ISP (Internet service provider). 10 Click Next. 11 Click the "I accept" option, then click Next. Note: To learn more about router configuration...
... home server on the Remote Access page. 7 Under Domain Name, click Setup to your Aspire easyStore H340 Web site. Even if your Internet IP address changes, you could register the name smithfamily.homeserver.com and then use that is assigned by your ISP (Internet service provider). 10 Click Next. 11 Click the "I accept" option, then click Next. Note: To learn more about router configuration...

Aspire easyStore H340 User's Guide
Page 126
112 5 Configuring the hard disk drive Removing a hard disk drive Caution: Always remove the hard drive from the Windows Home Server Console before removing an HDD from the Windows Home Server Console. (1) Double-click the Windows Home Server icon tray. in the system (2) Log on a hard drive if you physically disconnect the HDD from your home server without running the Remove a Hard Drive Wizard and you want to remove, then click Remove to connect it again. 1 Safely remove hard drive from the home server. You...
112 5 Configuring the hard disk drive Removing a hard disk drive Caution: Always remove the hard drive from the Windows Home Server Console before removing an HDD from the Windows Home Server Console. (1) Double-click the Windows Home Server icon tray. in the system (2) Log on a hard drive if you physically disconnect the HDD from your home server without running the Remove a Hard Drive Wizard and you want to remove, then click Remove to connect it again. 1 Safely remove hard drive from the home server. You...
Aspire easyStore H340 User's Guide
Page 135
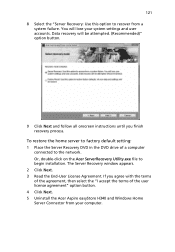
... installation. The Server Recovery window appears. 2 Click Next. 3 Read the End-User License Agreement. If you finish recovery process. 121 8 Select the "Server Recovery: Use this option to recover from your system settings and user accounts. To restore the home server to factory default setting: 1 Place the Server Recovery DVD in the DVD drive of the user license agreement" option button. 4 Click Next. 5 Uninstall the Acer Aspire easyStore H340 and Windows Home Server Connector from a system failure. Or, double-click on the Acer ServerRecovery Utility...
... installation. The Server Recovery window appears. 2 Click Next. 3 Read the End-User License Agreement. If you finish recovery process. 121 8 Select the "Server Recovery: Use this option to recover from your system settings and user accounts. To restore the home server to factory default setting: 1 Place the Server Recovery DVD in the DVD drive of the user license agreement" option button. 4 Click Next. 5 Uninstall the Acer Aspire easyStore H340 and Windows Home Server Connector from a system failure. Or, double-click on the Acer ServerRecovery Utility...

Aspire easyStore H340 User's Guide
Page 138
... PC Recovery Disc, it lists the NIC (network interface card) and storage devices it has found Windows drivers. to bring up an online help file for detailed instructions on how to find drivers for that is fully compatible with computers running Windows Vista or Windows XP. When you use the PC Recovery Disc, you can I find and load drivers. • Go to a USB flash or USB floppy drive. It can use a Vista-compatible NIC driver...
... PC Recovery Disc, it lists the NIC (network interface card) and storage devices it has found Windows drivers. to bring up an online help file for detailed instructions on how to find drivers for that is fully compatible with computers running Windows Vista or Windows XP. When you use the PC Recovery Disc, you can I find and load drivers. • Go to a USB flash or USB floppy drive. It can use a Vista-compatible NIC driver...

Aspire easyStore H340 User's Guide
Page 145
... correct connector at the system rear panel. • Try a different network cable. • Make sure the broadband router has power. Power indicator does not light. • Make sure the power button on the front panel is turned on the front panel does not light. • Make sure the network cable is not blocking the connection. Make sure the hard drive is connected correctly. • Make sure that may arise during the use of your home server. • Reset...
... correct connector at the system rear panel. • Try a different network cable. • Make sure the broadband router has power. Power indicator does not light. • Make sure the power button on the front panel is turned on the front panel does not light. • Make sure the network cable is not blocking the connection. Make sure the hard drive is connected correctly. • Make sure that may arise during the use of your home server. • Reset...

Service Guide
Page 23
... will be turned on this menu to incorrect values may cause your system to an interruption in AC power. Hardware Monitor Advanced Chipset Control After Power Failure [Last State] F1 Help Esc Exit Select Item -/+ Change Values F9 Setup Defaults Select Menu Enter Select Sub-Menu F10 Save and Exit Parameter Hardware Monitor Advanced Chipset Control After Power Failure Description Press Enter to select options for Advanced Chipset Control. When set to Stay...
... will be turned on this menu to incorrect values may cause your system to an interruption in AC power. Hardware Monitor Advanced Chipset Control After Power Failure [Last State] F1 Help Esc Exit Select Item -/+ Change Values F9 Setup Defaults Select Menu Enter Select Sub-Menu F10 Save and Exit Parameter Hardware Monitor Advanced Chipset Control After Power Failure Description Press Enter to select options for Advanced Chipset Control. When set to Stay...

Service Guide
Page 24
... and fan speeds. If any items require changes, please consult your system supervisor. Fan Speed F1 Help Esc Exit Select Item -/+ Change Values F9 Setup Defaults Select Menu Enter Select Sub-Menu F10 Save and Exit 16 Chapter 2 Information PhoenixBIOS Setup Utility Main Advanced Boot Hardware Monitor Exit Item Specific Help V+1.5 = 5VTR = VBAT = V+5 = Vccp = VCC = VTR = CPU Temperature = SYS Temperature = All items on this menu cannot be modified in user mode.
... and fan speeds. If any items require changes, please consult your system supervisor. Fan Speed F1 Help Esc Exit Select Item -/+ Change Values F9 Setup Defaults Select Menu Enter Select Sub-Menu F10 Save and Exit 16 Chapter 2 Information PhoenixBIOS Setup Utility Main Advanced Boot Hardware Monitor Exit Item Specific Help V+1.5 = 5VTR = VBAT = V+5 = Vccp = VCC = VTR = CPU Temperature = SYS Temperature = All items on this menu cannot be modified in user mode.

Service Guide
Page 52
H340 Diagnostics You can run the H340 diagnostics to the USB device. Plug the bootable USB device to the table below for detailed diagnostic conditions. Onboard memory flash check b. PQAF system test i. Test Items Boot from DMI data check l. Turn off the system. 2. The diagnostic utility may be obtained from the CD that came with the paper clip end. Immediately press and release the Recovery/reset button with the system. 3. HDD account check c. PQAF...
H340 Diagnostics You can run the H340 diagnostics to the USB device. Plug the bootable USB device to the table below for detailed diagnostic conditions. Onboard memory flash check b. PQAF system test i. Test Items Boot from DMI data check l. Turn off the system. 2. The diagnostic utility may be obtained from the CD that came with the paper clip end. Immediately press and release the Recovery/reset button with the system. 3. HDD account check c. PQAF...


