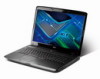
Aspire 7230 Pris - Acer
Aspire 7230 Pris
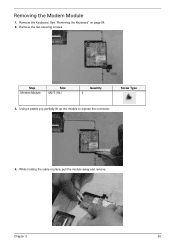
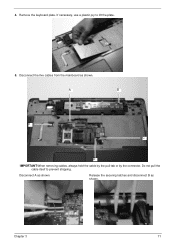
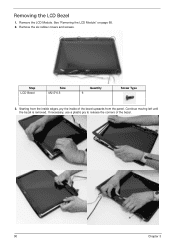
Related Manual Pages

Related Terms
The following terms were also used when searching for Aspire 7230 Pris - Acer:- acer aspire 7230
- aspire 7230
- aspire 7230 pris
- aspire 7230 charger
- aspire 7230 cooling fan
- aspire 7230 cpu fan
- aspire 7230 cpu upgrade
- aspire 7230 drivers
- aspire 7230 drivers xp
- aspire 7230 keyboard
- aspire 7230 manual
- aspire 7230 motherboard
- aspire 7230 notebook
- aspire 7230 price
- aspire 7230 batteri
- aspire 7230 ram
- aspire 7230 recovery
- aspire 7230 restore disk
- aspire 7230 review
- aspire 7230 spec
- aspire 7230 specifications
- aspire 7230 specs
- aspire 7230 support
- aspire 7230 user manual
- aspire 7230+spec
- batteri till acer aspire 7230
- batteri till aspire 7230
- acer aspire 7230 price
- acer aspire 7230 batteri
- acer aspire 7230 bios
- acer aspire 7230 charger
- acer aspire 7230 cooling fan
- acer aspire 7230 cpu fan
- acer aspire 7230 cpu upgrade
- acer aspire 7230 drivers
- acer aspire 7230 keyboard
- acer aspire 7230 manual
- acer aspire 7230 motherboard
- acer aspire 7230 notebook
- aspire 7230 bios
- acer aspire 7230 pris
- acer aspire 7230 ram
- acer aspire 7230 recovery
- acer aspire 7230 review
- acer aspire 7230 spec
- acer aspire 7230 specifications
- acer aspire 7230 specs
- acer aspire 7230 support
- acer aspire 7230 user manual
- acer aspire 7230+spec
- aspire 7230 acer