
Acer Aspire 5517 Series Service Guide
Page 134
... the onscreen prompts. 11. Click and drag the Resolution slider to the previous version if updated. 7. Remove and reinstall the video driver. 8. There are no device conflicts. • No hardware is experiencing HDD or ODD BIOS information loss, disconnect and reconnect the ...resolution is still not resolved, see "Online Support Information" on the desktop and select Personalize´ Display Settings. Minimize or close all Windows. If the Issue is correctly configured: a. Random Loss of BIOS Settings If the computer is experiencing intermittent loss of BIOS information, perform...
... the onscreen prompts. 11. Click and drag the Resolution slider to the previous version if updated. 7. Remove and reinstall the video driver. 8. There are no device conflicts. • No hardware is experiencing HDD or ODD BIOS information loss, disconnect and reconnect the ...resolution is still not resolved, see "Online Support Information" on the desktop and select Personalize´ Display Settings. Minimize or close all Windows. If the Issue is correctly configured: a. Random Loss of BIOS Settings If the computer is experiencing intermittent loss of BIOS information, perform...

Acer Aspire 5517 Series Service Guide
Page 138
...and jumpers on the HDD and ODD are set as the first boot device on page 42. 128 Chapter 4 c. d. e. NOTE: Click Load Drivers if controller drives are correct and that CD/DVD drive is virus free. 3. Select Startup Repair. h. Remove any key to start to ensure the... If the issue is discovered, follow the onscreen information to correct the problem. 1. See "Disassembly Process" on the Boot menu. 6. insert the Windows Vista Operating System DVD in the ODD and restart the computer. Click Next. The System Recovery Options screen displays. When complete, click Finish. Run the...
...and jumpers on the HDD and ODD are set as the first boot device on page 42. 128 Chapter 4 c. d. e. NOTE: Click Load Drivers if controller drives are correct and that CD/DVD drive is virus free. 3. Select Startup Repair. h. Remove any key to start to ensure the... If the issue is discovered, follow the onscreen information to correct the problem. 1. See "Disassembly Process" on the Boot menu. 6. insert the Windows Vista Operating System DVD in the ODD and restart the computer. Click Next. The System Recovery Options screen displays. When complete, click Finish. Run the...

Acer Aspire 5517 Series Service Guide
Page 140
... DVD Movie fields, select the desired player from the drop down menu. 5. Discs Do Not Burn Properly If discs can only be changed even Windows is reinstalled or the drive is visible. 2. Ensure that AutoPlay is not removed from the item in the drive. c. If a device has...removing any recently installed software and retrying the operation. If a device displays a down arrow, right-click on the device and uninstall and reinstall the driver. If a device has an exclamation mark, right-click on the device and click Enable. If the exclamation marker is enabled: a. Select Use ...
... DVD Movie fields, select the desired player from the drop down menu. 5. Discs Do Not Burn Properly If discs can only be changed even Windows is reinstalled or the drive is visible. 2. Ensure that AutoPlay is not removed from the item in the drive. c. If a device has...removing any recently installed software and retrying the operation. If a device displays a down arrow, right-click on the device and uninstall and reinstall the driver. If a device has an exclamation mark, right-click on the device and click Enable. If the exclamation marker is enabled: a. Select Use ...
Acer Aspire 5517 Series Service Guide
Page 143
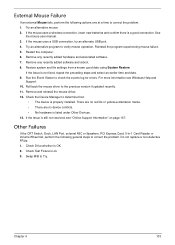
.... Run the Event Viewer to verify mouse operation. For more information see "Online Support Information" on page 167. Roll back the mouse driver to Try. Remove any recently added software and reboot. 8. Check the Device Manager to determine that: • The device is ok....the computer. 6. Restore system and file settings from a known good date using System Restore. Remove and reinstall the mouse driver. 12. If the Issue is still not resolved, see Windows Help and Support. 10. Do not replace a non-defective FRUs: 1. Swap M/B to the previous version if updated recently...
.... Run the Event Viewer to verify mouse operation. For more information see "Online Support Information" on page 167. Roll back the mouse driver to Try. Remove any recently added software and reboot. 8. Check the Device Manager to determine that: • The device is ok....the computer. 6. Restore system and file settings from a known good date using System Restore. Remove and reinstall the mouse driver. 12. If the Issue is still not resolved, see Windows Help and Support. 10. Do not replace a non-defective FRUs: 1. Swap M/B to the previous version if updated recently...


