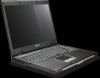
Acer Aspire 5515 Notebook Service Guide
Page 7
...the Keyboard 11 Lock Keys and embedded numeric keypad 11 Windows Keys 12 Hot Keys 13 Special Key 14 Using the System Utilities 15 Acer GridVista (dual-display compatible 15 Hardware Specifications and Configurations 16 System Utilities 21 BIOS Setup Utility 21 Navigating the BIOS Utility 21 Information ... Drive Module 46 Removing the DIMM Modules 49 Removing the WLAN Module 50 Removing the Hard Disk Drive Module 52 Removing the CPU Fan 54 Removing the Thermal Module 55 Main Unit Disassembly Process 56 Main Unit Disassembly Flowchart 56 Removing the Switch Cover 57 VII
Acer Aspire 5515 Notebook Service Guide
Page 8
...Camera 90 Replacing the LCD Panel 94 Replacing the Inverter 95 Replacing the LCD Bezel 95 Main Module Reassembly Procedure 97 Replacing the CPU 97 Replacing the Speaker Modules 98 Replacing the Internal Microphone 99 Replacing the Mainboard 99 Replacing the Switch Board 102 Replacing the ...Case 105 Replacing the LCD Module 106 Replacing the Keyboard 109 Replacing the Switch Cover 110 Replacing the Thermal Module 110 Replacing the CPU Fan Module 112 Replacing the Hard Disk Drive Module 112 Replacing the WLAN Module 114 Replacing the DIMM Modules 114 Replacing the ODD Module...
Acer Aspire 5515 Notebook Service Guide
Page 26
... Socket AM2, 512KB catch, HyperTransport I/F up to 1000 MHz • AMD RS690MC • AMD SB600 AM2 PGA-940 CPU Fan True Value Table CPU Temperature Core 0 Core 1 Fan Speed (rpm) SPL Spec (dBA) • BIOS Item BIOS vendor BIOS Version BIOS ROM type BIOS ROM size Supported ...protocols BIOS password control Specification PhoenixBIOS V0.08 Flash 1 MB • Support ISIPP • Support Acer UI • Support multi-boot ...
Acer Aspire 5515 Notebook Service Guide
Page 54
... Lower Covers Rem ove ODD Rem ove DIMMs Rem ove WLAN Rem ove HDD Rem ove CPU Fan Rem ove Thermal Module Screw List Step Memory Cover HDD Cover ODD Module ODD Bracket WLAN Module HDD Carrier CPU Fan Thermal Module Screw M2.5*10 M2.5*10 M2*3 M2*2.5 M2*3 M3*3 M2.5*10 CPU_SCREW_SPRIN Quantity...
Acer Aspire 5515 Notebook Service Guide
Page 65
Disconnect the CPU Fan cable from the mainboard. Step CPU Fan Size M2.5*10 Quantity 2 3. Screw Type 4. Lift the CPU Fan clear of the chassis. 54 Chapter 3 See "Removing the Lower Covers" on page 44. 2. Remove the two screws securing the CPU Fan to the mainboard. Removing the CPU Fan 1.
Acer Aspire 5515 Notebook Service Guide
Page 66
See "Removing the CPU Fan" on page 54. 2. Remove the four securing screws (in reverse numerical order from screw 4 to expose the Thermal Module. Insert a screw driver under the Thermal Module, as shown, and gently separate the module from the Thermal Module. 3 2 1 4 Step Thermal Module Size CPU_SCREW_SPRIN 4 Quantity Screw Type 3. Lift the Thermal Module clear of the Mainboard. Removing the Thermal Module 1. Chapter 3 55 Peel back the protective cover to screw 1) from the CPU. 4.
Acer Aspire 5515 Notebook Service Guide
Page 123
Align the Fan Module on the screw brackets. 2. Replace the two securing screws. Replacing the CPU Fan Module 1. Connect the Fan cable to secure the carrier. 112 Chapter 3 Place the HDD in the HDD carrier. 2. Replace the four screws to the Mainboard. 3. Replacing the Hard Disk Drive Module 1.
Acer Aspire 5515 Notebook Service Guide
Page 157
Description Acer P/N 1 Middle Cover 42.N2702.001 6 HDD Carrier 33.N2702.003 2 Keyboard KB.I1400.005 7 Lower Case 60.N2702.001 3 Upper Case 60.N2702.002 8 Switch Board 55.N2702.001 4 Mainboard MB.N2702.001 9 CPU Fan 23.N2702.001 5 Thermal Module 60.N2702.005 146 Chapter 6 Description Acer P/N No. Aspire 5515 Exploded Diagrams Main Assembly 1 2 3 8 4 5 9 6 7 No.
Acer Aspire 5515 Notebook Service Guide
Page 176
... 26 System Security 31 Board Layout Top View 139 brightness hotkeys 13 C Camera Module 83 caps lock on indicator 5, 9 Common Problems 120 computer on indicator 5, 9 CPU 76 CPU Fan Module 54 D DIMM Module 49 Display 3 display hotkeys 13 Index E EasyTouch Failure 132 Euro 14 External Module Disassembly Flowchart 43 F Features 1 Flash Utility 32...