User Manual
Page 17
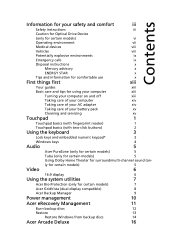
...computer xiii Turning your computer on - ly for certain models) 5 Video 6 16:9 display 6 Using the system utilities 7 Acer Bio-Protection (only for surround/multi-channel sound (on and off xiii Taking care of your computer xiv Taking care of your ... numeric keypad* 3 Windows keys 4 Audio 5 Acer PureZone (only for certain models) 5 Tuba (only for certain models) 5 Using Dolby Home Theater for certain models) 7 Acer GridVista (dual-display compatible) 8 Acer Backup Manager 9 Power management 10 Acer eRecovery Management 11 Burn backup discs 12 Restore 13...
...computer xiii Turning your computer on - ly for certain models) 5 Video 6 16:9 display 6 Using the system utilities 7 Acer Bio-Protection (only for surround/multi-channel sound (on and off xiii Taking care of your computer xiv Taking care of your ... numeric keypad* 3 Windows keys 4 Audio 5 Acer PureZone (only for certain models) 5 Tuba (only for certain models) 5 Using Dolby Home Theater for certain models) 7 Acer GridVista (dual-display compatible) 8 Acer Backup Manager 9 Power management 10 Acer eRecovery Management 11 Burn backup discs 12 Restore 13...
User Manual
Page 19
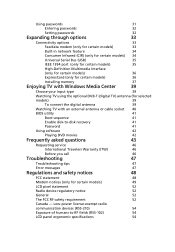
... optional DVB-T (digital TV) antenna (for selected models) 39 To connect the digital antenna 39 Watching TV with an external antenna or cable socket 40 BIOS utility 41 Boot sequence 41 Enable disk-to RF fields (RSS-102) 54 LCD panel ergonomic specifications 54 Low-power license-exempt radio communication devices...
... optional DVB-T (digital TV) antenna (for selected models) 39 To connect the digital antenna 39 Watching TV with an external antenna or cable socket 40 BIOS utility 41 Boot sequence 41 Enable disk-to RF fields (RSS-102) 54 LCD panel ergonomic specifications 54 Low-power license-exempt radio communication devices...
User Manual
Page 20
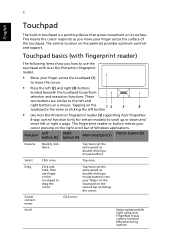
... location on a mouse. Tap once. Tap twice (at the same speed as clicking the left button. • Use Acer Bio-Protection fingerprint reader (3) supporting Acer FingerNav 4-way control function (only for certain models) to the left or right a page. These two buttons are similar ...button (2) Right button (4) Main touchpad (1) Center button (3) Execute Quickly click twice. Drag Click and hold, then use the touchpad with Acer Bio-Protection fingerprint reader. • Move your finger on the touchpad on the right scroll bar of the touchpad. This means the cursor responds...
... location on a mouse. Tap once. Tap twice (at the same speed as clicking the left button. • Use Acer Bio-Protection fingerprint reader (3) supporting Acer FingerNav 4-way control function (only for certain models) to the left or right a page. These two buttons are similar ...button (2) Right button (4) Main touchpad (1) Center button (3) Execute Quickly click twice. Drag Click and hold, then use the touchpad with Acer Bio-Protection fingerprint reader. • Move your finger on the touchpad on the right scroll bar of the touchpad. This means the cursor responds...
User Manual
Page 26
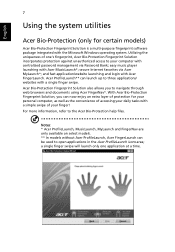
.... secure Internet favorites via Password Bank; and fast application/website launching and login with Acer MusicLaunch*; a single finger swipe will launch only one 's fingerprint, Acer Bio-Protection Fingerprint Solution incorporates protection against unauthorized access to the Acer Bio-Protection help files. Acer Bio-Protection Fingerprint Solution also allows you can be used to open applications in the...
.... secure Internet favorites via Password Bank; and fast application/website launching and login with Acer MusicLaunch*; a single finger swipe will launch only one 's fingerprint, Acer Bio-Protection Fingerprint Solution incorporates protection against unauthorized access to the Acer Bio-Protection help files. Acer Bio-Protection Fingerprint Solution also allows you can be used to open applications in the...
User Manual
Page 33
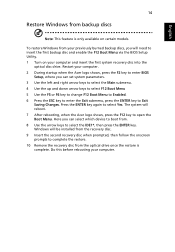
The system will reboot. 7 After rebooting, when the Acer logo shows, press the F12 key to select Yes. Windows will need to Exit ...the Exit submenu, press the ENTER key to insert the first backup disc and enable the F12 Boot Menu via the BIOS Setup Utility. 1 Turn on certain models. Here you will be installed from the recovery disc. 9 Insert the second... then press the ENTER key. Do this before rebooting your computer. 2 During startup when the Acer logo shows, press the F2 key to enter BIOS Setup, where you can select which device to boot from. 8 Use the arrow keys to complete...
The system will reboot. 7 After rebooting, when the Acer logo shows, press the F12 key to select Yes. Windows will need to Exit ...the Exit submenu, press the ENTER key to insert the first backup disc and enable the F12 Boot Menu via the BIOS Setup Utility. 1 Turn on certain models. Here you will be installed from the recovery disc. 9 Insert the second... then press the ENTER key. Do this before rebooting your computer. 2 During startup when the Acer logo shows, press the F2 key to enter BIOS Setup, where you can select which device to boot from. 8 Use the arrow keys to complete...
User Manual
Page 34
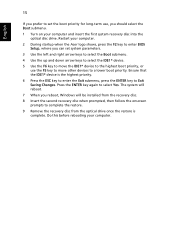
Do this before rebooting your computer. Restart your computer. 2 During startup when the Acer logo shows, press the F2 key to enter BIOS Setup, where you can set the boot priority for long-term use the F5 key to move the IDE1* device to the highest boot priority, ...
Do this before rebooting your computer. Restart your computer. 2 During startup when the Acer logo shows, press the F2 key to enter BIOS Setup, where you can set the boot priority for long-term use the F5 key to move the IDE1* device to the highest boot priority, ...
User Manual
Page 50
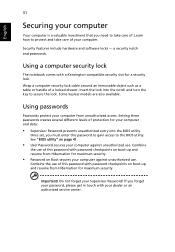
...password checkpoints on Boot secures your computer against unauthorized use. Security features include hardware and software locks - Insert the lock into the BIOS utility. Combine the use . Some keyless models are also available. Combine the use of this password to gain access to secure the... comes with your computer and data: • Supervisor Password prevents unauthorized entry into the notch and turn the key to the BIOS utility. Setting these passwords creates several different levels of protection for maximum security. • Password on boot-up and resume from...
...password checkpoints on Boot secures your computer against unauthorized use. Security features include hardware and software locks - Insert the lock into the BIOS utility. Combine the use . Some keyless models are also available. Combine the use of this password to gain access to secure the... comes with your computer and data: • Supervisor Password prevents unauthorized entry into the notch and turn the key to the BIOS utility. Setting these passwords creates several different levels of protection for maximum security. • Password on boot-up and resume from...
User Manual
Page 51
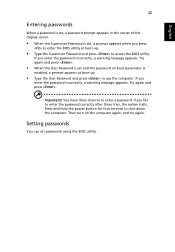
Then turn on boot parameter is set passwords using the BIOS utility. Setting passwords You can set , a prompt appears when you fail to enter the password correctly after three tries, the system halts. Important! You have ... and press . • When the User Password is set and the password on the computer again, and try again. If you press to enter the BIOS utility at boot-up . • Type the Supervisor Password and press to access the...
Then turn on boot parameter is set passwords using the BIOS utility. Setting passwords You can set , a prompt appears when you fail to enter the password correctly after three tries, the system halts. Important! You have ... and press . • When the User Password is set and the password on the computer again, and try again. If you press to enter the BIOS utility at boot-up . • Type the Supervisor Password and press to access the...
User Manual
Page 60
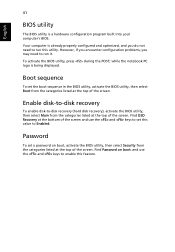
... configuration problems, you do not need to run it. Enable disk-to-disk recovery To enable disk-to-disk recovery (hard disk recovery), activate the BIOS utility, then select Main from the categories listed at the bottom of the screen. Find D2D Recovery at the top of the screen and use... the and keys to Enabled. Password To set the boot sequence in the BIOS utility, activate the BIOS utility, then select Boot from the categories listed at the top of the screen. English 41...
... configuration problems, you do not need to run it. Enable disk-to-disk recovery To enable disk-to-disk recovery (hard disk recovery), activate the BIOS utility, then select Main from the categories listed at the bottom of the screen. Find D2D Recovery at the top of the screen and use... the and keys to Enabled. Password To set the boot sequence in the BIOS utility, activate the BIOS utility, then select Boot from the categories listed at the top of the screen. English 41...
User Manual
Page 64
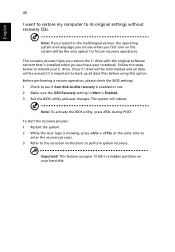
... future recovery operations. Important! Before performing a restore operation, please check the BIOS settings. 1 Check to see if Acer disk-to perform system recovery. To start the recovery process: 1 Restart the system. 2 While the Acer logo is showing, press + at the same time to enter the recovery process... Main is installed when you restore the C: drive with the original software content that is Enabled. 3 Exit the BIOS utility and save changes. Note: To activate the BIOS utility, press during POST. Note: If your C: drive. (Your C: drive will be reformatted and all data ...
... future recovery operations. Important! Before performing a restore operation, please check the BIOS settings. 1 Check to see if Acer disk-to perform system recovery. To start the recovery process: 1 Restart the system. 2 While the Acer logo is showing, press + at the same time to enter the recovery process... Main is installed when you restore the C: drive with the original software content that is Enabled. 3 Exit the BIOS utility and save changes. Note: To activate the BIOS utility, press during POST. Note: If your C: drive. (Your C: drive will be reformatted and all data ...
User Manual
Page 66
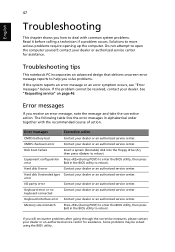
...error message or an error symptom occurs, see "Error messages" below. Equipment configuration Press (during POST) to enter the BIOS utility, then press Exit in the BIOS utility to deal with the recommended course of action. Hard disk 0 extended type Contact your dealer or an authorized service.... Keyboard error or no keyboard connected Contact your dealer or an authorized service center. The following table lists the error messages in the BIOS utility to reboot. See "Requesting service" on page 46. Some problems may be resolved, contact your dealer. Do not attempt to...
...error message or an error symptom occurs, see "Error messages" below. Equipment configuration Press (during POST) to enter the BIOS utility, then press Exit in the BIOS utility to deal with the recommended course of action. Hard disk 0 extended type Contact your dealer or an authorized service.... Keyboard error or no keyboard connected Contact your dealer or an authorized service center. The following table lists the error messages in the BIOS utility to reboot. See "Requesting service" on page 46. Some problems may be resolved, contact your dealer. Do not attempt to...


